Early in July I participated in a mini-competition on Freelance Forge (a very welcoming private forum for freelancers in the tabltetop RPG industry that I highly recommend aspiring freelancers join!) that challenged participants with creating a Starfinder creature themed around the phrase ‘Red, White, and BOOM!’ — a topic meant to bring to mind Independence Day but, as a Canadian, I immediately thought of Canada Day (happily they both involve fireworks! Haha). The goal of the competition is not to win, but to get inspired, practise making creatures, and to give and receive feedback on each others creations, so that we improve our skills. It was a lot of fun — both the act of creating, and getting to read everyone else’s entries. With the competition over I decided to incorporate some of the feedback I received and post my newly-polished, explosive little creature on d20 diaries.
Introducing… the scintrix!
SCINTRIX
CR 5 XP 1,600
CN Medium fey Init +5; Senses low-light vision; Perception +11
DEFENSE HP 70; RP 4 EAC 17; KAC 19 Fort +9; Ref +9; Will +4 Defensive Abilities vanishing trick
STATISTICS
Str +3; Dex +5; Con +1; Int +0; Wis +1; Cha +2 Skills Acrobatics +11, Stealth +16, Survival +11 Languages Common, Sylvan Other Abilities aglow, compression
SPECIAL ABILITIES
Aglow (Ex) A scintrix increases the light level by one step out to a radius of 10 feet. This glow is suppressed while the scintrix is invisible.
Brilliant Bolt(Su) As an attack, a scintrix can shoot a brightly colored bolt of energy from its body at a single target, which explodes upon impact in a shower of sparkling rainbow-hued light. This attack has a range increment of 60 ft. and the aurora weapon special property.
Explosive Entrance(Su) A scintrix that uses its bite attack while under the effects of vanishing trick reappears with an explosive bang and a flash of scintillating colors. Any creature within 10 feet, other than scintrix, must succeed at a DC 13 Fortitude save or be blinded for 1d3 rounds; on a successful save the creature is instead dazzled for 1d3 rounds.
Vanishing Trick(Su) As a standard action a scintrix can cause its body to disappear, leaving only its eyes and mouth visible. This functions as if the scintrix were invisible. The scintrix can maintain this invisibility as long as they desire, though it ends immediately if the scintrix attacks, sleeps, falls unconscious, or dies. By spending 1 Resolve Point, a scintrix can instead activate vanishing trick as a move action.
ECOLOGY
Environment any forest, jungle, or plains
Organization solitary, pair, or flare (3–7)
Scintrix are the fey embodiment of shock, surprise, and sudden excitement – a burst of vibrant energy given life and shifting form. At home in forests, jungles, and plains, throughout the universe, scintrix are most commonly found on planets with particularly vibrant colors, wild magic, unpredictable weather, or thin planar boundaries. Where nature, physics, or magic defy logic, scintrix are sure to appear.
Scintrix are animalistic quadrupeds with a stocky, thick-set body, gleaming eyes, and a wide grinning mouth filled with white sharp teeth. Their bodies are a kaleidoscope of brightly colored, shifting streaks of light that crackle and burst with energy. Only their eyes, mouth, paws, the tips of their short, pointed ears, and the ends of their frazzled, bushy tail remain stable. Despite appearing as bursts of light and color, the body of a scintrix is squishy and pliable, capable of squeezing through spaces much smaller than their size suggests.
Cunning and clever, with an appetite for fun as well as meat, scintrix are pranksters that take great glee in surprising their prey before devouring them. Stealth hunters, scintrix can become unnaturally quiet and still at a moment’s notice, vanishing from sight almost completely, with only their eyes and mouth remaining visible. They stalk their prey, leaping out to attack only when their prey is completely unaware. Their appearance is marked by a loud bang, blinding flash of light, and bursts of scintillating color.
Vain and talkative, scintrix prefer to hunt intelligent beings. Playful, they enjoy toying with their food, bursting in and out of a fight with crackling laughter, only to vanish and surprise their prey again later. When faced with particularly entertaining prey, scintrix are known to draw their hunts out over weeks, engage their foe in conversation, or take their prey captive as pets. Unfortunately for such prisoners, scintrix are easily bored.
Today we’re taking an in depth look at the first book in the Tyrant’s Grasp Adventure Path! This survival horror campaign pits the players against the return of the Whispering Tyrant, the lich-king Tar-Baphon, who was defeated and sealed away long ago. Tyrant’s Grasp will be the final Pathfinder 1st Edition Adventure Path released, before the switch is made over to Pathfinder 2nd Edition in August. Intended to take characters from levels 1 to 17, Tyrant’s Grasp is six volumes long.
A wonderful Player’s Guide for Tyrant’s Grasp is available as a free download on Paizo’s website here. The Player’s Guide gives players a relatively spoiler-free way to properly prepare for and integrate their characters into the Tyrant’s Grasp Adventure Path. I highly recommend checking it out!
The Tyrant’s Grasp Adventure Path begins with Pathfinder Adventure Path: The Dead Roads (Tyrant’s Grasp 1 of 6). Written by Ron Lundeen, The Dead Roads is an adventure intended for first level characters, which should bring PCs up to level five by its conclusion. This adventure begins when the PCs awaken already defeated in the Boneyard, a land where the dead go to be judged. There’s just one problem… They’re not quite dead. Trapped inside a tomb that doesn’t belong to them, they’ll need to escape, figure out what happened to them, and find a way to return home. But, how could one possibly escape the land of the dead?
Let me start by saying that The Dead Roads — and the Tyrant’s Grasp Adventure Path — is not for everyone. Terrible tragedies will occur, and you won’t always be able to prevent them. These events are bound to have a lasting effect on your characters, so players should be prepared to consider and role-play the marks left by the trials you face. Often you’ll be in dire situations with limited resources, so players will need to be resourceful to survive. Plenty of the imagery and events in this adventure are dark, morbid, and sorrowful. It’s definitely a horror campaign — though not your typical horror. It’s suspenseful survival horror, with a good deal of body horror in the first book, as well. The Dead Roads contains imagery that is inappropriate for children and some adult gamers will even consider an image or two disturbing. It’s definitely not a campaign I could play with my family.
That said, I loved The Dead Roads. Absolutely, positively, adored it.
For starters, it looks great. From cover to cover it’s a wonderful, high quality book filled with nice maps, and beautiful, dark artwork. The cover depicts Mictena (a catrina psychopomp the PCs are destined to interact with) in the foreground. Behind her is an image of Seelah (the Iconic paladin) and Yoon (the iconic kineticist) battling ostovites. Both images are by Igor Grechanyi. There’s a lovely map of The Gravelands (Lastwall and parts of Ustalav) on the inside cover. There’s a ton of artwork throughout the book — of enemies, allies, and characters who could become either. I particularly enjoyed the art for Prince Uspid and Mictena. Colulus was the most disconcerting image in the book. If any image is going to bug a squeamish player it’ll be that one. There’s a few characters that I wish had art but don’t (which is expected! Art’s not cheap and there’s only so much space!). Ayuki, in particular, would have been nice to see, as well as the jitterbone creature in the bestiary. The maps, all drawn by Matthias Rothenaicher, are really nice. They look great, of course, but they’re also well thought out, executed, and each has a unique feel to it. I particularly enjoyed ‘Roslar’s Tomb’ and ‘Deathbower.’ I wish that the maps of the various Dead Roads locations were given a bit more space, though. Squishing three multi-floor maps for three different locations onto one page is good for page count, but makes some of the maps difficult to read. Part of the eastern end of the ‘Palace of Teeth’ is nearly lost in the creases of the binding, while the entrance to ‘Salishara’s Scriptorium’ is hidden in the creases. If both of those maps were a few grid squares further to the left that would have been less of a problem. Finally, flipping back and forth between the map page and the various locations depicted in it (which is spread out over 28 pages) is a bit irritating. Have a bookmark or post-it note handy and try not to tear your pages. Much to my surprise there was also two player handouts which represent puzzles the group comes across. I’m really glad they’re depicted instead of just described. They’re necessary and a really nice touch.
Part of the maps lost in the creases.
The Dead Roads starts with a bang (HA!) and doesn’t let up. The entire opening has the feel of an ominous, suspenseful mystery. Your PCs don’t know where they are, how they got there, or what’s going on. Their locations hide clues to both their situation and the history of wider events, which the PCs may or may not be able to uncover. In time they will discover the answers to some of their questions, just as they realize it’s tied to an even bigger mystery.
There’s a lot of wonderful social encounters and NPCs in this adventure. Number Three, Barple Stonebreaker, Prince Uspid, Queen Carnassial, Kishokish and his portrait, Ayuki, Salighara, Berthold, the wyrwoods, Mrs. Pedipalp, Aydie, Reedreaper, Mictena — there’s just so many great interactions in this adventure! Among them, three particularly stand out amongst the crowd: interacting with the townsfolk of Roslar’s Coffer is poignant and amazing; speaking with Barzahk the Passage; and — my personal favourite characters — Umble and Thoot! This pair of friendly psychopomps are the best!
Umble and Thoot
Prince Uspid
Deathbower
Many of the creatures and NPCs you come across don’t look friendly — which doesn’t mean they aren’t friendly. Of course, it doesn’t mean they are friendly, either. Which I love! Appearances have no bearing on what a creature acts like and I appreciate that this adventure used that so effectively. It’s bound to throw players for a bit of a loop and make them feel… off-kilter. Which is great!
There’s a lot of challenging encounters in this adventure and plenty of unique monsters to face off against. I particularly enjoyed that so many can end in ways other than violence. But, don’t let that last sentence lull you into a false sense of security! There’s a lot of combat encounters in this book that cannot be avoided.
And the ending! Oh, the ending! I love it! I cannot wait to get my hands on the next book in this Adventure Path! I have a feeling Eulogy for Roslar’s Coffer is going to be just as good.
And now it’s time for a warning:
We’ve got more to say about this adventure, but it’ll come with spoilers! Don’t want to read them? Skip on past this next section until you see the large words ‘SPOILERS OVER.’ Got it? Good! See you on the other side where we’ll talk about the extra content in this book!
SPOILERS
The Dead Roads adventure is split into four major parts: Awake in Roslar’s Tomb, Among the Dead, Walking the Dead Roads, and Deathbower. One of these parts Walking the Dead Roads is particularly dense and is made up of three major locations: The Palace of Teeth, Nine-Eaves, and Salighara’s Scriptorium. All told The Dead Roads adventure is 52 pages in length with six pages afterwards dedicated to three NPCs: Mictena, Mrs. Pedipalp, and Reedreaper. All three of these are enemies the PCs will come across, but only one of them has to stay that way. The PCs have a chance to convince the other two to step aside without violence (although it’s extremely hard to accomplish for one of those two!).
Through this adventure the PCs will get to interact with psychopomps, a type of outsider native to the Boneyard who work to ensure that the processing of souls is done accurately and efficiently. Typically functioning as guides for the souls of the deceased, the psychopomps are confused over what to do about the mysterious PCs. Some will help them along their way (especially the delightful Umble and Thoot!) , and others with hinder them — particularly Mictena, a catrina psychopomp obsessed with putting the PCs spirits properly to rest. Through a good thorough death, of course! Psychopomps aren’t the only enemies and NPCs the players will interact with. The Boneyard is a huge realm, and there’s plenty of creatures living/stranded/invading there. Other major groups of enemies include fey, vermin, sakhil, and nightmarish beings from the Dimension of Dreams.
Fittingly, The Dead Roads begins with death. Lots of it. The entire town of Roslar’s Coffer has been destroyed in one terrifying instant. Including the PCs. I’ll leave the details out of this article, but suffice to say this will have a lasting effect on your players and their characters. Any family, friends, and companions — pets included — that lived in Roslar’s Coffer are dead. Although it might be tempting to warn some players about this in advance, that also will ruin some of the surprise and likely result in players purposely making no personal connections to the town of Roslar’s Coffer — which would be a mistake in my opinion. Every GM will need to judge their players accordingly, and perhaps provide them with some hints and warnings while they build their characters and backstories. In my opinion this event is handled incredibly well throughout this adventure, and I highly recommend allowing players to make a character with personal connections to Roslar’s Coffer. It adds so much to the story. However, it is important to inform PCs that if they have animal companions, mounts, or they are a wizard with a familiar, they will not have access to their pet at the start of the campaign. Player’s who have read the Tyrant’s Grasp Player’s Guide will already be aware of this, although they won’t (accurately) know why.
Happily, the player’s experience doesn’t begin with the death of Roslar’s Coffer. Instead, Part One: Awake in Roslar’s Tomb begins with the PCs waking up in a stone coffin. Literally entombed they need to push their way out of the stone box and into a cold, dark, mausoleum. It’s a great opening. Players and characters alike are bound to be curious what has happened and where they are. Players begin with any gear they had that could reasonably fit in a coffin with them. Any familiars who share a soul with your PCs (a shaman or witch familiar) will be in a coffin of their own, while all other companions are not present (as they are dead). Eidolons and phantoms can be summoned back normally, although all other familiars and companions will need to be replaced at a later time.
Soon, the PCs will discover they’re in someone else’s tomb — Ervin Roslar, Knight of Ozem and hero of the Shining Crusade. The same man that Roslar’s Coffer is named after, in fact. Interesting! As they navigate the tomb they’ll find strange creatures, animated bones (sort of…), a trapped spirit, and a tribe of mites. They’ll also discover that Ervin Roslar may have had a few secrets of his own, although it’s unlikely they’ll unravel his history completely. This section of the adventure is a suspenseful series of explorations, mysteries, tantalizing clues, and challenging combats. It’s going to be a ton of fun to both run and play.
Part Two: Among the Dead begins when the PCs exit Roslar’s Tomb to find themselves face to face with a pair of spooky looking (and absolutely delightful) psychopomps: Umble and Thoot! Seriously, they’re awesome. This quirky pair give the PCs some answers to their most pressing questions and explains that not only are the PCs dead and not dead at the same time — weird! — the rest of Roslar’s Coffer is well and truly dead. They ask the PCs to lend them a hand in convincing the spirits of the dead of Roslar’s Coffer that they are, in fact, dead. These poor fellows need a hand moving everyone on to the afterlife in a calm and orderly fashion! The PCs get to travel to a phantom version of Roslar’s Coffer where they interact with all the people in town — now dead. This is an amazing section of the adventure. Short and poignant, the GM has a chance to show the PCs what has happened to all their family and friends. They’ll need to convince loved ones to move on, and will have a chance to say goodbye. If they have any pets they’ll find them here as well. The adventure itself provides rules for interacting with these spirits, how to convince them to move on, and some tactics that will let them do it in a timely fashion — namely convincing the town leaders of their death. Some PCs will want to stay behind and die along with their family, others won’t have personal connections to the townsfolk, and others still will want to ‘save’ some of these spirits and attempt to return them back to life. There’s plenty of guidance in this book for handling PCs of every kind. After accepting their death the people of Roslar’s Coffer — even familial loved ones — want answers for what happened to them. The PCs are uniquely positioned to uncover this. And, of course, any spirits who can’t be convinced to move on (including those your PCs may want to bring back) will deteriorate in time until they become undead ghosts and other malevolent entities. Umble and Thoot can explain this to the group and ensure no PCs attempt anything so foolhardy. Also in this section the PCs are first introduced to the antagonist of this adventure, Mictena. Overall, this section of the book is among my very favourites. It’s exceptionally well handled and sure to be an emotional experience for players and characters alike. It’s a truly unique roleplaying opportunity. I’m not an overly emotional person, but I’m quite certain that if I was playing this with any character who had even a modest amount of family or friends in Roslar’s Coffer, under an even remotely talented GM, I would cry — in a good way! It has the potential to really tug at the heartstrings.
Part Three: Walking the Dead Roads begins after the PCs have helped the people of Roslar’s Coffer accept their death. Umble and Thoot, who are grateful and believe that since the PCs are only slightly dead they’re not truly dead at all, offer the PCs a way out of the Boneyard. The Dead Roads. They explain that this secret path is only ever trod by psychopomps and gatekeepers, the beings who watch over what amounts to traveller’s checkpoints along the road. Capable of leading anywhere, the PCs can use the Dead Roads to get home to Roslar’s Coffer (so they can figure out what’s happened) by taking a certain path. They’ll need to stop at the three checkpoints along the way and get stamped by that location’s master. Convincing them to grant the stamp should be the hardest part of the journey. Unbeknownst to Umble and Thoot, politics and turmoil have overtaken the three waystations, making each location more dangerous than expected. These locations may be visited in any order, although they are presented in order of difficulty (which is also how I recommend playing them).
The Palace of Teeth is a small castle ruled over Queen Carnassial and her court of tooth fairies. Not long ago her son, Prince Uspid, led a coup against her, and the two factions have been locked in a stalemate ever since. Although Queen Carnassial is the only one with the authority to stamp the PCs (at least until her death) it’s Prince Uspid the PCs are destined to meet first. They’ll need to navigate, bargain, and battle their way through bickering fey factions. They might even get to keep all their teeth…. This location is simultaneously goofy in a crazed sort of way and disconcerting. Although the Palace of Teeth was once a beautiful castle it’s undergone a rather morbid makeover since the fey moved in. The place is creepy and it’s denizens literally want to yank your teeth out. That can make bargaining… weird. Haha. I love the art for both the tooth fairy monarchs (particularly Prince Uspid!) and the stained glass angel. But, in my opinion, the creepiest encounter involves a pair of soulbound dolls in the midst of acting out a rather bloody play about dentistry. They attempt to make the PCs their next patients, using deep slumber and some particularly creepy statements. It’s awesome! Haha. The Palace of Teeth is my favourite location on in part three.
Nine-Eaves is a three storey manor owned by an old shoki psychopomp with a fondness for games and puzzles. Unfortunately, Kishokish’s manor has been invaded by sahkil and he’s now a prisoner in his own home. They PCs will need to free him if they want to get his stamp. Luckily they’re not without allies. An animated portrait created to pose riddles to visitors can lend the PCs a hand — if they can solve his puzzles! There are three puzzles total, and each one solved can earn the PCs information and advice. They’ll need to traverse the house as they seek answers, battling vermin, sahkil, and an unfettered phantom named Ayuki. I really enjoyed the puzzle aspects of this location.
Salighara’s Scriptorium was created by Salighara, a reclusive viduus psychopomp who is studying the Dimension of Dreams and oversees a crew of wyrwood scribes. Mictena attempted to convince Salighara to kill the PCs on her behalf, but was rebuffed. Mictena then offered the same deal to Salighara’s assistant, a plump woman named Mrs. Pedipalp (actually an aranea from a nightmarish section of the Dimension of Dreams). Happy to take the powerful psychopomp up on her offer, Mrs. Pedipalp has ousted Salighara from her own scriptorium and remade the building in her own image. Now a dark place of nightmares and horror, the PCs will need to set things right. This is definitely the most horror-themed location in The Dead Roads, with traps, haunts, and horrifying enemies. Colulus, a flayed ettercap and long-time minion of Mrs. Pedipalp is by far the most horrifying. But, even the Scriptorium is not without potential allies. PCs get to meet Salighara, some upset wyrwoods, and a ratling named Berthold. Mrs. Pedipalp herself is a great opponent — a capable liar, powerful spellcaster, and nightmarish foe all wrapped up in a kindly looking package. I particularly like her tactics. That said, it’s likely Colulus who will give parties the most trouble.
After receiving their stamps the PCs can finally traverse the rest of the Dead Roads and return to the land of the living — not! Mictena refuses to let them go! She magically relocated her domain, Deathbower, right onto the Dead Roads so that she and her dangerous shabti gardeners can kill your PCs properly. Which brings us to the final section of the Dead Roads adventure, Part Four: Deathbower. I love this location and its map. I love the inhabitants — gardeners, friends, and foes. And I love Mictena herself. Despite being an enemy of your PCs she’s not a bad being. She’s a psychopomp just doing what she thinks is right. Which is cool! Although some of the hazards and enemies in this glorious garden must be confronted head on, some characters can be swayed and may even join you for a while. Reedreaper is a particularly interesting character, although it’s unlikely he sticks around long enough to play much of a role. Even Mictena can be talked down — theoretically. The chances your PCs will be able to roll high enough are incredibly slim, but it could happen. Which I really like.
After leaving Deathbower behind the PCs find themselves back on the Dead Roads and greeted by an incredibly powerful psychopomp, Barzahk the Passage, a demigod and master of the Dead Roads. This enigmatic figure whisks the PCs off to their home in a matter of moments, giving them a bit of time to ask him any questions they might have. I thought this was a great moment and a wonderful way to end the adventure.
SPOILERS OVER
In addition to The Dead Roads adventure, this volume contains two articles intended for both GMs and players, one article solely for the GM, a campaign outline, and a bestiary containing five new creatures.
The first article, Tools of the Boneyard, is written by Matt Morris. In it you’ll find new gear and character options aimed at dealing with the dead. There is one alchemical remedy, one alchemical tool, and two alchemical weapons — bone burn is my favourite, so be sure to check it out! There are two new special materials useful for crafting — cryptstone can be used for ammunition and weapons, while spiresteel can be used for ammunition, weapons, and armour. Finally, there are five new magic items: crypt rod, grim helm, harbinger’s scythe, Lady’s Mercy, and Momument’s Truth. Although I enjoyed a lot of the items, it’s the character options that I found were most exciting. Graveslinger is a gunslinger archetype that specializes in combatting incorporeal undead. Soul Shepherd is a monk archetype that calm incorporeal undead and haunts with a touch. They also gain some otherworldly resistances and interesting ways to use their ki. Reaper is a new oracle mystery which I really enjoyed. Tightly themed and flavourful it’s capable of both killing the living and destroying undead. There are also six new barbarian rage powers including the psychopomp totem powers.
Thrilled to see shabti get some attention!
The second player friendly article is written by Mikhail Rekun and entitled The Half-Dead. This section talks about four races that have a strong connection to death and the undead. In addition to providing details and character options for dhampir, duskwalkers, and shabti, it also talks about the new subtype of creatures, mortics. Dhampir appear alongside two magical items, duswalkers have access to five new feats, and shabti have access to five new feats. I was particularly excited to see shabti included.
The next article, To Exceed Their Grasp, is written by Crystal Frasier and intended for GMs only. This article discusses some of the important concepts, characters, and events of the Tyrant’s Grasp Adventure Path and the role they play in the overarching story. It also contains a timeline. This is incredibly useful for GMs an will likely be referenced throughout the entire Adventure Path.
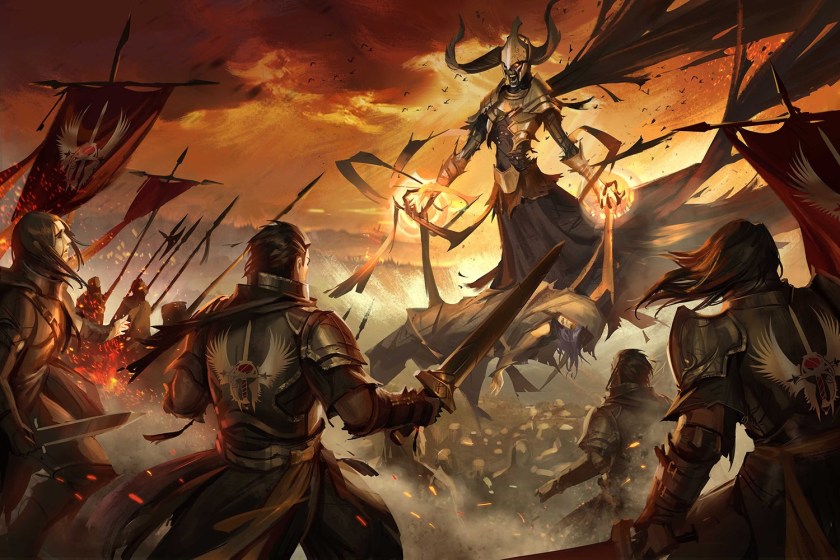
The Death of Arazni (Herald of Aroden) during the Shining Crusade. Art courtesy of Paizo Inc.
The Bestiary is up next! It contains a random encounter chart, two interesting social encounters, and five new creatures written by Ron Lundeen, Kyle T. Raes, and Mike Welham. All of the monsters in this book have ties to death and the Boneyard and two of them are featured in The Dead Roads adventure. Bonewrought Willow is an ominous looking intelligent plant capable of growing in Boneyard. Attracted to light and more benevolent than it appears this is a great CR 3 creature I can’t wait to confront my players with. Kaicherak are nasty little fanged worm beasts with ties to Achaekek and a fondness for messily gorging themselves on blood. At CR 4 they are among the most powerful new creatures in the bestiary. Mortics are living beings with strong connections to negative energy which makes them sort of like living undead. There are two mortic stat blocks included in the bestiary — the ghoulish elf-like angheuvore (CR 2) and the incredibly flexible halfling-like jitterbone (CR 4). As previously mentioned, more information on mortics is also included in The Half-Dead article. The final creature is the tooth fairy monarch, a CR 3 version of the lowly tooth fairy.
The last article is a campaign outline, written by Crystal Frasier and Ron Lundeen, that briefly details the events of the upcoming volumes of the Tyrant’s Grasp Adventure Path. Not the sort of thing you want your players peeking at! The campaign outline is incredibly useful for GMs.
As you may have heard, the latest issue of Wayfinder Magazine was recently released. Wayfinder is full of fan-created content for the Pathfinder Roleplaying Game, and is a free download on Paizo’s website. Over the years they’ve made an astounding 18 issues of Wayfinder, as well as a Bestiary! Nearly every issue has a theme, with this latest one being Fey and the First World! So whether you you’re a fan of the fey, or a fan of free, I highly suggest you give this little gem a chance!
But, what’s inside it anyway? A lot! At around 75 pages for each issue, that’s a lot of free stuff! The articles inside offer new player races, archetypes, feats and spells. As well as new equipment, both magical and mundane. In addition to player options, there’s plenty for GMs with adventure ideas, plot hooks, characters that can be used as allies or enemies, unique monsters, and even short adventures. Both players and GMs can make use of a ton of locations, personalities and gazetteers that are described throughout. To round things out there’s also songs, poetry, and fiction. And let’s not forget the awesome art!
There was a lot that I loved inside Wayfinder 18. My favourite archetype was the ‘Bogeykin,’ a spiritualist who has formed a bond with a dead bogeyman that urges her to sow terror! This archetype is written by Calder CaDavid, features art by Adam Munger, and can be found on page 26.
For spells, check out ‘liar’s light,’ ‘mother’s embrace,’ and ‘seneschal’s rebuke,’ all of which are inspired by Eldest of the First World, and can be found on pages 34-35. These spells are written by Jason Daugherty and Wojciech “Drejk” Gruchala, while the art in that article is by Jess Door.
I’m not a big fan of style feats, so imagine my surprise when my favourite feats all turned out to be styles! I’d suggest giving both the ‘Cold Iron Style’ (page 37) and the ‘Quickling Style’ (page 50) feat trees a read. These are written by Stewart “Reduxist” Moyer, and Matt “Helio” Roth, with art by John Bunger.
If it’s gear you’re interested in, be sure to check out the ‘living spear,‘ a +3 living wood called spear which is home to a dryad! This sure-to-be-fun weapon is on page 39. If you’re a worshipper of the Lantern King, then you should also check out the ‘vagabond’s cloak,’ found on page 40.
There are a lot of cool new creatures inside, but my favourites turned out to be the poppy leshy, a CR 1/2 creature found on page 65-66 which has adorable artwork. I also love the zolavoi, a somber little CR 5 creature found on page 67-68.
My favourite campaign inspiration was a plot hook on page 48 entitles ‘Rise of the Gerbie,’ which was written by Amanda Plageman and features art by Adam Munger. I also adored the article entitled ‘Sailing Across Eternity: Locales and Personages of the Sea Without a Shore‘ on page 54. Written by Matt Roth, with art by Fil Kearney, this is a mini gazetteer which takes a look at a few super unique settlements located within the Sea Without a Shore.
My children also enjoyed the Wayfinder Magazine. My daughter’s favourite part was an article on how animal companions can become altered by the First World. This is in no small part due to the wonderful art of a rabbit shooting fairies out of it’s mouth by Beatrice Pelagatti. The article itself is written by Calder CaDavid and features a ton of cool, creative ideas. I’m sure my daughter will be using some in the near future.
Meanwhile, my son’s favourite part was an article about the unintended side effects of bartering with fey. I highly suggest you check it out for yourself on page 14. Entitled ‘First World Trade,’ it’s written by Taylor Hubler, and features art by Jeremy Corff. It’s hilarious!
Want some more Wayfinder? Be sure to check out their many, many other issues on Paizo’s website!
Want to contribute to the next Wayfinder issue? You can! The next issue’s topic is Stafinder: Absalom Station! Head on over to the Paizo message boards, here, for more information on how and what you can submit! Each person is only allowed three potential submissions, so send your best! My children have both already submitted a creature each for consideration, while I’ve penned a ‘Weal or Woe’ article which I’ve submitted for consideration. I’ve also got an archetype and a theme in the works, but we’ll keep those under wraps for now. If you don’t own them, be sure to pick up the Starfinder Core Rulebook, and Starfinder Roleplaying Game: Pact Worlds before penning your submissions. Best of luck!
I hope you’ve enjoyed checking out the contents of the latest Wayfinder with me. If you happen to have contributed to it: Thanks! And if you’re thinking of applying for the next issue: I wish you the best of luck!
Hello, hello! Welcome! Today we’re going to take a look at one of my favourite soft cover releases of the past year: Pathfinder Player Companion: Legacy of the First World! If you’ve been reading the blog for a while, you’ll know that my daughter is already using some of the awesome character options found inside this little gem, with her Pathfinder Society character, Lady Naysha. Admittedly, I’m super jealous.
Legacy of the First World is a soft cover book that is 32 pages in length. As a book in the Player Companion line, it’s aimed at players, which means that you won’t find any great secrets of the First World hidden inside, or details on the plane itself. For that kind of information you’ll have to pick up Pathfinder Campaign Setting: The First World, Realm of the Fey, or the soon to be released Pathfinder Roleplaying Game: Planar Adventures. Legacy of the First World features amazing cover art by Kiki Moch Rizky, which showcases the iconic druid, Lini, and the iconic hunter Adowyn, engaged in battle against a grodair!
The front inside cover features brief information on all nine of the Eldest: gods of the First World who are often worshipped by fey and fey-blooded or fey-touched humanoids. Each entry includes their name, title, holy symbol, alignment, domains, favoured weapons, and the pages where related information and character options can be found. Curious who the Eldest are? Fear not! We’ll get into that later!
After this we’ve got the table of contents, the rules index, and the introduction. Here we find five new regional traits, each themed around places on the material plane where fey are common. Curious which locations? The Darkmoon Wood, Grungir Forest, Irrisen, Uringen, and a caravan known as the Witchmarket. ‘Fey Mediator (Grungir Forest)’ is a solid trait, but I think that ‘Voices of Solid Things (Witchmarket)’ turned out to be my favourite! This allows you to select either Appraise, Craft, Disable Device, or Spellcraft. In addition to making that a class skill, you can apply your Charisma modifier on those checks instead of Intelligence/Dexterity. Neat!
Moving on from the introduction we come to a pair of pages entitled ‘Fey Origins’ that deal with characters who have a touch of the fey in their bloodlines. Each of the core races has ideas for how fey-touched members of that race might look or act, and an alternate racial trait. After this there are three story feats which can be taken by any race. Although the human, half-orc, and half-elf alternate racial traits are very cool, its the one for elves that turned out to be my favourite. ‘Fey-sighted’ grants your elf detect magic as a constant ability, and replaces ‘elven magic.’ So cool! As for story feats? Check out ‘Fascinated by the Mundane’ for a really fun character concept!
Wait! That can’t be all that gnomes get in this book? Is it? Just a trait? Nope! It’s not. The next few pages focus on two races intrinsically tied to the First World: gnomes and gathlain. Up first? Gnomes! First up, rules for playing a bleaching, followed by two feats that can be taken by bleachlings. Finally! Past that we come to a quirky alchemist archetype called the ‘First World Innovator’ which lets you mix a bit of primal reagents into your alchemical creations (bombs, extracts, potions or mutagens) which will alter them in a random way. I highly recommend giving this one a read, because I loved it. Following the archetype itself are a trio of discoveries that let you create a fey-themed mutagen, which are pretty nifty. After that we come to two new alchemical creations: the chroma grenade, which dazzles enemies and makes them susceptible to illusions, and the vine tube, which spouts fast growing vines. These vinescan either grow along the ground to make difficult terrain, or can be molding by a skilled craftsman into basic tools and furniture which last for ten minutes. An interesting alternative to carrying around a bunch of heavy tools! The final little treat on the section on gnomes? It contains my favourite artwork in the book! A blue and orange haired little alchemist surrounded by very natural-looking components, crafting up some kind of glowing brew. I’m feeling it.
Leaving the gnomes behind we get into a pair of pages about gathlain. This section doesn’t contain any race-specific archetypes (for those you’ll need to check out Pathfinder RPG: Ultimate Wilderness), instead it features five alternate race traits, eight new favoured class options, and four new feats. For race traits be sure to check out ‘bower born’ and ‘sticky tendrils,’ and for feats take a peek at the very quirky ‘strange yield,’ which lets you pull a single fruit off of your wings a day that acts as a random potion.
After the various racial options in this book, we move on to the ways in which the First World has affected the material plane. The first two pages include the fey-touched template, a new oracle curse and mystery, and a bard archetype called the First World Minstrel. Although the First World Minstrel’s ability to pass on the ill luck of a pugwampi to your enemies is absolutely delightful, if I recommend only one thing from this book it would be the new oracle mystery: whimsy. It’s just… awesome. Flavourful, fun, and useful. I’d use it in a heartbeat. Unfortunately for me, (and very fortunate for my daughter), right before I could make a character with it, my daughter did. She beat me to it! And she did it so… perfectly. I just can’t compete. And so, for the forseeable future, I’ll refrain from making one of my own… At least until I can think of a concept completely different than my six-year old daughter’s…. For those of you who don’t have that issue, be sure to check out our favourite revelation: ‘whimsical prank!’ Other gems include ‘assumed form,’ ‘flicker,’ ‘whimsical step,’ and ‘woodland caprice.’
So good.
Seriously. Check it out.
But with a flip of the page we leave the whimsy behind to delve into two pages of character options which revolve around the harm fey can cause. First up are four alternate racial traits which focus around locations tainted by evil fey: Darkblight, Tanglebriar, and the Upper Korir River. I’d recommend giving the human trait, ‘imposter-wary‘ a read. Although it forces you to put your bonus skill point into sense motive at every level, it also grants you a bonus on saves against illusions. A great trade if you want to make a suspicious character. After this we get to a new hunter archetype that focuses on killing fey, the cleverly named ‘Feykiller.’ This archetype swaps out a few of the animal focus options for different ones, allows your animal companions attacks to bypass DR/cold iron, grants you a bonus against illusions and enchantments or, if they were cast by fey, makes you immune to such effects. Very cool! Lastly, this section gives us three new spells, my favourite of which is ‘iron spine.’ And yes, it does exactly what it sounds like it does. Ouch…
Every page after this point in Legacy of the First World is dedicated to one of the Eldest. First, it gives us a paragraph or two on the Eldest themselves, followed by new archetypes, class options, spells and gear which are related to that god or their teachings. Interesting, right?
First up: Count Ranalc, the Traitor. Eldest of betrayal, exile and shadows. This shifty fellow provides us with my husband’s very favourite part of the book: an archetype for slayers called ‘Ankou’s Shadow.‘ This awesome archetype gives you the ability to make shadow duplicates of yourself which function as mirror image and last until destroyed. As you level up you can command your duplicates to perform other actions, and you gain access to more duplicates. Oh, and you can see invisibility as a swift action for a minute per level per day. Sweet! He’d better get around to making one soon, or I will. Haha! After this is another interesting archetype, the ‘Shadow Scion‘ for rogues.
The Green Mother, also called the Feasting Flower, is the Eldest of carnivorous plants, intrigue, and seduction. Yikes! The pages focusing on her give us the ‘Grasping Vine‘ archetype for shamans, which shuffles up some spell options, allows you to speak with plants, gives you the ability to use plant shape, and even turns your familiar into a creature made of leaves and thorny vines. I think you could make a really cool shaman with this archetype. It’s very thematic, but also very… accessible. By that I mean: lots of different character concepts ranging throughout Golarion can make use of this archetype. Not just followers of the Green Mother, or characters from the First World. It’s easy to use. The second archetype up for offer here is much more of a niche, and focuses on The Green Mother’s seduction aspect. It’s the ‘Seducer’ archetype for witch! Their last ability, ‘Garden of Delight,’ just… Wow. I’m… a little surprised that saw print. I’m not sure why it surprised me so much. It shouldn’t. But, I’m certainly not letting my kids play this archetype! No way! That complaint aside, the archetype’s still not really my cup tea. Still, if you want to be a charming enchanter/enchantress style character, this is a really good option. Past the archetypes there are two new witch hexes up for offer and one new shaman hex. My favourite is the shaman hex ‘silkstring snare.’ Lastly, there’s three new spells. My favourite is ‘thirsting entanglement,‘ which is like a soul draining entangle spell, but the others are solid debuffs which should see use in play.
Up next is Imbrex, the Twins, Eldest of endings, statues and — you guessed it — twins. His two pages are almost entirely dedicated to summoners. It features an archetype, a new eidolon subtype, and three evolutions. After that there’s four teamwork feats. Usually, this would be a bit of bummer for me. I don’t often play summoners, even though I enjoy them, and dedicating so much space to only one class is a little unfortunate. But… it’s such an awesome archetype! SO COOL! The ‘Twinned Summoner’ has an eidolon that looks just like him (excluding any nifty evolutions). They also learn teamwork feats, which their eidolon can also automatically use. Think of the possibilities! It’s just… awesome! The moment my husband read it he looked at me and said. “Oh, this is interesting. You would be good with this archetype.” “But not you?” I asked. “No. Too much work. I’d get confused.” We laughed. Later I read through it, and you know what? I agreed. I could rock this archetype! Hahaha. The evolutions are brief, but useful — particularly ‘shared evolution‘ and ‘extra feat.‘ For teamwork feat be sure to check out ‘improved precise strike‘ and ‘spell synergy.’
Taking centre stage next is the Lantern King, also known as the Laughing Lie. He’s the Eldest of laughter, mischief, and transformation. Chances are when you think ‘fey’ you think of the attributes this guy has. He’s a prankster, and a shapeshifter. An agent of chaos with infinite forms. The character options include one archetype, the ‘Fey Prankster’ for bards, and two bloodlines that are both entitled ‘shapechanger.’ One is for bloodragers and the other for sorcerers. Both were really cool, but my favourite turned out to the the bloodrager bloodline. I’m not sure why I liked it so much, as the sorcerer bloodline was really solid, but hey! That’s how it goes sometimes.
Up next is an Eldest who is about as far from a jolly prankster as you can get: The Lost Prince. Also known as the Melancholy Lord, he’s the Eldest of forgotten things, sadness and solitude. This dour, brooding fellow has provided us with the ‘hermit‘ archetype for oracles, which is closely tied to the ‘reclusive‘ oracle curse. There’s also a ‘sorrow‘ themed psychic discipline, and a new type of feats which give you an advantage when no allies are nearby. I highly suggest giving the ‘hermit’ a thorough read, because their abilities are very, very cool. Particularly their base revelation, ‘Recluse’s Stride.’ For feats, be sure to check out ‘Centered Spell,’ which is a new metamagic feat which allows you to exclude yourself and your familiar from your instantaneous spells without increasing the spell level. Who doesn’t want to put themselves in the middle of a fireball once in a while? Right?
The next featured Eldest is Magdh, The Three, Eldest of complexity, fate, and triplets. Let me admit, up front, that I am a huge fan of this goddess. She’s my favourite in the book, by far! Unfortunately, none of the character options in her section wowed me. Now, maybe it’s just me. The three spells are interesting and useful. The monk archetype, ‘Nornkith‘, allows your monk to run off of Charisma instead of Wisdom, which is awesome, but… I wasn’t thrilled by anything. There are also three new items up for offer, my favourite of which was ‘charm of the thriceborn.’ I’d be very interested to hear what others thought about the options in Magdh’s section, so if you’ve given the book a read be sure to let me know in the comments below.
Next up is Ng, the Hooded, Eldest of the seasons, secrets, and wanderers. Under his section you’ll find a new cavalier archetype, the ‘Hooded Knight,’ who has a fey-touched mount, gains benefits when traveling on roads, and at higher levels can use dimensiondoor or teleport. There’s also a new cavalier order, the ‘Order of the Blossom,’ which sounds… interesting. Although it’s got some cool abilities, including gaining sneak attack and some minor enchantments, one of the edicts forces you to always accept a fey’s request for aid — which could be very troublesome for obvious reasons. Thankfully, blighted or corrupted fey are excluded from this, and he must instead destroy them. Still… It could be rough! Best ensure you have an understanding GM before selecting it! The final options in Ng’s section are three new items which involve secrecy. Be sure to check out the ‘whispering gloves,’ and the ‘clandestine horseshoes’! The ‘hood of privacy‘ is awesome, but very expensive. Definitely an investment.
Following Ng’s secrecy is an interesting Eldest who cares nothing for subtlety: Ragadahn, The Water Lord, Eldest of linnorms, oceans, and spirals. He’s a brutish creature who counts all the oceans of the First World as his territory. He expects fealty, and respect, but little else. There’s two new archetypes in his section, The ‘Deepwater Rager‘ for barbarians, and the ‘Serpent Herald’ for skalds. Despite the name, the ‘Deepwater Rager’ isn’t actually an underwater combatant. I highly recommend giving it a read, because their abilities ‘Spiraling Charge’ and ‘Disorienting Grapple‘ and both very cool! There’s also three new rage powers in this section of the book (check out ‘Master of the Deep,’ which lets you command aquatic creatures), and two bardic masterpieces, both of which are cool. ‘Ragadahn’s raqs beledi’ is a dance that allows you and your companions to squeeze into tight spaces without trouble, while ‘Ragadahn’s spiral ascent’ allows you to make a whirlwind which can whisk your companions to higher ground. Intriguing!
Finally, we come to the last Eldest in the book — which is also the last page of the book —Shyka, The Many, Eldest of entropy, reincarnation, and time. Now, time related concepts are both very cool, and very difficult to work with in a d20 system. So, although I went into these pages with high hopes — hopes made higher by the awesome wizard artwork in this section — I was wary I might be let down. This section contains a single archetype, and four new spells. The archetype is called the ‘Chronomancer,’ and is for wizards. They gives up the arcane bond class feature, as well as most of their bonus feats, to gain a reservoir of energy they can use to alter time. At low levels they can use it to improve an ally’s initiative, or saving throws, and to immediately re-prepare failed spells (either due to a failed concentration check, a passed save on behalf of your enemies, spell resistance or other immunities, and so on) as if they had not been cast. Cool, right? At higher levels they can use it to cast haste on their allies or trigger contingencies. At level twenty they can even summon a version of himself from an parallel timeline at the moment of his death. The alternate you only lasts for a minute, but it’s one heck of a final gambit! He even comes with your gear! I was SO pleasantly surprised with this archetype! If you’re even remotely interested you should give it a gander. As for the spells? Very cool! Particularly ‘temporal divergence!’ Definitely read it!
And that’s it! We’ve reached the back cover, and Legacy of the First World has come to an end. I hope seeing a bit of what’s inside has helped you decide whether this is a book you want to invest in. And if you’ve read through it already, be sure to let us know what your favourite options were in the comments! Still want more fey-inspired goodness? Be sure to pick up the newest Wayfinder fanzine, Wayfinder 18: Fey and the First World, which is a free download on Paizo’s website.

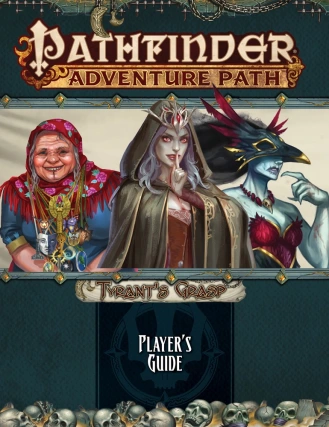 A wonderful Player’s Guide for Tyrant’s Grasp is available as a free download on Paizo’s website


 The first article, Tools of the Boneyard, is written by Matt Morris. In it you’ll find new gear and character options aimed at dealing with the dead. There is one alchemical remedy, one alchemical tool, and two alchemical weapons — bone burn is my favourite, so be sure to check it out! There are two new special materials useful for crafting — cryptstone can be used for ammunition and weapons, while spiresteel can be used for ammunition, weapons, and armour. Finally, there are five new magic items: crypt rod, grim helm, harbinger’s scythe, Lady’s Mercy, and Momument’s Truth. Although I enjoyed a lot of the items, it’s the character options that I found were most exciting. Graveslinger is a gunslinger archetype that specializes in combatting incorporeal undead. Soul Shepherd is a monk archetype that calm incorporeal undead and haunts with a touch. They also gain some otherworldly resistances and interesting ways to use their ki. Reaper is a new oracle mystery which I really enjoyed. Tightly themed and flavourful it’s capable of both killing the living and destroying undead. There are also six new barbarian rage powers including the psychopomp totem powers.
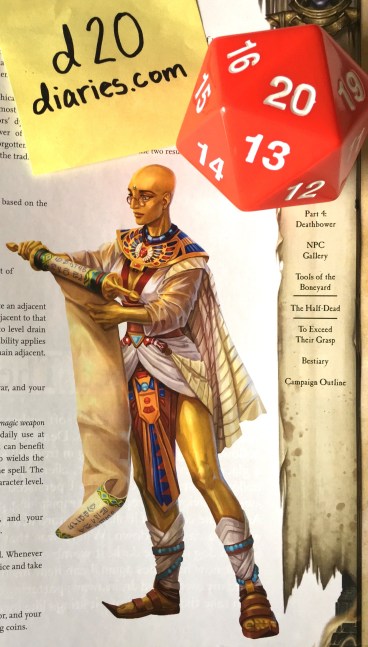


 After this we’ve got the table of contents, the rules index, and the introduction. Here we find five new regional traits, each themed around places on the material plane where fey are common. Curious which locations? The Darkmoon Wood, Grungir Forest, Irrisen, Uringen, and a caravan known as the Witchmarket. ‘Fey Mediator (Grungir Forest)’ is a solid trait, but I think that ‘Voices of Solid Things (Witchmarket)’ turned out to be my favourite! This allows you to select either Appraise, Craft, Disable Device, or Spellcraft. In addition to making that a class skill, you can apply your Charisma modifier on those checks instead of Intelligence/Dexterity. Neat!
