Hello, and welcome back to d20diairies! August 2019 is a crazy month for d20 releases, so buckle up! We’re in for one exciting ride!
Dungeons & Dragons
Although there’s no big D&D releases this month, highlights from last month include the first two releases in the Young Adventurer’s Guide line: Monsters & Creatures and Warriors & Weapons! Both of my kids are huge fans of these books. For more information check out our review on the Young Adventurer’s Guides here.
Pathfinder
Last month marked the finale of the Tyrant’s Grasp Adventure Path with Pathfinder Adventure Path 144: Midwives to Death by John Compton. This was the final Pathfinder First Edition adventure to be released. But, as First Edition comes to an end, Second Edition begins. And WOW, there is a LOT of Pathfinder Second Edition products coming out this month!
First and foremost: The Core Rulebook (also available in a Deluxe Edition). This massive 638 page tome contains (almost) everything you need to get started playing Pathfinder Second Edition. With a highly intuitive gameplay system, and incredibly varied character development choices that can be made at every level, Pathfinder Second Edition is shaping up to be absolutely awesome. We’ve just finished reading the rules and can’t wait to get started playing some mini-adventures. GMs, like myself, will also need one other book to play: Bestiary! The Bestiary (also available in a Deluxe Edition) is 357 pages long and contains over 400 creatures with dynamic and diverse abilities. Coming out later this month is another hardcover I’m particularly excited for, Pathfinder Lost Omens World Guide, which advances Golarion’s timeline ten years and shows us what’s happening throughout ten mega-regions of the Inner Sea Region. There’s plenty of changes coming, and I can’t wait to see what’s in store for us.
It may be new, but there’s already plenty of exciting Third Party Publisher releases for Pathfinder Second Edition. Although we haven’t had a chance to read many, below are a few we’re particularly excited for.
Everybody Games
Everybody Games has two issues of their ‘Files for Everybody’ line out. Issue 1: Nashi, by Alex Augunas, brings raccoon-folk to Second Edition, while Issue 2: Acrobatics Feats, by Dustin Knight, contains ten new General Acrobatics Skill feats.
Fat Goblin Games
Fat Goblin Games has two great looking products already out. Fellow Travellers: Animal Companions by Taylor Hubler contains over fifty new animal companions, while Game Changer: Alchemical Tools by Matt Roth contains over one hundred new or expanded alchemical tools from levels one through twenty.
Rusted Iron Games
Rusted Iron Games recently launched Tombstone, a gritty alternate history wild west setting compatible with Pathfinder Second Edition rules that pits PCs against monsters, magic, and The Blight, a terrifying infection from beyond the stars. A mixture of western, fantasy, and occult horror, it’s shaping up to be a fun and quirky twist on RPGs. Current releases in this line include Ancestries of Tombstone: Chupacabra by Joshua Hennington, Ancestries of Tombstone: Jackalope by Jacob W. Michaels, and Ancestries of Tombstone: Rougarou by Dennis Muldoon, all of which are available on DriveThruRPG. Upcoming releases include more ancestries, and class feats. My daughter has decided to make at least five jackalope characters — one for each heritage — so my PDF is proving well worth the money.
And finally, WizKids! This month saw the launch of the Pathfinder Battles: Legendary Adventures Preview Pack, an 8 miniature sneak peak of the upcoming Pathfinder Battles: Legendary Adventures miniatures. Later this month D&D: Icons of the Realms: Baldur’s Gate: Descent in Avernus is scheduled to launch! This set of random booster boxes features 45 different plastic pre-painted miniatures.
And that’s what we’re touching on this month! Got a favourite release? I’d love to hear about it!
Over a year ago my family started playing the Dead Suns Adventure Path by play-by-post. The hows and whys of our decision to play online instead of at a table in our own home, and why we started playing it in the first place, is something I’ve already written about. Suffice to say, time is a factor (it always is, isn’t it?). Time to play, time to prep, time we could be dedicating to other games or other things.
Life’s busy. But, my kids adore the Dead Suns Adventure Path. They love their characters, and have a blast playing them. So, due in no small part to the requests of both of my children, we’re finally bringing our Dead Suns campaign to a proper table! Which means, it’s time to talk Dead Suns…
Dead Suns is a six-part Adventure Path for the Starfinder Roleplaying Game that sees your PCs join the Starfinder Society, and race to gain control of an ancient super weapon before the undead Corpse Fleet or the terrifying Cult of the Devourer get their hands on it and lay waste to the galaxy! Dead Suns and its supplementary products include:
You can also check out the awesome trailer for Dead Suns below:
Dead Suns is the first campaign that was released for Starfinder, which means there’s a few kinks to iron out, particularly in regards to the difficulty of starship combat. It’s a fun, tough adventure, and my family is sure to have their hands full surviving to the end. There’s only three of them (four if we include my NPC), and my children don’t always make the most sound tactical decisions. To top it all off, my family did NOT make a balanced party AT ALL. But, you know what we did make? A goofy, group of weirdos that are a ton of fun to play.
So who are the heroes of our Dead Suns campaign?
So glad you asked!
At the centre of our team is my NPC T’Kesh. I know, I know. I’m the GM so why the heck is my character the heart of the team? For reasons I’ve already written about here! Haha. It makes sense, I swear!
T’Kesh is a red-scaled ikeshti (think of them as alien kobolds) from Akiton who, like most of her people, has a voracious appetite, a knack for surviving in the harshest of environments, and a willingness to stick pretty much anything in her mouth. She’s a hunter and a cook, and soon found she was exceptional at both. Like all ikeshti, life changed when she reached adulthood. Ikeshti who are in heat become incredibly aggressive, growing larger and angrier until they successfully mate and lay eggs. Those who cannot mate successfully turn into ravenous, violent monsters known as riveners. Luckily, T’Kesh found a mate and laid a clutch of eggs. Then, she and her mate fought to the death! (Which is absolutely normal behaviour for ikeshti parents. I blame the hormones…). TKesh won, which allowed her to become something known as a Congregant — a female ikeshti that is overcome with the need to ensure the success of her people as a whole. Not necessarily her individual eggs or young, but the whole of the ikeshti race. So T’Kesh set out to find a male brood-minder to tend to her eggs, dragged him back to her nest, and took off, heading for the nearest city. She marketed her talents at hunting and cooking, entering contests, competitions, and making home-made survival and cooking videos until she went viral. She bought herself a ship and convinced a local holo-vid station to let her have her own reality show: T’Kesh: Killer Chef! In the time since T’Kesh has travelled the Pact Worlds and beyond, surviving in harsh environments, hunting her own prey, and turning it into delicious gourmet meals. Whatever she doesn’t eat she turns into her own line of R2Es named after each episode of her show. T’Kesh: Killer Chef became a hit, allowing T’Kesh to send a hefty amount of credits back to her people.
T’Kesh is a bombastic, self-centred, resourceful ikeshti with a habit of narrating her exploits to the constantly filming video drones that follow her around. She fights with a survival knife, tactical pistol, and a sniper rifle. Mechanically, T’Kesh is an icon operative explorer that uses her surroundings to her advantage. She’s well-versed in a variety of physical, social, and survival skills, but knows next to nothing about technology.
While on Akiton T’Kesh met an SRO named Rabbot. Small in stature and rather slender, with a square squat base with large treads, a pole-like body, two stick-like arms, and two skinny antennae that stick up out of her head like the rabbit ears on an old tv, Rabbot is a bit of an enigma. She doesn’t talk about where she comes from, nor why she felt the need to work with T’Kesh. But, when T’Kesh was in need of a cinematographer for her hit show, Rabbot showed up for the job. In addition to working the cameras, Rabbot’s antennae function as a signal booster, and her torso can reconfigure itself into a small stove. Unknown to all but Rabbot, the little SRO has a hidden compartment in her forearm which contains a single, tiny, rabbit stuffed toy. Rabbot is very protective of her ‘baby’ and pets it when no one it looking. At all other times she denies its existence.
Rabbot is two and a half feet tall but can adjust her telescopic body and neck to be taller and shorter at will. Her treads allow her to be highly mobile, but make stairs and getting up onto high surfaces difficult. In such terrain Rabbot activates ‘jump mode’ which allows her to bounce up onto higher surfaces with ease and is likely the origin of her name. Rabbot has a robotic, monotone voice, and always begins every sentence with “Beep…. bop… rabbot…” making her seem rather serious and dim — which couldn’t be further from the truth! Rabbot is intelligent, cunning, and fond of telling jokes.
Mechanically, Rabbot is a roboticist operative with the ghost specialization. She’s prone to quickly building barricades for cover and protection, before slinking off to another location entirely without anyone noticing. She’s exceptionally good at acrobatics, disguise, stealth, and sleight of hand, and is a fair judge of character. She’s a solid pilot and engineer with a preference for tinkering with mechanical devices over computers. Rabbot fights with an azimuth laser pistol and is my seven-year old daughter’s character.
My daughter is the driving force behind us playing Dead Suns in the first place, and finally bringing it to the table. Her absolute love for Rabbot and her companions, and passion for the game is absolutely astounding to see in one so young. She’s thrilled to share Rabbot with all of you!
The next person to join the T’Kesh: Killer Chef crew was Nubb, a snot-nosed goblin with a habit of sticking everything in his mouth. Yes, everything. Once experimented on by unknown parties, Nubb has an advanced AI installed in his brain which makes him exceptionally intelligent and good with technology. Of course, Nubb himself is exceptionally dumb, even by goblin standards, which makes the Nubb of today a strange mix of reckless stupidity, wanton destruction, and computer genius, mixed with bouts of astounding brilliance. Interfacing with his AI through a series of holographic screens transmitted directly to his eyes, Nubb is often seen poking randomly at the air and talking to himself, going through the motions of touching screens only he can see. Nubb works as T’Kesh’s editor, prepping the footage into episodes of her show, and transmitting them to the show’s producers back on Akiton.
Mechanically, Nubb is a cyberborn operative with the hacker specialization. He’s nimble, smart (most of the time), and a whiz with technology of all kinds. He fights with a survival knife, needler pistol, and a laser pistol, but the majority of his wealth is invested in the AI and computer installed in his brain. Nubb is my husband’s character and the resident trapfinder, disabler, and hacker.
A skittermander from the Starfinder Critical Hit Deck. Illustration by Taylor Fischer. Art courtesy of Paizo Inc.
Finally, we have Skitt. Skitt is a super helpful yellow skittermander that desperately misses the little ‘tummy mouth’ he was born with. It was so helpful for eating! And Skitt LOVES eating. Eventually he had a new one made and installed as an augmentation, which he thinks is really neat. Skitt met the crew of T’Kesh: Killer Chef on Vesk-6 and, after hearing the word ‘chef’ Skitt couldn’t help but offer them his friendly services! T’Kesh told him to get lost — over and over again — but Skitt was always good with people! So he cast charm person and her and she didn’t complain anymore. …For a few days, at least! And so Skitt became a member of the crew! He works cameras (usually accidentally filming his feet) and helps with dialogue (which usually results in scenes having to be reshot). T’Kesh fires him at least once a week, but his magic-friend-making-smiley-spell always fixes that up real quick! Despite the many ways that Skitt messes everything up, he is friendly, helpful, enthusiastic, and cheery, making him the cheerleader and emotional heart of the group. He loves to sing and dance, and can even talk to animals — a trait which T’Kesh occasionally makes use of on her hunts.
Mechanically, Skitt is a priest mystic who worships Weydan, god of discovery, exploration, and freedom. He has the xenodruid connection and knowledge of a variety of living things. His favourite spells are charm person, life bubble, and mystic cure, while his favourite zero-level spells are ghost sound, stabilize, telekinetic projectile, and token spell. Although Skitt carries a survival knife and a laser pistol, he much prefers to use telekinetic projectile to throw things around with his mind — always being sure to point his many hands at his enemies like guns and shout ‘PEW PEW PEW!’ at them. Skitt is my eight-year-old son’s character.
Yes, you read that right. My family of four made three operatives for an adventure path. All the characters are small and dextrous, and none of them are physically strong. Far from a balanced party, I know. But, you know what we’re good at? Skills! Haha.
Our heroes are ready to begin their journey!
The Dead Suns Adventure Path begins with Incident at Absalom Station. The PCs have just arrived on the station to meet with a dwarf by the name of Durovar Kreel, who is supposed to be their contact in the Starfinder Society. Unfortunately, he dies in the first scene and it’s up to the PCs to work with the Starfinder Society to solve his murder. This leads the PCs to joining the Starfinder Society, and sets in motion a series of events that will take them farther and farther away from their home in order to save the Pact Worlds.
When my family started playing this adventure path we were already playing in the Starfinder Society, and didn’t want our AP characters to be doing the same thing. So, we decided to make a few changes. Although the AP itself and its characters would remain the same, the organization we work for would have a different name and purpose. It’s name?
That’s a story for another time!
We’ll be back later this week with our first campaign update for Dead Suns: Busted Up Dreams! See you then!
Today we’re taking an in depth look at the third book in the Tyrant’s Grasp Adventure Path! This survival horror campaign pits the players against the return of the Whispering Tyrant, the lich-king Tar-Baphon, who was defeated and sealed away long ago. Tyrant’s Grasp will be the final Pathfinder 1st Edition Adventure Path released before the switch is made over to Pathfinder 2nd Edition in August. Intended to take characters from levels 1 to 17, Tyrant’s Grasp is six volumes long.
A wonderful Player’s Guide for Tyrant’s Grasp is available as a free download on Paizo’s website here. The Player’s Guide gives players a relatively spoiler-free way to properly prepare for and integrate their characters into the Tyrant’s Grasp Adventure Path. I highly recommend checking it out.
It should be noted that the Tyrant’s Grasp Adventure Path is not for everyone. Terrible tragedies will occur and you won’t always be able to prevent them. These events are bound to have a lasting effect on your characters, so players should be prepared to consider and role-play the marks left by the trials you face. Depending on the generosity of your GM you could be in dire situations with limited resources, so players will need to be resourceful to survive. Plenty of the imagery and events in this adventure are dark, morbid, and sorrowful. Although I wouldn’t call all of the volumes in this series horror adventures, some are — though not your typical horror. I’d call it… a morbid tragedy. There’s plenty of undead, necromancers, and disaster. It’s definitely not a campaign to play with kids or if you’re looking for a light-hearted game.
Last Watch is the third volume of the Tyrant’s Grasp Adventure Path. Written by Larry Wilhelm, this is an adventure intended for 8th-level characters, which should bring PCs up to level 11 by its conclusion. This adventure begins when the PCs arrive in Lastwall’s capital of Vigil, intent on telling the Knight of Ozem what’s happened in Roslar’s Coffer. Luckily, their arrival coincides with the Whiteblade festival, making it easy to gain an audience with a wide variety of government officials, military officers, and other important people. All that’s left it to tell them your tale.
Right?
Yeah, not so simple. Haha.
As with the other volumes in this adventure path, Last Watch looks great. From cover to cover it’s a high quality book filled with nice maps and beautiful, dark artwork. The cover depicts Yosiduin, an elven antipaladin, in the foreground. Behind him is an image of Yoon (the iconic kineticist) and Imrijka (the iconic inquisitor) battling a gnome and some thugs in the streets of Vigil. Both images are by Igor Grechanyi. There’s a nice map of The Gravelands (Lastwall and parts of Ustalav) on the inside cover again, as there has been with the previous volumes. There’s a lot of awesome artwork throughout the book — mostly of humanoid allies and enemies. Interior artists include Yanis Cardin, Hai Hoang, Joel Holtzman, Oksana Kerro, Valeria Lutfullina, Dave Melvin, and Firat Solhan. I particularly enjoyed the art for Cleverquill, pest drakes, and the many NPC portraits. The maps, all drawn by Matthias Rothenaicher, are really nice. They look great, of course, but they’re also well thought out and executed. unfortunately, some of the map rooms are too close to the binding, which makes them difficult to see. Also, one important room is partially cut off by the page’s decorative border. Unfortunate!
In terms of content, Last Watch is a diplomatic mission, investigation, and exploration. PCs will need to convince the powers that be in Vigil that something horrible happened in Roslar’s Coffer and that Vigil needs to prepare for the worst. Of course, your PCs tale is rather far fetched… The PCs will need proof to go along with their words. The adventure is rather free form at the start but, as the PCs uncover clues that will lead them to further discoveries and encounters, the adventure becomes more linear.
Vigil is a great location to adventure in and this book did a good job of conveying atmosphere and populace through encounters and short descriptions. That said, the city isn’t fleshed out very much in this book, and I wish it was. I highly recommend GMs give Pathfinder Chronicles: Cities of Golarion a read if they own it, as it contains a ten-page gazetteer on Vigil which can be used to really make this place shine. Either way, this is a great time to let players explore, make friends, forge alliances, rest, properly equip themselves, and generally enjoy being among the living while they go about their duties.
Last Watch has a more balanced array of encounter types than it’s predecessor did. It begins heavy on the social encounters, then quickly transitions to heavy on combat encounters, before finishing with a welcome mix of both. Throughout the course of the book there’s chances for different skills and different character types to shine. The combats were interesting, but it’s those in the final chapter that I particularly enjoyed. I like the social encounters a lot, both in the beginning and end of the adventure, although I think some groups will flounder a bit with the beginning. GMs will need to pay close attention to their player’s behaviour to determine if more guidance is required. Personally, I think I’d have a lot of fun with it. But, again, it’s the social encounters in the final section of this adventure that really shine.
And now it’s time for a warning:
We’ve got more to say about this adventure, but it’ll come with spoilers! Don’t want to read them? Skip on past this next section until you see the large words ‘SPOILERS OVER.’ Got it? Good! See you on the other side!
SPOILERS
Last Watch is split into three major parts: Explosive Tidings, Into the Undercity, and Grim Dawn. The adventure is 53 pages in length with six pages afterwards dedicated to three NPCs: Ceto Malderra, a famous crusader who’s not what she seems (and has amazing artwork!); Kilibrandt Erstwhile, a gnome entrepreneur and criminal; and Yosiduin, an elven antipaladin and leader of the local Seal-Breaker cell.
Part One: Explosive Tidings begins with the PCs entering Vigil during a holiday with the intent of informing the Knights of Ozem what’s happened to Roslar’s Coffer. But no one believes them! Obviously. Their story sounds crazy. It’s awesome. Haha. PCs will have opportunities to approach a variety of different authority figures and try to convince them to believe their outlandish tales. In most cases the PCs will need more evidence, which could frustrate some players and groups. But, with work, PCs should be able to win over some of the dignitaries. Doing so can earn your PCs rewards, allies, and have an effect on the final chapter of this adventure.
Figuring out where to start your hunt for evidence is a bit more troublesome. Although many groups will know which clues they have of merit, make the right connections, and tug on the right threads, some won’t. Those groups will likely be lost and get a bit frustrated. GMs should be prepared to improvise and throw in a bit more clues or rumours at the start of the investigation process if needed. All in all, I like the places the investigation goes and what drives it.
Part Two: Into the Undercity begins when the PCs investigation leads them into the sewers beneath Vigil, where they’ll take on the Seal-Breakers in their base of operations, an abandoned temple of Arazni. This location is dark and haunted, and there’s more than one way for the players to explore it, which is really nice. But, who are these Seal-Breakers, anyway? In short, they’re an evil cabal intent on freeing the Whispering Tyrant in order to acquire a really old book he had in his possession when he was sealed away. Yes, a book. And yes, the founder of this group is the person who borrowed the book to the Whispering Tyrant. Sure, it might seem a little weird, and yes, founding a cult and unleashing an undead tyrant is a rather drastic step to get your evil book back, but it’s a really special book. With it the Seal-Breakers hope to do even worse things, like unleash Rovagug and destroy Golarion. Fun stuff! All humour aside, I like this part of the adventure. The location is appropriately atmospheric, the battles are challenging, and the villains are properly… villainous! The PCs are going to figure out a lot in their time here, particularly in regards to what’s happened to Roslar’s Coffer, what’s driving this adventure path, and what’s at stake if they fail. They’re going to learn about the Whispering Way, the Whispering Tyrant, and how he destroyed Roslar’s Coffer. They’ll learn a bit about the Seal-Breakers, what this group was doing in Vigil, and that they intend to free the Whispering Tyrant, but they won’t learn enough to know their ultimate aims and goals of the Seal-Breakers. It’s likely the group will come off as a militant ally of the Whispering Way –– which is exactly how the Seal-Breakers like it! (More on Seal-Breakers later!)
But, what I like best about this section of the adventure is the twist ending… Your PCs have fought long and hard to find the evidence they need to convince the city’s officials to trust them. They’ve scoured the city for clues, tracked down a gang, descended into the stinky sewers, and fought of a cult of violent fanatics, and now –– finally! –– they have what they need.
Suddenly there’s a muffled sound echoing down from the city above…. Was that an explosion? The ceiling shakes…
Part Three: Grim Dawn begins when the PCs exit the sewers after taking on the Seal-Breakers. They emerge to find Vigil destroyed…
Which is awesome! Horrible! But, awesome! This is such a great gaming moment that will be much more meaningful if the players have had time to get to love Vigil, so be sure to play that up while you can!
Now, Vigil is a big city, and the death toll is absolutely devastating, but there are a few pockets of survivors. In this section of the adventure the PCs explore the ruins of Vigil –– which has clearly suffered the same fate as Roslar’s Coffer –– fight off undead abominations, and meet up with the survivors. They’ll see some familiar faces and be happy to realize that their efforts did do some good, even if it didn’t save the city. There’s a direct correlation between the number of survivors in Vigil and how much the PCs managed to convince the various authority figures in Part One that the threat to this city was real. Although it’s not mentioned until the end of the chapter, GMs should definitely take the time to highlight this the entire way through!
The PCs need to rally these survivors, hatch a plan, and bring this group to meet up with another group of survivors. Together they’ll have to attack a terrifying foe that’s intent on ensuring no one leaves Vigil alive. If they can accomplish this the PCs can escape Vigil with their fellow refugees and live to fight another day.
In addition to the Last Watch adventure, this volume contains three articles and a bestiary containing five new creatures. All three articles are intended for GMs, but only one needs to be kept secret from players: Seal-Breakers, by Greg A. Vaughan. This article takes an in-depth look at the history and goals of the Seal-Breakers, it’s founders, members, and structure. It also mentions some places the Seal-Breakers are active and what their goals are in those locations.
SPOILERS OVER
There are two other articles in the book’s backmatter that players can hear about without it affecting the adventure. The first article, Into the Void, is written by Patchen Mortimer. It details the Negative Energy Plane, exploring its locations, ecology, denizens, and threats. This has always been a plane that I’ve considered pretty hard to wrap my head around. How does one adventure in a place that’s the antithesis of life? But, this article did a great job of making it a potential adventure location. It’s still horribly dangerous, but as a player and GM it seems a lot more accessible now. Really great job!
The final article is Relics of the Shining Crusade by Alexander Augunas. As the name implies, this article details some relics –– magical objects that can improve under certain conditions when utilized by PCs. The included relics are all objects from Lastwall that were used in the wars against the Whispering Tyrant, and are great options for dropping into the Tyrant’s Grasp Adventure Path. Keep in mind that the triggering conditions that can cause these objects to improve should be kept hidden from players.
The Bestiary is up next! It contains a random encounter chart and four special encounters, all suitable for use in the third part of Last Watch. There’s also eight new creatures written by Mike Headley, Isabella Lee, Meagan Maricle, Kendra Leigh Speedling, and Larry Wilhelm. Five of them are featured in the Last Watch adventure. Creatures include Lifeleecher mortic, a CR 8 mortic based off of orcs; pallid angel, a CR 12 evil outsider blessed by Urgathoa that’s a mockery of the angels they appear to be; pest drake swarm, a CR 9 swarm of colourful little dragons; sceazir, a CR 9 outsider from the Negative Energy Plane; sump steward, an intelligent plant that nurtures the growth of other plants (and my personal favourite of the new monsters); and finally, three swarms and troops of undead: the CR 10 clacking skull swarm, CR 7 barrier breaker troop, and the CR 9 sodden draugr troop.
Pest Drakes from the Last Watch Bestiary
Which brings us to the end of Last Watch by Larry Wilhelm! I think this is an absolutely awesome adventure that packs an emotional punch. I enjoyed it start to finish, but it’s the entire final chapter and the ominous foreshadowing of terrible tragedies that really makes this adventure special. GMs willing to put in the work to make Vigil and it’s people shine will definitely be rewarded!
Today we’re taking an in depth look at the second book in the Tyrant’s Grasp Adventure Path! This survival horror campaign pits the players against the return of the Whispering Tyrant, the lich-king Tar-Baphon, who was defeated and sealed away long ago. Tyrant’s Grasp will be the final Pathfinder 1st Edition Adventure Path released before the switch is made over to Pathfinder 2nd Edition in August. Intended to take characters from levels 1 to 17, Tyrant’s Grasp is six volumes long.
A wonderful Player’s Guide for Tyrant’s Grasp is available as a free download on Paizo’s website here. The Player’s Guide gives players a relatively spoiler-free way to properly prepare for and integrate their characters into the Tyrant’s Grasp Adventure Path. I highly recommend checking it out.
It should be noted that the Tyrant’s Grasp Adventure Path is not for everyone. Terrible tragedies will occur and you won’t always be able to prevent them. These events are bound to have a lasting effect on your characters, so players should be prepared to consider and role-play the marks left by the trials you face. Depending on the generosity of your GM you could be in dire situations with limited resources, so players will need to be resourceful to survive. Plenty of the imagery and events in this adventure are dark, morbid, and sorrowful. Although I wouldn’t call all of the volumes in this series horror adventures, some are — though not your typical horror. I’d call it… a morbid tragedy. There’s plenty of undead, necromancers, and disaster. It’s definitely not a campaign to play with kids or if you’re looking for a light-hearted game.
Eulogy for Roslar’s Coffer is the second volume of the Tyrant’s Grasp Adventure Path. Written by Jason Keeley, this is an adventure intended for fifth level characters, which should bring PCs up to level eight by its conclusion. This adventure begins when the PCs return home to Roslar’s Coffer and find it greatly changed.
Eulogy for Roslar’s Coffer looks great. From cover to cover it’s a high quality book filled with nice maps and beautiful, dark artwork. The cover depicts Jando Parr, a half-orc ranger, in the foreground. Behind him is an image of Imrijka (the iconic inquisitor) and Kess (the iconic brawler) battling an undead moose. Both images are by Igor Grechanyi. There’s a nice map of The Gravelands (Lastwall and parts of Ustalav) on the inside cover. There’s a lot of artwork throughout the book — mostly of enemies. I particularly enjoyed the art for Chatar Esuri, Valthazar Quietus, an oracle from the backmatter, and the couatls in the Bestiary. The maps, all drawn by Matthias Rothenaicher, are really nice. They look great, of course, but they’re also well thought out and executed. All of the rooms are clearly labelled and visible, and I didn’t notice any discrepancies between the maps and the accompanying text.
In terms of content, Eulogy for Roslar’s Coffer is a bit of mystery, a bit of exploration, a bit of problem solving, and a lot of combat. PCs will need to explore Roslar’s Coffer, figure out what happened, find a way to move forward, and defeat their enemies. There’s some nice connections between this volume, the ones before and after, and Pathfinder Society Scenario #10-04: Reaver’s Roar. I particularly enjoy how this adventure plays with feelings of familiarity, déjà vu, and player expectations.
The entire adventure takes place in Roslar’s Coffer and it’s immediate surroundings, as well as two major encounter areas. The town is a dark, tragic place to play in. There’s plenty of scripted danger and wandering encounters, as well as a few scripted non-combat encounters. Most of the social encounters in this adventure occur on the town’s streets, although there’s not that many of them. Outside of this most of the PCs interactions with others will be based around whatever information they manage to pry from their enemies lips. As much as I like what was done with Roslar’s Coffer, I wish there was more there. That said, Roslar’s Coffer is the perfect place for GMs to tie the surroundings closely to their player’s backstory and history. I highly recommend GMs do so as much as possible, as that’s what will really make this place special.
In and around Roslar’s Coffer there are two major locations to explore. Both are quite combat heavy and contain some memorable encounters and enemies.
And now it’s time for a warning:
We’ve got more to say about this adventure, but it’ll come with spoilers! Don’t want to read them? Skip on past this next section until you see the large words ‘SPOILERS OVER.’ Got it? Good! See you on the other side!
SPOILERS
Eulogy for Roslar’s Coffer is split into three major parts: A Town Tormented, Restless are the Dead, and The Unclean Light. The adventure is 55 pages in length with six pages afterwards dedicated to three NPCs: Chatar Esuri, the coolest looking ghoul I’ve ever seen; Jando Parr, a half-orc ranger who could become an ally of the PCs, and Valthazar Quietus, the final enemy the PCs will need to overcome.
Through this adventure the PCs will primarily take on undead and agents of the Whispering Way. It’s quite combat heavy, although, as previously mentioned, many of the enemies are memorable and unique. From simple foes like a mutated bear and a stampede of zombie moose (the stats say elk but the image on the cover is a moose, so I’m going with that!), to cunning enemies like patrols of Whispering Way cultists, tricky nekomata, and juju zombies made from the corpses of your PCs, there’s a lot of fun combats packed into this book.
There’s few potential allies in this adventure, but that doesn’t mean there’s few social encounters. The PCs will have plenty of opportunity to interact with spirits and help put them to rest. They’ll also have chances to interact with and befriend Jando Parr. Finally, a number of enemies can be rather chatty, and clever PCs might be able to learn much from them.
Part One: A Town Tormented begins with the PCs arriving in Roslar’s Coffer to find it destroyed. The people are dead, corpses stalk the streets, and a toxic miasma surrounds the town which proves fatal to anything that attempts to leave. Arriving from the Dead Roads in an old stable outside town, the PCs get to explore Roslar’s Coffer and attempt to learn what they can. There’s some fun encounters here –– the previously mentioned zombie moose stampede is a memorable combat, while meeting (and hopefully allying with) Jando Parr allows the PCs to make a friend, learn about the recent happenings in town, and find a base of operations where they can rest in safety. The other major encounter is with a loci spirit formed from the souls of those who died in Roslar’s Coffer. The spirit bars entry to the cemetery.
Unfortunately, there’s not a lot to do in Roslar’s Coffer. PCs won’t find many clues in the buildings, the only people they can talk to are Jando Parr, patrols of Whispering Way cultists, and a few spirits of the dead. I really like these spirits, and I love the mundane ways you can put them to rest –– things like fixing up a garden, teaching the school-kids a lesson so they can be dismissed by a teacher, and helping a man remember what jewelry he was about to buy for his beloved. It’s great fun! But that’s all there really is to do in town. So why would your PCs bother putting some spirits to rest? Hopefully out of the goodness of their hearts but, even if that’s not the case, the PCs will soon discover they have to. There’s no way to escape Roslar’s Coffer and the only place they can viably reach that is unexplored is the cemetery –– a cemetery that a certain loci spirit bars entry to. To get inside the loci spirit insists the other spirits in town be calmed. Accomplishing this allows PCs access to the cemetery where they find a familiar tomb….
Part Two: Restless are the Dead begins when the PCs enter the tomb of Roslar. This is a location that will seem very familiar to the PCs, as Tyrant’s Grasp begins when the PCs wake up in a idealistic version of Roslar’s Tomb in the Boneyard. This version? Not so nice! It’s decrepit, vandalized, and plagued by undead. This section of the adventure does a great job of messing with player expectations by showing them a location they’ll feel like they know that isn’t the same. It’s going to be a lot of fun to play at the table. It’s very combat heavy, with only few enemies within the tomb capable of carrying on a conversation.
Part Three: The Unclean Light begins after the PCs have traversed Roslar’s tomb and discovered a secret tunnel that leads to the Bastion of Light, a Sarenite church with a storied history located within the toxic fog surrounding Roslar’s Coffer. This temple has been home to Sarenites, orc war bands, and a mythic red reaver over the years, before it was liberated by the Pathfinder Society in scenario #10-04: Reaver’s Roar. In the months since it has undergone some renovations. Now it’s home to the Whispering Way. The foul cultists are using it as a base of operations to explore the town and catalogue the effects of the weapon used to destroy Roslar’s Coffer. In some ways this backstory will shine through. PCs that are locals will know some of the history of this place through ghost stories and legends. Players who’ve played #10-04 will enjoy the references and tie-ins. Canny PCs might be able to cobble together clues from room descriptions. But, for the most part, this is just a cool building where the bad guys live. The PCs sneak in through the secret tunnel, discover who lives there, and attack. This is likely going to take more than one day as the place is densely populated and PCs are going to be already low on resources from traversing the tomb. There is a place you can rest inside the temple, but it’s more likely PCs sneak back out the secret tunnels and recuperate under the watchful eyes of Jando Parr.
There are a lot of fun enemies in this temple. The Whispering Way cultists here (and throughout the whole book) have some really nice artwork. There’s a mutated bear that druids might be able to control or befriend, a zombie made from the red reaver that once lived here, and plenty of other traps and undead. My favourite encounters are a pair of tricky nekomata that try to separate and impersonate members of the party, and the final villain, Valthazar Quietus. Valthazar is an androgynous looking Ustalavic nobleman who is a pleasant conversationalist. He’s more than willing to chat with the PCs (as long as it suits him!). He’s accompanied by juju zombies created from the corpses of the PCs which is sure to be jarring and a ton of fun to play. It’s definitely a highlight of this adventure!
But, escaping Roslar’s Coffer isn’t as simple as killing your enemies. Valthazar used a powerful artifact to create a toxic fog around the destroyed town, then protected the artifact with an occult ritual. PCs will need to figure out how to access the artifact and shut it down. There’s plenty of clues laying around and a well-stocked library, but figuring this out could still be a bit frustrating for some players. This section also makes use of library and research rules.
Eulogy for Roslar’s Coffer ends with a mysterious stranger suggesting the PCs travel to Vigil, capital of Lastwall, to tell them what has happened to Roslar’s Coffer.
In addition to the Eulogy for Roslar’s Coffer adventure, this volume contains three articles and a bestiary containing five new creatures. All three articles are intended for GMs.
The first article, Merchants of the Road, is written by Eleanor Ferron. In it you’ll find details on a variety of very strange travelling merchants and caravans that could be added into the campaign. This is particularly useful at various points in the adventure path when shops are hard to come by. Each also comes with some potential plot hooks. The merchant groups are the Baramasco, Clockwork Caravan, Palanquin Trading, Taotake, and (my personal favourite) the Redclover Tribe of kobolds! Although I doubt I would add these groups into Tyrant’s Grasp when I run it, I would definitely enjoy using all of these groups in other adventures and campaigns.
The second article, Arazni, The Red Queen, is written by Lyz Liddell. As the name implies it contains information on Arazni, her history, and her fate. Arazni is such a tragic figure, and her personal story arc is incredibly important to this adventure path –– even though it does unfold primarily offscreen. She’s suffered through life, death, life as an undead, imprisonment, unwanted marriage, and so much more. She’s endured (and still endures) trauma that has shaped her into the person she is, and drives her actions throughout this adventure path. I particularly enjoyed seeing how her faith and focus has changed over the years. I think this article was very well handled.
The final article, Machinations of the Whispering Way, is written by Crystal Malarsky and details The Whispering Way, servants of the Whispering Tyrant and the primary villains of this adventure path. It also includes some stat blocks that are used in this adventure. It’s a very important article for GMs to read.
The Bestiary is up next! It contains a random encounter chart and five new creatures written by Sarah E. Hood, Luis Loza, Jen McTeague, and Mikhail Rekun. Oddly, none of them are featured in the Eulogy for Roslar’s Coffer adventure. The first two monsters are couatls: auwaz, a CR 6 couatl found near oceans that helps the lost find their way home, and mix, a CR 8 couatl known to guide and watch over societies. Other creatures include gurgist, a CR 6 human mortic; melacage, a disturbing CR 5 incorporeal (usually) ball of undead souls; and pixie circle, a CR 7 plant creature capable of transporting enemies to other pixie circles.
SPOILERS OVER
Which brings us to the end of Eulogy for Roslar’s Coffer (Tyrant’s Grasp 2 of 6) by Jason Keeley! Although I wish there was more to do and discover in Roslar’s Coffer, I really enjoyed this adventure. There’s some combat encounters in this book that are going to be unique and memorable for everyone at the table, and the adventure’s location and events are going to have a lot of emotional impact for PCs. As a GM that’s something I really appreciate.
Against the Aeon Throne is a shorter campaign than most. Typically six books in length, this Adventure Path is only three. It’s a great change of pace that will allow the folks at Starfinder to tell shorter, more personal stories. In addition, this three part length makes it easier to purchase and play through an entire adventure path. It’s awesome for gift giving and the budget conscious! Six books is a huge investment, but three? Well, that’s a lot more manageable for those of us without much extra cash laying around. On the other hand, with the three book format I feel like I blinked and the whole adventure path was over. I didn’t get my hands on the first book until the third came out and I missed the Signal of Screams Adventure Path completely. In general, it’s both easier to collect and easier to miss. Although I enjoy the three book format, I also enjoy the six book format, so I hope they continue to rotate between the campaign lengths.
So what exactly is Against the Aeon Throne: The Rune Drive Gambit all about? In previous adventures, the PCs defeated an Azlanti military force that had annexed the small colony of Madelon’s Landing on the planet of Nakondis. But saving the fledgeling colony was just the beginning. The PCs discovered that an experimental starship engine and their friend, the android Cedona, were transported off of Nakondis and back to the Azlanti Star Empire. Giving chase the PCs made some allies and rescued Cedona. All that’s left is to find the experimental starship engine, steal it or destroy it, and escape with their lives. Along the way they’ll fight Aeon Guard soldiers, rescue captive scientists, and face off against the man responsible for sending troops to Nakondis in the first place! No problem! …Right?
Now, let me take a moment to be clear. The Azlanti Star Empire is a pack of giant, pompous, jerks. They’re great villains for the PCs to clash with, but an overwhelming opponent. This adventure path does not send your PCs off to take down the entire Azlanti Star Empire. It’s much smaller in scale than that. And frankly? I love it. It lends a sense of suspense to the series and makes it feel like you’re playing real people in a living breathing world universe doing what they can, rather than heroes so powerful they change the whole world universe. It’s a wonderful change of pace and scope. It’s got a very Firefly / Star Wars feel to it.
But, before we get into that too much, let’s take a look at the book itself. Starfinder Adventure Path #9: The Rune Drive Gambit (Against the Aeon Throne 3 of 3) is a softcover adventure written by Larry Wilhelm that is 63 pages in length. It’s intended to take players from level five to level seven. The adventure itself is around 39 pages long, and split into three main parts: With Friends Like These, in which the players upgrade their ship and figure out where the heck they’re going; Within Enemy Territory, in which the players travel to and explore the upper levels of a secret research facility located in an asteroid; and Scientific Theories, in which the players finish exploring the research facility, track down the rune drive, and decide what to do with it. After the adventure there’s six pages of ideas on how to continue the campaign after it’s conclusion, with eight short ideas, and two detailed ideas that include a stat block or two. After that there’s an eight page primer on the Stewards, including two character archetypes. There’s seven new creatures in the Alien Archive, and a short Codex of Worlds article on New Thespera, heart of the Azlanti Star Empire. Lastly, the inside front and back covers feature information and a layout for a tier 5 starship: the Vanguard Regnant.
My favourite parts of this adventure are the layout, enemy tactics, and defences of the research facility, and the NPCs you unexpectedly discover along the way.
Before we continue with a more in depth look at the book, let me point out: there will be SPOILERS.
You have been warned.
For starters, I love the look of this book. I like the colours and the layout. The text inside is easy to read and the colours are easy on the eyes. The cover art is wonderful. It showcases Sardat Zolan Ulivestra, an Azlanti nobleman and enemy of the PCs, as drawn by Anna Christenson. Behind him is an awesome image of Obozaya (the iconic vesk soldier) and Quig (the iconic ysoki mechanic) fighting off Azlanti soldiers.
Azlanti Aeon Guard. Art courtesy of Paizo Inc.
The starship showcased on the inside covers is a Vanguard Regnant. This tier 5 small light freighter is destined to be the final (or second last) enemy the PCs face in this campaign. It’s a well-built luxury ship that’s fast and maneuverable, but still packs a punch. I particularly like the ship layout.
After that we hop right into the adventure itself. This adventure starts in Outpost Zed where the PCs (and Cedona) will need to get their ship upgraded by their friend Hasshachir, who they met in the previous adventure. While they wait they’ll run into trouble, which will ultimately provide the PCs with the clues they need to determine their next destination. We won’t talk about these events any further, as it would ruin the surprise for those of us reading this who ignored my spoiler warning. (You know who you are! Haha). What I will say, is that I enjoyed this section of the adventure.
Which brings us to part two of the adventure: Within Enemy Territory. In this section PCs will need to travel to Aurelos, the secret laboratory the rune drive was taken to, find a way inside, and explore the upper levels. Along the way they’ll have to take on the base’s defences and protectors. As previous mentioned, I was really impressed with the layout of the Aurelos base, both the upper levels featured in this section, and the lower levels featured in the next part of the adventure. It’s functional and easily defensible, and is populated with enemies who know how to use their surroundings. There’s a few complications and other defences to round out these encounters, and an enemy is introduced that I rather enjoyed.
Oliviana. Illustrated by Jakub Bazyluk. Art courtesy of Paizo Inc.
Which brings us to part three: Scientific Theories. In this section the PCs finish their exploration of Aurelos, fighting off further enemies and surmounting further challenges. Along the way they’ll have the chance to meet quite a few NPCs (potential friends and enemies), question scientists, explore science labs, and try to figure out what the heck the rune drive is and why it’s so important. Then they’ll have to figure out what to do with it and attempt to make their escape. They’ll face off against the mastermind of this whole debacle, Sardat Zolan Ulivestra, alongside some of his loyal (or not so loyal, depending upon your PCs actions) minions. Finally, they’ll have to engage in a starship battle to make their escape!
Part Three is fun, dynamic, and exciting, with plenty of people to interact with, challenging encounters, and a dilemma or two. I really enjoyed Evandrian, an Aeon Guard the PCs are destined to combat multiple times, and the Sardat’s statistics and tactics. He’s the perfect mix of pompous and skilled. I think PCs are going to really hate him. Haha. He’s a great villain. Finally, I like that some of the encounters in this section are open ended. There’s more than one potential outcome, and the choice ultimately rests in the hands of the PCs, either knowingly or through their actions. On the other hand, Part Three is also where I have some issues. There’s really only one thing to do with the rune drive. It’s cool, and it makes sense, but there’s clearly no real alternatives to the option presented. Which is unfortunate. Also, that option? Wow, it’s… complex? It’s logical, both in terms of the story and in terms of Pact Worlds implications. But I was also left wondering why it also does… some other stuff that seems tacked on. Cool stuff! But odd. I’m being vague, I know, but you’ll understand when you read it. Haha.
Which brings us to the end of The Rune Drive Gambit and the Against the Aeon Throne Adventure Path. But, that’s not the end of the book. Up next, as previously mentioned, is a lot of ideas for how to continue the campaign. There’s eight minor ideas here, some of which will lead to short adventures, and others which could form the basis of long, epic campaigns. I know my family will want to head back to Nakondis to help out the colony there, so it’s nice to see a few options that deal with the Madelon’s Landing. Other ideas involve the Stewards, the Azlanti Star Empire, and even transitioning into the Signal of Screams Adventure Path (definitely not the option my family will be using, but it’s nice to see it in print). There’s also two longer campaign ideas. One is a direct continuation, which makes a lot of sense, and I’m very likely to make use of. The other is both awesome and out there! I love it! But, it’s way too confusing to run with my kids (which is who I’m currently running through Against the Aeon Throne). If any of you make use of Kellixtrian I’d love to hear about it.
Following this is an eight page primer on the Stewards. Basically the peace-keeping force of the Pact Worlds, the Stewards are warrior diplomats that are organized into four main branches and run by a Director-General. The branches are Constabulary (the police force), Ops (the spies), Overwatch (the starship fleet), and Conclave of Legates (veterans who act as a council and advisory board). This section describes the Stewards origins, history, structure, leadership, purpose, bases, training regimen, and interests. It also presents two new archetypes, the Stewards infiltrator (an ops agent) and Stewards stalwart (self-sufficient agents that often work alone). Both of the archetypes are useful and very cool! I’m really glad the Stewards are getting some attention, as they are a powerful organization that can be utilized and interacted with in a wide variety of campaigns. They’re very usable.
Azlanti Battle Robot. Illustrated by Alexandur Alexandrov. Art courtesy of Paizo Inc.
The Alien Archive is up next, which is always one of my favourite sections of an Adventure Path. It contains seven new creatures, three of which are featured in the adventure itself. The creatures include: power archon, a CR 5 outsider tasked with destroying corrupting technology; carnivorous crystal, a CR 11 ooze that can turn you to crystal; comanide, a very creepy looking CR 7 fey; entropy slug, a CR 4 magical beast the PCs will face in part one of this adventure; hulsa, a CR 10 fey; Azlanti battle robot, a CR 6 robot the PCs will face in part three of this adventure; and twinsoul, a very strange CR 8 creature also featured in this adventure.
Finally, there’s a short, one page Codex of Worlds entry on New Thespera, the heart of the Azlanti Empire and seat of the Aeon Throne. It’s an incredibly useful article, but very brief. New Thespera’s the sort of important place you could write pages of information on.
Against the Aeon Throne is a shorter campaign than most. Typically six books in length, this Adventure Path is only three. It’s a great change of pace that will allow the folks at Starfinder to tell shorter, more personal stories. In addition, this three part length makes it easier to purchase and play through an entire adventure path. It’s awesome for gift giving and the budget conscious! Six books is a huge investment, but three? Well, that’s a lot more manageable for those of us without much extra cash laying around. On the other hand, with the three book format I feel like I blinked and the whole adventure path was over. I didn’t get my hands on the first book until the third came out and I missed the Signal of Screams Adventure Path completely. In general, it’s both easier to collect and easier to miss. Although I enjoy the three book format, I also enjoy the six book format, so I hope they continue to rotate between the campaign lengths.
So what exactly is Against the Aeon Throne: Escape from the Prison Moon all about? In short, the PCs defeated an Azlanti military force that had annexed the small colony of Madelon’s Landing on the planet of Nakondis. But saving the fledgeling colony is just the beginning. The PCs have discovered that an experimental starship engine and their friend, the android Cedona, were already transported off of Nakondis and back to the Azlanti Star Empire. Determined to rescue Cedona and retrieve the starship drive the PCs travel to the Azlanti Star Empire and attempt to rescue Cedona from the prison moon she’s being held on. Exciting stuff!
Now, let me take a moment to be clear. The Azlanti Star Empire is a pack of giant, pompous, jerks. They’re great villains for the PCs to clash with, but an overwhelming opponent. This adventure path does not send your PCs off to take down the entire Azlanti Star Empire. It’s much smaller in scale than that. And frankly? I love it. It lends a sense of suspense to the series and makes it feel like you’re playing real people in a living breathing world universe doing what they can, rather than heroes so powerful they change the whole world universe. It’s a wonderful change of pace and scope. It’s got a very Firefly / Star Wars feel to it.
But, before we get into that too much, let’s take a look at the book itself. Starfinder Adventure Path 8: Escape from Prison Moon (Against the Aeon Throne 2 of 3) is a softcover adventure written by Eleanor Ferron that is 63 pages in length. It’s intended to take players from level three to level five. The adventure itself is around 35 pages long, and split into three main parts: A Distant Call, in which the players travel to the Azlanti Star Empire; Outpost Zed, in which the players explore a space station and plan their caper; and Jailbreak, in which the players infiltrate the Prison Moon to free Cedona. After the adventure there’s an eight page primer on the Azlanti Star Empire and an eight page primer on the non-human races of the Azlanti Star Empire. There’s also seven new creatures in the Alien Archive, and a short Codex of Worlds article on Outpost Zed. Lastly, the inside front and back covers feature information and a layout for a tier 3 starship: the Vanguard Parapet.
My favourite parts of this book are the large number of new player races (there’s six of them), the incredibly varied and quirky NPCs (Glest, Half-Red, Xaarb, and Talmrin are all great fun), and how free-form the locations are. Yes, you have to go to ‘A’ place, and accomplish ‘B’ goal, then go to ‘C’ place, and accomplish ‘D’ goal, but how you go about achieving your goals in ‘A’ and ‘C’ — the order and methods — are up to you. I really like that. Another minor thing I really enjoyed is that every enemy has a name. It sounds like a silly thing to enjoy in an adventure, but giving every villain a name allows for PCs to take approaches to dealing with them that amount to more than ‘attack’ and ‘loot.’ That’s incredibly important in this adventure, particularly in Part Three: Jailbreak.
Before we continue with a more in depth look at the book, let me point out: there will be SPOILERS.
You have been warned.
For starters, I love the look of this book. I like the colours and the layout. The text inside is easy to read and the colours are easy on the eyes. The cover art is wonderful. It showcases Cedona, an android, retired Steward, and ally of the PCs, as drawn by Anna Christenson. Behind her is an awesome image of Raia (the iconic lashunta technomancer) and Quig (the iconic ysoki mechanic) fighting off Azlanti prison guards.
The starship showcased on the inside covers is a Vanguard Parapet. This tier 3 medium transport is destined to be the final enemy the PCs face in this adventure. All in all it’s a well-built ship, that packs some serious firepower. I particularly like how it’s shield points are balanced, with barely any shields in the quadrants where they have the most guns, and the excess shields where they have the least guns. The art is nice and the ship layout is useful.
After that we hop right into the adventure itself. This adventure starts a bit slower than its predecessor. It begins with some necessary bookkeeping. The PCs likely have some loose ends and social encounters to wrap up in Madelon’s Landing after the conclusion of Reach of the Empire (Against the Aeon Throne 1 of 3) and they’ll need to upgrade their starship to tier 3. Afterwards they receive a recorded transmission from The Stewards which should help nudge them on their way and get the adventure going. For many groups this transmission is unnecessary. PCs should already know their goals for this one: retrieve the drive and rescue their friend. But, for those groups that need a little more guidance, this recording gets the job done quick and efficiently. The PCs will need to fly to the Azlanti Star Empire, get their bearings, and find their way to the Prison Moon Cedona is being held at. On the way they run into a witchwyrd merchant ship where they’ll have a chance to make friends, barter, and pick up some valuable intel. This social encounter also gives them a destination where they can learn some more about the Azlanti: Outpost Zed.
Glest, a nervous screedreep from Outpost Zed.
Which brings us to part two of the adventure: Outpost Zed. In this section PCs will need to travel to Outpost Zed, a rebellious little space station on the fringes of Azlanti space, figure out where Cedona was taken, and determine a way to properly disguise their ship. This is done primarily through interacting with the locals. Of course, not all the locals are friendly or willing to talk to obvious foreigners. Other hurdles the PCs will come up against are learning how to communicate with the locals, and figuring out Outpost Zed’s societal structure. As previously mentioned, this section of the adventure is a little free-form. There’s plenty of people to talk to, a section of the spaceport to explore, some quick battles (some of which can be avoided), and the PCs can go about their socializing in any order. However, they can’t really stray outside this area or get too off track. Still, it’s fun and enjoyable. Many of the NPCs they’re destined to meet are from races the PCs know nothing about. I particularly enjoyed Glest (a nervous, shifty screedreep), Half-Red (a tiny squid-like stellifera that floats in an orb of water), Xaarb (an agressive creature who’s mostly mouth), and Talmrin (a very useful NPC who looks like a weasel-person). This section does a great job of showcasing that your PCs are obvious outsiders, which is something they’ll need to address if they want to break their friends out of prison without fighting their way through the whole place. Overall, it’s a fun, flavourful place to explore, filled with plenty of memorable social encounters. Before you move on, the PCs will need to take what they’ve learned and concoct a plan to travelling to and infiltrating the Prison Moon Gulta, for rescuing Cedona, and for escaping alive. Good luck! Haha. In all seriousness, the pieces of the puzzle the PCs need should come relatively easily, and there’s an NPC around who can help with the planning in a major way if the PCs are in need of inspiration or assistance. The actual planning shouldn’t be too hard once they’ve got their ducks in a row.
One of the many denizens of Outpost Zed!
Which brings us to part three: Jailbreak. This is by far the longest and most challenging section of the adventure. As the PCs approach Gulta, the prison moon, they should already know that non-Azlanti are typically held in Cell Block J. With their destination narrowed down considerably, they’ll need to disguise their ship, approach Gulta, and dock in Cell Block J. From there it’s more free-form. Depending upon what races the PCs are they’ll need disguises to manage any kind of infiltration mission. They’ll also need a way to speak Azlanti, someone who’s decent at lying, and someone who’s handy with a computer or at engineering. Then they’ll need to explore Cell Block J without tipping off the guards or raising an alarm. Plus there’s the security cameras and patrols to worry about. PCs who choose to go in guns blazing will instead need to be quick and get the security feeds shut down as soon as possible. Either way, once the PCs manage to get Cedona free (and hopefully some other prisoners as well), they’ll need to find a way to escape with her — a job much harder than getting in. Finally, before they escape they’ll need to contend with this volume’s big bad — an Azlanti woman named Iolastrila — and the Zandamant, a prison ship that pursues the PCs as they make their escape.
This section of the adventure is incredibly well presented, but not easy for GMs to run. It lays out the entirety of Cell Block J, what security measures are in place, labels every security camera, and shows where guards are located. Every guard has a name and some information about them — all useful information for PCs attempting an infiltration. There’s also notes on what things the PCs can do to raise or lower the alertness of guards, and cause alarms to sound. It describes what changes throughout the Cell Block in such circumstances, and what the various guards do. It’s really detailed, and really well thought out. Which is incredibly important! Your PCs are going to go in there and going to make a scene. GMs will need to keep track of what cameras are in operation, who’s suspicious of them, what the various guards are doing, and so on. It’s complex, and a lot to track. But pulling off this caper — both for the PCs and the GM — is a rewarding, exciting, experience. This place is dynamic, detailed, and reacts to the PCs. It will be different for every group and I really, really enjoyed it.
By the end of this chapter the PCs will have freed Cedona, made their escape from the Prison Moon, and retreated to Outpost Zed. But their mission’s not yet complete. The PCs and Cedona know they need to get back the experimental drive from the Azlanti before its too late.
Which brings us to the end of Escape the Prison Moon! But, that’s not the end of Against the Aeon Throne, or the book. Up next, as previously mentioned, is an incredibly useful primer on the Azlanti Star Empire entitled Empire of the Aeon Throne. This eight page article provides a short history of the Azlanti Star Empire, information on the solar systems under it’s control (there’s twelve of them!), and information on their culture, and society. Finally, it’s got some new gear, including five new aeon stones, four new magitech augmentations, and two new weapons.
Talmrin, a gosclaw from Outpost Zed.
The second primer is entitled Citizens of the Star Empire. Also eight pages in length, this section describes a whopping nineteen races common to the Azlanti Star Empire, most of which are new. Six of these races is also given much more information and full racial traits to allow you to play these races. Playable races include the brakim, gosclaw, neskinti, screedreep, stellifera, and vilderaros. I really enjoyed all of these races, but the brakim and screedreep turned out to be my favourites. The brakim are also featured in Starfinder Society Scenario #1-27: King Xeros of Star Azlant.
The Alien Archive is up next, which is always one of my favourite sections of an Adventure Path. It contains seven new creatures, four of which are featured in the adventure itself. The creatures include: Aeon Stone Network, a CR 7 construct made from a swarm of aeon stones; Radiation Drake, a CR 9 drake; Iztheptar, a CR 6 shellfish-like humanoid that’s featured in both Escape from the Prison Moon and Starfinder Society Scenario #1-27: King Xeros of Star Azlant; Ooheo, a tiny CR 1 vermin with a long harpoon-like tongue; Paralith, a CR 4 aberration they’ll meet on Outpost Zed; Void Palm, a CR 7 gravity controlling plant; and Xaarb, an aggressive CR 5 magical beast they’ll meet on Outpost Zed.
Paralith by David Franco. Art courtesy of Paizo Inc.
Finally, there’s a short, one page Codex of Worlds entry on the Outpost Zed. Despite its short length, the information contained therein is useful for this adventure, and a must read for any GMs who expect their PCs to do a bit more exploring of the space port than is scripted in this adventure.
Outpost Zed by Mirco Paganessi. Art courtesy of Paizo Inc.
Against the Aeon Throne: Part Three: The Rune Drive Gambit is written by Larry Wilhelm and intended for level five characters. In it, the PCs head to a secret Azlanti science station in an asteroid where the experimental starship drive is being held. They’ll need to get inside, infiltrate or fight their way to the Rune Drive, and learn what the heck it is. Then they’ll need to find a way to steal it. Along the way they’ll fight Aeon Guard soldiers, rescue captive scientists, and face off against the man responsible for sending troops to Nakondis in the first place! Awesome!
EDIT: You can read our review on it here: Review: Against the Aeon Throne: The Rune Drive Gambit.
I hope you enjoyed taking an in depth look at the second volume of Against the Aeon Throne much as I did!
It’s been a while since we talked about my family’s current home campaign, Shackled City. We haven’t stopped playing — far from it. But we’ve been so busy lately it’s hard to find the time to play anything at all, let alone write about it. So while I have a free moment let me welcome you back to Cauldron, home of the The Shackled City Adventure Path!
When we last left off our heroic musicians had finally returned home to Cauldron. They had saved a lot of people and brought down an underground slave ring, but they were ill at ease. Someone else knew about the slavers and had done nothing. Who were they? And what about the people they had failed to save? The people who were sold to unknown parties before our heroes were even hired to find them… Were they gone forever? Could four kooky members of an up and coming band possibly brave the Darklands to track them down? No! Surely they couldn’t do anything so foolish! ….Or could they…?
The Shackled City Adventure Path is available for purchase in its entirety here. The first volume, Life’s Bazaar, is available for purchase here.
The Heroes
Our eccentric heroes are all members of ‘Dinorabbit,’ a musical band that changes its name frequently and was most previously known as ‘Boople Snoot.’ The band’s lead singer and song-writer is Falco Rhiavadi, a foppish noble bastard of mixed Tien descent whose father was devoured by a dragon when Falco was just a boy. A well-groomed, handsome man with an easy smile and a winning personality, Falco’s a black sheep among his family. Mechanically, Falco is an oracle of life whose familiar is a jealous and demanding thrush named Ruby. Falco is played by my husband.
Mick Frimfrocket is a gnome with dark blue skin, bright pink hair that stands straight up on his head, and light blue eyes with flecks of red around his pupils. He’s energetic, bold, and loves nothing more than a good laugh! Mick acts as the band’s pianist and creative director. He’s the driving force behind the band’s constant name changes, and over-the-top performances. Mick was born in the gnomish enclave of Jzadirune but was brought to the city of Cauldron to escape the Vanishing. Orphaned by the mysterious events and with few memories of those early years, Mick was raised in the Lantern Street Orphanage — the very same orphanage that recently had four children kidnpapped right from their beds! Determined to save those little scamps, Mick was very excited to take up this missing person’s case and follow it to its conclusion — particularly when he realized that it led through his one-time home. Mechanically Mick is a monk / bard (prankster) who attacks with wild kicks while playing his piano in battle. Partway through exploring Jzadirune he came into possession of a broken magical construct. He’s played by my seven-year old son.
Rabbity Castalle is a rabbitfolk waitress who works at the Tipped Tankard Tavern. A dancer and singer for the band Dinorabbit, Rabbity also has a pet panther named Panthy. She’s lucky, nimble, and quick, but a little skittish. A co-workers of hers, Griffin Malek, was one of the recently abducted people, so she was very keen to solve this mystery and return him home. Rabbity is a hydrokineticist played by my six-year old daughter, using the rabbitfolk race. Rabbitfolk are a Pathfinder Compatible race created by my daughter (with some help) which will one day be published in the upcoming Realms of Atrothia: Primary Expansion by Sunburst Games. Rabbity recently ‘befriended’ (she thinks) a vicious howler named Prickles. What could go wrong?!
The final member of our party is Aeris Caldyra, a local locksmith who was cajoled by her roommate, Rabbity, to join the band as a percussionist and set designer. With few friends to call her own, Aeris relented to the rabbitfolk’s request and is the least talented member of the band. The last worshipper of Alseta in Cauldron, with more than a few secrets and regrets, Aeris is a suli bloodrager with a chip on her shoulder. Always one to lend a hand, like her Grandfather Marzio once would have done, Aeris was determined to rescue the missing citizens of Cauldron. Aeris is my character for the Shackled City Adventure Path.
The jungle city of Cauldron, located in the bowl of a dormant volcano.
The members of Dinorabbit and their newly liberated Cauldronites arrived in Cauldron to little fanfare. They brought the people they had freed from slavery to the Church of Abadar — the group who had hired them to find four missing orphans — and spoke with it’s current leader, Jenya Urikas. The authorities were called and the group had just enough time to ask about Terrem Karatys, one of the four children they had been tasked to save. Terrem had been free by our heroes only a few moments before a monstrous beholder had appeared and stole him away again. They admitted their failings to the Priestess, who looked confused.
“Oh? You didn’t save Terrem? Well, he is here safe and sound. He arrived on our doorstep before any others.” She counted out the coins she owed the group for saving three of the four children and handed it to them with a smile. “A pleasure doing business with you.”
My family was more than a little confused. Why would a beholder go to the trouble of stealing an orphaned kid that they had saved from slavery just to bring the kid home? And this beholder… He wasn’t the only one interested in Terrem. The Last Laugh Thieve’s Guild also wanted the boy. In fact, they had gone as far as tasking the orphanage’s janitor, Patch, with keeping an eye on him. Strange… Our heroes tried to speak with Terrem, but the boy would say nothing.
Suddenly the town guard arrived and everyone — victims, heroes, and even some priests — were brought to the Garrison for questioning. The PCs were interviewed over and over by the authorities. The guards looked for holes in their story. Incongruities that might show they had something to do with the kidnappings… They were lectured on the legality and dangers of vigilanteism. Informed that the entirety of Jzadirune and the Malachite Fortress were off limits — it was an active crime scene, after all. The poor musicians were so busy they barely had a moment to stop and breathe. After a few days they received one last warning from Terseon Skellerang, Captain of Cauldron’s city watch, and were sent on their way.
On the way out they ran into Krylscar Endercott, a town guard who was among those that had been abducted from his home by dark folk and then saved by Dinorabbit. Although he was badly wounded when they found him, he grinned at the sight of them and asked for a blade. The stubborn fool was a big help in getting everyone home safe. They chatted with him a bit, and bid him farewell.
Upon re-entering the city for the first time in days they were shocked to discover that although their deeds were well known, their identities were not. A heinous crime! While Aeris returned to work at her locksmith shop, the rest of the band spent some time spreading word of their triumphs and of an upcoming performance — which they had yet to schedule. The next few days were marked with frivolities — writing, practising, performing, rumourmongering, and so on. Falco took these responsibilities very seriously, intent on milking their newfound fame for all it was worth.
Rabbity discovered that Griffin, the friend she had worked so hard to save, was out of a job. He had been replaced as bartender and was now stuck waiting tables. Also, Rabbity had been fired. She hadn’t been into work in nearly a week and left no word as to why, so that wasn’t too much of a surprise. Still, my daughter was a little insulted. She also worried about her pet howler, Prickles, who was currently locked inside the Malachite Fortress, hopefully not killing (or being killed by) the investigating city guards. Deciding they needed to sneak into Jzadirune and save him before he got into trouble, Rabbity concocted a plan. She looked into the people who they hadn’t saved and picked out one whose home was close to Jzadirune — 52 Ash Avenue, the home of skinner Rikaldo Veskar. Rikaldo had a tiny, blood-stained, stinky home that had been abandoned 37 nights. Knowing that he had been sold to unknown buyers in the Darklands and wouldn’t be returning, my daughter set out to purchase the building from the city. She sought guidance from her friend Ruphus Laro at the Church of Abadar and determined the steps to take to buy the building. It cost more than she had, but she managed to convince the group it was important. They pooled their money and bought the house. Then Rabbity asked Falco to start using his stone shape spells to tunnel out a passage from their new junky home to Jzadirune. With some luck and planning they’d be able to get to Prickles before he killed anyone. Hopefully….
Mick was equally busy. He spent a lot of time trying to figure out how he could legally get his hands on Jzadirune. Deciding he needed help he sought professional guidance from the Church of Abadar, just as Rabbity had. With their legal advice he put together a plan to legally acquire the underground complex. And so he set out to track down the original ownership paperwork, and the living descendants of Jzadirune’s founders. There weren’t many of them. Only six. So Mick set out to barter with them over ownership, in the hopes they would turn it over to him. Hopefully, when all is said and done, he could legally claim the property from the city.
Aeris spent her time working, patrolling the town, and looking for a sign that matched the mysterious Kingfisher symbol they had discovered on a letter written to the slaver Kazmojen. She discovered nothing.
There was plenty the group did together, as well. They visited the orphanage, Church of Abadar, and all the other people they had saved, double checking they were safe, healthy, and reintegrating back into society. Patch was fine and back at work. Apparently he had managed to keep his affiliations with the Last Laugh Thieve’s Guild a secret. The orphans were a little traumatized — all except for Terrem who seemed unconcerned over the entire ordeal.
Krylscar had returned home to find his parents hadn’t even been looking for him. Turns out they thought he had robbed them and fled the city — the jerks! He was trying to find himself a new place to live, but not having any luck. At work everyone treats him like a weirdo and he’s angry that they never saved him. In fact, he was generally an angry guy. Still, he had friends. He remained close with his pal Griffin, and often showed up to hang out with the members of Dinorabbit. They knew he wasn’t some shifty loser. They knew he was a good guy. (My family really grew to like this guy! Haha).
Jasper and Jeneer had gone back to work like nothing had happened. Jasper teaches math at Bluecrater Academy, and Jeneer is a jeweller’s apprentice. The group saw Maple, a suspected member of the Alleybashers gang, on the streets from time to time, but she never stayed to chat. And Coryston Pike, the retired adventurer, made it home, but hadn’t been seen around town since.
But, not everyone had recovered. Sondor (the dwarven cartwright), Deven Myrlzal (a teenage human lamplighter), and Irruth Mercadi (a chandler), were all traumatized by their experiences. They wouldn’t talk. They just sat still, scared, and sad. Currently they were at the Church of Abadar, but they would need to head home soon. As Priestess Jenya Urikas plainly pointed out, the Church of Abadar was not in the business of charity.
When the group discovered that Keygan Ghelve had been arrested they went to visit him. My kids were a little upset about his fate. Did he really deserve to be arrested? Out of fear he had helped the kidnappers and slavers, but he had also fought alongside our heroes to free them again. Of course, he had done that only because the group had forced him to… In time they realized that Keygan’s fate was out of their hands. Instead they offered to take care of his rat familiar, Starbrow, and his home. It took some bargaining and a signed contract, but Keygan agreed to transfer ownership of his home and locksmith shop to the members of Dinorabbit on the condition they took care of Starbrow, they did not sell any of his paintings or his grandfather clock, and they didn’t bring their meddlesome pets into his home. When he was released from prison, ownership of his home and shop would revert to Keygan. Keygan was grateful, and they began to feel a little better about this whole ordeal.
In time they discovered a vandalism problem in Cauldron. Someone had been painting words on buildings in goblin. Things like “Murrd wrote this!” “Snurk smells like dung!” and “Drakthar has bat ears!” Luckily, Mick could speak goblin and was pretty sure the culprits were a gang of goblins. Which was absurd! Everyone knew no goblins lived in Cauldron! Determined to prove he wasn’t crazy, the group stayed up late a few nights, attempting to catch the vandals red-handed. Although they came close, the only thing they managed to earn was a scolding from the guards for suspicious behaviour. Whoops!
One day the group received a summons from the Mayor’s Office. They hurried over and were told that the mayor — Lord Mayor Severen Navalant — wanted to host a ceremony in honour of their deeds. Although it was clear he was hoping to use their newfound celebrity status to bolster the public’s opinion of him, the band didn’t mind. They wanted to do the same to him, after all. Together they made some plans and the party was scheduled, with Dinorabbit making a headlining performance. The Mayor also asked about their experiences under Cauldron and their opinions on what should be done about Jzadirune, the Malachite Fortress, and the passages to the Darklands. Mick took this opportunity to share his plans to acquire full ownership of Jzadirune while Rabbity petitioned for her ‘beloved’ new pet Prickles to be returned to her at once! The Mayor smiled and assured them he would take it under advisement. The group was skeptical he would, but had little choice but to accept him at his word.
The days leading up to the festival were hectic, with even Aeris practising as much as she could. They put on a lot of other performances, both big and small. My family was happiest to earn themselves a performance at both the Cusp of Sunrise (a fancy social club that was for the nobility) and the Coy Nixie (a fancy restaurant where they first began their adventure). Before they knew it the party was upon them. Much to their surprise the mayor named them ‘Champions of Cauldron’ — a position which he later assured them had no real responsibilities to go with it — rewarded them the deed to Jzadirune, and gave them a new task: putting an end to the goblin vandals that have been irritating the town! Both shocked and pleased at this turn of events, the gang agreed. Not that they were given a choice…. Haha. After the ceremony the party began, and my family had a blast describing their performances and songs. The night ended with fireworks, and a few angry scowls from Captain Skellerang.
The next day would see them busy again. Plans had to be made for Jzadirune and Prickles had to be liberated. The Lord Mayor’s secretary informed them that the Malachite Fortress would be turned into a guard post for the Town Guard so that the entrance to the Darklands could be properly protected. This, of course, meant that they would need to have engineers remodel the entrances to both Jzadirune and the Malachite Fortress a bit. Both the members of Dinorabbit and the Town Guard had to be able to access different parts of the complex without traipsing through the others space. I handed my kids a map of Jzadirune and asked them for their ideas. They also got to make plans for the engineers to fix up some of Jzadirunes broken walls and tunnels while they were at it — courtesy of a small grant provided to them by the Mayor’s Office. A surprise my kids found very exciting! Even more exciting? The group got to visit Jzadirune and Rabbity retrieved Prickles. Happily he did not try to devour her. Yet.
By the time Dinorabbit left Jzadirune and began to walk home they were greeted by rain. More than that. It was a downpour. Fall had come to Cauldron, which meant the rains would continue for a few weeks more, at least. It was misty out. Cool and dark. There was a chilling howl on the wind — like that of a wolf. On the side of Aeris’ locksmith shop was more goblin graffiti.
“Who builds town in volcano? Stupid humans!”
The gang sighed.
Tomorrow they would need to put aside their ambitions and get to work. The had a gang of vandals to catch.
Behind the Screen
The Shackled City Adventure Path is a difficult to get your hands on adventure path published in eleven separate Dungeon Magazines, or available in hardcover from Amazon here or from Paizo Publishing’s website here. The first adventure, Life’s Bazaar is available in Dungeon Magazine #97 from Paizo Publishing’s website here. A copy of the premade player handouts is available from Paizo here.
Despite being a 3.5 Dungeons and Dragons Adventure Path, we’re running this campaign with Pathfinder (both the campaign setting and the ruleset). Our characters utilize content from many sources, some of which are listed below.
Today we’re taking an in depth look at the first book in the Tyrant’s Grasp Adventure Path! This survival horror campaign pits the players against the return of the Whispering Tyrant, the lich-king Tar-Baphon, who was defeated and sealed away long ago. Tyrant’s Grasp will be the final Pathfinder 1st Edition Adventure Path released, before the switch is made over to Pathfinder 2nd Edition in August. Intended to take characters from levels 1 to 17, Tyrant’s Grasp is six volumes long.
A wonderful Player’s Guide for Tyrant’s Grasp is available as a free download on Paizo’s website here. The Player’s Guide gives players a relatively spoiler-free way to properly prepare for and integrate their characters into the Tyrant’s Grasp Adventure Path. I highly recommend checking it out!
The Tyrant’s Grasp Adventure Path begins with Pathfinder Adventure Path: The Dead Roads (Tyrant’s Grasp 1 of 6). Written by Ron Lundeen, The Dead Roads is an adventure intended for first level characters, which should bring PCs up to level five by its conclusion. This adventure begins when the PCs awaken already defeated in the Boneyard, a land where the dead go to be judged. There’s just one problem… They’re not quite dead. Trapped inside a tomb that doesn’t belong to them, they’ll need to escape, figure out what happened to them, and find a way to return home. But, how could one possibly escape the land of the dead?
Let me start by saying that The Dead Roads — and the Tyrant’s Grasp Adventure Path — is not for everyone. Terrible tragedies will occur, and you won’t always be able to prevent them. These events are bound to have a lasting effect on your characters, so players should be prepared to consider and role-play the marks left by the trials you face. Often you’ll be in dire situations with limited resources, so players will need to be resourceful to survive. Plenty of the imagery and events in this adventure are dark, morbid, and sorrowful. It’s definitely a horror campaign — though not your typical horror. It’s suspenseful survival horror, with a good deal of body horror in the first book, as well. The Dead Roads contains imagery that is inappropriate for children and some adult gamers will even consider an image or two disturbing. It’s definitely not a campaign I could play with my family.
That said, I loved The Dead Roads. Absolutely, positively, adored it.
For starters, it looks great. From cover to cover it’s a wonderful, high quality book filled with nice maps, and beautiful, dark artwork. The cover depicts Mictena (a catrina psychopomp the PCs are destined to interact with) in the foreground. Behind her is an image of Seelah (the Iconic paladin) and Yoon (the iconic kineticist) battling ostovites. Both images are by Igor Grechanyi. There’s a lovely map of The Gravelands (Lastwall and parts of Ustalav) on the inside cover. There’s a ton of artwork throughout the book — of enemies, allies, and characters who could become either. I particularly enjoyed the art for Prince Uspid and Mictena. Colulus was the most disconcerting image in the book. If any image is going to bug a squeamish player it’ll be that one. There’s a few characters that I wish had art but don’t (which is expected! Art’s not cheap and there’s only so much space!). Ayuki, in particular, would have been nice to see, as well as the jitterbone creature in the bestiary. The maps, all drawn by Matthias Rothenaicher, are really nice. They look great, of course, but they’re also well thought out, executed, and each has a unique feel to it. I particularly enjoyed ‘Roslar’s Tomb’ and ‘Deathbower.’ I wish that the maps of the various Dead Roads locations were given a bit more space, though. Squishing three multi-floor maps for three different locations onto one page is good for page count, but makes some of the maps difficult to read. Part of the eastern end of the ‘Palace of Teeth’ is nearly lost in the creases of the binding, while the entrance to ‘Salishara’s Scriptorium’ is hidden in the creases. If both of those maps were a few grid squares further to the left that would have been less of a problem. Finally, flipping back and forth between the map page and the various locations depicted in it (which is spread out over 28 pages) is a bit irritating. Have a bookmark or post-it note handy and try not to tear your pages. Much to my surprise there was also two player handouts which represent puzzles the group comes across. I’m really glad they’re depicted instead of just described. They’re necessary and a really nice touch.
Part of the maps lost in the creases.
The Dead Roads starts with a bang (HA!) and doesn’t let up. The entire opening has the feel of an ominous, suspenseful mystery. Your PCs don’t know where they are, how they got there, or what’s going on. Their locations hide clues to both their situation and the history of wider events, which the PCs may or may not be able to uncover. In time they will discover the answers to some of their questions, just as they realize it’s tied to an even bigger mystery.
There’s a lot of wonderful social encounters and NPCs in this adventure. Number Three, Barple Stonebreaker, Prince Uspid, Queen Carnassial, Kishokish and his portrait, Ayuki, Salighara, Berthold, the wyrwoods, Mrs. Pedipalp, Aydie, Reedreaper, Mictena — there’s just so many great interactions in this adventure! Among them, three particularly stand out amongst the crowd: interacting with the townsfolk of Roslar’s Coffer is poignant and amazing; speaking with Barzahk the Passage; and — my personal favourite characters — Umble and Thoot! This pair of friendly psychopomps are the best!
Umble and Thoot
Prince Uspid
Deathbower
Many of the creatures and NPCs you come across don’t look friendly — which doesn’t mean they aren’t friendly. Of course, it doesn’t mean they are friendly, either. Which I love! Appearances have no bearing on what a creature acts like and I appreciate that this adventure used that so effectively. It’s bound to throw players for a bit of a loop and make them feel… off-kilter. Which is great!
There’s a lot of challenging encounters in this adventure and plenty of unique monsters to face off against. I particularly enjoyed that so many can end in ways other than violence. But, don’t let that last sentence lull you into a false sense of security! There’s a lot of combat encounters in this book that cannot be avoided.
And the ending! Oh, the ending! I love it! I cannot wait to get my hands on the next book in this Adventure Path! I have a feeling Eulogy for Roslar’s Coffer is going to be just as good.
And now it’s time for a warning:
We’ve got more to say about this adventure, but it’ll come with spoilers! Don’t want to read them? Skip on past this next section until you see the large words ‘SPOILERS OVER.’ Got it? Good! See you on the other side where we’ll talk about the extra content in this book!
SPOILERS
The Dead Roads adventure is split into four major parts: Awake in Roslar’s Tomb, Among the Dead, Walking the Dead Roads, and Deathbower. One of these parts Walking the Dead Roads is particularly dense and is made up of three major locations: The Palace of Teeth, Nine-Eaves, and Salighara’s Scriptorium. All told The Dead Roads adventure is 52 pages in length with six pages afterwards dedicated to three NPCs: Mictena, Mrs. Pedipalp, and Reedreaper. All three of these are enemies the PCs will come across, but only one of them has to stay that way. The PCs have a chance to convince the other two to step aside without violence (although it’s extremely hard to accomplish for one of those two!).
Through this adventure the PCs will get to interact with psychopomps, a type of outsider native to the Boneyard who work to ensure that the processing of souls is done accurately and efficiently. Typically functioning as guides for the souls of the deceased, the psychopomps are confused over what to do about the mysterious PCs. Some will help them along their way (especially the delightful Umble and Thoot!) , and others with hinder them — particularly Mictena, a catrina psychopomp obsessed with putting the PCs spirits properly to rest. Through a good thorough death, of course! Psychopomps aren’t the only enemies and NPCs the players will interact with. The Boneyard is a huge realm, and there’s plenty of creatures living/stranded/invading there. Other major groups of enemies include fey, vermin, sakhil, and nightmarish beings from the Dimension of Dreams.
Fittingly, The Dead Roads begins with death. Lots of it. The entire town of Roslar’s Coffer has been destroyed in one terrifying instant. Including the PCs. I’ll leave the details out of this article, but suffice to say this will have a lasting effect on your players and their characters. Any family, friends, and companions — pets included — that lived in Roslar’s Coffer are dead. Although it might be tempting to warn some players about this in advance, that also will ruin some of the surprise and likely result in players purposely making no personal connections to the town of Roslar’s Coffer — which would be a mistake in my opinion. Every GM will need to judge their players accordingly, and perhaps provide them with some hints and warnings while they build their characters and backstories. In my opinion this event is handled incredibly well throughout this adventure, and I highly recommend allowing players to make a character with personal connections to Roslar’s Coffer. It adds so much to the story. However, it is important to inform PCs that if they have animal companions, mounts, or they are a wizard with a familiar, they will not have access to their pet at the start of the campaign. Player’s who have read the Tyrant’s Grasp Player’s Guide will already be aware of this, although they won’t (accurately) know why.
Happily, the player’s experience doesn’t begin with the death of Roslar’s Coffer. Instead, Part One: Awake in Roslar’s Tomb begins with the PCs waking up in a stone coffin. Literally entombed they need to push their way out of the stone box and into a cold, dark, mausoleum. It’s a great opening. Players and characters alike are bound to be curious what has happened and where they are. Players begin with any gear they had that could reasonably fit in a coffin with them. Any familiars who share a soul with your PCs (a shaman or witch familiar) will be in a coffin of their own, while all other companions are not present (as they are dead). Eidolons and phantoms can be summoned back normally, although all other familiars and companions will need to be replaced at a later time.
Soon, the PCs will discover they’re in someone else’s tomb — Ervin Roslar, Knight of Ozem and hero of the Shining Crusade. The same man that Roslar’s Coffer is named after, in fact. Interesting! As they navigate the tomb they’ll find strange creatures, animated bones (sort of…), a trapped spirit, and a tribe of mites. They’ll also discover that Ervin Roslar may have had a few secrets of his own, although it’s unlikely they’ll unravel his history completely. This section of the adventure is a suspenseful series of explorations, mysteries, tantalizing clues, and challenging combats. It’s going to be a ton of fun to both run and play.
Part Two: Among the Dead begins when the PCs exit Roslar’s Tomb to find themselves face to face with a pair of spooky looking (and absolutely delightful) psychopomps: Umble and Thoot! Seriously, they’re awesome. This quirky pair give the PCs some answers to their most pressing questions and explains that not only are the PCs dead and not dead at the same time — weird! — the rest of Roslar’s Coffer is well and truly dead. They ask the PCs to lend them a hand in convincing the spirits of the dead of Roslar’s Coffer that they are, in fact, dead. These poor fellows need a hand moving everyone on to the afterlife in a calm and orderly fashion! The PCs get to travel to a phantom version of Roslar’s Coffer where they interact with all the people in town — now dead. This is an amazing section of the adventure. Short and poignant, the GM has a chance to show the PCs what has happened to all their family and friends. They’ll need to convince loved ones to move on, and will have a chance to say goodbye. If they have any pets they’ll find them here as well. The adventure itself provides rules for interacting with these spirits, how to convince them to move on, and some tactics that will let them do it in a timely fashion — namely convincing the town leaders of their death. Some PCs will want to stay behind and die along with their family, others won’t have personal connections to the townsfolk, and others still will want to ‘save’ some of these spirits and attempt to return them back to life. There’s plenty of guidance in this book for handling PCs of every kind. After accepting their death the people of Roslar’s Coffer — even familial loved ones — want answers for what happened to them. The PCs are uniquely positioned to uncover this. And, of course, any spirits who can’t be convinced to move on (including those your PCs may want to bring back) will deteriorate in time until they become undead ghosts and other malevolent entities. Umble and Thoot can explain this to the group and ensure no PCs attempt anything so foolhardy. Also in this section the PCs are first introduced to the antagonist of this adventure, Mictena. Overall, this section of the book is among my very favourites. It’s exceptionally well handled and sure to be an emotional experience for players and characters alike. It’s a truly unique roleplaying opportunity. I’m not an overly emotional person, but I’m quite certain that if I was playing this with any character who had even a modest amount of family or friends in Roslar’s Coffer, under an even remotely talented GM, I would cry — in a good way! It has the potential to really tug at the heartstrings.
Part Three: Walking the Dead Roads begins after the PCs have helped the people of Roslar’s Coffer accept their death. Umble and Thoot, who are grateful and believe that since the PCs are only slightly dead they’re not truly dead at all, offer the PCs a way out of the Boneyard. The Dead Roads. They explain that this secret path is only ever trod by psychopomps and gatekeepers, the beings who watch over what amounts to traveller’s checkpoints along the road. Capable of leading anywhere, the PCs can use the Dead Roads to get home to Roslar’s Coffer (so they can figure out what’s happened) by taking a certain path. They’ll need to stop at the three checkpoints along the way and get stamped by that location’s master. Convincing them to grant the stamp should be the hardest part of the journey. Unbeknownst to Umble and Thoot, politics and turmoil have overtaken the three waystations, making each location more dangerous than expected. These locations may be visited in any order, although they are presented in order of difficulty (which is also how I recommend playing them).
The Palace of Teeth is a small castle ruled over Queen Carnassial and her court of tooth fairies. Not long ago her son, Prince Uspid, led a coup against her, and the two factions have been locked in a stalemate ever since. Although Queen Carnassial is the only one with the authority to stamp the PCs (at least until her death) it’s Prince Uspid the PCs are destined to meet first. They’ll need to navigate, bargain, and battle their way through bickering fey factions. They might even get to keep all their teeth…. This location is simultaneously goofy in a crazed sort of way and disconcerting. Although the Palace of Teeth was once a beautiful castle it’s undergone a rather morbid makeover since the fey moved in. The place is creepy and it’s denizens literally want to yank your teeth out. That can make bargaining… weird. Haha. I love the art for both the tooth fairy monarchs (particularly Prince Uspid!) and the stained glass angel. But, in my opinion, the creepiest encounter involves a pair of soulbound dolls in the midst of acting out a rather bloody play about dentistry. They attempt to make the PCs their next patients, using deep slumber and some particularly creepy statements. It’s awesome! Haha. The Palace of Teeth is my favourite location on in part three.
Nine-Eaves is a three storey manor owned by an old shoki psychopomp with a fondness for games and puzzles. Unfortunately, Kishokish’s manor has been invaded by sahkil and he’s now a prisoner in his own home. They PCs will need to free him if they want to get his stamp. Luckily they’re not without allies. An animated portrait created to pose riddles to visitors can lend the PCs a hand — if they can solve his puzzles! There are three puzzles total, and each one solved can earn the PCs information and advice. They’ll need to traverse the house as they seek answers, battling vermin, sahkil, and an unfettered phantom named Ayuki. I really enjoyed the puzzle aspects of this location.
Salighara’s Scriptorium was created by Salighara, a reclusive viduus psychopomp who is studying the Dimension of Dreams and oversees a crew of wyrwood scribes. Mictena attempted to convince Salighara to kill the PCs on her behalf, but was rebuffed. Mictena then offered the same deal to Salighara’s assistant, a plump woman named Mrs. Pedipalp (actually an aranea from a nightmarish section of the Dimension of Dreams). Happy to take the powerful psychopomp up on her offer, Mrs. Pedipalp has ousted Salighara from her own scriptorium and remade the building in her own image. Now a dark place of nightmares and horror, the PCs will need to set things right. This is definitely the most horror-themed location in The Dead Roads, with traps, haunts, and horrifying enemies. Colulus, a flayed ettercap and long-time minion of Mrs. Pedipalp is by far the most horrifying. But, even the Scriptorium is not without potential allies. PCs get to meet Salighara, some upset wyrwoods, and a ratling named Berthold. Mrs. Pedipalp herself is a great opponent — a capable liar, powerful spellcaster, and nightmarish foe all wrapped up in a kindly looking package. I particularly like her tactics. That said, it’s likely Colulus who will give parties the most trouble.
After receiving their stamps the PCs can finally traverse the rest of the Dead Roads and return to the land of the living — not! Mictena refuses to let them go! She magically relocated her domain, Deathbower, right onto the Dead Roads so that she and her dangerous shabti gardeners can kill your PCs properly. Which brings us to the final section of the Dead Roads adventure, Part Four: Deathbower. I love this location and its map. I love the inhabitants — gardeners, friends, and foes. And I love Mictena herself. Despite being an enemy of your PCs she’s not a bad being. She’s a psychopomp just doing what she thinks is right. Which is cool! Although some of the hazards and enemies in this glorious garden must be confronted head on, some characters can be swayed and may even join you for a while. Reedreaper is a particularly interesting character, although it’s unlikely he sticks around long enough to play much of a role. Even Mictena can be talked down — theoretically. The chances your PCs will be able to roll high enough are incredibly slim, but it could happen. Which I really like.
After leaving Deathbower behind the PCs find themselves back on the Dead Roads and greeted by an incredibly powerful psychopomp, Barzahk the Passage, a demigod and master of the Dead Roads. This enigmatic figure whisks the PCs off to their home in a matter of moments, giving them a bit of time to ask him any questions they might have. I thought this was a great moment and a wonderful way to end the adventure.
SPOILERS OVER
In addition to The Dead Roads adventure, this volume contains two articles intended for both GMs and players, one article solely for the GM, a campaign outline, and a bestiary containing five new creatures.
The first article, Tools of the Boneyard, is written by Matt Morris. In it you’ll find new gear and character options aimed at dealing with the dead. There is one alchemical remedy, one alchemical tool, and two alchemical weapons — bone burn is my favourite, so be sure to check it out! There are two new special materials useful for crafting — cryptstone can be used for ammunition and weapons, while spiresteel can be used for ammunition, weapons, and armour. Finally, there are five new magic items: crypt rod, grim helm, harbinger’s scythe, Lady’s Mercy, and Momument’s Truth. Although I enjoyed a lot of the items, it’s the character options that I found were most exciting. Graveslinger is a gunslinger archetype that specializes in combatting incorporeal undead. Soul Shepherd is a monk archetype that calm incorporeal undead and haunts with a touch. They also gain some otherworldly resistances and interesting ways to use their ki. Reaper is a new oracle mystery which I really enjoyed. Tightly themed and flavourful it’s capable of both killing the living and destroying undead. There are also six new barbarian rage powers including the psychopomp totem powers.
Thrilled to see shabti get some attention!
The second player friendly article is written by Mikhail Rekun and entitled The Half-Dead. This section talks about four races that have a strong connection to death and the undead. In addition to providing details and character options for dhampir, duskwalkers, and shabti, it also talks about the new subtype of creatures, mortics. Dhampir appear alongside two magical items, duswalkers have access to five new feats, and shabti have access to five new feats. I was particularly excited to see shabti included.
The next article, To Exceed Their Grasp, is written by Crystal Frasier and intended for GMs only. This article discusses some of the important concepts, characters, and events of the Tyrant’s Grasp Adventure Path and the role they play in the overarching story. It also contains a timeline. This is incredibly useful for GMs an will likely be referenced throughout the entire Adventure Path.
The Death of Arazni (Herald of Aroden) during the Shining Crusade. Art courtesy of Paizo Inc.
The Bestiary is up next! It contains a random encounter chart, two interesting social encounters, and five new creatures written by Ron Lundeen, Kyle T. Raes, and Mike Welham. All of the monsters in this book have ties to death and the Boneyard and two of them are featured in The Dead Roads adventure. Bonewrought Willow is an ominous looking intelligent plant capable of growing in Boneyard. Attracted to light and more benevolent than it appears this is a great CR 3 creature I can’t wait to confront my players with. Kaicherak are nasty little fanged worm beasts with ties to Achaekek and a fondness for messily gorging themselves on blood. At CR 4 they are among the most powerful new creatures in the bestiary. Mortics are living beings with strong connections to negative energy which makes them sort of like living undead. There are two mortic stat blocks included in the bestiary — the ghoulish elf-like angheuvore (CR 2) and the incredibly flexible halfling-like jitterbone (CR 4). As previously mentioned, more information on mortics is also included in The Half-Dead article. The final creature is the tooth fairy monarch, a CR 3 version of the lowly tooth fairy.
The last article is a campaign outline, written by Crystal Frasier and Ron Lundeen, that briefly details the events of the upcoming volumes of the Tyrant’s Grasp Adventure Path. Not the sort of thing you want your players peeking at! The campaign outline is incredibly useful for GMs.
Today we’re taking a look the Tyrant’s Grasp Adventure Path, a six-part survival horror campaign for the Pathfinder Roleplaying Game that is currently available for pre-order. This campaign pits the players against the return of the Whispering Tyrant, the lich-king Tar-Baphon, who was defeated and sealed away long ago. Tyrant’s Grasp will be the final Pathfinder 1st Edition Adventure Path released, before the switch is made over to Pathfinder 2nd Edition in August.
A wonderful Player’s Guide for Tyrant’s Grasp was recently released, which is a free download on Paizo’s website here. The Player’s Guide gives players a relatively spoiler-free way to properly prepare for and integrate their characters into the Tyrant’s Grasp Adventure Path. It explains that this is a campaign where terrible tragedies will occur, and you won’t always be able to prevent them. Often you’ll be in dire situations with limited resources, so players will need to be resourceful to survive. In addition, the Tyrant’s Grasp Player’s Guide offers suggestions for thematic archetypes, prestige classes, bloodlines, mysteries, patrons, favoured enemies, and favoured terrains. It points out useful feats, skills, traits, and languages. It lists local animals that could make good choices for familiars and animal companions. It touches on each of the major races and religions in the area and where they fit into Lastwall’s society. Finally there’s a list of unique campaign traits that player’s can select for this campaign, and a short primer on Lastwall, the country where this adventure path is (partly) located.
The Tyrant’s Grasp Adventure Path begins with Pathfinder Adventure Path: The Dead Roads (Tyrant’s Grasp 1 of 6). Written by Ron Lundeen, The Dead Roads is an adventure intended for first level characters, which should bring PCs up to level four by its conclusion. This adventure begins when the PCs awaken already defeated in the Boneyard, a land where the dead go to be judged. There’s just one problem… They’re not dead. Trapped inside a tomb that doesn’t belong to them, they’ll need to escape, figure out what happened to them, and find a way to return home. But, how could one possibly escape the land of the dead?
PCs will get to interact with psychopomps, a type of outsider native to the Boneyard who work to ensure that the processing of souls is done accurately and efficiently. Typically functioning as guides for the souls of the deceased, the psychopomps are confused over what to do about the mysterious PCs. Players will need to maneuver their way through psychopomp politics and travel the Dead Roads, a secret path that connects the Boneyard to the land of the living. If they can, they just might make it home.
In addition to The Dead Roads adventure, this volume contains a few articles and a bestiary of new creatures. Matt Morris shares “tips, tools, and tricks drawn from the Boneyard and its grim denizens,” Mikhail Rekun discussing four races with connections to death, dusk walkers, mortice, shabtis, and my personal favourites, dhampir. Finally, Crystal Frasier wrote a timeline for the events leading up to the Tyrant’s Grasp Adventure Path, which will be invaluable for GMs. New monsters in this book all have ties to death and the Boneyard, and are written by Ron Lundeen, Kyle T. Raes, and Mike Welham.
Pathfinder Adventure Path: Eulogy for Roslar’s Coffer (Tyrant’s Grasp 2 of 6) is written by Jason Keeley and is intended for fifth-level characters. Having returned to the land of the living, the PCs find themselves in the ruins of Roslar’s Coffer, which was destroyed by a super-weapon known as Radiant Fire. Here the dead walk, creatures are corrupted, the very air is a toxic fog, and cultists of the Whispering Way stalk the streets. You’ll need to escape the town and warn the rest of Lastwall about the events that have occurred!
In addition to the adventure itself, this book contains articles on Arazni the Red Queen (written by Lyz Liddell), mercantile groups in the Lake Encarthan region (written by Eleanor Ferron), and the Whispering Way (by Crystal Malarsky). New creatures in the bestiary are written by Sarah E. Hood, Luis Loza, Jen McTeague, and Mikhail Rekun.
Pathfinder Adventure Path #141: Last Watch (Tyrant’s Grasp 3 of 6) is written by Larry Wilhelm and is intended for 8th-level characters. PCs will need to travel to Vigil, capital of Lastwall, to tell the Knights of Ozem about the terrible events that occurred in Roslar’s Coffer. Unfortunately, no one believes your crazy tales. But, Vigil’s got its own problems, and if you can unravel them you just might be able to prove to them that the threat posed by the Whispering Tyrant and his agents is real.
Further content in this volume include articles on the threats of the Negative Energy Plane (written by Patchen Mortimer), the Seal-Breakers (written by Greg A. Vaughan), and relics from the Shining Crusade (written by Alexander Augunas). New creatures in the bestiary are fearsome monsters and undead hordes, written by Mike Headley, Isabelle Lee, Meagan Maricle, Kendra Lee Speedling, and Larry Wilhelm.
Gardens of Gallowspire
Pathfinder Adventure Path #142: Gardens of Gallowspire (Tyrant’s Grasp 4 of 6) is written by Crystal Frasier and intended for 11th-level characters. In it the players will enter the haunted lands of Virlych to confront the Whispering Tyrant before he can escape Gallowspire, regain his former power, and lay waste to the world. Extra content in this volume include articles on extra missions that can be accomplished in Lastwall, the ecology of carnivorous plants, and witchgates. Although new creatures will be included in the bestiary, further details have not yet been announced.
Borne by the Sun’s Grace
Pathfinder Adventure Path # 143: Borne by the Sun’s Grace is written by Luis Loza and is intended for 14th-level characters. Saved from doom by Arazni, the Red Queen, the PCs find themselves in Arcadia where they’ll get to examine the legacy left behind by both Tar-Baphon the Whispering Tyrant and Aroden the deceased god of humanity. Here there are new alliances to forge, secrets to uncover, and new lands to explore. Additional content in this volume includes an extra large article on the region of Arcadia where Borne by the Sun’s Grace occurs, an article on a psychopomp usher, and new monsters.
Midwives to Death
Pathfinder Adventure Path #144: Midwives to Death (Tyrant’s Grasp 6 of 6) is the epic conclusion to the Tyrant’s Grasp Adventure Path. Written by John Compton, this adventure is intended for 16th-level characters. Your PCs return to the Inner Sea only to discover that the Whispering Tyrant is leading his armies against Absalom, in an effort to seize the Starstone for himself and become a god! They’ll have to battle his allies, turn his super-weapon against him, and destroy him for good! The events of this Adventure Path are world-shaping, said to bring about “dramatic changes to Golarion.” Additional content in this volume include an article “showcasing the final material written by Paizo’s developers for the first edition of the Pathfinder RPG.”
Its going to be epic!
An Ending
And with that we come to the end of the Tyrant’s Grasp Adventure Path, and the end of Pathfinder 1st Edition. Or rather, we come to the beginning. At the end of this month the first volume of Tyrant’s Grasp will be in our hands and we’ll get to create characters that can embark on this epic adventure to save Golarion. With the conclusion of this adventure path, we’ll transition to a new edition of the game. A new way to play in the world that we all know and love.
“Times they are a-changin,’ ” and I can’t wait to see how this adventure path leads us into the future.
Jessica
The Dead Roads (Tyrant’s Grasp 1 of 6)
Eulogy for Roslar’s Coffer (Tyrant’s Grasp 2 of 6)
Last Watch (Tyrant’s Grasp 3 of 6)
EDIT: Be sure to check out the Tyrant’s Grasp trailer!
But, there’s changes coming to the Pathfinder Adventure Card Game! Lots of changes!
Last year it was announced that the Pathfinder Adventure Card Game was getting revamped. Not rebooted, mind you. All of your old cards will still work with new ones. But, updated.
Why?
In short, they want to make the game better, faster, and smarter. When asked what challenges the game faces, Mike Selinker explained the following issues:
“The game is a bit too slow in all phases: how long it took to set up, how long it took to take a turn, how long it took to tear down. We looked for solutions that sped up everything, even if we gained just a few seconds here or there.”
“For a game set in one of the most expansive fantasy worlds ever made, we gave you too little story. The opportunity we had to tell stories was mostly limited to tiny boxes on the backs of cards, and conveyed very little of the depth the orignal storytellers had given us.”
“Though we tell many different stories, the game often gives off a feeling of sameness.”
“Groups of players get varying experiences by group size. A solo character is less likely to run out of time and more likely to die; the reverse is true for large groups. While that’s fine, giving people the ability to toggle those variables seemed smart.”
“Many cards have complicated text. We’ve piled template upon template, sometimes requiring three or four powers on a card before we started making it interesting. Certain card types like armors and spells got burdened in ways we never envisioned.”
“Some sets were easy and some were hard, but regardless there was no way to control difficulty. If you wanted to make the game harder, you were on your own. We will benefit from giving players controls for this.”
“For a cooperative card game, the game is often not interactive enough. When you want to help your friend, the game generally tells you that you can’t unless you have a card that does so. It’s a co-op game, so it should feel more cooperative.”
They’ve come up with a lot of ways to solve these problems and over the last few months they’ve shared some of the results with us. Further changes and details will continue to be released up until the release of the Core Set this summer. So what do we know so far?
The game boxes will be smaller. The Core Set will measure 9″ x 12″ with Adventure Paths measuring 7.5″ × 9″. That’s a huge improvement!
The story your players go through in each game will be focused on more, and made much more clear. Personally, I’m thrilled for this change, as it’s the rich stories and worlds which drew me to Pathfinder in the first place. Inspired by the exciting stories of the Pathfinder Adventure Card Game Guild, they’re getting rid of Adventure Path, Adventure, and Scenario cards, and creating a storybook instead, which will have much more story and content. Each scenario will have a two-page spread in the 5.5″ x 8.5″ storybook. For the Core Set this storybook will be 24 pages long. Curious what this would look like? Check below!
An unfinished sample of Scenario 0 from the Core Set Dragon’s Demand Adventure Path. Image courtesy of Paizo Inc.A finished sample of Scenario 1C from the Core Set Dragon’s Demand Adventure Path. Image released during PaizoCon 2019, courtesy of Paizo Inc.
There’s also going to be a variety of ways for you to change the difficulty and length of your games — which is awesome! As a player with young kids, this is a must have for everyone to enjoy the game. Shockingly, my kids don’t like dying all the time. Haha. To aid with this you’ll have the ability to use small, medium, and large locations, and you’ll be allowed to add or remove cards from the Blessings Deck, which is now going to be called the Hourglass. They’ve also added Wild Cards, which can alter scenarios and affect difficulty.
This past week they unveiled some further changes which highlight how they’re streamlining and simplifying the game, it’s text, and its rules. This would make it easier to understand, play, and would fix up any known rules quibbles and difficulties. Simple, right? Not so! That’s a ton of work and much easier than it sounds! Haha. New key words have been added to the game which allowed them to get rid of a lot of repetitive and confusing text that appeared on the cards. Reload, Local, Distant, Hour, Hourglass, and Vault are among some of the new terms. But, you can bet there’s plenty more where that came from. Other terms, like Basic and Elite, were removed from the game. The rulebook will contain a glossary, for ease of reference, and some notes on how to use cards from generation one that feature removed terms.
Want a sneak peek at some of the new cards? Below are some examples of what Paizo has shared with the public so far.
Wildcard: The Perils
Blessing: Cayden’s Revelry
Rovagug’s Destruction
Monster: Traitor
Loot: Ally: Riding Allosaurus
Loot: Armour: Voidglass Armour
Loot: Weapon: Wyrmsmite
Looking good!
So, how is this going to affect the actual products we’re buying? For starters, all you need to play is the new Core Set.
The core set contains 440 cards and is based on the mega-module Dragon’s Demand, an adventure that sees your players stranded in a small town called Belhaim. Shortly after arriving an old tower in town collapses, some kobold corpses turn up, and the town wizard goes missing. In time they’ll see there’s more going on here than meets the eye, and face off against a legendary dragon who was supposedly killed long ago. The Core Set allows 1-4 players to play. It contains 12 character pawns of the Iconic Classes (the eleven Core Iconics, plus Fumbus the new Iconic Alchemist), a set of dice, tokens for tracking scourges, a quick start guide, a rulebook, and the storybook for running the Dragon’s Demand Adventure Path. In addition to the cards needed for Dragon’s Demand, the Core Set also contains “a modular core for infinite scenarios that allows you to control the difficulty and speed of play.” Colour me intrigued!
In addition, they’ll continue to release Adventure Paths. To play, you mix the cards from the Adventure Path in with the Core Set, and you’re good to go. Want to play a different Adventure Path? Just mix the Core Set with a different Adventure Path. This will even work with the previous Adventure Path releases, like Rise of the Runelords. As an added bonus, this allows you to play with a fifth and sixth player (if you so choose). And the first Adventure Path they’re releasing? Curse of the Crimson Throne, which is one of my very favourite Adventure Paths. So exciting!
This one Adventure Path release contains the entirety of the Curse of the Crimson Throne Adventure Path. Yup! No more multiple expansions needed. Just this one box and the Core Set. Awesome! It contains 550 cards, a 48-page storybook, and four new character pawns (Hakon the skald, Kess the brawler, Quinn the investigator, and Varian Jeggare the wizard). It’s going to be awesome!
Can’t wait to get your hands on the Core Set and Curse of the Crimson Throne? Neither can I! Preorders are expected in May 2019.
UPDATE: The Pathfinder Adventure Card Game is OUT! You can also download a free copy of the rules from Paizo here! Want to buy a copy? Check out the links below!


")


")


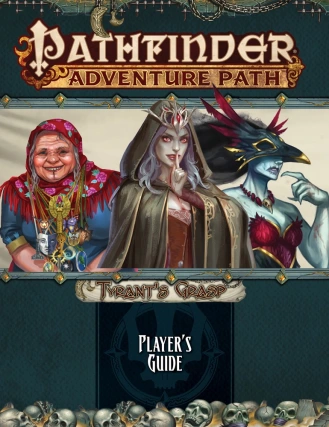 A wonderful Player’s Guide for Tyrant’s Grasp is available as a free download on Paizo’s website
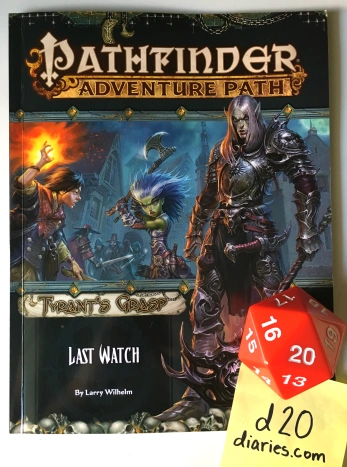
 In terms of content, Last Watch is a diplomatic mission, investigation, and exploration. PCs will need to convince the powers that be in Vigil that something horrible happened in Roslar’s Coffer and that Vigil needs to prepare for the worst. Of course, your PCs tale is rather far fetched… The PCs will need proof to go along with their words. The adventure is rather free form at the start but, as the PCs uncover clues that will lead them to further discoveries and encounters, the adventure becomes more linear.
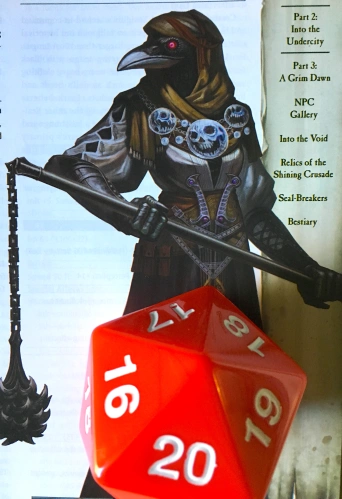 Part One: Explosive Tidings begins with the PCs entering Vigil during a holiday with the intent of informing the Knights of Ozem what’s happened to Roslar’s Coffer. But no one believes them! Obviously. Their story sounds crazy. It’s awesome. Haha. PCs will have opportunities to approach a variety of different authority figures and try to convince them to believe their outlandish tales. In most cases the PCs will need more evidence, which could frustrate some players and groups. But, with work, PCs should be able to win over some of the dignitaries. Doing so can earn your PCs rewards, allies, and have an effect on the final chapter of this adventure.
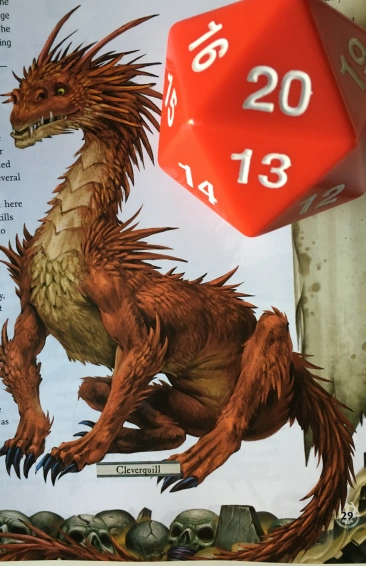 Part Two: Into the Undercity begins when the PCs investigation leads them into the sewers beneath Vigil, where they’ll take on the Seal-Breakers in their base of operations, an abandoned temple of Arazni. This location is dark and haunted, and there’s more than one way for the players to explore it, which is really nice. But, who are these Seal-Breakers, anyway? In short, they’re an evil cabal intent on freeing the Whispering Tyrant in order to acquire a really old book he had in his possession when he was sealed away. Yes, a book. And yes, the founder of this group is the person who borrowed the book to the Whispering Tyrant. Sure, it might seem a little weird, and yes, founding a cult and unleashing an undead tyrant is a rather drastic step to get your evil book back, but it’s a really special book. With it the Seal-Breakers hope to do even worse things, like unleash Rovagug and destroy Golarion. Fun stuff! All humour aside, I like this part of the adventure. The location is appropriately atmospheric, the battles are challenging, and the villains are properly… villainous! The PCs are going to figure out a lot in their time here, particularly in regards to what’s happened to Roslar’s Coffer, what’s driving this adventure path, and what’s at stake if they fail. They’re going to learn about the Whispering Way, the Whispering Tyrant, and how he destroyed Roslar’s Coffer. They’ll learn a bit about the Seal-Breakers, what this group was doing in Vigil, and that they intend to free the Whispering Tyrant, but they won’t learn enough to know their ultimate aims and goals of the Seal-Breakers. It’s likely the group will come off as a militant ally of the Whispering Way –– which is exactly how the Seal-Breakers like it! (More on Seal-Breakers later!)
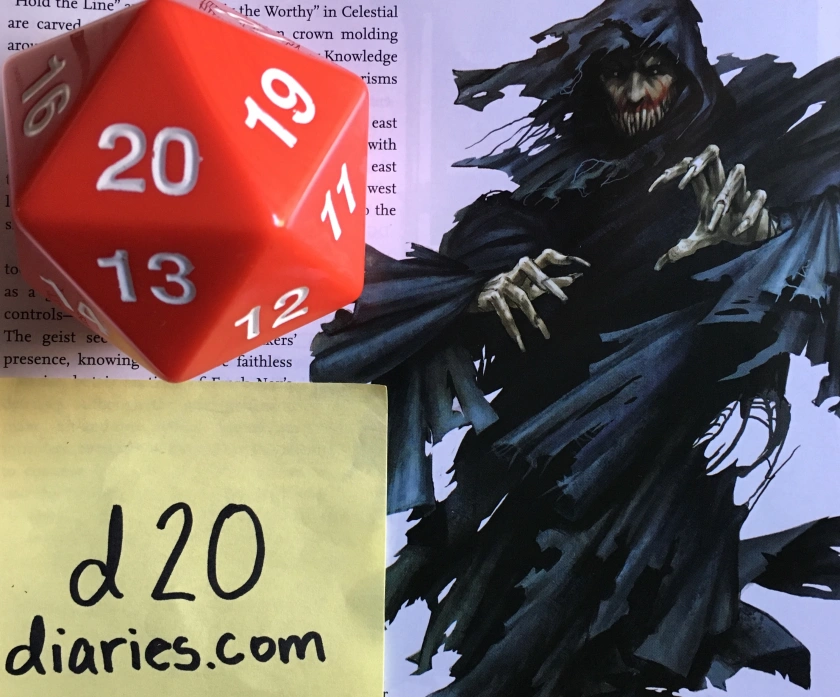
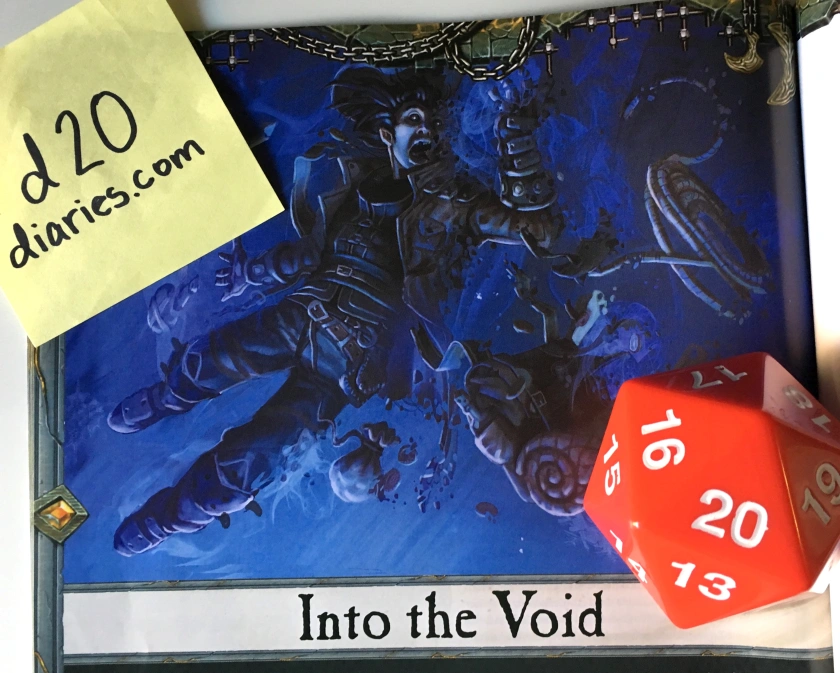
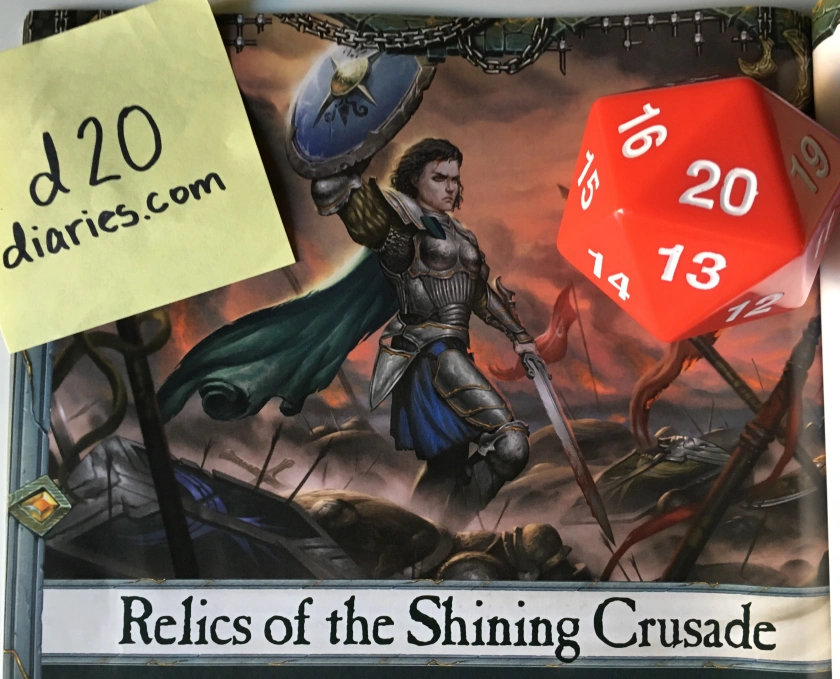
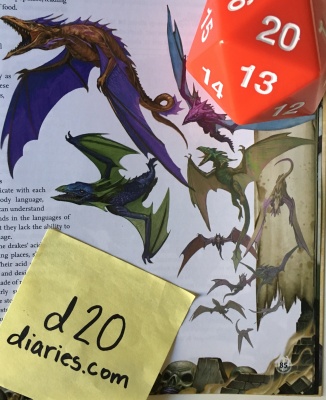
 Eulogy for Roslar’s Coffer looks great. From cover to cover it’s a high quality book filled with nice maps and beautiful, dark artwork. The cover depicts Jando Parr, a half-orc ranger, in the foreground. Behind him is an image of Imrijka (the iconic inquisitor) and Kess (the iconic brawler) battling an undead moose. Both images are by Igor Grechanyi. There’s a nice map of The Gravelands (Lastwall and parts of Ustalav) on the inside cover. There’s a lot of artwork throughout the book — mostly of enemies. I particularly enjoyed the art for Chatar Esuri, Valthazar Quietus, an oracle from the backmatter, and the couatls in the Bestiary. The maps, all drawn by Matthias Rothenaicher, are really nice. They look great, of course, but they’re also well thought out and executed. All of the rooms are clearly labelled and visible, and I didn’t notice any discrepancies between the maps and the accompanying text.
 There are a lot of fun enemies in this temple. The Whispering Way cultists here (and throughout the whole book) have some really nice artwork. There’s a mutated bear that druids might be able to control or befriend, a zombie made from the red reaver that once lived here, and plenty of other traps and undead. My favourite encounters are a pair of tricky nekomata that try to separate and impersonate members of the party, and the final villain, Valthazar Quietus. Valthazar is an androgynous looking Ustalavic nobleman who is a pleasant conversationalist. He’s more than willing to chat with the PCs (as long as it suits him!). He’s accompanied by juju zombies created from the corpses of the PCs which is sure to be jarring and a ton of fun to play. It’s definitely a highlight of this adventure!
 The Bestiary is up next! It contains a random encounter chart and five new creatures written by Sarah E. Hood, Luis Loza, Jen McTeague, and Mikhail Rekun. Oddly, none of them are featured in the Eulogy for Roslar’s Coffer adventure. The first two monsters are couatls: auwaz, a CR 6 couatl found near oceans that helps the lost find their way home, and mix, a CR 8 couatl known to guide and watch over societies. Other creatures include gurgist, a CR 6 human mortic; melacage, a disturbing CR 5 incorporeal (usually) ball of undead souls; and pixie circle, a CR 7 plant creature capable of transporting enemies to other pixie circles.


 Now, let me take a moment to be clear. The Azlanti Star Empire is a pack of giant, pompous, jerks. They’re great villains for the PCs to clash with, but an overwhelming opponent. This adventure path does not send your PCs off to take down the entire Azlanti Star Empire. It’s much smaller in scale than that. And frankly? I love it. It lends a sense of suspense to the series and makes it feel like you’re playing real people in a living breathing
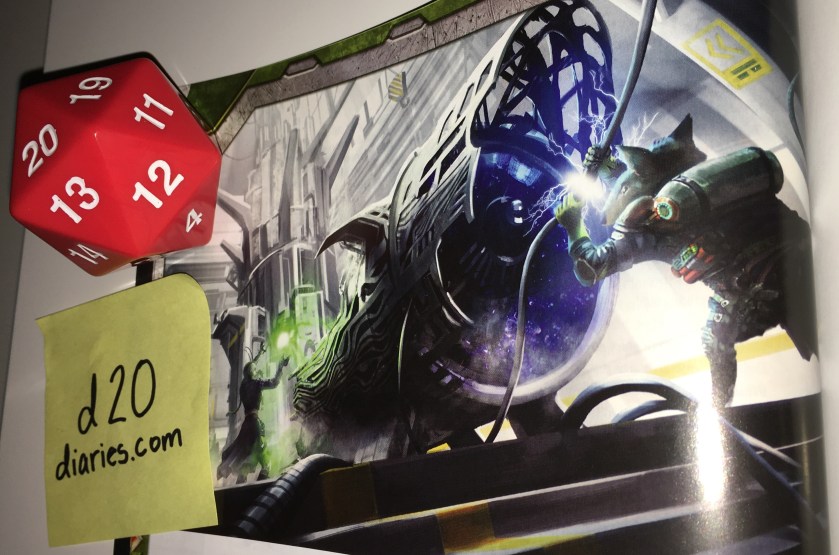


 By the end of this chapter the PCs will have freed Cedona, made their escape from the Prison Moon, and retreated to Outpost Zed. But their mission’s not yet complete. The PCs and Cedona know they need to get back the experimental drive from the Azlanti before its too late.


 The first article, Tools of the Boneyard, is written by Matt Morris. In it you’ll find new gear and character options aimed at dealing with the dead. There is one alchemical remedy, one alchemical tool, and two alchemical weapons — bone burn is my favourite, so be sure to check it out! There are two new special materials useful for crafting — cryptstone can be used for ammunition and weapons, while spiresteel can be used for ammunition, weapons, and armour. Finally, there are five new magic items: crypt rod, grim helm, harbinger’s scythe, Lady’s Mercy, and Momument’s Truth. Although I enjoyed a lot of the items, it’s the character options that I found were most exciting. Graveslinger is a gunslinger archetype that specializes in combatting incorporeal undead. Soul Shepherd is a monk archetype that calm incorporeal undead and haunts with a touch. They also gain some otherworldly resistances and interesting ways to use their ki. Reaper is a new oracle mystery which I really enjoyed. Tightly themed and flavourful it’s capable of both killing the living and destroying undead. There are also six new barbarian rage powers including the psychopomp totem powers.