It’s rare that we shine a spotlight on crowdfunding campaigns, but May’s turning out to be one heck of an awesome month for RPGs! Earlier this month we talked about Pathfinder’s Kingmaker Campaign, and today? We’re talking Grimmerspace!
Grimmerspace is a Starfinder Compatible Sci-Fi Horror RPG setting by Iron GM Games. (And by horror, we do mean HORROR. It’s a mature setting and is not intended for children or families). The Grimmerspace team includes Rone Barton, Lou Agresta, and Sean Astin! Launching on May 22nd 2019, the Grimmerspace Kickstarter funded in a few short hours. The main products in the Kickstarter are three books: Grimmerspace: Settings & Adventures, Grimmerspace: Xeno Files, and Grimmerspace: Player’s Guide. These books contain the Grimmerspace campaign setting, horrifying enemies and monsters, five new classes, new character options, and a large number of stand-alone horror adventures. All three books are available in PDF or print form. In addition, backers had the chance to pick up the Starfinder Player’s Guide, Starfinder Beginner’s Box, Immersive Battle Maps by Yarro Studios, Denizen Deck, Xeno Deck, gaming paper, and more through backer tiers and add-ons. Although the stretch goals haven’t been detailed, a digital map pack and a poster are already unlocked at the time of writing.
Grimmerspace takes place in the Gliding Rim Galaxy, an alliance of five technologically advanced polities plagued by terrifying alien abominations. From a purple tear in the sky comes the warmongering Sundermages, magic users from the default Starfinder setting who have travelled for centuries across time and space. The sundermages have become something inhuman, and bring magic and devastation to the magic-less Gliding Rim Galaxy, which they intend to conquer. Teaming up with the monstrous Hodrak’s of the Gyre, the Sundermages are a force to be reckoned with. A battle of magic versus technology has come to Grimmerspace!
Grimmerspace adventures are stand alone modules sorted by horror genre, intensity, and the time they take to play through. They are location specific, so they can easily be dropped into any campaign.
There are five new character classes in Grimmerspace, ARCop, Crypto-Monk, Quantum Seer, Recombinator, Voti Marine. ARCop’s are police officers who bond with a special gun that contains the memories of a dead ARCop. These guns, known and an ARCop PIECE, are intelligent, capable of firing multiple types of ammunition, and grow in power with your PC. Which is super cool! Crypto-Monks are conspiracy theorists that believe an unknown alien presence is controlling all of Grimmerspace. In order to combat this unseen threat they hone their bodies, create weapons out of everyday objects, and learn how to combat and destroy aliens. Quantum Seers can manifest monstrous versions of themselves around their physical bodies. Recombinators are bioengineers capable of creating unique lifeforms that serve them, much like a Starfinder Mechanic creates their own drones. Voti Marine’s are strong warriors that wield shoulder cannons and other powerful arms. In addition to these classes there are new races, archetypes, themes, polities, and factions that players can join and combat.
If you’re even remotely interested in sci-fi horror and RPGs I highly recommend you give Grimmerspace a look-see. It’s going to be amazing!
For more information on Grimmerspace’s Kickstarter Campaign click here. To download a free Grimmerspace adventure, Abattoir 8 by Richard Pett, click here.
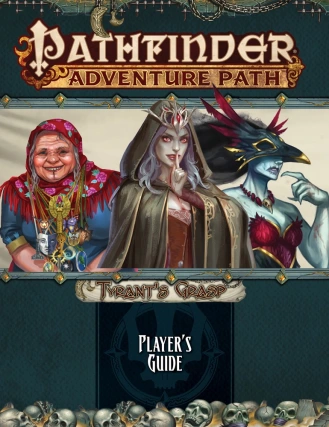
Today we’re taking an in depth look at the first book in the Tyrant’s Grasp Adventure Path! This survival horror campaign pits the players against the return of the Whispering Tyrant, the lich-king Tar-Baphon, who was defeated and sealed away long ago. Tyrant’s Grasp will be the final Pathfinder 1st Edition Adventure Path released, before the switch is made over to Pathfinder 2nd Edition in August. Intended to take characters from levels 1 to 17, Tyrant’s Grasp is six volumes long.
A wonderful Player’s Guide for Tyrant’s Grasp is available as a free download on Paizo’s website here. The Player’s Guide gives players a relatively spoiler-free way to properly prepare for and integrate their characters into the Tyrant’s Grasp Adventure Path. I highly recommend checking it out!
The Tyrant’s Grasp Adventure Path begins with Pathfinder Adventure Path: The Dead Roads (Tyrant’s Grasp 1 of 6). Written by Ron Lundeen, The Dead Roads is an adventure intended for first level characters, which should bring PCs up to level five by its conclusion. This adventure begins when the PCs awaken already defeated in the Boneyard, a land where the dead go to be judged. There’s just one problem… They’re not quite dead. Trapped inside a tomb that doesn’t belong to them, they’ll need to escape, figure out what happened to them, and find a way to return home. But, how could one possibly escape the land of the dead?
Let me start by saying that The Dead Roads — and the Tyrant’s Grasp Adventure Path — is not for everyone. Terrible tragedies will occur, and you won’t always be able to prevent them. These events are bound to have a lasting effect on your characters, so players should be prepared to consider and role-play the marks left by the trials you face. Often you’ll be in dire situations with limited resources, so players will need to be resourceful to survive. Plenty of the imagery and events in this adventure are dark, morbid, and sorrowful. It’s definitely a horror campaign — though not your typical horror. It’s suspenseful survival horror, with a good deal of body horror in the first book, as well. The Dead Roads contains imagery that is inappropriate for children and some adult gamers will even consider an image or two disturbing. It’s definitely not a campaign I could play with my family.
That said, I loved The Dead Roads. Absolutely, positively, adored it.
For starters, it looks great. From cover to cover it’s a wonderful, high quality book filled with nice maps, and beautiful, dark artwork. The cover depicts Mictena (a catrina psychopomp the PCs are destined to interact with) in the foreground. Behind her is an image of Seelah (the Iconic paladin) and Yoon (the iconic kineticist) battling ostovites. Both images are by Igor Grechanyi. There’s a lovely map of The Gravelands (Lastwall and parts of Ustalav) on the inside cover. There’s a ton of artwork throughout the book — of enemies, allies, and characters who could become either. I particularly enjoyed the art for Prince Uspid and Mictena. Colulus was the most disconcerting image in the book. If any image is going to bug a squeamish player it’ll be that one. There’s a few characters that I wish had art but don’t (which is expected! Art’s not cheap and there’s only so much space!). Ayuki, in particular, would have been nice to see, as well as the jitterbone creature in the bestiary. The maps, all drawn by Matthias Rothenaicher, are really nice. They look great, of course, but they’re also well thought out, executed, and each has a unique feel to it. I particularly enjoyed ‘Roslar’s Tomb’ and ‘Deathbower.’ I wish that the maps of the various Dead Roads locations were given a bit more space, though. Squishing three multi-floor maps for three different locations onto one page is good for page count, but makes some of the maps difficult to read. Part of the eastern end of the ‘Palace of Teeth’ is nearly lost in the creases of the binding, while the entrance to ‘Salishara’s Scriptorium’ is hidden in the creases. If both of those maps were a few grid squares further to the left that would have been less of a problem. Finally, flipping back and forth between the map page and the various locations depicted in it (which is spread out over 28 pages) is a bit irritating. Have a bookmark or post-it note handy and try not to tear your pages. Much to my surprise there was also two player handouts which represent puzzles the group comes across. I’m really glad they’re depicted instead of just described. They’re necessary and a really nice touch.
Part of the maps lost in the creases.
The Dead Roads starts with a bang (HA!) and doesn’t let up. The entire opening has the feel of an ominous, suspenseful mystery. Your PCs don’t know where they are, how they got there, or what’s going on. Their locations hide clues to both their situation and the history of wider events, which the PCs may or may not be able to uncover. In time they will discover the answers to some of their questions, just as they realize it’s tied to an even bigger mystery.
There’s a lot of wonderful social encounters and NPCs in this adventure. Number Three, Barple Stonebreaker, Prince Uspid, Queen Carnassial, Kishokish and his portrait, Ayuki, Salighara, Berthold, the wyrwoods, Mrs. Pedipalp, Aydie, Reedreaper, Mictena — there’s just so many great interactions in this adventure! Among them, three particularly stand out amongst the crowd: interacting with the townsfolk of Roslar’s Coffer is poignant and amazing; speaking with Barzahk the Passage; and — my personal favourite characters — Umble and Thoot! This pair of friendly psychopomps are the best!
Umble and Thoot
Prince Uspid
Deathbower
Many of the creatures and NPCs you come across don’t look friendly — which doesn’t mean they aren’t friendly. Of course, it doesn’t mean they are friendly, either. Which I love! Appearances have no bearing on what a creature acts like and I appreciate that this adventure used that so effectively. It’s bound to throw players for a bit of a loop and make them feel… off-kilter. Which is great!
There’s a lot of challenging encounters in this adventure and plenty of unique monsters to face off against. I particularly enjoyed that so many can end in ways other than violence. But, don’t let that last sentence lull you into a false sense of security! There’s a lot of combat encounters in this book that cannot be avoided.
And the ending! Oh, the ending! I love it! I cannot wait to get my hands on the next book in this Adventure Path! I have a feeling Eulogy for Roslar’s Coffer is going to be just as good.
And now it’s time for a warning:
We’ve got more to say about this adventure, but it’ll come with spoilers! Don’t want to read them? Skip on past this next section until you see the large words ‘SPOILERS OVER.’ Got it? Good! See you on the other side where we’ll talk about the extra content in this book!
SPOILERS
The Dead Roads adventure is split into four major parts: Awake in Roslar’s Tomb, Among the Dead, Walking the Dead Roads, and Deathbower. One of these parts Walking the Dead Roads is particularly dense and is made up of three major locations: The Palace of Teeth, Nine-Eaves, and Salighara’s Scriptorium. All told The Dead Roads adventure is 52 pages in length with six pages afterwards dedicated to three NPCs: Mictena, Mrs. Pedipalp, and Reedreaper. All three of these are enemies the PCs will come across, but only one of them has to stay that way. The PCs have a chance to convince the other two to step aside without violence (although it’s extremely hard to accomplish for one of those two!).
Through this adventure the PCs will get to interact with psychopomps, a type of outsider native to the Boneyard who work to ensure that the processing of souls is done accurately and efficiently. Typically functioning as guides for the souls of the deceased, the psychopomps are confused over what to do about the mysterious PCs. Some will help them along their way (especially the delightful Umble and Thoot!) , and others with hinder them — particularly Mictena, a catrina psychopomp obsessed with putting the PCs spirits properly to rest. Through a good thorough death, of course! Psychopomps aren’t the only enemies and NPCs the players will interact with. The Boneyard is a huge realm, and there’s plenty of creatures living/stranded/invading there. Other major groups of enemies include fey, vermin, sakhil, and nightmarish beings from the Dimension of Dreams.
Fittingly, The Dead Roads begins with death. Lots of it. The entire town of Roslar’s Coffer has been destroyed in one terrifying instant. Including the PCs. I’ll leave the details out of this article, but suffice to say this will have a lasting effect on your players and their characters. Any family, friends, and companions — pets included — that lived in Roslar’s Coffer are dead. Although it might be tempting to warn some players about this in advance, that also will ruin some of the surprise and likely result in players purposely making no personal connections to the town of Roslar’s Coffer — which would be a mistake in my opinion. Every GM will need to judge their players accordingly, and perhaps provide them with some hints and warnings while they build their characters and backstories. In my opinion this event is handled incredibly well throughout this adventure, and I highly recommend allowing players to make a character with personal connections to Roslar’s Coffer. It adds so much to the story. However, it is important to inform PCs that if they have animal companions, mounts, or they are a wizard with a familiar, they will not have access to their pet at the start of the campaign. Player’s who have read the Tyrant’s Grasp Player’s Guide will already be aware of this, although they won’t (accurately) know why.
Happily, the player’s experience doesn’t begin with the death of Roslar’s Coffer. Instead, Part One: Awake in Roslar’s Tomb begins with the PCs waking up in a stone coffin. Literally entombed they need to push their way out of the stone box and into a cold, dark, mausoleum. It’s a great opening. Players and characters alike are bound to be curious what has happened and where they are. Players begin with any gear they had that could reasonably fit in a coffin with them. Any familiars who share a soul with your PCs (a shaman or witch familiar) will be in a coffin of their own, while all other companions are not present (as they are dead). Eidolons and phantoms can be summoned back normally, although all other familiars and companions will need to be replaced at a later time.
Soon, the PCs will discover they’re in someone else’s tomb — Ervin Roslar, Knight of Ozem and hero of the Shining Crusade. The same man that Roslar’s Coffer is named after, in fact. Interesting! As they navigate the tomb they’ll find strange creatures, animated bones (sort of…), a trapped spirit, and a tribe of mites. They’ll also discover that Ervin Roslar may have had a few secrets of his own, although it’s unlikely they’ll unravel his history completely. This section of the adventure is a suspenseful series of explorations, mysteries, tantalizing clues, and challenging combats. It’s going to be a ton of fun to both run and play.
Part Two: Among the Dead begins when the PCs exit Roslar’s Tomb to find themselves face to face with a pair of spooky looking (and absolutely delightful) psychopomps: Umble and Thoot! Seriously, they’re awesome. This quirky pair give the PCs some answers to their most pressing questions and explains that not only are the PCs dead and not dead at the same time — weird! — the rest of Roslar’s Coffer is well and truly dead. They ask the PCs to lend them a hand in convincing the spirits of the dead of Roslar’s Coffer that they are, in fact, dead. These poor fellows need a hand moving everyone on to the afterlife in a calm and orderly fashion! The PCs get to travel to a phantom version of Roslar’s Coffer where they interact with all the people in town — now dead. This is an amazing section of the adventure. Short and poignant, the GM has a chance to show the PCs what has happened to all their family and friends. They’ll need to convince loved ones to move on, and will have a chance to say goodbye. If they have any pets they’ll find them here as well. The adventure itself provides rules for interacting with these spirits, how to convince them to move on, and some tactics that will let them do it in a timely fashion — namely convincing the town leaders of their death. Some PCs will want to stay behind and die along with their family, others won’t have personal connections to the townsfolk, and others still will want to ‘save’ some of these spirits and attempt to return them back to life. There’s plenty of guidance in this book for handling PCs of every kind. After accepting their death the people of Roslar’s Coffer — even familial loved ones — want answers for what happened to them. The PCs are uniquely positioned to uncover this. And, of course, any spirits who can’t be convinced to move on (including those your PCs may want to bring back) will deteriorate in time until they become undead ghosts and other malevolent entities. Umble and Thoot can explain this to the group and ensure no PCs attempt anything so foolhardy. Also in this section the PCs are first introduced to the antagonist of this adventure, Mictena. Overall, this section of the book is among my very favourites. It’s exceptionally well handled and sure to be an emotional experience for players and characters alike. It’s a truly unique roleplaying opportunity. I’m not an overly emotional person, but I’m quite certain that if I was playing this with any character who had even a modest amount of family or friends in Roslar’s Coffer, under an even remotely talented GM, I would cry — in a good way! It has the potential to really tug at the heartstrings.
Part Three: Walking the Dead Roads begins after the PCs have helped the people of Roslar’s Coffer accept their death. Umble and Thoot, who are grateful and believe that since the PCs are only slightly dead they’re not truly dead at all, offer the PCs a way out of the Boneyard. The Dead Roads. They explain that this secret path is only ever trod by psychopomps and gatekeepers, the beings who watch over what amounts to traveller’s checkpoints along the road. Capable of leading anywhere, the PCs can use the Dead Roads to get home to Roslar’s Coffer (so they can figure out what’s happened) by taking a certain path. They’ll need to stop at the three checkpoints along the way and get stamped by that location’s master. Convincing them to grant the stamp should be the hardest part of the journey. Unbeknownst to Umble and Thoot, politics and turmoil have overtaken the three waystations, making each location more dangerous than expected. These locations may be visited in any order, although they are presented in order of difficulty (which is also how I recommend playing them).
The Palace of Teeth is a small castle ruled over Queen Carnassial and her court of tooth fairies. Not long ago her son, Prince Uspid, led a coup against her, and the two factions have been locked in a stalemate ever since. Although Queen Carnassial is the only one with the authority to stamp the PCs (at least until her death) it’s Prince Uspid the PCs are destined to meet first. They’ll need to navigate, bargain, and battle their way through bickering fey factions. They might even get to keep all their teeth…. This location is simultaneously goofy in a crazed sort of way and disconcerting. Although the Palace of Teeth was once a beautiful castle it’s undergone a rather morbid makeover since the fey moved in. The place is creepy and it’s denizens literally want to yank your teeth out. That can make bargaining… weird. Haha. I love the art for both the tooth fairy monarchs (particularly Prince Uspid!) and the stained glass angel. But, in my opinion, the creepiest encounter involves a pair of soulbound dolls in the midst of acting out a rather bloody play about dentistry. They attempt to make the PCs their next patients, using deep slumber and some particularly creepy statements. It’s awesome! Haha. The Palace of Teeth is my favourite location on in part three.
Nine-Eaves is a three storey manor owned by an old shoki psychopomp with a fondness for games and puzzles. Unfortunately, Kishokish’s manor has been invaded by sahkil and he’s now a prisoner in his own home. They PCs will need to free him if they want to get his stamp. Luckily they’re not without allies. An animated portrait created to pose riddles to visitors can lend the PCs a hand — if they can solve his puzzles! There are three puzzles total, and each one solved can earn the PCs information and advice. They’ll need to traverse the house as they seek answers, battling vermin, sahkil, and an unfettered phantom named Ayuki. I really enjoyed the puzzle aspects of this location.
Salighara’s Scriptorium was created by Salighara, a reclusive viduus psychopomp who is studying the Dimension of Dreams and oversees a crew of wyrwood scribes. Mictena attempted to convince Salighara to kill the PCs on her behalf, but was rebuffed. Mictena then offered the same deal to Salighara’s assistant, a plump woman named Mrs. Pedipalp (actually an aranea from a nightmarish section of the Dimension of Dreams). Happy to take the powerful psychopomp up on her offer, Mrs. Pedipalp has ousted Salighara from her own scriptorium and remade the building in her own image. Now a dark place of nightmares and horror, the PCs will need to set things right. This is definitely the most horror-themed location in The Dead Roads, with traps, haunts, and horrifying enemies. Colulus, a flayed ettercap and long-time minion of Mrs. Pedipalp is by far the most horrifying. But, even the Scriptorium is not without potential allies. PCs get to meet Salighara, some upset wyrwoods, and a ratling named Berthold. Mrs. Pedipalp herself is a great opponent — a capable liar, powerful spellcaster, and nightmarish foe all wrapped up in a kindly looking package. I particularly like her tactics. That said, it’s likely Colulus who will give parties the most trouble.
After receiving their stamps the PCs can finally traverse the rest of the Dead Roads and return to the land of the living — not! Mictena refuses to let them go! She magically relocated her domain, Deathbower, right onto the Dead Roads so that she and her dangerous shabti gardeners can kill your PCs properly. Which brings us to the final section of the Dead Roads adventure, Part Four: Deathbower. I love this location and its map. I love the inhabitants — gardeners, friends, and foes. And I love Mictena herself. Despite being an enemy of your PCs she’s not a bad being. She’s a psychopomp just doing what she thinks is right. Which is cool! Although some of the hazards and enemies in this glorious garden must be confronted head on, some characters can be swayed and may even join you for a while. Reedreaper is a particularly interesting character, although it’s unlikely he sticks around long enough to play much of a role. Even Mictena can be talked down — theoretically. The chances your PCs will be able to roll high enough are incredibly slim, but it could happen. Which I really like.
After leaving Deathbower behind the PCs find themselves back on the Dead Roads and greeted by an incredibly powerful psychopomp, Barzahk the Passage, a demigod and master of the Dead Roads. This enigmatic figure whisks the PCs off to their home in a matter of moments, giving them a bit of time to ask him any questions they might have. I thought this was a great moment and a wonderful way to end the adventure.
SPOILERS OVER
In addition to The Dead Roads adventure, this volume contains two articles intended for both GMs and players, one article solely for the GM, a campaign outline, and a bestiary containing five new creatures.
The first article, Tools of the Boneyard, is written by Matt Morris. In it you’ll find new gear and character options aimed at dealing with the dead. There is one alchemical remedy, one alchemical tool, and two alchemical weapons — bone burn is my favourite, so be sure to check it out! There are two new special materials useful for crafting — cryptstone can be used for ammunition and weapons, while spiresteel can be used for ammunition, weapons, and armour. Finally, there are five new magic items: crypt rod, grim helm, harbinger’s scythe, Lady’s Mercy, and Momument’s Truth. Although I enjoyed a lot of the items, it’s the character options that I found were most exciting. Graveslinger is a gunslinger archetype that specializes in combatting incorporeal undead. Soul Shepherd is a monk archetype that calm incorporeal undead and haunts with a touch. They also gain some otherworldly resistances and interesting ways to use their ki. Reaper is a new oracle mystery which I really enjoyed. Tightly themed and flavourful it’s capable of both killing the living and destroying undead. There are also six new barbarian rage powers including the psychopomp totem powers.
Thrilled to see shabti get some attention!
The second player friendly article is written by Mikhail Rekun and entitled The Half-Dead. This section talks about four races that have a strong connection to death and the undead. In addition to providing details and character options for dhampir, duskwalkers, and shabti, it also talks about the new subtype of creatures, mortics. Dhampir appear alongside two magical items, duswalkers have access to five new feats, and shabti have access to five new feats. I was particularly excited to see shabti included.
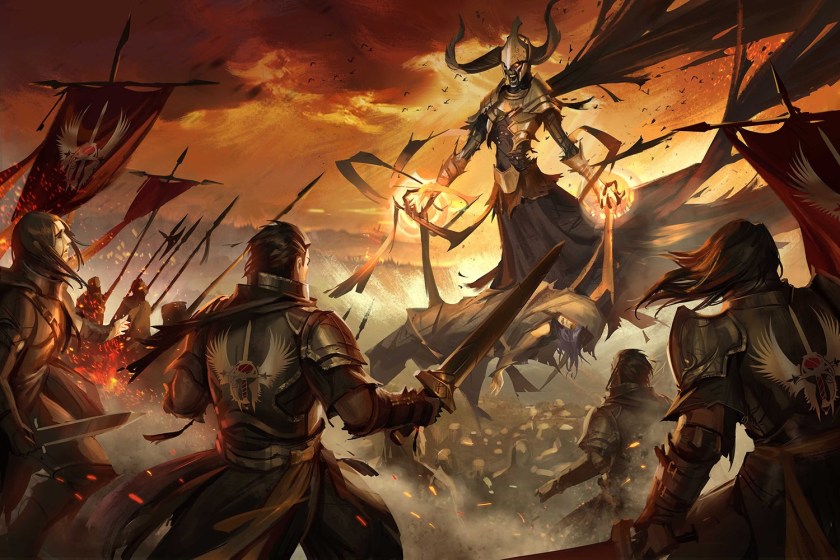
The next article, To Exceed Their Grasp, is written by Crystal Frasier and intended for GMs only. This article discusses some of the important concepts, characters, and events of the Tyrant’s Grasp Adventure Path and the role they play in the overarching story. It also contains a timeline. This is incredibly useful for GMs an will likely be referenced throughout the entire Adventure Path.
The Death of Arazni (Herald of Aroden) during the Shining Crusade. Art courtesy of Paizo Inc.
The Bestiary is up next! It contains a random encounter chart, two interesting social encounters, and five new creatures written by Ron Lundeen, Kyle T. Raes, and Mike Welham. All of the monsters in this book have ties to death and the Boneyard and two of them are featured in The Dead Roads adventure. Bonewrought Willow is an ominous looking intelligent plant capable of growing in Boneyard. Attracted to light and more benevolent than it appears this is a great CR 3 creature I can’t wait to confront my players with. Kaicherak are nasty little fanged worm beasts with ties to Achaekek and a fondness for messily gorging themselves on blood. At CR 4 they are among the most powerful new creatures in the bestiary. Mortics are living beings with strong connections to negative energy which makes them sort of like living undead. There are two mortic stat blocks included in the bestiary — the ghoulish elf-like angheuvore (CR 2) and the incredibly flexible halfling-like jitterbone (CR 4). As previously mentioned, more information on mortics is also included in The Half-Dead article. The final creature is the tooth fairy monarch, a CR 3 version of the lowly tooth fairy.
The last article is a campaign outline, written by Crystal Frasier and Ron Lundeen, that briefly details the events of the upcoming volumes of the Tyrant’s Grasp Adventure Path. Not the sort of thing you want your players peeking at! The campaign outline is incredibly useful for GMs.
Hello, and welcome to d20diaries! Today we’re taking a look at a dark and dramatic adventure path filled with political intrigue and horrifying monsters. Trade War for the Mists of Akuma campaign setting.
What is Mists of Akuma?
Mists of Akuma is an Eastern fantasy noir steampunk campaign setting that’s compatible with fifth edition Dungeons and Dragons. Created by Mike Myler and published by Storm Bunny Studios, Mists of Akuma is based in a fictional nation called Soburin which is very closely based on Japanese culture of… oh, the Sengoku period of the 16th century if I had to guess (but I’m no expert). Soburin’s many prefectures are locked in a tenuous peace, torn between tradition and new technology, and beset on all sides by the terrifying Mists of Akuma, which corrupt everything they touch. Capable of transforming the land into a poisoned wasteland, peaceful dead into undead monstrosities, helpful spirits into foul oni, family heirlooms into cunning living objects, and people into terrifying monsters, the Mists of Akuma are a malignant evil. The Mists of Akuma campaign setting also features a wide variety of new character options, rules, technological items, magical objects, and creatures.
It’s a sorrowful, rich setting that pays close attention to eastern traditions and culture, and brings it into an exciting fictional fantasy world. Manners, honour, and lack of, all play a part, as do kami, oni, and a variety of other Japanese myths and traditions. Mists of Akuma is a setting bursting with creativity, intrigue, mythology, and tragedy that fills a niche all it’s own. For more information on the Mists of Akuma campaign setting you can visit Storm Bunny Studios. To pick up a copy of Mists of Akuma you can visit the Open Gaming Store, Paizo, and Drive Thru RPG. There’s also a few FREE primers available. I highly recommend picking up Mists of Akuma: Soburin Primer for a glimpse at the world of Soburin and the Mists of Akuma campaign setting, Mists of Akuma: Primer for a sampling of character options, and Mists of Akuma: Tsukumogami for a collection of new creatures (objects transformed into fell beasts by the corrupting Mists of Akuma).
Mists of Akuma by Mike Myler and Storm Bunny Studios
But, enough about the campaign setting. Let’s talk Trade War.
Trade War
Mists of Akuma: Trade War is a 375-page adventure for the Mists of Akuma campaign setting written by Mike Myler, along with Christopher Rippee, Andrew Engelbrite, and Dirk van de Rijt. Intended for 4-6 players, Trade War should bring characters from levels three all the way to level twelve or so. Although Trade War contains everything you need to play the adventure path, I highly recommend picking up the Mists of Akuma campaign setting or downloading the free primers mentioned above. They really enrich the adventure and your players understanding of their world and the beings in it.
Trade War: A Mists of Akuma Adventure Path
Trade War is a campaign focused on politics, intrigue, and tragedy, with it’s true plot is hidden under layers of other stories and adventures. Players uncover threads of the mystery and its villains right from the beginning of the adventure path, with time weaving these seemingly disparate tales into a wonderful, layered story. The adventures are all open ended, providing information on a variety of paths your players might choose to follow instead of just assuming one ‘ending’ occurs. There’s plenty of important NPCs to interact with — both allies and enemies — and monsters to battle, with the lines between good and evil becoming increasingly blurred. Alliances can be forged, loyalties swayed, promises betrayed, and throughout it all your PCs will need to make difficult choices. For doing the right thing isn’t always easy — if you can even determine what the ‘right thing’ is. These tough decisions, moral dilemmas, and pyrrhic victories are truly a highlight of the adventure path.
Before we get any further into this review it’s important to note that not all of the content of Trade War is new. In fact, Trade War consists of six previously released adventure modules bound together with new adventures, side quests, and connections, all culminating in a brand new, epic conclusion. And when I say ‘epic’ I truly do mean it. The final adventure is exceptionally well done.
The six previously published adventures contained in Trade War are Scourge of Róbai Shita Temple, Feud Primordial, Fangs of Revenge, Curse of the Scorpion Samurai, Yai Sovereign of Storms, and Revenge of the Pale Master. The finale is entitled Hone-Noroi Keep Ascends. There are also two side trek adventures (Golden Carp and Cursed Well of Itami) which have varying difficulty levels and are intended to be inserted by the GM when they need to get the players back on track (or whenever they feel is most dramatic). There’s also a series of five ‘Connections,’ which are basically a collection of short social and combat encounters which occur on the journey between adventures and all tie in with the various ongoing plots and events of the adventure path. In addition to these adventures and connections, Trade War contains a bit of important information on the Mists of Akuma campaign setting, some new rules, a wide array of new character options, a player handout, and a character sheet. Finally, Trade War contains some quick and simple instructions for those GMs who want to run Trade War without the steampunk components.
Because Trade War is a mystery I won’t get into the plot just yet. Instead, information on the adventure’s storyline and various adventures will all be contained at the end of this blog post after a large spoiler warning. So, without spoilers, what do I think about Trade War?
For starters, Mists of Akuma is a really great, atmospheric setting. I love it. Trade War is grand campaign that’s much more layered than it originally appears. Despite it’s rather tightly constructed meta-plot it leaves a lot of room for players to make their own decisions, managing to continue the events of the adventure path no matter how honourable or disreputable your players turn out to be. It’s got a lot of climatic moments, dynamic battles, moral dilemmas, betrayals, and surprises. All of the scripted social encounters matter, playing a role in either the meta-plot, current adventure, or foreshadowing other important events. Many NPCs — both ally and enemy — have chances to make return appearances, and players will often be surprised at the role some of the people they meet will come to have. There’s a variety of factions your players could ally themselves with throughout the course of the adventure, all of which are very different.
However, all that open-ended storytelling does come with a downside. This is a rather loosely scripted campaign, with plenty of decisions for GMs to make, NPCs for GMs to create, and plenty of downtime for GMs to fill. While many GMs will be thrilled with this, I do prefer my adventures have a tighter narrative. Why your characters are travelling from one region to another between adventures is left for GMs to determine in most instances and, although the journey and ‘Connections’ themselves are filled with engaging encounters, the motivations behind the journeys are lacking (until the later adventures). In addition to this, many of the adventures utilize the same opening plot hook: a bengoshi told you to. Bengoshi in Mists of Akuma are essentially government officials who have the power to deputize citizens into performing tasks on their behalf. Refusal is met with execution. Obviously “do this because I said so or you die” is not really an engaging motivator. Although for some of these adventures it makes sense that a bengoshi would hire your PCs, at other times it’s unnecessary. There’s plenty of other PCs who could have acted as quest givers and, in many instances, the plot of the adventure itself or a few social encounters could have done a better job.
As previously mentioned, many of the battles are dynamic and complex. Although thrilling and rewarding, they aren’t easy to run. If you’re a beginner GM this is not the campaign for you to start with. Trade War has a lot of cool new creatures, some of which can transform into more powerful forms. Overall, the battles in this adventure path are challenging, memorable, and very well-crafted.
Mists of Akuma is not for the feint of heart. There are strong themes of tragedy, decay, corruption, and sorrow. There’s also some rather gross, horrific depictions (particularly in the finale), and body horror (as the Mists of Akuma can transform even your PCs into terrifying monsters). Although I thoroughly enjoyed the atmospheric, mature tone, it’s not for everyone. And certainly not a child-friendly or family campaign.
Mists of Akuma utilizes many Japanese terms throughout its length, which I really enjoyed. Particularly for names of people, locations, monsters, weapons, and titles. That said, I found that some terms are used but not explained, so I had to stop and look them up. In a few instances the Japanese version of an English loan word is used, instead of just using the English word, which was both jarring and a strange choice. I’m a fan of using culturally appropriate terms and naming conventions whenever possible, but in my opinion Trade War took it a bit too far. It hindered my comprehension of the material on more than a few occasions, which in turn made it less useful for me as a GM and less enjoyable for me as a reader. This adventure would have greatly benefitted from a glossary.
All in all I thought this was a wonderful, challenging, dramatic campaign that mature players are going to really enjoy. It’s set in an atmospheric fantasy world filled with tragedy, desperation, and corruption, wherein players get to make important, complicated decisions — and live with the consequences. I really enjoyed Mists of Akuma: Trade War.
SPOILERS
Be warned! The following section contains information on the plot and component adventures of Trade War. If you don’t want any spoilers, stop reading!
Trade War‘s metaplot involves an ancient necromancer called the Pale Master, whose minions are working to bring him back into the world of the living. Fortunately for the world of Soburin, a powerful figure (who I won’t mention by name to prevent too many spoilers) has foreseen the return of the Pale Master and set events into motion that they hope will allow the people of Soburin to have a future. It’s the machinations of both the Pale Master and this other figure that drive the events of the Trade War adventure path. Set amongst this turmoil is a variety of other groups and factions which become embroiled in the growing conflict, either as allies, enemies, minions, pawns, or victims. PCs will have the chance to interact with members of all of the above mentioned groups on multiple occasions and forge relationships with them as they see fit (for good or ill).
Throughout this adventure PCs will face off against scheming humanoids, dark magic, ancient evil, corrupting fog, terrifying oni, powerful demons, unquiet spirits, animated dead, ninja, samurai, dragons, and even the undead army of a necromancer.
Trade War begins with Scourge of Robai Shita Temple, an adventure for third level characters. Tasked by a bengoshi to investigate the village of Shibai, PCs will need to determine why the village — which was mystically protected from the Mists of Akuma — has suddenly become overrun by the mists, the monsters that stalk within it, and a powerful wind demon named Fukō. This mystery is fun and pretty free-form, although I think having a bengoshi give your PCs their task is unnecessary. The various NPCs (or even just the events of this adventures) could have motivated the PCs just as easily. I particularly enjoyed the interactions with another group hired to protect the town, the boisterous Mubō Brothers. My only complaint is that there are a lot of battles with tsukumogami in this one (a bit too many, in my opinion).
From there your PCs travel East over the course of the winter, having a variety of adventures on their journey. Some important events in the adventure path are foreshadowed with social encounters, which was nice to see, and important rumours are already flying. I particularly enjoyed the encounters with the elemental oni Kumo-Rui, an ice-themed spider-like monster who has brought about an unnaturally cold winter. In this section the PCs also meet another bengoshi, Akia the Iron Shell, who tasks them with tracking down an oni-touched sorcerer who has formed his own cult and bringing her anything of value in his possession. This task is trickier than it seems, continuing on into the next adventure, Feud Primordial. It should be noted that the inclusion of Akia the Iron Shell is one I support, as she is important to the ongoing plot line and the next adventure, and it makes sense for her to hire the PCs in order to see her goals accomplished.
Feud Primordial is intended for fifth level characters, and begins with the PCs already in the middle of tracking down a cult-leader. Unfortunately, he has way too many possessions for the PCs to easily carry, making them unable to bring everything back to Akia the Iron Shell. They need to determine what’s valuable and sell the rest. Unfortunately, turns out the object Akia most wanted — in fact the whole reason she sent you after the cult-leader — was to fetch a specific object that was valuable to her, but not actually valuable. An object PCs have either sold (most likely) or was stolen from them (less likely). Furious, the bengoshi sends your PCs back out to hunt down the missing object. This adventure leads the PCs to a town where a murderer stalks the streets, and eventually casts them as pawns locked in a power struggle between two incredibly powerful ancient beings.
After finally appeasing Akia the Iron Shell the PCs accept work as a caravan guard and travel north. Along the journey they get involved in some interesting events, my favourite of which involves a corpse-eating oni.
In time the PCs arrive in Samon, home of the Tazuki Rail Company, where they become embroiled in the events of the next adventure, Fangs of Revenge. Once again, they’re hired by a bengoshi, although this time they’re asked to investigate a growing unrest among the labourers of Samon, discover the leader of the workers growing rebellion, and put and end to their uprising before it begins. This leads to a complex web of intrigue and a large cast of interesting characters. PCs will soon discover that there’s more going on in Samon that meets the eye as they clash with shapeshifting snake-folk, and dark rituals.
Leaving Samon behind the group travels south, working as guards for two different groups at different times. By now they’re likely catching wind of a smuggling operation that’s apart of this campaigns meta-plot, although they won’t necessary understand all the movers and shakers behind it. The PCs actions will continue to affect how a few factions see them later in the campaign.
The next adventure, Curse of the Scorpion Samurai, is intended for 7th-level characters and begins when the PCs are hired by a bengoshi from Fuson prefecture to sneak into Fuson, investigate a series of grisly murders, and lay a trap for the killer using his intended victims as bait. But their enemy, the Scorpion Samurai, was once a local folk hero with a tragic past. PCs will need to be exceptionally canny to prevent the people of Shinjitsu from informing the Scorpion Samurai of their presence lest they go from the hunters to the hunted.
From Fuson prefecture the PCs take a mountainous journey at the behest of a poor woman. Although their mission does not reach its conclusion, they do make some important discoveries related to a series of black torii gates that have been popping up throughout Soburin since the start of Trade War.
The next adventure, Yai Sovereign of Storms, is intended for 8th-level characters and takes place in a mountainous region of the GMs choosing, likely the same mountains that PCs were just travelling through. The PCs find themselves ambushed by a fearsome oni bengoshi who wants to hire them (this marks the second instance where I thought using a bengoshi quest giver was particularly important to the story). Xiqzoxix has heard of the PCs recent exploits and needs their aid to oust a powerful storm demon who usurped the throne from the previous warlord that ruled the oni city of Tsukisasu. Unfortunately, the storm demon is a hate-filled beast who gets more powerful by the day. PCs will need to sneak into the city of monsters in disguise, undo the storm demons magic circles, and defeat him before he becomes too powerful. In the end they’ll get to decide who will rule in the storm demons place — the original oni warlord or Xiqzoxix himself.
Leaving the magically hidden city of Tsukisasu behind the PCs suddenly find themselves in a forest near a newly laid rail track. In this series of connections they’ll have to battle an enemy atop a moving train, punish the oni behind the corrupted black torii gates, and discover that the various factions of Soburin are preparing for war.
Revenge of the Pale Master begins in the city of Kizaki immediately before the annual Festival of Falling Hawks. Intended for 8 – 10th level characters, this adventure once again sets the PCs on the trail of an infamous murderer. This time the murderer has come back from the dead to sacrifice six children whose relatives he tried to sacrifice in life exactly ten years ago. Although the local government has already placed three of these children in protective custody, the other three were kidnapped and need to be rescued. Except… that’s not really what’s going on at all. Haha. This adventure is full of twists, surprises, and betrayals. Whether the PCs ever figure out what’s really going on is entirely up to them. Revenge of the Pale Master is my favourite adventure in Trade War.
Which brings us to the all new finale to Trade War: Hone-Noroi Keep Ascends. In this adventure intended for 12th level characters the Pale Master’s bone tower rises from the earth and towers above Soburin, disappearing into the clouds. Undead march from the tower, the land becomes tainted, and dark magic is seen roiling in the skies. Villagers are evacuated by the government and the various factions met in this adventure path put their brewing war on hold to combat this ancient evil. The PCs may be able to ally with one or more of these armies and gain advantages (and disadvantages) based on how they treated the various groups. Some may be trusted allies, while others may be bitter enemies. Together with these armies your PCs will assault the Pale Master’s undead armies, storm the tower, ascend to the top, and defeat the Pale Master. It’s a gross and horrific gauntlet that’s packed full of challenging encounters and foul enemies. Such a great conclusion to this campaign!
Although that’s the end of the adventure path there are two more adventures in this book. Each is a short side quest intended for varying level difficulties. The first, Cursed Well of Itami, is best played at 5th level, and fits well between Feud Primordial and Fangs of Revenge. In it the PCs find themselves in a village whose well has been corrupted and now holds only blood and other vile substances. PCs need to descend into the well — and the hidden chambers connected to it — in order to cleanse the well and save the town. The second adventure, which is my favourite of the side quests, is Golden Carp. Intended for 7th-level characters, this adventure fits well between either Fangs of Revenge and Curse of the Scorpion Samurai or between Curse of the Scorpion Samurai and Yai Sovereign of Storms. In this adventure the PCs find a magical golden carp who begs them to prevent a noblewoman from catching him in her fishing net. If they choose to save the little fish from the woman — who’s actually an oni in disguise — they discover it is a powerful dragon on a pilgrimage back to its home. The dragon must undertake the journey in the humble form of a carp once every century in order to maintain is powers. They’ll need to protect the fish on it’s trip up to it’s mountain shrine without physically interfering in its journey.
Which brings us to the end of Mists of Akuma: Trade War!
Thanks for joining us today. I hope you enjoyed checking out the dark fantasy world of Mists of Akuma as much as I have.
Today we’re going to take a look at two of the most recent Pathfinder Society Scenarios that are currently available for purchase, and let you know we thought. Although you’ll find references to events in each that I liked or disliked, and comments about specific characters, these scenarios are not explored in detail. It’s not my intention to spoil the events in these scenarios, or give summaries and full reviews, but to share my opinions and provide recommendations. That said, if you want to avoid even minor spoilers then I recommend clicking on a different article. Whether you intend to use them in home games of the Pathfinder Roleplaying Game, sanctioned scenarios for use with the Pathfinder Society Organized Play, or just want to read a nifty new adventure, we’ve got you covered! So let’s get cracking!
Katapesh is a strange place, and the city itself if home to not one, but four Pathfinder Lodges. The most senior Venture-Captain is Roderus who runs a lodge out of his inn and handles all missions that take place outside of the city. The most secure and respected Venture-Captain is Aurora Steelbloom, who runs the grandest lodge in the city at the ruins known as the Twilight Gate. Jurisdiction for the rest of the city is split between Venture-Captain Wulessa Yuul, and Venture-Captain Phlegos Dulm. Unfortunately, these two bicker and fight constantly. So, when the aged Venture-Captain Roderus decides its finally time for him to retire, he’s more than a little uneasy! How can he leave the fate of Pathfinders in Katapesh in the hands of a pair of agents who can’t even follow one of the three main Pathfinder creeds: COOPERATE? This adventure tasks the PCs with working at Roderus’ retirement party. They’ll have to serve drinks, entertain guests, clean up, keep order, and perform other menial tasks. Using their mundane duties as a cover they’ll need to spy on the Venture-Captains in question (Dulm and Yuul), ferret out the truth from rumours, and determine if these two Pathfinders can work together, or are trying to sabotage one another. If the PCs uncover any wrongdoing they’ll need to report to Roderus and delve deeper into the investigation, until the facts come to light and Roderus has enough peace of mind to retire. Players and GMs looking for more information on the featured Venture-Captains can check out Seekers of Secrets or (to a lesser extent) Dark Markets: A Guide To Katapesh.
This scenario had a lot going for it. It has a lot of fun, engaging social encounters that feature a ton of colourful characters. Zig and Yigrig Moneymaker were particular favourites of mine (as I suspect they will be for many players). Zig’s scripted examples of assistance he can lend during the opening retirement party are adorable. There’s a great dynamic evening battle featuring both allies and enemies which promises to be entertaining. Finally, the inclusion of Yigrig Moneymaker’s family is a great segue that can lead to goblins becoming a core race in Pathfinder Second Edition next year. Overall, I really enjoyed this scenario. I give it four out of five stars.
In the previous adventure, Magnimar found its beloved monuments corrupted by some foul source. The PCs worked for Venture-Captain Shiela Heidmarch and the Varisian Council, made an enemy of the occult investigator Theodorus Ichonvarde, saved a servant of the goddess Ashava, discovered the identity of the being behind the corruption (whom we will call only by their name, Tulvhatha, to avoid too many spoilers), and the place they can be found (The Glade of Silver Sparks) which was once a holy site to Ashava. In addition, the PCs were likely granted a blessing, which can be granted to all characters participating in this adventure if they will allow him to do so. This adventure tasks the PCs with travelling through the Mushfens, confronting Tulvhatha, and doing what they can to cleanse the area of evil. Characters who have already played the first in this series of adventures will of course have more reason to participate in this one. But, characters who worship Ashava, have an interest in moonlight, dancing, or putting spirits to rest, or have connections to lycanthropy will all find something special to interest them in this scenario. On a similar note, if you have any characters who have a lot of fears, or who you would enjoying roleplaying their response to their fears at a table, I highly recommend you bring them! This is a spooky adventure, and embracing that atmosphere can be a lot of fun. One final note, if you happen to have a horrible fear of werewolves (like my daughter) or spirits this is NOT the scenario for you!
This scenario had an wonderful haunting tone to it. The environment was appropriately ominous, of course, but many of the encounters themselves often played into the horror theme. Not a gory sort of horror. More of a moody, hopeless, suspenseful sort of horror. I ADORED it. The scenario starts with some minor (but fun) roleplaying encounters. The blessing which your characters can accept is awesome! I adored the first major encounter of this scenario. In addition to bringing back another character from the first scenario in this series, it could cause some healthy discussion as to the fate of your opponents (depending upon the alignments we see on the player’s side of the table). There’s a delightful chase in this scenario, which has very clear repercussions for failure. I absolutely loved it! Although, it should be noted, I’m a sucker for a good, purposeful chase. The haunts in this scenario were exceptionally well-done. Particularly the one that plays upon your character’s fears. Embracing that horror theme with my characters is something I always enjoy as a player, so I can’t wait to toss one of my more expressive characters into this mission! And the final battle with the main villain was both memorable, flavourful, an mechanically difficult. Just awesome. But my favourite part? This scenario features the coolest wolf encounter in existence! It’s going to be so much fun! Overall I loved this scenario. Seriously. Loved it. I give it five out of five stars!
I hope you enjoyed taking a peek at this months newest Pathfinder Society Scenarios with me. I know I enjoyed reading them!
We carved pumpkins last week with my sister. My daughter carved a rabbit, and my son a cat. Or, more accurately, I carved a rabbit, and my sister carved a cat while my children bossed us around. Both of my kids shrieked when they had to put their hands inside and scoop out the pumpkin’s innards. Mostly they poked at it with a spoon. In fact, my kids didn’t do much at all. But, we had fun! We drew on some more pumpkins at home yesterday. Again, my daughter made a rabbit. My son went with a classic jack-o-lantern face.
This morning I packed up my kids costumes, and sent them off to school. They’ll have a party this morning, change into their costumes after lunch, and spend the afternoon at a school dance and haunted house. They’re absolutely over the moon. My son’s going to be a red dragon for Halloween. And my daughter? One guess.
Yup. A rabbit.
She might be obsessed.
My kids can’t wait to head out trick or treating.
And me?
To celebrate I’m taking a look at my five favourite Horror Adventures!
We’re starting off small with Starfinder Society Scenario #1-04: Cries from the Drift by Joe Pasini! This delightful little adventure is intended for Tier 1-4, features one starship battle, and tasks the player’s characters with exploring a derelict ship, uncovering what became of it’s crew (Spoiler Alert: NOTHING GOOD), and collecting the valuable intel they were carrying. This scenario does a great job of setting an ominous atmosphere right from the moment you step foot on the ship, and, with a solid GM, can be quite suspenseful. It’s got some surprises, so I won’t go into too much detail, but I will say that this adventures features some body horror, so it’s not for the faint of heart!
Up Next? The Strange Aeons Adventure Path! Strange Aeons is a six part series of adventures that will have your characters questioning their past, their allies, and their sanity! Strongly inspired by the works of H. P. Lovecraft, it’s spooky, macabre, and downright strange. With alien, unknowable entities, crazed cultists, and a whole heck of a lot of weird! I LOVE this adventure path. Seriously. Love it.
Strange Aeons begins with your characters waking up in an insane asylum with no idea who they are or how they got there. Oh, also, there’s some strange monster performing invasive surgery on someone else right outside your cell. Not the way you want to wake up! After your daring breakout you’ll have to explore the asylum, battle strange, shape-changing creatures, and find a way to escape — without being devoured by the… things outside. From there? Well, let’s just keep that under wraps for now. This is one of those campaigns where being in the dark is half the fun!
Next we leave behind the psychological terror, and head into some classic gothic horror! Curse of Strahd! This hardcover adventure path for Dungeons and Dragons takes place in the Ravenloft campaign setting’s country of Borovia and will take characters from levels one through ten. It’s a spooky, atmospheric, delightful piece of horror that features the vampire Count Strahd von Zarovich himself! Play it with a good DM and you’re guaranteed to get chills! This campaign has some tough fights, and was the winner of THREE Ennies in 2016: Winner (Gold): Best Adventure, Winner (Gold): Best Art/Cover, and Winner (Silver): Product of the Year. Special player options are available to download here, untagged maps are available here, and some special notes for DMs are available here.
From Dungeons and Dragons, we skip back over to Pathfinder, with the Carrion Crown Adventure Path! Carrion Crown is a six part gothic horror campaign that is like a tour de force of classic horror beasts! The first volume, Haunting of Harrowstone, tasks the players with investigating a haunted prison, while later volumes feature carrion golems, werewolves, foul cults, strange beings, vampires, undead, liches, and more! The best part? You don’t always have to kill these beasts. Some have the potential to be allies (if you’re brave enough)! The plot? Stop the Whispering Way from freeing the Lich King Tar-Baphon! I ADORE this campaign!
So what’s my very favourite horror adventure? Carnival of Tears by Tim Hitchcock and Nicolas Logue! First of, let me point out this is a dark, gory, violent, disturbing adventure. Second, I loved it. Carnival of Tears (more properly known as GameMastery Module E1: Carnival of Tears) is a 3.5 adventure from Paizo Publishing intended for fifth level characters that takes place in the desperate little town of Falcon’s Hollow. Man, that place has gone through a lot! So what better way to relax than with a winter carnival? Right? WRONG! When dark fey take over the carnival they twist it into a nightmare, and use powerful illusions to hide the truth from the citizens. The PCs need to stop the fey, save what townsfolk they can, and try their best to survive the night! I find this scenario is particularly effective when played in a town the player’s have grown fond of (even if that means you don’t play in Falcon’s Hollow), and when they’re forced to help deal with the aftermath of the so-called Carnival of Tears. Just awesome. The horror!
And that’s it!
Or is it..?
There’s one last thing I want to talk about: the future! The horror adventure I most want to play (and read), but haven’t.
Signal of Screams is a three-part adventure path for the Starfinder Roleplaying Game that starts at level seven. It begins with your PCs on vacation at a luxury resort on an asteroid when suddenly the staff and guests begin to get violent! They’ll need to protect themselves and the uninfected guests. But, what if they’re not immune to the madness? I can’t wait to find out!
Now, before we get started, there’s one thing I need to state plainly, right up front. This is NOT a family friendly book. It’s not the book you want to bring with you to read at the laundromat or on the bus, and it’s not a book you’re going to get a lot of ideas from for games involving children, or the many gamers who prefer a fun, carefree kind of game. This book is dark. It’s disconcerting. More specifically, it features body horror, mental and physical torture, as well as imagery and content that may disturb some readers. If you’re a gamer who doesn’t enjoy (or enjoy experimenting with) such content in your d20 games, then this is NOT the book for you. I’d suggest such readers pass on it, and pick up another of the wonderful books that are available for Pathfinder.
Those of you who regularly read my blog may wonder why I bothered to invest in a book with mature content when most of the time when I GM my children are involved (a six and seven year old). That’s a fair question! This book was not chosen with them in mind. This book was for me. Why?
For starters, I have no other content outside of the Inner Sea World Guide, and the Pathfinder Module: The Midnight Mirror, that features Nidal. None. To me, that spot on the map is a giant question mark. I know the basics, but nothing else. Second, I’m the kind of player that likes a wide variety of experiences in my games. Yes, I love a happy, feel-good, fun game. I love character development, social interactions, and humour. But, I also love horror. I want my dark locales to actually be dark. The evil in my games should be disturbing, and disconcerting, not shallow and cliche. Within reason. Games are only worthwhile when the players find them fun, after all. This book on Nidal did just that.
Pathfinder Campaign Setting: Nidal, Land of Shadows is written by Liane Merciel, with additions by Lyz Liddell, Ron Lundeen, and Mark Moreland. It’s cover features awesome artwork by Kiki Moch Rizky that depicts the iconic hunter, Adowyn, and the iconic bard, Lem, facing off against an umbral dragon! This book is a thick softcover book which weighs in at 63 pages long. As a book in the Pathfinder Campaign Setting line, it contains information on the locations of Golarion (Nidal, specifically). It does not feature new archetypes, or other character options. But, that doesn’t mean this is only a book for GMs! They’re awesome for GMs, of course, but they’re also great for helping players of all kinds create fully-formed characters from different locations. In addition, I find these books really fire up the imagination. They spark ideas for both adventures, side quests, villains and characters.
The inside cover features a gorgeous map of Nidal, complete with labels, scale, and beautiful tiny depictions of the major settlements, drawn with care. The book is split into four chapters. ‘Living in Shadow’ is a ten page look at what life is like for most citizens. ‘Gazetteer’ is a thirty page look at the locations found within Nidal. ‘Threats in the Gloom’ is a twelve page look at the various locations which are particularly well suited to adventuring. And ‘Bestiary’ is a nine page look at some of the unique creatures found within Nidal’s borders. The entire book is filled with darkly beautiful artwork, some of which may be disturbing to some readers.
The first chapter of the book, ‘Living in Shadow,’ begins with a wonderful Nidalese sermon which really helped put their view on their (horribly evil) religion into perspective. If read with the proper gravitas I swear it could make a shiver run down your spine. Very atmospheric! Its accompanied by some gothic artwork of a vampiric noblewoman looking out across the city. After this is a short, half-page summary of Nidal, it’s origins, and its culture. Up next is a gorgeous image of a Nidalese Horselord and about a page worth of text on the history of Nidal. This includes what life was like before they became thralls of Zon-Kuthon. There’s also information on the government of Nidal and some of its important personages. Nidal is a theocracy dedicated to Zon-Kuthon, headed by the Black Triune, and governed by the Umbral Court. After this there is information on some of the rare citizens you might come across in Nidal, including Caligni, Fetchlings, and the terrifying Kytons. Then we get a glimpse of what life is like in the decadent cities of Nidal, and the rural countryside. Spoiler Alert: It’s WAY different. Haha. There’s also a short section about the different kinds of religious and underground resistance found within Nidal. There’s also a discussion on Nidal’s relations with other nations, and a full page timeline showing important dates in Nidal’s history. Oh! And a delightful (disturbing) image of Zon-Kuthon, the benevolent (NOT) god who rules Nidal! Such a photogenic guy! (Note the sarcasm.)
I found this chapter was the incredibly useful in helping me understand life in Nidal. I had forgotten that the Nidalese people used to be horselords. Although I knew that they were the only civilization to survive Earthfall and the Age of Darkness (sort of), I hadn’t quite realized how important it was to their history. It’s a source of constant pride. Proof of the validity of their beliefs. It also means that they have relics, written works, books, maps, and actual, reliable artifacts and history from that time. From before that time. Refugees from other places — say… Azlanti and Thassilon for example — would have fled to Nidal for safety as refugees. it was once the literal centre of civlization in the Inner Sea. The Absalom of it’s time in a world of darkness, death, and barbarism. Even the poorest farmer would still have housewares and relics handed down through the millennia. Family heirlooms that are older than nations. Even if you only count Nidal’s history from the moment they made a pact with Zon-Kuthon, they’re a nation over 10,000 years old. That’s… monumentous. This nation’s history makes it particularly useful for anyone wanting to make a character with ties to ancient civilizations, including some of the new character options from Pathfinder Player Companion: Blood of the Ancients.
I particularly enjoyed reading about the difference between city life and rural life, as well as about the Black Triune. For those of you who don’t know, they were the original horselords who beseeched Zon-Kuthon for protection for their people from Earthfall. Although the evil Zon-Kuthon granted their desires and saved their people (making them the only civilization to survive Earthfall and the Age of Darkness without crumbling) it also transformed the horselords into literal servants of Zon-Kuthon’s. They are his will made flesh. Eternal and unloving. They rule Nidal to this day, though they are rarely seen by any outside the Umbral Court.
The Gazeteer begins with a moving quote from a retiring Chelish Ambassador to her replacement about the cold beauty, harsh cruelty, and ancient knowledge which can be found in Nidal. I particularly loved the last line:
“…It is a place, for better or worse, that you will never forget. You can’t. The scars remain forever.”
Such a wonderful, atmospheric quote — again. Whoo! Love it! It’s accompanied by artwork depicting a Varisian caravan approaching a Nidalese city, surrounded by wildlife that looks rather ominous. Past the opening quote is about a page and a half of information about Nidal’s culture and politics, followed by details on their four major holidays.
Note to self: Don’t celebrate the Eternal Kiss. Or The Festival of Night’s Return. Or The Shadowchaining. Or anything, really. In fact, let’s amend that to: never visit Nidal. Haha. Honestly, I adored reading about the holidays! They were the perfect balance of ‘holiday’ and dark horror. Shivers!
After this we get to the bulk of the Gazeteer: details on a ton of locations, all of which are shown on that loverly inside-cover map I mentioned earlier. There’s a total of 55 locations which are detailed in this chapter, including two major cities (Pangolais and Ridwan) which include their own maps, and multiple locations within them. The Gazeteer’s locations include cities, towns, settlements, ancient ruins, dangerous locales, and natural features. They run the gamut from ‘safe’ and ‘unique’ to ‘deadly’ and ‘disturbing.’ It’s got a really great variety. A lot of these places sparked ideas for campaigns, adventures, and character origins — not all of which are evil. In fact, the most useful part of this chapter may be in it’s ability to make you realize that you can adventure here. You can be a hero in Nidal. I don’t mean just as a sweeping revolutionary who tries to change Nidal, but as a Nidalese person who lives and survives here. A local hero. In addition to details on the places, there’s information on important figures, enemies, and plenty of plot-hooks. There’s also a ton of useful references for where you can find further information on those places, people, and topics (both within this book, and in other books).
Stormhollow from Nidal, Land of Shadows
Some of my favourite places to read about were the Atteran Ranches (which is a great place to create characters who want to be members of the underground resistance), Auginford (a small settlement which recently unearthed a disturbing monument), Blacksulfur Pond (a pond connected to the Shadow Plane), Brimstone Springs (where a devil is enjoying a ‘delightful’ prank), Grayfrond (home to a creature based off a chilling Inuit folk creature), Stormhollow (a village whose inhabitants were slaughtered by kytons — and still walk the streets today as mutilated husks), and, my personal favourite, The Library Without Light, which is home to ancient texts and relics dating back to before Earthfall. If any of you own this book, I’d be curious to hear what your favourite locations were!
Unholy symbol of Zon-Kuthon, god of envy, pain, darkness and loss.
The next chapter, ‘Threats in the Gloom,’ begins with a recounting of an adventure in Nidal, by an Aspis Agent. It’s dour and dark, and perfect. And the art that comes with it? Creeeeeeepy! After this is looks at eleven different dangerous locations in Nidal, dedicating about a page to each. It includes the classes of powerful denizens, the kinds of creatures you can encounter there, features common to the area, as well as history, and plot-hooks for these locales. Once again, there’s a wide variety of locations here, from dungeons, dangerous wilds, haunted places, and urban areas. Those of you looking for more information on hidden bastions of good should check out the ‘Plains of Night’ and ‘Undervale.’ ‘The House of Lies’ is a great location for those of you looking for reasons for foreigners to visit. ‘Shadowreach’ revisits the legacy of a character from the Council of Thieves Adventure Path (Ilnerik Sivanshin who was mentioned in Council of Thieves: Book 3: What Lies in Dust, and featured in Council of Thieves: Book 5 – Mother of Flies). Looking for something darker? Check out the ‘Tower of Slant Shadows.’ Not only does it have connections to the wonderful Curse of the Crimson Throne Adventure Path, it’s also (in my humble opinion) the creepiest thing in the entire book. Yikes! I wish I had thought of that for my home game of Second Darkness… My personal favourite locations in this chapter are ‘Castle of the Captive Sun’ wherein a vampire keeps a collection of divinely descended beings prisoner, and tortures himself with holy artifacts! Very cool! And Barrowmoor, which is land filled with ancient burial mounds of the Nidalese Horselords. It’s steeped not only in creepy a atmosphere and a bunch of undead, but also in the occult, which I ALWAYS love. Barrowmoor is also the setting of the Tomb of Attai Horse-Speaker, which was published in its entirety in Pathfinder Campaign Setting: Tombs of Golarion. Honestly, it’s one of my favourite tombs I’ve ever had the pleasure to read.
Castle of the Captive Sun from Nidal, Land of Shadows
The last chapter of this book is the Bestiary, which collects six random encounter tables (which contains a few entries which pleasantly surprised me!) and six new monsters. The creatures vary from CR 2 to CR 8. There’s a new kyton, of course, called the suffragan. It’s born from the souls of another new creature, the joyful thing, which definitely is my pick for the most disturbing creature in this book! Yikes! The strongest monster on offer is the hive brute. For more information on hives you can check out Pathfinder Roleplaying Game: Horror Adventures. I’m not a big fan of most plant creatures, but there is a cool shadow plant called the shadow fern which I actually really like. There’s also the smokeshade, which is a tiny extraplanar, incorporeal, aberration that looks like a patch of shadow. In addition to being an enemy, these little guys can be taken as familiars by casters of at least 7th level with the Improved Familiar feat. They’re actually quite fun, flavourful critters, that enjoy forming themselves into different rude shapes in order to mock other people or pantomime insults. I want one! Haha. But, the definite winner for the most useful creature is the shadow animal template. Not only can it be used to make shadow tainted creatures, it’s abilities are chosen from a list, which makes it very adaptable. It’s super useful, and really well done.
And that brings us to the end of Nidal, Land of Shadows. Overall, I really enjoyed this book. It made me think about Nidal in a new way, which made it playable. It also gave me a lot of good ideas for characters and adventures set in this morbid, horrible place. But, keep in mind, this book is NOT for everyone. Only purchase this book if you enjoy adding dark horror to your games.

 A wonderful Player’s Guide for Tyrant’s Grasp is available as a free download on Paizo’s website


 The first article, Tools of the Boneyard, is written by Matt Morris. In it you’ll find new gear and character options aimed at dealing with the dead. There is one alchemical remedy, one alchemical tool, and two alchemical weapons — bone burn is my favourite, so be sure to check it out! There are two new special materials useful for crafting — cryptstone can be used for ammunition and weapons, while spiresteel can be used for ammunition, weapons, and armour. Finally, there are five new magic items: crypt rod, grim helm, harbinger’s scythe, Lady’s Mercy, and Momument’s Truth. Although I enjoyed a lot of the items, it’s the character options that I found were most exciting. Graveslinger is a gunslinger archetype that specializes in combatting incorporeal undead. Soul Shepherd is a monk archetype that calm incorporeal undead and haunts with a touch. They also gain some otherworldly resistances and interesting ways to use their ki. Reaper is a new oracle mystery which I really enjoyed. Tightly themed and flavourful it’s capable of both killing the living and destroying undead. There are also six new barbarian rage powers including the psychopomp totem powers.
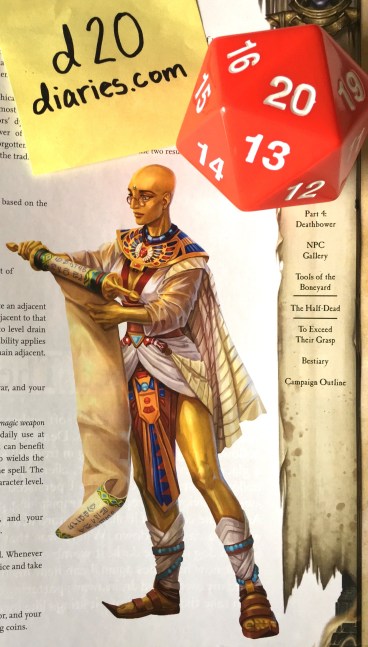


 Those of you who regularly read my blog may wonder why I bothered to invest in a book with mature content when most of the time when I GM my children are involved (a six and seven year old). That’s a fair question! This book was not chosen with them in mind. This book was for me. Why?
 The inside cover features a gorgeous map of Nidal, complete with labels, scale, and beautiful tiny depictions of the major settlements, drawn with care. The book is split into four chapters. ‘Living in Shadow’ is a ten page look at what life is like for most citizens. ‘Gazetteer’ is a thirty page look at the locations found within Nidal. ‘Threats in the Gloom’ is a twelve page look at the various locations which are particularly well suited to adventuring. And ‘Bestiary’ is a nine page look at some of the unique creatures found within Nidal’s borders. The entire book is filled with darkly beautiful artwork, some of which may be disturbing to some readers.
 I found this chapter was the incredibly useful in helping me understand life in Nidal. I had forgotten that the Nidalese people used to be horselords. Although I knew that they were the only civilization to survive Earthfall and the Age of Darkness (sort of), I hadn’t quite realized how important it was to their history. It’s a source of constant pride. Proof of the validity of their beliefs. It also means that they have relics, written works, books, maps, and actual, reliable artifacts and history from that time. From before that time. Refugees from other places — say… Azlanti and Thassilon for example — would have fled to Nidal for safety as refugees. it was once the literal centre of civlization in the Inner Sea. The Absalom of it’s time in a world of darkness, death, and barbarism. Even the poorest farmer would still have housewares and relics handed down through the millennia. Family heirlooms that are older than nations. Even if you only count Nidal’s history from the moment they made a pact with Zon-Kuthon, they’re a nation over 10,000 years old. That’s… monumentous. This nation’s history makes it particularly useful for anyone wanting to make a character with ties to ancient civilizations, including some of the new character options from
  Note to self: Don’t celebrate the Eternal Kiss. Or The Festival of Night’s Return. Or The Shadowchaining. Or anything, really. In fact, let’s amend that to: never visit Nidal. Haha. Honestly, I adored reading about the holidays! They were the perfect balance of ‘holiday’ and dark horror. Shivers!


