Today we’re going to take a look at two of the most recent Pathfinder Society Scenarios that are currently available for purchase, and let you know we thought. Although you’ll find references to events in each that I liked or disliked, and comments about specific characters, these scenarios are not explored in detail. It’s not my intention to spoil the events in these scenarios, or give summaries and full reviews, but to share my opinions and provide recommendations. That said, if you want to avoid even minor spoilers I recommend you check out a different article. Whether you intend to use them in home games of the Pathfinder Roleplaying Game, sanctioned scenarios for use with the Pathfinder Society Organized Play, or just want to read a nifty new adventure, we’ve got you covered! So let’s get cracking!
Recently the Shoanti people of the Storval Plateau were angered by the actions of the Pathfinder Society, when an over-enthusiastic Pathfinder raided and destroyed an important Shoanti burial ground — and then passed it off as Thassilonian. Angered (with reason) at the actions of this Pathfinder many Shoanti are calling for the expulsion of the Pathfinder Society from their lands (or worse!). This adventure tasks the PCs with attending a Shoanti council where they will need to return the grave goods taken from the site, and attempt to salvage what they can of the relationship between the Pathfinder Society and the representatives from the various Shoanti Quahs. More specifically, their goal is to earn a chance to fix the damage that has been done to the ancient Shoanti sepulchre, and make what reparations they can. This scenario doesn’t continue any ongoing storylines and isn’t connected to any factions. If you’ve got any characters who have played a PFS scenario involving the Shoanti people (such as #4-06: The Green Market, #8-22: Wrath of the Fleshwarped Queen, or #8-23: Graves of Crystalmaw Pass), now is a good time to play them. In addition, characters with other connections to the Shoanti, characters who have a respect for foreign cultures and history, and characters who are diplomatic, will all find something to be excited about in this scenario. Reckless, destructive, and rude characters are not going to excel in this adventure.
Kemchet Flame Stoker, chosen representative of the Sklar-Quah (Sun Clan). Illustrated by Michele Giorgi. Art courtesy of Paizo Inc.
First off: I love the premise of this scenario! As a student (once upon a time) of anthropology and archaeology, I adore any adventure that goes out of its way to add some semblance of reality to Pathfinder excavations. So, cleaning up after some shoddy treasure hunter? Sign me up! In addition, the Shoanti are one of my very favourite ethnic groups in the world of Golarion, so getting both in one adventure had me more than a little excited. Putting aside my biases, this is a really fun adventure. It has some useful handouts, lots of nice art, and an interesting cast of NPCs. Influencing the clans at the council meeting was both enjoyable and rewarding, but could be difficult for some GMs to run. It features seven important NPCs (Payah Against the Winds, Cousin to All, Kemchet Flame Stoker, Lake at Dawn, Memory Tender, Rollicks in Waves, and Togimal in Shadow), each of whom has their own personality, values, and pet peeves. This could get confusing for GMs and players alike. However, with some prep work (or great improv) this scene is going to be tense and exciting — a lot’s riding on it, after all! Repairing the tomb and the devastation wreaked there was very enjoyable for me, and the more… talkative inhabitant of the sepulchre was a really nice touch! The final encounter is quite a challenge, both for the participants synergy and for the encounter context. This battle is likely to cause some PCs to hesitate or stress, which leads to one of my only issues with this scenario. However, my relatively vague comments on it are heavier on the spoilers than I typically share, so if that makes you nervous skip the next paragraph.
If something is meant to be in a tomb that you’re restoring, but that something is hazardous to you, should you preserve it or destroy it? A nice dilemma! Unfortunately, this scenario doesn’t embrace that conundrum and has no notes on what should be done if PCs attempt to circumvent it instead of using more destructive methods. A bit of a missed opportunity, I think. Now, most groups will have no such qualms and leap into the encounter without issue, but for those groups who do show professional restraint, their hesitation could prove their undoing, and cause this nice challenging encounter to be too difficult. I’m curious to hear how this shakes out in play!
Overall, I really enjoyed the topic, content, and execution of this adventure. It’s right up my alley, and I can’t wait to play it. I give it four out of five stars.
This adventure tasks the PCs with travelling to Axis, finding the legendary sorceress Hao Jin, and attaining her help in repairing the Hao Jin tapestry, a powerful artifact and demiplane used by the Pathfinder Society for a whopping seven seasons of play. This scenario continues the ongoing saga of the Hao Jin Tapestry, and any characters who have interacted with the Hao Jin Tapestry — particularly those who helped attain, defend, or protect it — will have ample reason to get involved in this scenario. It’s also a direct continuation of events from Pathfinder Society Scenario Special #10-00: Hao Jin Cataclysm, and Scenarios #10-11: The Hao Jin Hierophant and #10-13: Fragments of Antiquity. Although I won’t get into the reasons why (to avoid spoilers), characters who were involved in any of the following scenarios will find a familiar face/event or two seen/mentioned: #4-16: The Fabric of Reality, #5-09: The Traitor’s Lodge, #6-98: Serpent’s Rise,#7-09: The Blakros Connection, and #7-23: Abducted in Aether. I highly recommend you bring along such characters (although not necessarily more than those who have an interest in Hao Jin and her tapestry). Finally, any worshippers of Abadar, Brigh, Chaldira Zuzaristan, and Pharasma will have a chance to visit or glimpse their god’s domain throughout the course of this scenario, which can be an awesome and fulfilling character moment.
The Maker, an eccentric kolyarut from #10-15: Tapestry’s Trial. Illustrated by Leonardo Santanna. Art courtesy of Paizo Inc.
Planar adventures are tricky. Players need to feel like they’re someplace totally different — a whole other world — but not so much that it hinders play. NPCs need to be extra memorable, locations need to be extra unique, and through it all you need to try to distill a whole planar environment into a short amount of time and a few encounters. Players want to experience a plane — after all, it’s likely they’ll only go there once! This scenario does an awesome job of showcasing Axis. The place is at once understandable and completely alien, with cool environments, and a lot of fun NPCs. And by a lot, I mean a lot! There’s a whopping nine new NPCs to interact with. I really enjoyed the various social interactions, particularly the entire final sequence of events. Many of these social interactions and encounters have unexpected effects and consequences, some of which will even have effect past the end of this scenario (which is always a treat!). Of the various locations you can visit I particularly enjoyed The Floating Library, not only for its contents and librarian, but also for the view. PCs can literally see a few domains of the gods from this vantage point, which is a really nice moment. Although social encounters and big decisions are the major focus of this scenario, it’s not without its combats. Chaotic and unlucky groups could have as many as four combat encounters (or more if they continue to attract the ‘law enforcement’ of Axis), while other groups will have as few as one combat encounter. The battles that are included are enjoyable, and all have extra considerations and complications for player’s take into account, which is a really nice touch. Overall, I love this scenario. I think it’s going to be a satisfying, exciting experience, that has a lot of cool moments, and ramifications for further scenarios. I give it five out of five stars.
Thanks for joining us today. Tune in later this week for a look at this month’s new d20 releases!
Today we’re taking an in depth look at the first book in the Return of the Runelords Adventure Path! Return of the Runelords is a six volume Pathfinder Adventure Path that is intended to take your characters from levels 1 to 20! The issues in this Adventure Path are longer than usual, and the final issue is supposed to be the biggest adventure of the series. Each of the six Runelords (excluding the seventh: Karzoug) is featured on one of the covers, with gorgeous artwork drawn by Ekaterina Burmak.
The Adventure Path takes place in Varisia, and is a direct sequel to the Rise of the Runelords and the Shattered Star Adventure Paths. In addition, the events of the Curse of the Crimson Throne Adventure Path, the novel Pathfinder Tales: Lord of Runes, and Season Four of the Pathfinder Society: Year of the Risen Rune, are all presumed to have taken place. Although playing through these other adventure paths first will definitely make this campaign more enjoyable, it’s not necessary. You can hop right into Return of the Runelords and still have a blast.
So, what is Return of the Runelords? For starters, you can check out a previous blog post I wrote on the topic: Return of the Runelords. Then head down to the video immediately below this paragraph and give the AWESOME Return of the Runelords trailer a watch. Trust me! It’s worth it!
Got it?
Good! Let’s dive right in!
The first book of the Return of the Runelords Adventure Path is #133: Secrets of Roderic’s Cove. Written by Adam Daigle, this adventure is intended to take you from level one right through to level five. In addition to the adventure itself the book contains an NPC Gallery which features detailed information and statistics on three major characters in the adventure, a delightful primer on Roderic’s Cove which will be invaluable to GMs, a short chapter about the Runelords (their history, how they escaped Earthfall, and what’s happened to them since), a bestiary containing four new creatures, and a campaign outline that lets GMs know what’s coming further down the road.
The layout and appearance of this book is nice. It looks good, is easy to read (which isn’t always the case with Adventure Paths), and features gorgeous artwork of the Runelord of Wrath Alaznist on the cover by Ekaterina Burmak. Behind Alaznist is an image of Jirelle (the iconic swashbuckler) and Erasmus (the iconic medium) getting ambushed by some reefclaws! Awesome!
Before we continue with a more in depth look at the book, let me point out: there will be SPOILERS.
You have been warned!
Carrying on the wrathful theme of the front cover, the inside covers feature images and information on a few key topics related to the Runelord Alaznist. The inside front cover shows two weapons: Alaznist’s Hateful Ranseur (her weapon of rule) and Garvok the Sword of Wrath. Meanwhile, the inside back cover showcases Hollow Mountain, once the capital of Alaznist’s Empire and the place within which she retreated when Earthfell drew near. In addition it contains information on Yamasoth, a qlippoth lord and ally of Alaznist’s — although whether he was her minion, or she was his unwitting pawn is debatable. After the covers we hop right into the adventure background, followed by the adventure itself.
Kolton, a citizen of Roderic’s Cove. Illustrated by Nikolai Ostertag
Secrets of Roderic’s Cove is split into five parts: Bubbling Tensions, Roderic’s Wreck, Into the Churlwood, Humbling Pride, and Calming Wrath. Unlike many premade adventures, it doesn’t really feature a ‘patron’ type character. There’s no employer or mentor around to tell the PCs what to do or where to go next. A lot of different NPCs will give you suggestions if you ask. And there’s one character who asks the PCs to help the town. Well, two if you count the dead. Instead, the entire book is driven by the PCs. This means that its imperative your players make characters who want to drive the story forward. Characters who care about the town of Roderic’s Cove — where our story begins — but will be willing to leave for a time when events lead them elsewhere. Characters who would meddle in gang politics, protect their neighbours, and put a spirit to rest. Characters who care. That doesn’t mean the characters have to be a bunch of do-gooders. It just means that players need to think of a reason that their characters would do these things voluntarily, and without the promise of monetary reward.
Welcome to the town of Roderic’s Cove! Cartography by Matthias Rotenaicher.
Our story begins in the tiny town of Roderic’s Cove, which is located along the coast very near to Riddleport. It’s a prosperous town with neither homeless or poor. However, the town is periodically home to unusual occurrences and oddities. The ghost of the town’s founder, Sir Roderic, lurks in the town, emerging from the decrepit remains of his haunted home only when the town is in great danger. Roderic’s Cove is home to two different gangs: the Horned Fangs and the Roadkeepers, both of which are little more than thugs and bullies. It’s also home to a strange but harmless scholarly society known as the Order of Resplendence. Recently, the gangs have been at each others throats, strange deformed creatures have been seen in town, Sir Roderic’s ghost has resurfaced, and there’s even been a murder!
It’s best if the PCs all know each other at the start of this adventure but, even if they don’t, all they truly need is to be in ‘Circle Market’ shopping (or passing through) on Market Day. Here they find two gangs about to come to blows. The PCs have just enough time to interfere before another joins them — the ghost of Sir Roderic himself! As the gangs and citizens run for it Sir Roderic wails about the safety of his town! Then he vanishes as quickly as he appeared. The town guard is on the scene shortly afterwards to thank you for your help before bidding you farewell.
After that the PCs are on their own. They can explore Roderic’s Cove, chat up the locals, learn about Sir Roderic, the local murders, and the gang violence. Eventually they’ll either approach or be approached by a forlorn elf and local grave digger by the name of Audrahni. She’s very concerned over the spirit of Sir Roderic, and is hopeful that the PCs can be the ones to put his spirit to rest again by bringing peace back to the town. They had the courage to stop the gangs from fighting this morning, surely they’re brave enough to do it again?
It’s assumed that the PCs take up this task with aplomb, but even if they don’t it’s a simple matter to get them back on track. After another run-in or two with the various gangs they should want to take them on — even if its not for the good of the town.
However they get involved the PCs goal for this adventure is to bring peace to Roderic’s Cove and put Sir Roderic’s spirit to rest. How they go about this is relatively free-form. The most likely place to start is with the recent murder that happened in the Circle, and the two gangs that are reputed to be involved. They’ll get to speak with witnesses, rumourmonger, search for clues, investigate the victims and their death, and question suspects. They’ll need to keep in mind that they’re citizens of Roderic’s Cove, not law enforcement, so simply busting into a suspected gang hideout and bashing in heads isn’t going to fly. They need evidence. As time passes they’ll come across strange creatures lurking in the town at night, mysterious hauntings, and even learn of some other crimes that have taken place.
This first section of the adventure is very loosely scripted. It’s got information on some witnesses and some scripted events — some of which relate to the murders, and some of which lead to further mysteries. It’s really well written, but it’s definitely a slow start to a campaign. It’s not one of those openings that will grab your characters right off the bat and send them off on some immediate, daring adventure. Don’t get me wrong, it’s enjoyable! But it’s not the mind-blowing, gripping, epic, opening I expected for this campaign. It’s subtle. It requires players who are good role-players, and a really solid GM to make this part of the adventure shine. Anyone can play it. But, it takes a solid group to make it something special. New GMs and players have the potential to flounder.
At some point during their investigation of the murders the PCs are bound to decide to investigate the dilapidated haunted house of Sir Roderic himself. The haunted house is interesting and engaging, but it’s also a grind! Only two halls don’t feature either a battle or a haunt, which is a lot for a house. This will be a tough place to explore, particularly if the PCs want to check the house out quite early in the adventure. However, there’s no immediate time constraints, so they’re welcome to leave and return at a later time, or explore the house in more than one trip.
Sir Roderic. Illustrated by Valeria Lutfullina.
Overall, I really like the haunted house. The haunts are a wonderful touch, as are some of the encounters. But, I think that some of the vermin encounters would have been better served as flavourful non-violent encounters that contain clues, and serve to set a more ominous mood. Of course, considering it will be the first chance the PCs have to actually engage in a fight, I’m sure plenty of groups will be happy for the opportunity to flex their combat muscles. Haha.
Either way, the house can give the PCs some important clues as to what’s happening in town, and allow the group a chance to speak with Sir Roderic’s ghost. Totally worth it!
In time, the PCs investigation will lead them outside of the town and into the Churlwood Forest, which is the focus of Part Three of this adventure. There’s multiple reasons they’ll want to come here. Perhaps they’ll come out one mission at a time and make a total of three or more forays out into the woods, or perhaps they’ll come out to accomplish all three at once. It all depends on how your group has proceeded with their investigation. Whatever they’re after, there are three major tasks that can be accomplished in the Churlwood. In addition, there’s a few scripted encounters that can lead the PCs onto these tasks and progress the story. For starters, they could be here to pay a visit to the Roadkeepers gang of bandits. They might also be here to find a pair of local dwarves who were kidnapped by goblins. Finally, they might be here looking for a mysterious location that Sir Roderic mentioned. As these locations are all interconnected, it’s likely that one task will lead into another. Overall I rather enjoyed this part of the adventure. It’s free-form enough to allow players to decide their own priorities and courses of action, but the actual locations are very detailed, well-scripted, and interconnected. It looks like a lot of fun. And as an added bonus? PCs will get their first taste of ancient Thassilonian ruins, and pick up some awesome treasure. In fact, they’ll pick up their first minor artifact in this place!
Eventually the characters will return to Roderic’s Cove having done some good, solved some problems, and discovered further clues that will lead them to an odd location: Peacock Manor. This is a series of houses that were connected into a large, confusing manor, and is occupied by the scholarly group known as the Order of Resplendence. On the surface they’re a bunch of obsessive scholars who study ancient Thassilon. Most folks in town think they’re a harmless cult. But, looks can be deceiving. By now your players will have more than enough reason to suspect the leader of this group as being the true culprit behind the recent murders in the Circle. How? Why? Well, I don’t want to give away everything, but I will say that it’s leader has come into possession of one of the Seven Swords of Sin — a powerful artifact she’s unable to properly wield. But, investigating Peacock Manor is not a simple task! For starters, they’re a secretive group, and are highly unlikely to allow you in. Second? Not everyone there is a criminal. Many are simple scholars. Bringing unnecessary violence against such people could put you on the wrong side of the law. And finally? Gossip! Folks who just force their way into the manor, or spend a long time fighting there are sure to attract the attention of the local citizens of Roderic’s Cove. And when supposed heroes attack a bunch of defenceless, harmless scholars and eccentrics, chances are folks won’t consider them heroes anymore. All of these factors combine to make paying a visit to Peacock Manor more difficult than it seems. I really enjoyed it! This section’s got some awesome character art! Also? Players can pick up a second super cool artifact in the halls of Peacock Manor: Baraket, the Sword of Pride!
But, that’s not the end of this adventure! There’s still a second gang to deal with! The Horned Fangs who, quite mysteriously, bear the Thassilonian sigil of Wrath as their emblem! Characters will have to find the lair of the Horned Fangs and give them what for! But, the Horned Fangs are more than what they seem! They lair in the ancient Thassilonian ruins beneath town and, although once a simple group of thugs, they’ve recently come under the control of a foul sin spawn named Mozamer who travelled there via a magical one-way portal from Hollow Mountain. It’s Mozamer himself who’s behind the strange creatures that have been terrorizing the town, and behind the Horned Fangs recent violent behaviour! The PCs will get to explore the ruins, bring down a gang, discover their surprising leader, and battle otherworldly allies. But, not before the sinspawn invites you to join his army and serve the cause of his mistress, the Runelord of Wrath. Who’s already AWAKE.
Trouble in Roderic’s Cove. Illustrated by Ekaterina Burmak.
Wanna join?
Haha.
Mozamer and the ample surrounding evidence show that the sinspawn came from Hollow Mountain, which was once the heart of Alaznist’s Empire, and is where she waited out Earthfall. Although bringing down the Horned Fangs and Mozamer is enough to put Sir Roderic to rest and save Roderic’s Cove — sort of — the Runelord of Wrath is an enemy that will have to be dealt with. Particularly since there’s that one-way portal under the town that Alaznist could send an army through at any moment…
THAT brings us to the end of the adventure. And what an adventure! It’s got urban adventure, a murder mystery, crime fighting, horror, wilderness exploration, ancient ruins, dangerous relics, awesome treasure, and you get to come out of the ordeal already the hero of your town. There’s nice, obvious, compelling reasons to continue on to the next adventure, and — unlike this series’ predecessors — the villain is already revealed and obvious from the start. From here on out you’ve got to take down the Runelord Alaznist before she can conquer Varisia and rebuild Thassilon!
Although I hoped book one of Return of the Runelords would completely blow me away and I’d give it five stars, in the end the shaky opening means I’m only giving it four out of five stars. I expected epic perfection! And, although this was a solid, super fun adventure that I can’t wait to play, perfect it was not.
But, the end of the adventure isn’t the end of the book! There’s more to look at!
After the adventure are three two-page spreads focusing on three major characters in this adventure. Two are enemies, and one is an ally. Audrahni the forlorn elf who is going to have a continuing role in book two; Corstela Rostrata, leader of the Order of Resplendence; and Mozamer, sinspawn leader of the Horned Fangs and general pain in the ass. The artwork in this section is awesome (as expected), the stat blocks are solid, and the background is useful for roleplaying these characters.
Following this is an incredibly important part of the book: a gazetteer on Roderic’s Cove. GMs will find this chapter absolutely invaluable. You need it to inject detail and interest into the entire first section of the book. In addition, you’ll reference it in between all the other sections of the book, whenever the PCs wander the town of Roderic’s Cove. The gazetteer itself is interesting. Roderic’s Cove is a neat, engaging, town with plenty of secrets and colourful characters to visit. It’s a fun place to adventure in.
Up next is one of the most fun sections for GMs to peruse — or I thought so anyway! An entire chapter on the Runelords, what they’ve been up to, how they survived Earthfall, and what Alaznist has been doing since she awakened. Which, but the way, is A LOT. It involves powerful magic, assassination, and even TIME TRAVEL! COOL! (And confusing!)
This brings us to the Bestiary, which contains three new creatures and one new creature template. My favourite of the creatures is the Cyphergull, a CR 2 magical beast that’s essentially an intelligent seagull with an innate understanding of magic and glowing Thassilonian runes upon its wings. They can devour scrolls and thereafter cast those spells. What an awesome little beast to lurk around the Lost Coast — particularly near Riddleport! Other creatures include the Nochlean, a CR 3 fey that delights in stealing children and causing terror; and the Warpglass Ooze, a CR 2 ooze that can enthral passersby and tempt them into it’s acidic body. Beware the reflection in the pool! Haha. The creature template will be incredibly useful not only in this adventure, but also in any of the others that involve the Runelords or Thassilonian ruins: a Runewarped Creature. This template can be applied to any animal, humanoid, or monstrous humanoid, and is essentially a precursor to sinspawn. They’re twisted abominations that are driven to consume magic.
Finally, this book contains a Campaign Outline, which provides GMs with information on what’s happened before this campaign, and what each of the upcoming volumes entails. Before we get into specifics, let me just say: Return of the Runelords is going to be AWESOME!
Return of the Runelords: Book Two: It Came From Hollow Mountain is written by Mike Shel and intended for levels 5-7. In it, the PCs travel to Magnimar to tell the Sihedron council about Alaznist’s rise in Hollow Mountain only to realize that they already knew! In fact, they sent a powerful group of heroes there to investigate in secret, and they haven’t returned. Your PCs are charged with travelling to Hollow Mountain to figure out what’s going on.
Return of the Runelords: Book Three: Runeplague is written by Richard Pett and intended for levels 8-11. By now the PCs know for certain that Alaznist is awakening, not only that, many of the others are as well! They need to travel to four different cities in Varisia — wonderfully familiar cities to many of us — to stop a few different groups that are related to the Runelords and are causing trouble. These groups include the Cult of the Peacock Spirit (who have ties to Xanderghul, Runelord of Pride); cultists of the qlippoth lord Yamasoth (who have ties to Alaznist, Runelord of Wrath); and the Whispering Way (who seek to rebuild Zutha, the Runelord of Sloth’s phylactery). They’ll get a chance to adventure in Korvosa, Magnimar, Riddleport, and, my personal favourite, Kaer Maga! In addition, they’ll have a chance to speak with Sorshen, Runelord of Lust in this adventure. Yes, you read that right. Speak with. Sorshen is a potential ally and source of information for the PCs!
Return of the Runelords: Book Four: Temple of the Peacock Spirit is written by Jason Keeley and is intended for levels 12-14. With intel obtained from Sorshen, the PCs discover that the most powerful Runelord, the Runelord of Pride Xanderghul, is weakened due to Alaznist’s actions. This is their chance to bring the battle to him! Cause what’s better than kicking a big bad when they’re down?! Taking down a big bad who also turns out to be a GOD! That’s right! In it we discover that Xanderghul is the Peacock Spirit himself! An ancient Thassilonian god of secrets! They’ll have to head to his hidden temple and defeat this tyrant before he regains his full powers!
Return of the Runelords: Book Five: The City Outside of Time is perhaps the book I’m most excited for. It’s written by Amanda Hamon Kunz and is intended for levels 15-17. Now that they’ve taken down Xanderghul (hopefully), your PCs will be fully aware that Alaznist is the mastermind behind pretty much everything (although it’s likely they’ll be well aware of this before hand… Haha). Alaznist is building a realm for herself in Varisia, dubbed ‘New Thassilon’, and has used powerful magic, including messing up the past with time travel, to set her plans into motion. To defeat her they’ll need to get their hands on a relic from the Shattered Star Adventure Path known as the Sihedron Star. This artifact is currently trapped in Crystilan, which is essentially a section of the Runelord of Envy Belimarius’ dominion that was locked in a time-loop since the fall of Thassilon. They’ll need to slip into the city via the Plane of Shadows and sieze the artifact. Along the way they’ll get to explore a little part of Thassilon and see what it was like in its heyday. Unfortunately, Alaznist has messed everything up with her time meddling, so the people within are no longer stuck in a time loop. Instead they’re just… stuck. With Runelord Belimarius’ hold over her people slipping the PCs will have a chance to make an ally or an enemy out of Belimarius! Plus, they get to rescue the Sihedron Heroes (your previous campaign’s heroes) from the city! This is going to be amazing! I can feel it!
Return of the Runelords: Book Six: Rise of New Thassilon is the finale of this grand campaign! It’s written by Greg A. Vaughan and is intended for levels 18-20. The PCs have a daring plan: use the Cyphergate in Riddleport to travel back in time. Once there, they can repair all the damage that Alaznist has done to the past. There’s just one problem: they don’t know how to use the Cyphergate. The person who does? Karzoug, Runelord of Greed! …Except he’s dead. The Sihedron Heroes killed him in Rise of the Runelords. Fortunately, that doesn’t mean they can’t speak to him. They’ll simply need to speak with his ghost! Yes! you get to try to convince the dead Runelord of Greed’s spirit to help you screw over Alaznist! Hahaha! I love it! And for those players who have played through Rise of the Runelords this will be a huge surprise! Once they’ve convinced Karzoug to lend his aid they’ll need to use the Cyphergate an travel to a city in the Dimension of Time, which will allow them to send copies of themselves back to the past to repair the damage done to the timeline. What becomes of these copies and how much do your players actually get to experience of the past? I don’t know, but I sincerely hope they get to play in the past for at least a little while. It’s just… awesome! Once they’ve repaired the past they can return to the present and take on Alaznist herself in Hollow Mountain!
And that’s it! The end.
I’m not sure I can express how excited I am for this campaign. Just know it’s a LOT.
Thanks for joining us today! We’ll see you later this week when we take a look at the newly releasing Pathfinder and Starfinder Society Scenarios!
See ya’!
Jessica
Want more Return of the Runelords? Check out these awesome images from the Adventure Path!
Krune Runelord of Sloth
Belimarius Runelord of Envy
Zutha Runelord of Gluttony
Sorshen Runelord of Lust
Clegg Zincher from the Second Darkness Adventure Path appears in Return of the Runelords: Book Three: Runeplague
Korvosa is originally featured in the Curse of the Crimson Throne Adventure Path and is revisited in Return of the Runelords: Book Three: Runeplague
Today we’re going to take a look at two of the most recent Pathfinder Society Scenarios that are currently available for purchase, and let you know we thought. Although you’ll find references to events in each that I liked or disliked, and comments about specific characters, these scenarios are not explored in detail. It’s not my intention to spoil the events in these scenarios, or give summaries and full reviews, but to share my opinions and provide recommendations. That said, if you want to avoid even minor spoilers then I recommend clicking on a different article. Whether you intend to use them in home games of the Pathfinder Roleplaying Game, sanctioned scenarios for use with the Pathfinder Society Organized Play, or just want to read a nifty new adventure, we’ve got you covered! So let’s get cracking!
Katapesh is a strange place, and the city itself if home to not one, but four Pathfinder Lodges. The most senior Venture-Captain is Roderus who runs a lodge out of his inn and handles all missions that take place outside of the city. The most secure and respected Venture-Captain is Aurora Steelbloom, who runs the grandest lodge in the city at the ruins known as the Twilight Gate. Jurisdiction for the rest of the city is split between Venture-Captain Wulessa Yuul, and Venture-Captain Phlegos Dulm. Unfortunately, these two bicker and fight constantly. So, when the aged Venture-Captain Roderus decides its finally time for him to retire, he’s more than a little uneasy! How can he leave the fate of Pathfinders in Katapesh in the hands of a pair of agents who can’t even follow one of the three main Pathfinder creeds: COOPERATE? This adventure tasks the PCs with working at Roderus’ retirement party. They’ll have to serve drinks, entertain guests, clean up, keep order, and perform other menial tasks. Using their mundane duties as a cover they’ll need to spy on the Venture-Captains in question (Dulm and Yuul), ferret out the truth from rumours, and determine if these two Pathfinders can work together, or are trying to sabotage one another. If the PCs uncover any wrongdoing they’ll need to report to Roderus and delve deeper into the investigation, until the facts come to light and Roderus has enough peace of mind to retire. Players and GMs looking for more information on the featured Venture-Captains can check out Seekers of Secrets or (to a lesser extent) Dark Markets: A Guide To Katapesh.
This scenario had a lot going for it. It has a lot of fun, engaging social encounters that feature a ton of colourful characters. Zig and Yigrig Moneymaker were particular favourites of mine (as I suspect they will be for many players). Zig’s scripted examples of assistance he can lend during the opening retirement party are adorable. There’s a great dynamic evening battle featuring both allies and enemies which promises to be entertaining. Finally, the inclusion of Yigrig Moneymaker’s family is a great segue that can lead to goblins becoming a core race in Pathfinder Second Edition next year. Overall, I really enjoyed this scenario. I give it four out of five stars.
In the previous adventure, Magnimar found its beloved monuments corrupted by some foul source. The PCs worked for Venture-Captain Shiela Heidmarch and the Varisian Council, made an enemy of the occult investigator Theodorus Ichonvarde, saved a servant of the goddess Ashava, discovered the identity of the being behind the corruption (whom we will call only by their name, Tulvhatha, to avoid too many spoilers), and the place they can be found (The Glade of Silver Sparks) which was once a holy site to Ashava. In addition, the PCs were likely granted a blessing, which can be granted to all characters participating in this adventure if they will allow him to do so. This adventure tasks the PCs with travelling through the Mushfens, confronting Tulvhatha, and doing what they can to cleanse the area of evil. Characters who have already played the first in this series of adventures will of course have more reason to participate in this one. But, characters who worship Ashava, have an interest in moonlight, dancing, or putting spirits to rest, or have connections to lycanthropy will all find something special to interest them in this scenario. On a similar note, if you have any characters who have a lot of fears, or who you would enjoying roleplaying their response to their fears at a table, I highly recommend you bring them! This is a spooky adventure, and embracing that atmosphere can be a lot of fun. One final note, if you happen to have a horrible fear of werewolves (like my daughter) or spirits this is NOT the scenario for you!
This scenario had an wonderful haunting tone to it. The environment was appropriately ominous, of course, but many of the encounters themselves often played into the horror theme. Not a gory sort of horror. More of a moody, hopeless, suspenseful sort of horror. I ADORED it. The scenario starts with some minor (but fun) roleplaying encounters. The blessing which your characters can accept is awesome! I adored the first major encounter of this scenario. In addition to bringing back another character from the first scenario in this series, it could cause some healthy discussion as to the fate of your opponents (depending upon the alignments we see on the player’s side of the table). There’s a delightful chase in this scenario, which has very clear repercussions for failure. I absolutely loved it! Although, it should be noted, I’m a sucker for a good, purposeful chase. The haunts in this scenario were exceptionally well-done. Particularly the one that plays upon your character’s fears. Embracing that horror theme with my characters is something I always enjoy as a player, so I can’t wait to toss one of my more expressive characters into this mission! And the final battle with the main villain was both memorable, flavourful, an mechanically difficult. Just awesome. But my favourite part? This scenario features the coolest wolf encounter in existence! It’s going to be so much fun! Overall I loved this scenario. Seriously. Loved it. I give it five out of five stars!
I hope you enjoyed taking a peek at this months newest Pathfinder Society Scenarios with me. I know I enjoyed reading them!
Today we’re going to take a look at two of the most recent Pathfinder Society Scenarios that are currently available for purchase, and let you know we thought. Although you’ll find references to events in each that I liked or disliked, and comments about specific characters, these scenarios are not explored in detail. It’s not my intention to spoil the events in these scenarios, or give summaries and full reviews, but to share my opinions and provide recommendations. That said, if you want to avoid even minor spoilers then I recommend clicking on a different article. Whether you intend to use them in home games of the Pathfinder Roleplaying Game, sanctioned scenarios for use with the Pathfinder Society Organized Play, or just want to read a nifty new adventure, we’ve got you covered! So let’s get cracking!
Scenario #10-04: Reaver’s Roar is a Tier 7-11 Adventure written by Steven Hammond. It begins in Three Pines Ford in Lastwall, with a mission briefing hosted by Venture-Captain Shevar Besnik and Ollysta Zadrian, leader of the Silver Crusade. The scenario quickly moves on to the semi-abandoned outpost of Roslar’s Coffer, and the Sarenite temple known as the Bastion of Light found within. For more information on Lastwall you can check out the Inner Sea World Guide. For more information on Sarenrae you can check out Inner Sea Gods. This scenario features creatures from Pathfinder Roleplaying Game: Bestiary, and Pathfinder Adventure Path: Curse of the Crimson Throne Anniversary Edition (although all of the necessary stat blocks are included within the scenario). It makes use of a vast number of sourcebooks, including the Core Rulebook, Advanced Class Guide, Advanced Player’s Guide, Ultimate Combat, Ultimate Equipment, and even Mythic Adventures. All of the necessary rules from the Advanced Class Guide and the Mythic Adventures are included in this scenario. It features one custom map, and one custom chase. This mission is of particular importance to members of the Silver Crusade faction as well as any worshippers of Sarenrae.
Uirch of the Burning Sun from PFS #10-04: Reaver’s Roar. Illustrated by Dion Harris. Art courtesy of Paizo Inc.
This adventure tasks the PCs with travelling to Roslar’s Coffer and retrieving a helmet of religious significance from the Bastion of Light, an important temple to Sarenrae. The temple once contained many relics and rituals vital during the Shining Crusade. Unfortunately, the temple has since become the lair of an incredibly powerful red reaver. The PCs will have to enter the temple, defeat the red reaver, and obtain the helmet. But, this mission won’t be as simple as it seems! For starters, the red reaver has formed powerful bonds with the relics housed in the temple, which have greatly empowered it. PCs will need to find ways to weaken the red reaver, sever its connection to these relics, and outsmart the territorial creature. In addition, orcs from the Twisted Nail tribe are also after the red reaver for (no doubt) nefarious purposes. The cast of characters is rounded out by Gorm Greathammer, a famous Pathfinder and the third prince of the dwarven sky citadel Kraggodan, who acts as a contact and source of information for the PCs. The town of Roslar’s Coffer is appropriately serious and ominous. When the villagers learn of your purpose in town they offer to send a letter to your loved ones when you die a horrible death. How sweet! Haha. It’s a simple but effective way to showcase the ‘friendly’ villagers and let the players know that they might not survive the challenges ahead. I love the atmospheric buffer zone between the town and the territory of the red reaver. There’s a great chase scene in this scenario, and the red reaver is wonderfully challenging. The exploration of the Bastion of Light is a lot of fun, providing characters with danger, a few scares, chances to weaken the red reaver, chances to gain holy blessings, and even chances to make an ally or two. It offers GMs some nice flexibility in the placement of a few encounters, and does a really great job of setting an ominous, suspenseful mood. Perhaps one of the most impressive things? It will make your PCs scared for their lives. A rare thing at high levels of play! The red reaver is a fierce opponent that needs to be weakened in order for your characters to have a chance of defeating it. And even then? It should still be a tough fight! This, of course, makes it a difficult scenario to use with players who prefer to decimate everything, straight-forward encounters, and for most younger players. But the ending? SO worth it! Overall I really liked this scenario, although it’s atmosphere and difficulty are not for everyone. I give it four out of five stars.
Inspector Theodorus Ichonvarde from PFS #10-05: Mysteries Under Moonlight. Illustrated by Tadas Sidluahskas. Art courtesy of Paizo Inc.
Something strange is happening to Magnimar’s beloved monuments, and its up to your PCs to find out what’s going on, and put a stop to it! But, this mystery isn’t as simple as it seems. The honourable Lord-Mayor Grobaras has hired his own investigator to look into the crimes, one who seems to be more than a little biased towards blaming the city’s Varisian population. Your players will have to investigate monuments, question witnesses, confront dangerous enemies, speak with the dead, and dabble in the occult to succeed! The three monuments featured in this scenario are the Cenotaph, Founder’s Flame, and Mistress of Angels. There’s a wide array of NPCs in this delightful adventure including Venture-Captain Shiela Heidmarch and her husband Venture-Captain Canayven Heidmarch, Mystery Cultist Davorge, Inspector Theodorus Ichonvorde, plenty of witnesses (living and dead!), an outsider, and even the ghost of one of Magnimar’s Founders: Ordellia Whilwren! Perceptive PCs can uncover a lovely little tribute to any of your players characters who permanently died during any Season 4 Scenario, or during #7-03: The Bronze House Reprisal, #7-25: Orders from the Gate, #8-01: Portent’s Peril, #8-22: Wrath of the Fleshwarped Queen, or #9-09: Beyond the Halflight Path. It’s a nice little shout-out that’s lovely to see. There’s a lot of unique and interesting social encounters in this scenario, which are really the highlight of this adventure. That said, there’s still a large number of battles in this one, so it’s going to be tricky to fit it all in. I found the final battle properly climatic and exciting, with obvious consequences for failure. The other battles aren’t particularly exciting, though. The occult rituals and objects included in this adventure are fun, and don’t bog down the game with complicated rules. I really enjoyed it (although I admit to being a sucker for the occult! Haha). I really enjoyed this scenario. It’s a fun change of pace that has a lot to offer. My only complaint? If you don’t have a good GM for this one, some sections could become repetitive. Overall, I really enjoyed it! It’s a fun, refreshing adventure that’s right up my alley! I give it four out of five stars.
Thanks for joining us today! Tune in later this week when we take a look at the final Pathfinder Playtest Society Scenario that’s been released: #4: The Frozen Oath!
The Return of the Runelord’s Player’s Guide has recently been released by Paizo. Meant to go with the Return of the Runelord’s Adventure Path, which takes place in the nation of Varisia, this player’s guide is a free download on their website. The Return of the Runelords Adventure Path is already underway, with volume one, Secrets of Roderic’s Cove, released at the start of this month, and volume two, It Came from Hollow Mountain, released at the end of this month. The other four volumes have yet to be released (but are available for pre-order).
Now, I’m not sure about all of you, but I’ve been supremely excited for the Return of the Runelords Adventure Path. I have loved every adventure path set in Varisia, and played through or GMed quite a few of them. It’s a place of adventure, history, mystery, and — for me — fond memories. It’s right up there with my favourite nations of Golarion.
Like the Adventure Path Player’s Guides before it, this one is filled with all the information you need to create a character well-suited to the (Return of the Runelords) Adventure Path, and invested in its major plots and purpose. It contains advice and short compiled lists of which classes and archetypes are best suited to the campaign. It briefly describes the region that the Adventure Path will be taking place in (Varisia, in this instance), as well as the races found there. It gives advice on which religions are common — including information on some obscure faiths. It also contains suggestions for animal companions and familiars that are appropriate to the region. However, these lists (excluding the animals) are very brief. This is because the Return of the Runelords is very broad in scope. There is no one class that is better suited to it than others, and no classes that are unheard of. Characters of any race are more than welcome to play. This is a great time to pull out the wacky, weird, obscure, and eccentric character options you’ve been mulling over and give them a try.
There was plenty of interesting information in this little guide, including six new traits specific to the Adventure Path (called Campaign Traits), of which each character is expected to have one. I particularly enjoy ‘accidental clone,’ and ‘scion of legend.’ The player’s guide left me happily inspired. Although there’s lots of neat tidbits we could discuss here, I’m not going to go into details. It’s free! You might as well download it yourselves. What I will say is that all of your PCs must play people who have been in Roderic’s Cove for at least a month, and that you all are acquainted with one another. Not friends, or anything. That’s not required. But you know of each other and would be willing to work alongside one another for this adventure. Furthermore, your characters should be ambitious, and curious. They need to be willing to seek out answers and adventure for themselves. This adventure path does not rely on NPCs hiring you to complete a task or ordering you around. The drive to continue needs to come from your player’s characters. Finally, your characters need to be willing to protect not just the city of Roderic’s Cove, but the nation of Varisia as a whole. This is not a campaign that stays idle. It travels the width and breadth of the country.
In addition to your typical Player’s Guide information, this one also had a few extra goodies. For starters, Return of the Runelords is the direct sequel to the Rise of the Runelords Adventure Path and the Shattered Star Adventure Path (which begins with Pathfinder Adventure Path 61: Shards of Sin (Shattered Star 1 of 6)). It assumes that heroes — probably your PCs from those campaigns — defeated the Runelord of Greed, Karzoug, and reforged an ancient Thassilonian artifact known as the Sihedron. Of the many heroes who accomplished these feats, a few have decided to stay in Varisia and act as the nation’s defenders. Each player gets to select one of their heroes from either Rise of the Runelords or Shattered Star and make them one of these so called ‘Sihedron Heroes.’ These heroes will be in the background of the campaign, doing… stuff! Haha. (I have no idea what they’ll be doing, but you can bet its important!). As for the other PCs from those campaigns? That’s up to you. They will not play a major role in the adventure path. If you’ve never played either previous adventure path, that’s alright! Your fellow players can select their past PCs and you can make a concept (or stats) of your own hero. It’s a nice touch that ensures none of your players will be left out of the fun. Finally, if you’re from a group where none of your players completed Rise of the Runelords or Shattered Star, the GM will make the entire team of Sihedron Heroes themselves. Full details on the Sihedron Heroes role in Return of the Runelords (for GMs) will appear in other issues of the adventure path, beginning in Pathfinder Adventure Path 134: It Came from Hollow Mountain (Return of the Runelords 2 of 6). It should be noted that at the start of Return of the Runelords, the current location of the Sihedron Heroes is unknown.
The last little bit of extra fun involves the campaign’s starting event: you’re attending the weekly Circle Market in Roderic’s Cove. During the first session you have a chance to find a great deal in the market. You’ll get 10% off of a single item chosen from either basic gear, alchemical items, weapons, potions, scrolls, or even a magical object. Although you’re free to choose the object itself, what category of item it is is determined by a d20 roll. It’s think its a nice bit of fun. Particularly if its repeated each time you attend the Circle Market. It is a weekly event, after all!
But, this is a Player’s Guide! It’s not about treasure, or cities, or Varisia. Not at its core. At its beating heart the Player’s Guide is a free tool to help players like us make characters who will work well within the Adventure Path they’re going to commit to. It should inspire us to make characters, entice us with ideas, provide us with some cool traits, and let us go crazy. And this one did.
So after reading the guide, what would I make?
A good question!
There’s a huge number of character concepts you could run with for this campaign, and a ton of classes that would work. In fact it’s one of those nice campaign where pretty much anything goes. I wouldn’t suggest using an aquatic mount or animal companion, but other than that it’s pretty open. I gave all the classes a lot of thought and came up with way too many ideas. I would adore playing the children of some of the other PCs from my family’s Varisian campaigns. Children of the heroes of Curse of the Crimson Throne, Second Darkness, and Rise of the Runelords adventure paths would be a ton of fun. Or, perhaps a spiritualist whose spirit companion is an NPC or a PC who died during one of those campaigns! I’ve always wanted to utilize the harrower prestige class, especially coupled with the deadly dealer feat, but have never had the chance. Someone descended from ancient Thassilonians would be a blast. There’s some fun character options from Pathfinder Player Companion: Blood of the Ancients which would make that enjoyable. I have a soft spot for the Shoanti peoples, and playing a member of the Spire Clan would be particularly fun (they practically worship the ancient monuments dotting Varisia). I would have a blast playing a ex-gray maiden whose trying to start fresh and has the masked maiden vigilante archetype. And that’s not even counting all the other things I’d like to do! Chronomancer wizard, twinned summoner, relic raider rogue, and an arcanist are all on my list of things I’d love to play.
How about you? What character concepts and builds would YOU like to play for Return of the Runelords? I’d love to hear them!
It’s been teased for a decade and finally — FINALLY — the Runelords are making their move! Yes! Today we’re taking a look at the brand new Return of the Runelords Adventure Path. I don’t know about you, but I’m excited.
Back before Pathfinder had its own rules set I was a huge fan of Dungeon Magazine. So, when it was announced that the run of the magazine was coming to an end, transitioning to Paizo’s new Pathfinder adventures was a no brainer. I didn’t have much extra cash at the time, so transitioning to 4th edition Dungeons and Dragons wasn’t an option. Pathfinder didn’t involve new rulebooks (…yet. Haha), and I could keep reading some awesome adventures.
I enjoyed the free module Hollow’s Last Hope, and it’s sequel Crown of the Kobold King. I loved the desperate, hopeless air of Falcon’s Hollow, and enjoyed the flavourful non-combat encounters in the adventures. But Rise of the Runelords?! I bought part one and was completely hooked. It was a fun, new twist on a classic style of adventure. As its sequels came out I was continually impressed. I loved that it took a bit of a tour of different adventure themes, from the horror of the The Skinsaw Murders, the depravity of The Hook Mountain Massacre, and even the vast, sandboxy exploration featured in the finale Spires of Xin-Shalast. It featured classic enemies, right alongside new ones, in a way that was fresh and exciting. I loved exploring the lost ruins of Thassilon, and discovering the history and culture of the ancient empire and its tyrannical rulers as you went.
We started playing Rise of the Runelords nearly right away. Unfortunately, we had a few false starts. Players came and went, and games ended each time. I swear we tried to play it three or four times before we finally got a solid group together. We ended up playing other campaigns before returning to Rise of the Runlords. We played an entire run of Curse of the Crimson Throne (which now has an awesome anniversary edition available: Curse of the Crimson Throne: Anniversary Edition) and to this day Curse of the Crimson Throne is my all-time favourite campaign. Heck, we even named my son after my husband’s PC. (For the record, it’s an awesome name. Haha). We also finished the entire Legacy of Fire Adventure Path in that time (which begins with Legacy Of Fire: Book One: Howl Of The Carrion King).
So when it came time to finally replay Rise of the Runelords — this time as Rise of the Runelords: Anniversary Edition! — we were ready for it. I was GMing, my husband, brother, and a friend of ours were playing, and I made an NPC to join them. We created characters who were the children of our characters from our Legacy of Fire campaign, and had an absolute blast. In time one of the characters split from the group and they rolled up a new one. They continued playing this second character online via email, and I created an entire new campaign for them, linked to the main events of Rise of the Runelords, but dealing with the other Runelords. The main Rise of the Runelords game (but not the email spin-off) paused for nearly a year when my brother had his second child, and when we finally got back to playing it was without him. We got all the way to the final book. And there we were, ready to make the trek to Xin-Shalast and confront Karzoug, the Runelord of Greed himself! And our extra player stopped showing up. In time my brother was ready to play with us again and we got ready to finally finish the last book — when my husband decided he wanted to play something new.
I swear we’re cursed!
In the time since my kids have been asking to play Rise of the Runelords. They saw it on the Adventure Card Game app and were mindblown at Aldern Foxglove’s character arc. Literally AMAZED. I promised them we’d start it in time, only to have my husband say he wanted to make someone to play alongside them. Uh… okay? Haha. I guess it’s waiting until after we finish Carrion Crown (we’re currently on Carrion Crown: Book Two: Trial of the Beast) and The Shackled City Adventure Path together then! Don’t get me wrong, I’m thrilled to play it as a family, but I found the request odd! He’d played so much of it that I was surprised he’d want to do so again. Since I’ve never really gotten to experience the campaign as a player I also joined a play-by-post game of it, which is a lot of fun.
Suffice to say, my experiences with Rise of the Runelords are both positive and enduring. I was thrilled to see the Runelord Sorshen mentioned in Curse of the Crimson ThroneAdventure Path, see the Runelord’s predecessor Xin featured in the Shattered Star Adventure Path (which begins with Shattered Star: Book One: Shards of Sin), and see Krune and the followers of Lisalla showcased in Pathfinder Society Season Four: Year of the Risen Rune (culminating in Scenario #4-26: The Waking Rune). Readers of the previous campaigns will know that the other Runelords have always been coming. They’re there, waiting to rise…
And now it’s time!
Return of the Runelords is a new six-part Adventure Path that revolves around the return of the rest of the Runelords and the rise of New Thassilon. The events of Rise of the Runelords and the Shattered Star have already happened. But, if you’ve never played either, never fear! You can still enjoy this campaign. It begins with some trouble brewing in the Varisian town of Roderic’s Cove (more on that later!). The issues in this Adventure Path are longer than usual, and the final issue is supposed to be the biggest adventure of the series. (Pardon me while I squeal in glee). This Adventure Path will take you all the way from levels 1 to 20, which allows you to take on the incredibly powerful Runelords without delving into mythic tiers. Each of the six Runelords (excluding the seventh: Karzoug) is featured on one of the covers, with gorgeous artwork drawn by Ekaterina Burmak (you’ll see them featured throughout this article).
Before we get too far into what we know about Return of the Runelords, we’re going to talk a bit about the Runelords and Thassilon.
What the heck is Thassilon, and what’s a Runelord?
Thassilon is an ancient empire founded over 11,000 years ago by First King Xin. Xin was Azlanti, but thought that place sucked. He was exiled and decided to found his own nation. Things seemed to be working fine, and his country spread far and wide. He appointed seven wizard governors to oversee the provinces of his empire. Each was an expert in a specific school of magic which was originally based on the seven virtues of rule (charity, generosity, humility, kindness, love, temperance, and zeal). In time, these virtues became twisted into the seven sins (envy, gluttony, greed, lust, pride, sloth, and wrath) and the Runelords betrayed Xin. In the aftermath Xin was destroyed, the Runelords seized control of Thassilon, Xin’s son was placed on the throne as a puppet emperor, and the tyrannical Runelords continued ruling their own provinces. But the Runelords were greedy. They bickerer, bargained, and plotted for more power and territory over each other. In addition, they were big jerks. They enslaved races, subjugated their people, and so on. They built massive monuments which survive throughout Varisia to this day. You ever hear of the Irespan in Magnimar? Thassilonian. The Old Light in Sandpoint? Thassilonian. The black pyramid underneath Castle Korvosa? Thassilonian. Skull’s Crossing? Lady’s Light? Yup! Thassilonian!
In time, Earthfall drew near. And the Runelords? They saw it coming. They prepared for the coming apocalypse and enacted magical countermeasures. Each waited out the end of their empire and the coming Age of Darkness in their own ways. But Earthfall devastated Golarion more than they had ever imagined, and most of their countermeasures and failsafes either failed or malfunctioned. The Runelords slumbered on throughout the ages.
Until Karzoug: Runelord of Greed. Now, Karzoug wasn’t the only Runelord of Greed. There were seven before him: Kaladurnae, Fethryr, Gimmel, Ligniya, Mazmiranna, Aethusa, and Haphrama. But, at the time of Earthfall, he was the big shot. He ruled all of the province of Shalast from its capital of Xin-Shalast, was a master of transmutation magic, and wielded a powerful burning glaive which was decorated with meteorites. Just over a decade ago Karzoug stirred. His minions spread throughout his realm of Xin-Shalast, and then out into Varisia, but Karzoug himself could not quite manifest into the Material Plane. His minions’ efforts to bring him back into Golarion are thwarted by heroes during the course of the Rise of the Runelords Adventure Path. I won’t go into detail on its events — that’s what playing is for! — but I will say that if your players have done their job, the Runelord Karzoug is no more.
But there, at the very back of Rise of the Runelords final volume, it reads:
“The runelords will return.”
Tease much? Haha.
So what’s Shattered Star? More Runelords?
Nope! During the Shattered Star Adventure Path you play as Pathfinders under the command of Venture-Captain Shield Heidmarch of Magnimar. She gives you one of seven pieces of a ancient Thassilonian artifact and tasks you with using it’s magical connection with the other six pieces to track down the artifacts components and put it back together. You explore ancient Thassilonian monuments from throughout Varisia, briefly visit a lot of fun places showcased in other Varisian Adventure Paths, and reforge an ancient relic, only to discover Thassilon’s capital of Xin, and come up against the First King himself. It’s awesome! But no, it does not feature any of the Runelords, which means that there are six Runelords left.
Pathfinder Society Season Four: Year of the Risen Rune pits the Pathfinder Society against the cult of Lissala, an ancient Thassilonian goddess. At the time of Earthfall, Lissalla’s highest ranking priest was also a Runelord: Krune, Runelord of Sloth. Krune ruled the province of Haruka, from his capital of Xin-Haruka, and wielded a longspear made from a dragons tooth that could move and attack on its own. His skin was said to be tattooed with countless magical spells and runes. There were six other Runelords of Greed before Krune: Xirie, Ilthyrius, Azeradni, Zalelet, Krenlith, and Ivarinna. It’s said Krune was the least violent of the Runelords, mostly cause he was lazy. During the course of the Year of the Risen Rune, the Lissalan cult tries to bring about the return of the Runelord Krune. And succeeds. This campaign arc includes Scenarios: #4-00: Race for the Runecarved Key, #4-02: In Wrath’s Shadow, #4-07: Severing Ties, #4-08: Cultist’s Kiss, #4-10: Feast of Sigils, #4-12: The Refuge of Time, #4-20: Words of the Ancients, and #4-26: The Waking Rune. In the finale they face off against Krune himself. And hopefully kill him. Haha.
So who were these other Runelords?
Good question! In addition to Karzoug, The Runelord of Greed, and Krune, The Runelord of Sloth, there were five other Runelords. Runelords that we will, hopefully, get to face off against (or thwart the minions of) throughout the course of Return of the Runelords.
The Runelord of Envy is Belimarius, an aged, overweight woman who adored gossip and politics. She was a paranoid schemer who wasn’t afraid to get her hands dirty. She’s generally considered to have been an efficient ruler, and among the weakest of the Runelords. She ruled the realm of Edasseril, was a master of abjuration magic, and wielded a gold and mithral halberd that could steal the memories of her enemies. (Awesome!). There were a whopping nine Runelords of Envy before her, including Naaft, Tannaris, Ivamura, Jurah, Chalsardra, Esedrea, Zarve, Desamelia, and Phirandi. It’s said that when Belimarius usurped her throne from Runelord Phirandi, she locked him in a clear coffin and put him on display in her palace (safe to assume it was a magical coffin). Belimarius had a lot of trouble preparing for Earthfall. In the end, her magical ritual backfired and she accidentally locked her entire city in a week-long time loop (the city is surrounded by an impenetrable forcefield and is known by local Varisians as Crystilan). Also? Apparently she had a magic mirror, like the one from Snow White. Cool! Belimarius has long been one of my favourite Runelords. I’ve always liked the idea of the scheming, jealous old woman who’s super powerful. Plus, her specialty is abjuration! It’s about time someone made that badass. (I know, I know. Not many people would say she’s their favourite Runelord. Haha.)
The Runelord of Gluttony was Zutha, a unique undead who could experience life as vividly as any living man. He ruled the realm of Gastash, was a master of necromancy magic, and wielded a scythe made of bone that could drain the life from his enemies, and a collection of powerful ioun stones. He was a ravenous gourmand who constantly sought new foods (including living humanoids), experiences, and luxuries. He nation was the breadbasket of Thassilon, and he was not above cutting off food supplies to any Runelords who dared to cross him. There were four Runelords of Gluttony before him including Kaliphesta, Atharend, Aethusa, and Goparlis. With the fall of Thassilon Zutha bound his life to a magical tome which was then split into three parts. These books were given to his servants who were supposed to rejoin them once it was safe. His spirit would then subsume them until they became him. These books and one of their owners (the taiga giant lich necromancer Thulos) are described in detail in the extra articles at the back of the Shattered Star Adventure Path: Book Six: The Dead Heart of Xin.
The Runelord of Lust was Sorshen, an incredibly beautiful woman rumoured to have used blood magic to become eternally youthful. She ruled over the realm of Eurythnia, was a master enchantress, and wielded a double-headed guisarme. Sorshen was the only Runelord of Lust to have ever existed. That’s right! The one and only. The famous Lady’s Light monument in the Mushfens (which is explored in Shattered Star: Book Two: Curse of the Lady’s Light) depicts Sorshen. Other monuments of her rule include the Sunken Queen (which is showcased in Curse Of The Crimson Throne: Book Six: Crown Of Fangs), while her tomb is located underneath Castle Korvosa in the Grand Mastaba. There she is said to be sleep eternally alongside her awakening vampiric servants.
The Runelord of Pride was Xanderghul, an absurdly arrogant, silver-tongued diplomat who tried to rise above the petty squabbling of the other Runelords. He ruled the realm of Cyrusian, was a master of illusions, and wielded a lucerne hammer made from skymetal. Like Sorshen, Xanderghul ruled for the entire reign of Thassilon. There was no Runelord of Pride either before or after him. He is widely regarded as the most powerful Runelord of them all. He publicly worshipped the Peacock Spirit, a mysterious deity that he encouraged his followers to venerate (which was actually himself). Xanderghul always struck me as the big bad of the remaining Runelords, and when I made my own custom campaign revolving around their return, it was him who I had envisioned as the final boss. Although I can only speculate on what role he’ll play in the Return of the Runelords Adventure Path, he is definitely not the ‘final boss.’
The Runelord of Wrath was Alaznist, an angry, impulsive woman who waged war against Karzoug throughout her reign. She ruled the realm of Bakrakhan, was a master evoker, and wielded a ranseur upon which she impaled the skull of the first Runelord of Wrath, Alderpash. Other than good old Alderpash, there were three other Runelords of Wrath: Angothane, Xiren, and Thybidos. Alaznist worshipped demons, particularly Yamasoth, and channeled the anger of her people in order to create monsters for her armies (including sinspawn, and reefclaws). It’s said she also modified her troops with fleshwarping, alchemy, and other methods. The ruins of Hollow Mountain are part of her domain and have her face carved on the side of the mountain. More details on Hollow Mountain can be found in Pathfinder Campaign Setting: Dungeons of Golarion, where they showcase an entire level of this massive complex, as well as Pathfinder Society Scenario #4-02: In Wrath’s Shadow. She’s also the creator of the Irespan in Magnimar, and the Old Light in Sandpoint, which is actually a magical siege machine called a hellfire flume which could shoot fireballs at invading armies. As far as I can recall, Alaznist escaped Earthfall by entering some kind of otherworldly (or maybe it was extraplanar?) refuge or hideout (don’t quote me on that, haha) within Hollow Mountain.
Enough with the history lesson! Tell me about Return of the Runelords!
Return of the Runelords is a six part adventure path that tasks your players with preventing the return of not one, but all the remaining Runelords of Thassilon. These volumes are extra long, with the final issue promising to be the largest adventure path volume yet! It’s intended to bring your player’s characters all the way from levels 1 to 20! There’s going to be plenty of references to previous events, places, treasures and characters who first appeared in Rise of the Runelords and Shattered Star, and of course, you’ll get to hear what happened to any heroes from those adventures.
Return of the Runelords begins with Book One: Secrets of Roderick’s Cove, written by Adam Daigle, and showcasing the Runelord of Wrath Alaznist on its cover. It takes place in the port town of Roderic’s Cove, where some strange things are happening! What sort of things? Well, I won’t go into it too much, but it involves multiple factions violently vying for control of the little town (and utilizing Thassilonian magics and relics to do so!), and a mysterious ghost. As your PCs become embroiled in trying to bring peace to Roderic’s Cove, they’ll also learn that the Runelords of Thassilon are reawakening! In addition to the adventure itself, this issue features an awesome gazetteer on Roderic’s Cove, some new monsters (including the nochlean, and the warpglass ooze), and an article on the history of Thassilon and how each Runelords survived Earthfall. It’s going to be awesome! This adventure should bring your characters from level 1 to 5.
Now that your PCs know the point of the campaign, it’s time for them to do something about it! Return of the Runelords: Book Two: It Came from Hollow Mountain is written by Mike Shel, features the Runelord of Sloth Kruth on the cover, and is intended to bring your characters from level 5 to 8. Your PCs travel to the Varisian city of Magnimar to deliver a powerful relic, and tasks them with following up on rumours of the Runelords. They head to the infamous Hollow Mountain — a mountain on Rivenrake Island where the Runelord Alaznist once hid from Earthfall. This dungeon complex is massive, and filled with monsters and traps. There they’ll discover secrets that can help them in their coming fights. And as for Alaznist? She’s already awake! In addition to the adventure itself, this issue has an article and statistics on the empyreal lord Ashava, as well as an article on the always nasty sinspawn! Creature in this issue include the choking shade, and the shriezyx queen.
Return of the Runelords: Book 3: Runeplague is written by Richard Pett, features the disgusting Runelord of Gluttony Zutha on the cover, and is intended to bring your characters from level 8 to 12. Armed with new information (and haunted by weird visions!) your players learn of a magical plague that begins in Magnimar and is set to spread across all of Varisia! They travel the country, face cultists of Yamasoth, and stop the Polymorph Plague from turning people into monsters! Its also hinted that they might be able to stop as many as two different Runelords from being awakened (My bets are on Zutha and Sorshen, but that’s conjecture). Interestingly, this book raises the question: are all of the Runelords equally dangerous and can some of them become your allies? Well, colour me intrigued! In addition to the adventure itself you’ll find an articles on the cult of Yamasoth, the Polymorph Plague, magical pools, and some new monsters (including misery siktempora and kasthezvi).
The next volume in this adventure path is Return of the Runelords: Book Four: Temple of the Peacock Spirit. It’s written by Jason Keeley, likely features artwork of Xanderghul on the cover, and is intended to bring your characters from level 12 to around level 15 (or 16, perhaps? I’m guessing). In this issue your players face off against the cult of the Peacock Spirit, travel to their temple in the mountains, and stop them from bringing Xanderghul back into the world. An important task, since he’s among the most powerful of the Runelords! Details on this issue are scant, and I am not yet sure what extra articles and monsters will be featured in its pages.
Return of the Runelords: Book Five: The City Outside of Time is written by Amanda Hamon Kunz, probably features the Runelord of Envy Belimarius on the cover, and is likely to bring your characters from around level 15/16 to level 18 or so (I’m guessing on the level range). In it, your players head to Crystilan, a city encased in a crystal sphere where the Runelord Belimarius and her citizens live out the same week of their life over and over again. You’re heading there to stop the Runelord Alaznist from utilizing time altering magic to do… something! But getting past Crystilan’s inpenetrable walls is not going to be easy! You’ll have to head to the shadow plane, perform a ritual, enter the eternally preserved Thassilonian city of Edasseril, and figure out a way to stop her. But, Alaznist’s presence has altered this place, and things are changing for the first time in ages. This adventure sounds like it has a lot of fun social interactions, intrigue, and politics, which is going to be AMAZING. I’m actually the most excited for this volume of the Adventure Path, out of all of them! I am not yet sure what extra articles and monsters will be featured in its pages.
Return of the Runelords: Book Six: Rise of New Thassilon is the final instalment of the Return of the Runelords Adventure Path. It promises to be the longest yet! Written by Greg A. Vaughan, and featuring artwork of… The Runelord of Lust Sorshen, I think (don’t quote me on that, haha!), and is intended to bring your characters all the way up to level 20. In this volume Alaznist has messed with time, affecting both the past and the future! Your characters will need to fix the damage she’s caused, and take down the Runelord of Wrath Alaznist! That’s right! It’s got time travel! Oh yeah, and you’ll have to figure out what becomes of ‘New Thassilon.’ Yes. You read that right! It’s going to be epic! I am not yet sure what extra articles and monsters will be featured in its pages.
This brings us to the end of the Return of the Runelords Adventure Path. The first issue is already out, multiple other issues are available for pre-order, and the final volumes are due out by year’s end! This campaign sounds like a ton of fun, and I can’t wait to get my hands on it.
Today on d20 Diaries the end is nigh! That’s right! We’re talking about Doomsday Dawn!
Pathfinder Playtest released a short time ago, and alongside it they launched a few adventures. There are three Pathfinder Society Playtest Scenarios out, which we’ll talk about later this week. But, the main playtest experience is an adventure called Doomsday Dawn. All four of these adventures are a free download on Paizo’s website.
More accurately, Pathfinder Playtest Adventure: Doomsday Dawn is a series of linked adventures which, played all in a row, make a comprehensive storyline. It’s like a mini-adventure path. With a few differences. For starters, this is created for Pathfinder Playtest, not the Pathfinder Roleplaying Game. It’s intended not only to introduce players to the new Pathfinder rules, but also to playtest certain aspects of those rules. As such, each mini-adventure is focused on a different aspect of gameplay. Once you’ve finished a section of the adventure you’re invited to head over to Paizo’s website and fill out a survey about your experience. While you’re there, I highly recommend picking up the maps for this adventure: Pathfinder Playtest Flip-Mat Multi-Pack. It contains two different flip-mats which feature the four major maps of this adventure. Other maps found throughout are more generic and can be drawn on a blank mat (Pathfinder: Flip Mat: Bigger Basic), or created with other flip-mats and map products you might have at home.
There’s a few other important things to note. Doomsday Dawn takes place over a long time. A decade to be exact! And it takes it characters all throughout the Inner Sea. Most importantly: this adventure is not always played with the same characters. That is to say, you’ll make a group of ‘Primary’ characters, who will play three parts of this adventure together: parts 1, 4 and 7. For the other four parts you will play different heroes who do tasks related to the primary character’s ongoing story. Each of these side groups will be created for a specific purpose and are only used once. These characters will play parts 2, 3, 5, and 6. Intrigued? Then read on!
Doomsday Dawn tells the story of the Aucturn Enigma, which was first introduced in the module Entombed With The Pharaohs, and was also featured in the module The Pact Stone Pyramid, both of which came out before Pathfinder had its own official rules set. No idea what that is? No worries. Neither do your characters. Basically this adventure involves Ancient Osirion, the Dominion of the Black, the Esoteric Order of the Palatine Eye, The Night Heralds, the planet Aucturn, and nothing short of the end of the world. Yup, the stakes are high! For more information on Osirion, you can check out Pathfinder Campaign Setting: Osirion, Legacy of Pharoahs.
In the year 4718 A.R. (later this year) the celestial bodies will align allowing the Dominion of the Black an opportunity to merge the planet Aucturn with that of Golarion. If this happens life as we know it will end. This doomsday is only possible with objects of power from Ancient Osirion which were put in place long ago in preparation for this time. A group of evil cultists called the Night Heralds seek to bring this end into being, while another group, the Esoteric Order of the Palatine Eye, seeks to stop them. That’s where your many different characters come in.
The first part of Doomsday Dawn is entitled The Lost Star and is intended to introduce new players and GMs to the rules of Pathfinder Playtest. During this adventure you’ll get the hang of encounter mode, and generally get a handle on the new rules. The Lost Star is played by your primary characters, who will begin at level one. They will follow all of the regular character creation rules as detailed in the Pathfinder Playtest Rulebook, except for their background, which will be chosen from the special backgrounds presented at the start of Doomsday Dawn. These special backgrounds include: Budding Osirionologist, Esoteric Scion, Family Friend, Goblin Renegade, Mind Quake Survivor, and Pathfinder Hopeful. Each of these backgrounds is much more specific than the generic backgrounds in the Playtest Rulebook, and is meant to not only tie your primary character to adventure’s story, but also provide them with lore skills that will be of use. There are no other special considerations you need to take into account when making your characters, although it is recommended your primary characters form a balanced party from a wide variety of ancestries, classes and backgrounds.
The Lost Star begins in Magnimar in the year 4707 AR, which is eleven years before Golarion’s present and a week or two before the start of Paizo’s first Pathfinder Adventure Path: Rise of the Runelords. It takes place in the Varisian city of Magnimar and involves a noblewoman by the name of Keleri Deverin. Keleri is a relative of Kendra Deverin, the mayor of Sandpoint. With the upcoming Swallowtail festival to to begin in Sandpoint soon, Keleri headed down into her family’s vaults to pick up a family heirloom known as the Star of Desna, in hopes of getting it blessed at the festival. Unfortunately, she found the vaults robbed by goblins. And one was left behind! She questioned the brute, only to discover that the little goblin’s tribe (the Mudchewers) had been conquered by a nasty hobgoblin by the name of Drakus the Taker. Poor little goblins! Sensing opportunity, Keleri sought outside help. She hired a group of adventurers — your Primary PCs — and sends them down into the sewers of Magnimar to both obtain the Star of Desna and, possibly, to forge an alliance with the remains of the Mudchewers. But unforeseen events are at work, and clues discovered under Magnimar will lead to greater adventures after this. The Lost Star makes use of one side of the flip-mats in the Pathfinder Playtest Flip-Mat Multi-Pack.
My family has already had a chance to play The Lost Star. We found it great fun, although it was not without difficulty. We had a tough time with Drakus the Taker, having multiple characters fall unconscious, and one die. We also had some trouble with our alchemist running out of resonance in the first battle. She had to overspend her resonance for the rest of the adventure, which was dicey at best. On an upcoming playtest where I get to make a character, I’m going to make an alchemist of my own, to see how it works in other hands. About the same, I expect. Lastly, we had trouble identifying treasure. It takes an hour to identify a magical item and, since my family’s character’s weren’t forced to retreat and rest, that means they never had a chance to identify or utilize a single piece of treasure throughout the adventure. Obviously, this is disappointing. That said, it’s not the fault of the adventure, so much as a part of the Pathfinder Playtest rules itself. In addition, there are some ways for characters to shorten this timeframe down. Alternatively, this can be solved by your players retreating to rest, recover resources and study objects. However, I didn’t really find this adventure suited that tactic very well. It’s not so much that you don’t have the chance. You do, if you want to, but that my players had no reason to. They were comfortable pressing on.
The Inner Sea World Guide contains information on all of the nations visited in Doomsday Dawn.
All in all, I rather enjoyed the Lost Star. It’s a fun introduction to the game, with some very intriguing elements. My family particularly enjoyed the polluted fountain, and the glimpse of the future. In an effort not to spoil the adventure too much, I won’t say much more on the topic. Just know that we enjoyed it. In fact, my kids had so much fun, they turned the title of the adventure (Doomsday Dawn) into a song that they’ve been singing around the house. My daughter also made a delightful little sign that reads ‘We Be (GOOD) Goblins!’ She gleefully made a goblin as her primary character.
The second part of Doomsday Dawn is called ‘In Pale Mountain’s Shadow.’ It takes place two years after the end of the Lost Star. During that time, Keleri Deverin and the Esoteric Order of the Palatine Eye have been hard at work looking into the clues uncovered by the Primary characters during their foray into the goblin caves. They’ve recently learned of an Ancient Osiriani object of power called a countdown clock, which is counting down to a time when the world will come to an end. Believing that having one of these countdown clocks (there’s a lot of them) in their possession will give the Primary Characters and the Esoteric Order of the Palatine Eye an advantage in foiling the apocalypse, they have been hard at work attempting to track one down. Thankfully, they’ve succeeded. Unfortunately, there are others after the same countdown clock. In order to get at it in time the Esoteric Order will have to hire outside help. This is your second characters.
This second group is a team of adventurers or mercenaries who live in and around the recently liberated town of Kelmarane. Yes, you heard right. This adventure takes place in Katapesh, in between Legacy Of Fire: Book One: Howl Of The Carrion King, and Legacy Of Fire: Book 2: House Of The Beast. Legacy of Fire is one of my all time favourite Adventure Paths (as anyone whose visited my d20 Stories page may have noticed… Haha), so I was more than a little excited for this connection. My children are equally excited to play through this part of Doomsday Dawn, as they’re currently in a play-by-post Legacy of Fire campaign and are working their way up to liberating Kelmarane as we speak. (But that’s a story for another day!)
‘In Pale Mountain’s Shadow’ sees your new adventuring group hired by a noblewoman representing the Esoteric Order of the Palatine Eye. She tasks your PCs with travelling through the surrounding wilds, to the slopes of Pale Mountain, where they will enter through a back-door to the tomb of Tular Seft. They must retrieve the countdown clock before another enemy group does (The Night Heralds), and may keep anything else they find in the tomb. Oh, and they’ll be well paid, of course. This adventure features a lot of exploration mode and travel through the wilds, so at least one of your group members should be capable of navigating and surviving in the wilderness (two is better!). In addition, it is built to test out how terrain, hazards, and other difficulties affect battle. They’re interested in if such battles are still fun to play, or they drag out too long. They’re also interesting in seeing if the terrain makes battle too difficult. So once you’re done playing through this section be sure to give your feedback. It will directly help them hammer out this aspect of Pathfinder’s new ruleset.
The characters you will be making will be brand new fourth level characters made following all of the character creation and level up rules found in the Pathfinder Playtest Rulebook. In addition, three uncommon languages are available for your characters to select with their languages known: Auran, Gnoll, and Ancient Osiriani. Knowledge of these languages can open up new opportunities throughout the adventure, it is not necessary. As for gear, each character gets one 3rd-level item, two 2nd-level items, one 1st-level item, and 300 sp to spend on additional items.
Overall, ‘In Pale Mountains Shadow’ looks like a lot of fun. It has an actual introduction, which Lost Star didn’t, and is a relief. The exploratory portion has interesting encounters which I think will play well at the table. These travel encounters all occur on maps you’ll be drawing yourself, or creating with your own map products at home. There are detailed instructions for drawing these maps, and feedback is desired if this was handled adequately in the surveys you’ll be filling out. After the exploration portion (which will likely take a single play session for my family), we get to the Tomb of Tular Seft himself. This portion of the adventure includes an image of a custom map which is not included in the Pathfinder Playtest Flip-Mat Multi-Pack so you’ll have to draw it yourself. It’s an awesome looking tomb, with a lot of nifty features. It’s my kids favourite map in the entire Doomsday Dawn Adventure, for sure, and has them quite intrigued. The tomb also has some interesting role-playing opportunities which your group may or may not be able to capitalize on. At some point, your players are bound to run into their rivals — the Night Herald cultists who have been sent to acquire the countdown clock before you can. When this occurs is entirely up to your group and will vary from table to table. There’s even a chance they might slip in and out without ever meeting the Night Heralds (though the chances of that are infinitely slim). The battle looks tough, and like a lot of fun. Particularly because it allows your players to interact with the Night Heralds for the first time. It think it’s going to be a lot of fun. That said, this battle involves multiple different, complex, NPC stat blocks, and GMs should prepare accordingly. In fact, I think that this chapter is actually my favourite adventure within Doomsday Dawn. Whether that will be the case after running it at the table next week remains to be seen. Haha.
Our story continues in a few years later in part three of Doomsday Dawn: ‘Affair at Sombrefell Hall.’ The Esoteric Order of the Palatine Eye has a been researching the strange cult known as the Night Heralds, and their plans to bring about the end of the world. Thanks to the efforts of mercenaries the Order has acquired a countdown clock, and have a timeline for the apparent coming end. They’ve discovered enemies, allies, and even discerned that this ‘doomsday’ involved the Dominion of the Black. They’ve gleaned all they can on their own, but now is the time to call on outside help. Your third group of characters will be a team hired by (or a part of) the Esoteric Order of the Palatine Eye who are sent to Ustalav to contact the foremost expert in the study of the Dominion of the Black, Dr. Verid Oscilar, and obtain his assistance in determining the plans of the Night Heralds. Upon arriving they discover that the good doctor is currently taking a break from teaching, and is relaxing at his personal manor in the countryside. Your characters will head to the manor, and try to obtain his help. Unfortunately for both your characters and Dr. Oscilar, the Night Heralds are more than aware of his expertise, and seek to make him one of their own. …Sort of. We’ll leave that a surprise for now. Haha. It doesn’t make use of any flip-mats, so be sure to have a blank map and your markers ready. You’ll be doing a lot of drawing!
This section of the adventure takes place in Ustalav during the events of the Pathfinder Adventure Path: Carrion Crown: Book One: Haunting of Harrowstone. That said, they take place in completely different parts of the country and aren’t going to have any effect on each other. It’s meant to be a survival horror adventure, which will feature a lot of combat against a lot of undead with minimal preparatory time in between. This is meant to test out the healing resources of a group that includes multiple healers against undead forces. GMs will need to track not only how long each battle takes, but also how much healing is used in each fight. Your group must include at least two clerics capable of channeling energy. The other members of the group must be characters capable of healing to some extent (which can include bard, druid, paladin, or a sorcerer that has divine spells and, to a lesser extent, the alchemist). These new characters will be level seven. They will follow all of the character creation and level up guidelines for characters found in the Pathfinder Playtest Rulebook. For gear, they will begin with one 6th-level item, two 5th-level items, one 4th-level item, two 3rd-level items, and 125 gp to spend as they see fit. One character in the group also starts with one +2 magic armor. Good luck deciding who gets that bit of treasure! Haha.
‘Affair at Sombrefell Hall’ is a dark, difficult adventure that takes place at an interesting location. It makes wonderful use of the locale, giving players a chance to explore well before the danger starts. This can give them some really interesting combat options once the battles do begin. The adventure itself begins with some interesting (and probably suspicious) social encounters, and some good old fashioned snooping around. I’m a fan of the survival horror genre in my d20 games, but, due to the nature of the playtest, this one is going to be particularly difficult. You’re going to take a lot of damage, use a lot of healing resources, and probably lose a party member or two. Hopefully, you all come out alive in the end. And, if not, at least some of you survive and secure the aid of Dr. Oscilar to enlighten your Primary Characters. Even if you don’t, you can continue Doomsday Dawn and move on to the next chapter. Perhaps the most important part of this section of the adventure is giving your players a glimpse of the evil that the Dominion of the Black is capable of. And man, oh man. They’re just so… evil! Haha.
Part four of the Doomsday Dawn, ‘Mirrored Moon,’ reunites your players with their Primary Characters. This are the same characters who played the Lost Star. They will be levelled up to 9th level, following all of the levelling rules from the Pathfinder Playtest Rulebook. They begin with all of the gear they acquired during the Lost Star, plus they get to purchase one 8th-level item, two 7th-level items, one 6th-level item, and two 5th-level items. They also get 250 gp to spend on extra gear. These characters are now considered to be either agents or members of the Esoteric Order of the Palatine Eye, and have been off doing tasks and missions together for the last few years. Currently, they’re in a section of the River Kingdoms known as Thicketfell, on the hunt for a mystical lake known as the Moonmere, where they hope to find ancient ruins that were once used by a villain (and possibly founder of the Night Heralds) named Ramlock. There, they will scour the ruins for information on what the coming apocalypse will bring, in order to stop it. Unfortunately, the Night Heralds are already there, and the trouble they’re up to could destroy a nation (at least). Finding the Moonmere will be the least of their troubles!
This adventure heavily uses exploration mode, and is meant to test out what kinds of challenges the characters can handle when they only get in one battle per day. The battles are difficult, so expect to go all out during each fight. That said, you’ll also very often have opportunities to scout out locations ahead of time, which should allow for some clever planning and preparations from players. This adventure makes use of one of the flip-mats from Pathfinder Playtest Flip-Mat Multi-Pack, as well as three other flip-mats: Pathfinder Flip-Mat Classics: Forest, Pathfinder Flip-Mat: Giant Lairs, and Pathfinder Flip-Mat: Hill Country. These maps aren’t necessary, and can easily be replaced by hand-drawings on a blank map. This adventure also makes use of a terrain hex map featuring the Thicketfell region, much like those used in the Kingmaker Adventure Path (which begins with Kingmaker: Part One: Stolen Land).
I’m not a huge fan of sandbox-style explorations like those found in Kingmaker. It’s just not my cup of tea. That’d not to say its not fun. It is. It’s just not my favourite genre for d20 games. I point this out for context. I’m heading into this one pretty sure that the actual exploration itself isn’t going to be my favourite part of this adventure (or Doomsday Dawn as a whole). Far from it. That said, I always try to put aside my biases, or at least point them out. I intend, as always, to head into playing this section of the adventure with an open mind. After giving it a thorough reading I can safely say that the Mirrored Moon has the most eclectic, enjoyable cast of NPCs found throughout the entirety of Doomsday Dawn, which is going to make it quite fun. Throughout the adventure there will be plenty of opportunities to explore, roleplay, forge alliances, and gain intelligence, which should make for an interesting adventure. The gnomish citizens of Korlabablin were a particular favourite of mine. All in all, I think this is going to be a fun, challenging adventure.
Part Five of Doomsday Dawn is entitled ‘Heroes of Undarin,’ and may turn out to be the most controversial part of the playtest adventures. Why? Well, in short, it keeps a secret from its players, which I honestly believe should be shared. More on this later, but for now, we’ll take a look at the adventure itself.
‘Heroes of Undarin’ takes place in the Worldwound, after the events of the Wrath of the Righteous Adventure Path (which begins with Wrath of the Righteous: Book 1: The Worldwound Incursion). It assumes that the Worldwound has been closed, the Fifth Crusade is winding down, but that demons still infest the region and are being slowly battled. It will probably take a decade or so to make the region safe for travellers again, so for now, it’s still a dangerous, post-apocalyptic type place, infested with demons and other evils. Your players will be making brand new level 12 characters who are all members of the Crusade. They’ve fought battles against demons many of times before and are well-prepared for this mission. They’re hardy, brave, self-sacrificing folks who won’t flee from a fight. They’re… hardened. To create them you’ll be following all of the standard character creation and levelling up rules found in the Pathfinder Playtest Rulebook. As for gear, there’s a specific list of magical items they’ll have access to. In addition, they’ll get 100 gp to spend on anything they want. Its highly suggested you create a balanced and diverse party. This adventure is intended to test the limits and capabilities of mid/high level characters.
So who the heck are these people, and what do a bunch of crusaders have to the with Doomsday Dawn? In short, your Primary Characters are in need of information housed in an ancient ruin in the region and your Crusaders have been tasked with escorting them to the site, and protecting them while they’re there. These Crusaders have no idea whats going on with the overall plot line, which will be a bit of a refreshing change of pace. Upon arrival, the Primary Characters descend into the ruins to discover the information they need isn’t mobile. It’s not a book or a tablet. It’s all over the walls. They’re going to have to copy it. Your Crusaders will have to defend the ruins from demonic intruders while the Primary Characters are out of sight doing whatever that entails. It’s a difficult and thankless job. Note that you will NOT be playing your Primary Characters during this adventure at all. Only the Crusaders.
Now, onto the potential controversy. Note that the next paragraph after this contains SPOILERS. If you don’t want to know, don’t read it. It should be noted that the adventure specifically asks that GMs not tell their players the following piece of information. I totally understand why this is, but I disagree with the necessity for secrecy. I can honestly say that if I ran this for my family, without telling them the secret, the session would end with everyone very angry and upset. My kids would literally be in tears. No joke. I’m a firm believer that games should be fun. Tears and anger? Not what we’re aiming for. Because of this, I have one further piece of information to share with our readers. If you don’t want to know, definitely skip the rest of this section on the ‘Heroes of Undarin’ and head on down to the nice big words I’ve added that say ‘Spoiler over.’
SPOILER:
As mentioned, this adventure is meant to test the limits of mid/high level characters. Most specifically, its designed to determine how much is too much. Your characters will fight wave after wave of demons. And in the end? It’s entirely expected they’ll die. All of them. Dead. It’s been stated that knowledge of this tidbit will cause players to create characters who are purposely made to ‘survive’ which could throw off the results of this playtest. Throwing off this calibration will do no one any good. That said, I personally believe that if a player knows what they’re getting into, and what’s at stake, they’ll play fair. Roleplaying games are a game about trust, and I trust my players, just like players should trust their GMs. Sending players into a certain death scenario without their knowledge is a breach of that trust. Therefore, I’m telling you. And when my family plays, I’m telling them. Your characters will die. I suggest you embrace the spirit of that. Embrace that self-sacrifice during character creation. Embrace your death scene and make it epic! Don’t make characters made to ‘win.’ Winning isn’t fighting to the end. Winning, in this instance, is making sure that the playtest receives accurate results. It’s being an honest player. So make yourself a team of crusaders, and enjoy pushing them to their limits and beyond. And when your doomed character meets their end, be happy you’ve had a chance to ensure that mid/high level play during Pathfinder Second Edition will be of a fair and challenging difficulty.
The sixth (and second last) adventure in Doomsday Dawn is a definite change of pace. Entitled ‘Red Flags,’ this adventure is meant to test how fun and engaging social encounters, espionage, and skill based adventures can be at high levels of play. That’s not to say that there’s no combat in it. There is. But, that’s neither the point, nor the focus. The focus is on your skills, subtlety and guile. To that end you’ll make powerful level 14 characters who are members of the Esoteric Order of the Palatine Eye. Its recommended that they be characters whose role among the Order is to act as one of the following; archivist, diplomat, historian, researcher, spy, or something similar. Don’t make a character who’s geared towards combat. This is an interesting challenge that I’m very excited for. The gear they can utilize is a mix of gold, and specific magical objects, but it’s long, so I won’t write it all here.
These Agents of the Order are sent to a fancy gala on a volcanic island in the Shackles held by a white feathered tengu Free Captain by the name of Whark the Alabaster, the lord of Plumetown. They’re tasked with obtaining an important book from Whark’s treasury called The Last Theorem. Its hoped that the information contained in this book can help the Esoteric Order of the Palatine Eye (and your Primary Characters) stop the coming doomsday for good. The stakes are high! This adventure takes place after the end of the Skull and Shackles Adventure Path (which begins with Skull & Shackles: Book 1: The Wormwood Mutiny). It utilizes a neat custom map which is not included in the flip-mats. It looks like a lot of fun, but due to the nature of espionage style adventures, I’m going to refrain from saying any more on the matter than that.
Which brings us to the end. The climax. The final chapter of Doomsday Dawn. It’s called ‘When The Stars Go Dark‘ and it is a finale in every sense of the word. It will be played by your Primary Characters, although they’ll be levelled up all the way to 17th level. They’ll have a chance to stop the Night Heralds and the Dominion of the Black, thereby preventing an apocalypse that would destroy all of Golarion. Perhaps they’ll triumph. And perhaps they’ll fail. Whatever the outcome, this is one fun, challenging adventure. It takes place in the present time (for Golarion) on a demiplane known as Ramlock’s Hallow. The purpose of this final playtest is to have fun! They want to know if the game is still enjoyable and challenging at high levels. So get in the game, and have a blast! Oh, and try to save Golarion while you’re at it.
The adventure itself is complex. I can say for certain that my kids will pretty much have no idea what’s going on. Haha. For them it will be more of a ‘point them at the bad guys and they’ll fight’ kind of scenario. That said, they’ll still enjoy it. Those of you who understand what’s going on will obviously get a lot more out of it than that. There’s a good variety of encounters, and getting to the end will involve more than just muscles. You’ll need to put on your thinking caps. I particuarly enjoyed the flavourful encounter with the Ashen Man.
I don’t want to give away too much more about this adventure. But, I will say, that I think it’s an epic conclusion to the Doomsday Dawn.
It’s definitely a different style of ‘campaign’ than I expected. It’s longer, and more… disjointed. That said, it’s a lot of fun, and an imperative aspect of the Playtest. This adventure allows the folks over at Paizo to test out the aspects of the game they need help to calibrate. It allows all of you to have a say in the final product, while simultaneously helping them fine-tune the game balance.
I highly recommend that players interested in the Playetst find a group and play through Doomsday Dawn together. It’s my hope that this article can help people get excited about Doomsday Dawn, and head into it with appropriate expectations.
I’d be very interested to hear your thoughts on both the Playtest and your experiences playing Doomsday Dawn. If you’ve had a chance to play, be sure to leave a comment and let me know how it went!
Later this week we’ll take a look at the Pathfinder Society Playtest Scenarios, my family’s Pathfinder Playtest Characters, as well as the new Pathfinder Society Scenarios that were recently released for Season 10, and the new Starfinder Society Scenarios! In addition, we’ve got articles on Starfinder Roleplaying Game: Pact Worlds, and Pathfinder Player Companion: Blood of the Sea on the horizon!

 Pathfinder Society Scenario #10-14: Debt to the Quah is a Tier 3-7 adventure written by Adrian Ng. It takes place in Varisia’s Storval Plateau, in a sepulchre along the Muschkal River, and heavily features the Shoanti people and their culture. For more information on Varisia, the Storval Plateau, and the Shoanti, check out Pathfinder Campaign Setting: Inner Sea World Guide, Pathfinder Player Companion: Varisia, Birthplace of Legends
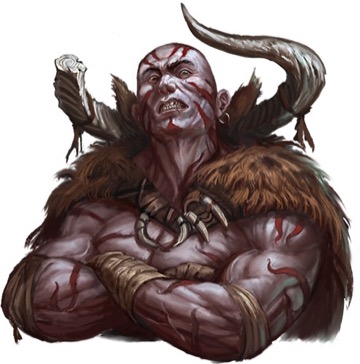
 Pathfinder Society Scenario #10-15: Tapestry’s Trial is a Tier 7-11 adventure written by Alex Greenshields. It takes place in Axis, a lawfully aligned plane. For more information on Axis and its denizens check out Pathfinder Campaign Setting: Inner Sea World Guide and Pathfinder Roleplaying Game: Planar Adventures. Tapestry’s Trial features creatures and templates from Pathfinder Roleplaying Game: Bestiary, Bestiary 2, Bestiary 5, and Monster Codex
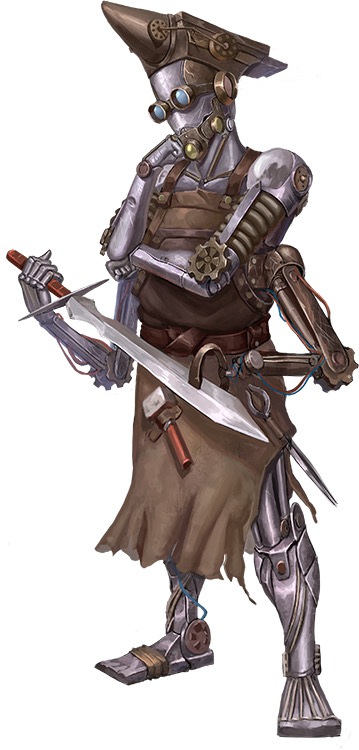


 More accurately,
  In the year 4718 A.R. (later this year) the celestial bodies will align allowing the Dominion of the Black an opportunity to merge the planet Aucturn with that of Golarion. If this happens life as we know it will end. This doomsday is only possible with objects of power from Ancient Osirion which were put in place long ago in preparation for this time. A group of evil cultists called the Night Heralds seek to bring this end into being, while another group, the Esoteric Order of the Palatine Eye, seeks to stop them. That’s where your many different characters come in.

 contains information on all of the nations visited in Doomsday Dawn.


