Hello, and welcome back to d20diairies! August 2019 is a crazy month for d20 releases, so buckle up! We’re in for one exciting ride!
Dungeons & Dragons
Although there’s no big D&D releases this month, highlights from last month include the first two releases in the Young Adventurer’s Guide line: Monsters & Creatures and Warriors & Weapons! Both of my kids are huge fans of these books. For more information check out our review on the Young Adventurer’s Guides here.
Pathfinder
Last month marked the finale of the Tyrant’s Grasp Adventure Path with Pathfinder Adventure Path 144: Midwives to Death by John Compton. This was the final Pathfinder First Edition adventure to be released. But, as First Edition comes to an end, Second Edition begins. And WOW, there is a LOT of Pathfinder Second Edition products coming out this month!
First and foremost: The Core Rulebook (also available in a Deluxe Edition). This massive 638 page tome contains (almost) everything you need to get started playing Pathfinder Second Edition. With a highly intuitive gameplay system, and incredibly varied character development choices that can be made at every level, Pathfinder Second Edition is shaping up to be absolutely awesome. We’ve just finished reading the rules and can’t wait to get started playing some mini-adventures. GMs, like myself, will also need one other book to play: Bestiary! The Bestiary (also available in a Deluxe Edition) is 357 pages long and contains over 400 creatures with dynamic and diverse abilities. Coming out later this month is another hardcover I’m particularly excited for, Pathfinder Lost Omens World Guide, which advances Golarion’s timeline ten years and shows us what’s happening throughout ten mega-regions of the Inner Sea Region. There’s plenty of changes coming, and I can’t wait to see what’s in store for us.
It may be new, but there’s already plenty of exciting Third Party Publisher releases for Pathfinder Second Edition. Although we haven’t had a chance to read many, below are a few we’re particularly excited for.
Everybody Games
Everybody Games has two issues of their ‘Files for Everybody’ line out. Issue 1: Nashi, by Alex Augunas, brings raccoon-folk to Second Edition, while Issue 2: Acrobatics Feats, by Dustin Knight, contains ten new General Acrobatics Skill feats.
Fat Goblin Games
Fat Goblin Games has two great looking products already out. Fellow Travellers: Animal Companions by Taylor Hubler contains over fifty new animal companions, while Game Changer: Alchemical Tools by Matt Roth contains over one hundred new or expanded alchemical tools from levels one through twenty.
Rusted Iron Games
Rusted Iron Games recently launched Tombstone, a gritty alternate history wild west setting compatible with Pathfinder Second Edition rules that pits PCs against monsters, magic, and The Blight, a terrifying infection from beyond the stars. A mixture of western, fantasy, and occult horror, it’s shaping up to be a fun and quirky twist on RPGs. Current releases in this line include Ancestries of Tombstone: Chupacabra by Joshua Hennington, Ancestries of Tombstone: Jackalope by Jacob W. Michaels, and Ancestries of Tombstone: Rougarou by Dennis Muldoon, all of which are available on DriveThruRPG. Upcoming releases include more ancestries, and class feats. My daughter has decided to make at least five jackalope characters — one for each heritage — so my PDF is proving well worth the money.
And finally, WizKids! This month saw the launch of the Pathfinder Battles: Legendary Adventures Preview Pack, an 8 miniature sneak peak of the upcoming Pathfinder Battles: Legendary Adventures miniatures. Later this month D&D: Icons of the Realms: Baldur’s Gate: Descent in Avernus is scheduled to launch! This set of random booster boxes features 45 different plastic pre-painted miniatures.
And that’s what we’re touching on this month! Got a favourite release? I’d love to hear about it!
Established in 2007, Free RPG Day works with participating hobby game retailers and RPG publishers to bring new and exclusive RPG products and adventures into the hands of gamers worldwide. Fans can grab brand new material for a variety of RPGS for free by stopping by their local participating game and hobby shop.
Last year my family had a ton of fun with Free RPG Day, particularly with Paizo’s two releases: Skitter Shot, a first level Starfinder adventure featuring a crew of excitable skittermanders, and We Be 5uper Goblins, a hilarious sixth level Pathfinder adventure featuring some infamous goblin heroes on their most epic and amazing adventure yet! For those of you who missed FREE RPG Day 2018, both modules are available as a free download on Paizo’s website, or as a physical copy for five dollars.
This year Free RPG Day was held on June 15, 2019, with Paizo’s free downloads of the PDFs being available on July 1, 2019.
My husband, my children and I headed out for a trip to our local game shop. There’s a few places you can go in Winnipeg for RPG products, but our shop of choice is Game Knight Games and Cool Stuff. It’s a bit of a trek to get there, two buses and at least an hour and a half of travel time for us, but it has a great selection of RPGs, board games, miniatures, and collectible card games. They also have a spacious game space. It’s a wonderful store. The buses were accommodating, and we made good time. In no time at all we headed inside and perused the goodies on offer. There was quite a selection!
There were two products we knew we wanted to bring home with us: Skitter Crash, a third level Starfinder adventure featuring skittermanders, and We Be Heroes? a Pathfinder Playtest adventure for first level goblins. My seven-year old daughter immediately scampered over to the table and swept up Skitter Crash, while my son grabbed We Be Heroes? This left my husband and I a bevy of books to browse. In the end, my husband settled on The Witcher Easy Mode: An Introductory Booklet to the Witcher TRPG, and I scooped up Modern Age Threefold Quickstart.
The Witcher Easy Mode: An Introductory Booklet to the Witcher TRPG is just that –– an easy introduction to The Witcher TRPG. 30 pages in length it includes rules, six pre-generated characters and a short adventure called Still Waters.
Modern AGE Threefold Quickstart is an easy to understand gateway to the Modern AGE RPG that comes with streamlined rules, reference sheets, five pre-generated characters, and an introductory adventure called Burning Brighter. It’s 40 pages long and has a lot of nice art inside.
We Be Heroes?
We Be Heroes? is an adventure we knew we wanted to bring home with us. It’s a Pathfinder Playtest adventure, using the final version of the Playtest rules. We Be Heroes? is a first level adventure written by Brian Duckwitz which continues the tradition of the super popular We Be Goblins series (We Be Goblins!, We Be Goblins Too!, We Be Goblins Free!, We B4 Goblins!, and We Be 5uper Goblins!). However, this adventure features a whole new team of goblin adventurers who are set to take on the minions of the Whispering Tyrant! (And zombie pigs?!) Driven by hunger and the orders of their chief, the goblins of the Crookedtoes tribe are tasked with finding out why all the animals in the forest have fled the region, and what happened to the tribe’s best scout. They get to meet up with some heroic knights, explore a wrecked farmhouse, and… be heroes! We absolutely adored reading this adventure and intend to play it soon — although whether we’ll play it as a Playtest adventure, switch it over to Pathfinder First Edition so we can play it right away, or wait for August and switch it over to Pathfinder Second Edition rules remains to be seen. Either way, we’re going to have a blast with it. If you didn’t get your hands on this amazing product, don’t worry. You’ll be able to download it for free on Paizo’s website in two weeks or so.
Skitter Crash
Finally, there’s my personal favourite… Our skittermander heroes from Skitter Shot are set to continue their adventures in Skitter Crash! Written by Jason Keeley, this is a third level Starfinder module that sees our skittermander heroes crash their ship on a mysterious swampy planet after a run in with space pirates and an interstellar cyclone! They’ll need to find their ship, deal with the space pirates, and (of course!) make some nu-friends! The adventure was a lot of fun. So fun, in fact, that we played it today at our local gaming store with a wonderful GM (you’re awesome, Wil!) and another player new to RPGs (I hope you had fun, Robin!).
The verdict?
This adventure is a BLAST. I highly recommend it.
I hope a lot of you got out to Free RPG Day! If you did, I’d love to hear what kind of products you got your hands on, and what you thought of them.
As you may have heard, the latest issue of Wayfinder magazine was recently released. Wayfinder is full of fan-created content for the Pathfinder Roleplaying Game or the Starfinder Roleplaying Game, and is a free download on Paizo’s website. Over the years they’ve made an astounding 19 issues of Wayfinder, as well as a Bestiary! Nearly every issue has a theme, with this latest one being Starfinder’s Absalom Station! So whether you’re a fan of fun, or a fan of free, I highly suggest you give this little gem a chance!
But, what’s inside Wayfinder #19? A lot! At around 72 pages for each issue, that’s a lot of free stuff! The articles inside offer new aliens, themes, equipment, and starships. In addition to player options, there’s plenty for GMs with adventure ideas, plot hooks, characters that can be used as allies or enemies, unique NPCs, and even a short adventure. Both players and GMs can make use of a ton of locations, personalities and gazetteers that are described throughout. To round things out there’s also songs, poetry, and fiction. And let’s not forget the awesome art!
Over eighty people contributed to this fanzine, from authors and artists, to directors and editors. My kids and I were both surprised and honoured to be among them this year. I submitted a ‘Weal or Woe’ article entitled ‘Victims of the Vat Gardens,’ as well as two themes, ‘Ghost Level Delver’ and ‘Scrounger.’ My seven year old daughter submitted ‘Galactic Rabbits’ and their smaller counterparts ‘Galactic Bunnies’ to the Alien Archive, while my eight year old son submitted ‘Radioactive Robots.’ Both of my kids have been showing off their creations to their teachers and friends at school, which proved rather difficult. First they had to explain what Starfinder and Wayfinder are. Haha. We’re all very proud. Their favourite part? Getting to see the wonderful art that was created for their monsters!
There was a lot that I loved inside Wayfinder #19. From player options and monsters, to fun locations and fiction, everything was really well done. My favourite player options were the many themes available, particularly the ‘Guttersnipe,’ ‘Laborer,’ and ‘Eyeswide Aspirant.’ I really enjoyed an article on the goblin hero-gods entitled ‘Blessings of the Barghest‘ by Joshua Hennington, with awesome art by Tyler Clark. There’s some really creative cortex options for mechanics written by Nicholas Flitter, which is sure to be a fan favourite. It’s accompanying art is by Paul Chapman.
If it’s gear you’re interested in, be sure to check out the ‘gloves of experience’ and ‘detective’s duster,’ magic items by Jonathan Hendricks. There’s also some snazzy new weapon properties, fast draw and low-velocity, by Adam Kessler and Nicholas Hite.
Starships. Some people love them and some people hate them. Most fall somewhere in between. Whatever your preferences I highly recommend you check out an advice article entitled ‘Making the Best of Starship Combat.’ The GM Guide, written by Hilary Moon Murphy, and the Player’s Guide, written by Brett Indrelee, are packed full of helpful advice for running and engaging in starship combat. This article alone is worth the effort of downloading the fanzine. It’s really great work. For those of you interested in more mechanical options, you’ll find many starships in this book, as well as crews and personalities to man them, and new build options. I particularly enjoyed an article on ‘Iceforged Ships’ by John Laffan with art by Beatrice Pelagatti. (You know you want to bring Winter Witches into space!)
There are a lot of cool new creatures inside Wayfinder #19, but my favourites (other than those my kids made!) turned out to be the trashbot, a CR 1 robot made of scrap, and the gelatinous z-sphere, a CR 3 ooze that can zip around even in zero-g. Oh, your poor low-level players!
My favourite campaign inspiration was an adventure seed entitled ‘The Show Must Go On,’ which was written by K. M. B. Kovalcik and features art by Todd Westcott. It involves skittermander pop stars who are in need of some help if they’re going to get to their performance on time. I also adored the many articles on Absalom Station itself, particularly ‘Ollie’s Option Bar‘ by Hilary Moon Murphy, and ‘Urban Myths of Absalom Station‘ by Alex Riggs.
Want less inspiration and more adventure? Check out ‘The Disappearance of Sector G17‘ by Paris Crenshaw, an adventure for 4–6 4th-level characters that tasks the PCs with tracking down an entire missing sector of the Spike. This adventure features art by Tanyaporn Sangsnit and maps by Alex Moore.
Want some more Wayfinder? Be sure to check out their many, many other issues on Paizo’s website!
I hope you’ve enjoyed checking out the contents of the latest Wayfinder with me. If you happen to have contributed to it: Thanks! And if you’re thinking of applying for the next issue: I wish you the best of luck!
Have fun!
Jessica
Update: The topic for the next Wayfinder Fanzine is Starfinder: The Diaspora! Stay tuned for more information.
They’re obsessively browsing the Dwarven Forge website, and watching their many youtube videos. My son takes every opportunity to bring it up, attempting to convince me I should buy him some for his birthday, or for my birthday, or maybe my husband’s Christmas gift.
So when my son asked if he could download the free Dungeon of Doom Adventure a while back, I let him. And when he asked me over and over if I had read it yet, I pushed it up a little higher on my to-read list.
You see, I like Dwarven Forge, but when it comes to adventures, I tend to prefer a sweeping story over a classic dungeon. And the Dungeon of Doom adventure? Seemed like one big deadly dungeon.
Which it is. But, turns out, it’s also awesome! Haha.
I finally got around to reading the adventure and was pleasantly surprised. Every encounter area is well planned, well executed, and exceptionally creative –– all things I expect from Dwarven Forge. There’s some basic plot hooks to get the adventure moving, but not much else. On the surface, at least. There’s much more going on in this dungeon delve than anticipated, as the PCs will uncover as they adventure.
If they survive.
Dungeon of Doom is packed full of layered, multi-stage traps and puzzles that work to create a deadly challenge for the PCs. It’s smart, clever, and surprisingly funny! There’s a wide array of NPCs you can meet and interact with in the dungeon, from ghostly spirits, to chatty gargoyles and, my personal favourite, a talking door. The PCs have plenty of secrets and history to uncover through their exploration, and a lot of powerful treasure to claim. But, as previously mentioned, this is definitely a deadly dungeon! For starters, the dungeon itself drains your PCs life force, making taking a long rest impossible. PCs will need to complete the entire dungeon with relative speed or they’ll run out of resources. In addition, characters that die have their souls trapped within the dungeon and rise as an undead spirit known as a maerghast. Not a desirable end! Along the way the PCs will need to collect magical artifacts known as glyphstones, which are powerful semi-intelligent artifacts which affect the PCs personality and behaviour, but grants them potent magical powers –– some of which can allow players to heal or gain the effects of taking a long rest. But, the greatest challenge is definitely the dungeon itself. As I previously mentioned the encounter rooms are packed full of well-utilized, challenging puzzles and traps which I absolutely adored. It’s deadly, but a lot of fun.
The Dungeon of Doom Adventure is a free download here, and is intended for characters between the levels of 1 and 10. Each challenge is written for three difficulty levels, based on your party’s APL (average party level). APL 1–4, APL 5–7, and APL 8–10, with the variable numbers (DCs, Damage, and so on) separated by a slash. For example DC 12/14/16 or 1d8/2d8/3d8 damage. It’s easy to understand and efficient. Monsters are instead listed on a chart, with the composition of each encounter being determined by your party’s APL. Level 1 parties might face off against a quasit while a level 10 party might face a nalfeshnee in the same location. The adventure is written for 5e Dungeons and Dragons, but has rules in the back for running it for the Pathfinder RPG (which is awesome!). Those of you interested in investing in Dwarven Forge’s Dungeon of Doom products can buy the pieces needed to make the Dungeon of Doom on a room by room basis on their website, while the adventure contains detailed build guides to show you how to set it all up. You can also watch Dungeon of Doom played or see a run-down of the rooms on youtube.
Dungeon of Doom is a deviously deadly dungeon full of interesting puzzles and traps, perfectly suited to challenge players of a variety of levels. I found it absolutely inspiring! I highly recommend you give it read!
Wizards of the Coast has just announced its newest Dungeons and Dragons campaign, Baldur’s Gate: Descent into Avernus! The announcement was made during its D&D Live: The Descent event in L.A. Beginning in the incredibly popular town of Baldur’s Gate and descending into Avernus (the first level of Hell), this 256-page campaign takes players from level 1 to level 13. Baldur’s Gate: Descent into Avernus is scheduled to make its debut September 17, with the Beadle and Grimm’s Platinum Edition scheduled for release in October.
For more information on this diabolical campaign, check out the video below, or click here for a full list of the D&D Beyond interviews regarding this campaign on youtube.
For more information on Beadle & Grimm’s Platinum Edition of Baldur’s Gate: Descent into Avernus, click here. Only 1000 copies of the Platinum Edition will be made, and yes, it’s expected to sell out. This weekend only (May 18th – May 19th 2019), the Platinum Edition is on sale for $449.00 USD (from it’s full retail price of $499.00 USD).
Baldur’s Gate: Descent into Avernus. Image credit: Wizards of the Coast
Against the Aeon Throne is a shorter campaign than most. Typically six books in length, this Adventure Path is only three. It’s a great change of pace that will allow the folks at Starfinder to tell shorter, more personal stories. In addition, this three part length makes it easier to purchase and play through an entire adventure path. It’s awesome for gift giving and the budget conscious! Six books is a huge investment, but three? Well, that’s a lot more manageable for those of us without much extra cash laying around. On the other hand, with the three book format I feel like I blinked and the whole adventure path was over. I didn’t get my hands on the first book until the third came out and I missed the Signal of Screams Adventure Path completely. In general, it’s both easier to collect and easier to miss. Although I enjoy the three book format, I also enjoy the six book format, so I hope they continue to rotate between the campaign lengths.
So what exactly is Against the Aeon Throne: Escape from the Prison Moon all about? In short, the PCs defeated an Azlanti military force that had annexed the small colony of Madelon’s Landing on the planet of Nakondis. But saving the fledgeling colony is just the beginning. The PCs have discovered that an experimental starship engine and their friend, the android Cedona, were already transported off of Nakondis and back to the Azlanti Star Empire. Determined to rescue Cedona and retrieve the starship drive the PCs travel to the Azlanti Star Empire and attempt to rescue Cedona from the prison moon she’s being held on. Exciting stuff!
Now, let me take a moment to be clear. The Azlanti Star Empire is a pack of giant, pompous, jerks. They’re great villains for the PCs to clash with, but an overwhelming opponent. This adventure path does not send your PCs off to take down the entire Azlanti Star Empire. It’s much smaller in scale than that. And frankly? I love it. It lends a sense of suspense to the series and makes it feel like you’re playing real people in a living breathing world universe doing what they can, rather than heroes so powerful they change the whole world universe. It’s a wonderful change of pace and scope. It’s got a very Firefly / Star Wars feel to it.
But, before we get into that too much, let’s take a look at the book itself. Starfinder Adventure Path 8: Escape from Prison Moon (Against the Aeon Throne 2 of 3) is a softcover adventure written by Eleanor Ferron that is 63 pages in length. It’s intended to take players from level three to level five. The adventure itself is around 35 pages long, and split into three main parts: A Distant Call, in which the players travel to the Azlanti Star Empire; Outpost Zed, in which the players explore a space station and plan their caper; and Jailbreak, in which the players infiltrate the Prison Moon to free Cedona. After the adventure there’s an eight page primer on the Azlanti Star Empire and an eight page primer on the non-human races of the Azlanti Star Empire. There’s also seven new creatures in the Alien Archive, and a short Codex of Worlds article on Outpost Zed. Lastly, the inside front and back covers feature information and a layout for a tier 3 starship: the Vanguard Parapet.
My favourite parts of this book are the large number of new player races (there’s six of them), the incredibly varied and quirky NPCs (Glest, Half-Red, Xaarb, and Talmrin are all great fun), and how free-form the locations are. Yes, you have to go to ‘A’ place, and accomplish ‘B’ goal, then go to ‘C’ place, and accomplish ‘D’ goal, but how you go about achieving your goals in ‘A’ and ‘C’ — the order and methods — are up to you. I really like that. Another minor thing I really enjoyed is that every enemy has a name. It sounds like a silly thing to enjoy in an adventure, but giving every villain a name allows for PCs to take approaches to dealing with them that amount to more than ‘attack’ and ‘loot.’ That’s incredibly important in this adventure, particularly in Part Three: Jailbreak.
Before we continue with a more in depth look at the book, let me point out: there will be SPOILERS.
You have been warned.
For starters, I love the look of this book. I like the colours and the layout. The text inside is easy to read and the colours are easy on the eyes. The cover art is wonderful. It showcases Cedona, an android, retired Steward, and ally of the PCs, as drawn by Anna Christenson. Behind her is an awesome image of Raia (the iconic lashunta technomancer) and Quig (the iconic ysoki mechanic) fighting off Azlanti prison guards.
The starship showcased on the inside covers is a Vanguard Parapet. This tier 3 medium transport is destined to be the final enemy the PCs face in this adventure. All in all it’s a well-built ship, that packs some serious firepower. I particularly like how it’s shield points are balanced, with barely any shields in the quadrants where they have the most guns, and the excess shields where they have the least guns. The art is nice and the ship layout is useful.
After that we hop right into the adventure itself. This adventure starts a bit slower than its predecessor. It begins with some necessary bookkeeping. The PCs likely have some loose ends and social encounters to wrap up in Madelon’s Landing after the conclusion of Reach of the Empire (Against the Aeon Throne 1 of 3) and they’ll need to upgrade their starship to tier 3. Afterwards they receive a recorded transmission from The Stewards which should help nudge them on their way and get the adventure going. For many groups this transmission is unnecessary. PCs should already know their goals for this one: retrieve the drive and rescue their friend. But, for those groups that need a little more guidance, this recording gets the job done quick and efficiently. The PCs will need to fly to the Azlanti Star Empire, get their bearings, and find their way to the Prison Moon Cedona is being held at. On the way they run into a witchwyrd merchant ship where they’ll have a chance to make friends, barter, and pick up some valuable intel. This social encounter also gives them a destination where they can learn some more about the Azlanti: Outpost Zed.
Glest, a nervous screedreep from Outpost Zed.
Which brings us to part two of the adventure: Outpost Zed. In this section PCs will need to travel to Outpost Zed, a rebellious little space station on the fringes of Azlanti space, figure out where Cedona was taken, and determine a way to properly disguise their ship. This is done primarily through interacting with the locals. Of course, not all the locals are friendly or willing to talk to obvious foreigners. Other hurdles the PCs will come up against are learning how to communicate with the locals, and figuring out Outpost Zed’s societal structure. As previously mentioned, this section of the adventure is a little free-form. There’s plenty of people to talk to, a section of the spaceport to explore, some quick battles (some of which can be avoided), and the PCs can go about their socializing in any order. However, they can’t really stray outside this area or get too off track. Still, it’s fun and enjoyable. Many of the NPCs they’re destined to meet are from races the PCs know nothing about. I particularly enjoyed Glest (a nervous, shifty screedreep), Half-Red (a tiny squid-like stellifera that floats in an orb of water), Xaarb (an agressive creature who’s mostly mouth), and Talmrin (a very useful NPC who looks like a weasel-person). This section does a great job of showcasing that your PCs are obvious outsiders, which is something they’ll need to address if they want to break their friends out of prison without fighting their way through the whole place. Overall, it’s a fun, flavourful place to explore, filled with plenty of memorable social encounters. Before you move on, the PCs will need to take what they’ve learned and concoct a plan to travelling to and infiltrating the Prison Moon Gulta, for rescuing Cedona, and for escaping alive. Good luck! Haha. In all seriousness, the pieces of the puzzle the PCs need should come relatively easily, and there’s an NPC around who can help with the planning in a major way if the PCs are in need of inspiration or assistance. The actual planning shouldn’t be too hard once they’ve got their ducks in a row.
One of the many denizens of Outpost Zed!
Which brings us to part three: Jailbreak. This is by far the longest and most challenging section of the adventure. As the PCs approach Gulta, the prison moon, they should already know that non-Azlanti are typically held in Cell Block J. With their destination narrowed down considerably, they’ll need to disguise their ship, approach Gulta, and dock in Cell Block J. From there it’s more free-form. Depending upon what races the PCs are they’ll need disguises to manage any kind of infiltration mission. They’ll also need a way to speak Azlanti, someone who’s decent at lying, and someone who’s handy with a computer or at engineering. Then they’ll need to explore Cell Block J without tipping off the guards or raising an alarm. Plus there’s the security cameras and patrols to worry about. PCs who choose to go in guns blazing will instead need to be quick and get the security feeds shut down as soon as possible. Either way, once the PCs manage to get Cedona free (and hopefully some other prisoners as well), they’ll need to find a way to escape with her — a job much harder than getting in. Finally, before they escape they’ll need to contend with this volume’s big bad — an Azlanti woman named Iolastrila — and the Zandamant, a prison ship that pursues the PCs as they make their escape.
This section of the adventure is incredibly well presented, but not easy for GMs to run. It lays out the entirety of Cell Block J, what security measures are in place, labels every security camera, and shows where guards are located. Every guard has a name and some information about them — all useful information for PCs attempting an infiltration. There’s also notes on what things the PCs can do to raise or lower the alertness of guards, and cause alarms to sound. It describes what changes throughout the Cell Block in such circumstances, and what the various guards do. It’s really detailed, and really well thought out. Which is incredibly important! Your PCs are going to go in there and going to make a scene. GMs will need to keep track of what cameras are in operation, who’s suspicious of them, what the various guards are doing, and so on. It’s complex, and a lot to track. But pulling off this caper — both for the PCs and the GM — is a rewarding, exciting, experience. This place is dynamic, detailed, and reacts to the PCs. It will be different for every group and I really, really enjoyed it.
By the end of this chapter the PCs will have freed Cedona, made their escape from the Prison Moon, and retreated to Outpost Zed. But their mission’s not yet complete. The PCs and Cedona know they need to get back the experimental drive from the Azlanti before its too late.
Which brings us to the end of Escape the Prison Moon! But, that’s not the end of Against the Aeon Throne, or the book. Up next, as previously mentioned, is an incredibly useful primer on the Azlanti Star Empire entitled Empire of the Aeon Throne. This eight page article provides a short history of the Azlanti Star Empire, information on the solar systems under it’s control (there’s twelve of them!), and information on their culture, and society. Finally, it’s got some new gear, including five new aeon stones, four new magitech augmentations, and two new weapons.
Talmrin, a gosclaw from Outpost Zed.
The second primer is entitled Citizens of the Star Empire. Also eight pages in length, this section describes a whopping nineteen races common to the Azlanti Star Empire, most of which are new. Six of these races is also given much more information and full racial traits to allow you to play these races. Playable races include the brakim, gosclaw, neskinti, screedreep, stellifera, and vilderaros. I really enjoyed all of these races, but the brakim and screedreep turned out to be my favourites. The brakim are also featured in Starfinder Society Scenario #1-27: King Xeros of Star Azlant.
The Alien Archive is up next, which is always one of my favourite sections of an Adventure Path. It contains seven new creatures, four of which are featured in the adventure itself. The creatures include: Aeon Stone Network, a CR 7 construct made from a swarm of aeon stones; Radiation Drake, a CR 9 drake; Iztheptar, a CR 6 shellfish-like humanoid that’s featured in both Escape from the Prison Moon and Starfinder Society Scenario #1-27: King Xeros of Star Azlant; Ooheo, a tiny CR 1 vermin with a long harpoon-like tongue; Paralith, a CR 4 aberration they’ll meet on Outpost Zed; Void Palm, a CR 7 gravity controlling plant; and Xaarb, an aggressive CR 5 magical beast they’ll meet on Outpost Zed.
Paralith by David Franco. Art courtesy of Paizo Inc.
Finally, there’s a short, one page Codex of Worlds entry on the Outpost Zed. Despite its short length, the information contained therein is useful for this adventure, and a must read for any GMs who expect their PCs to do a bit more exploring of the space port than is scripted in this adventure.
Outpost Zed by Mirco Paganessi. Art courtesy of Paizo Inc.
Against the Aeon Throne: Part Three: The Rune Drive Gambit is written by Larry Wilhelm and intended for level five characters. In it, the PCs head to a secret Azlanti science station in an asteroid where the experimental starship drive is being held. They’ll need to get inside, infiltrate or fight their way to the Rune Drive, and learn what the heck it is. Then they’ll need to find a way to steal it. Along the way they’ll fight Aeon Guard soldiers, rescue captive scientists, and face off against the man responsible for sending troops to Nakondis in the first place! Awesome!
EDIT: You can read our review on it here: Review: Against the Aeon Throne: The Rune Drive Gambit.
I hope you enjoyed taking an in depth look at the second volume of Against the Aeon Throne much as I did!
Last year I shared my family’s experiences creating their first Starfinder characters. We had a lot of fun making a kooky crew, and tried them out a bit before deciding they would join the Starfinder Society. There were some changes that needed to be made. Tucker was a halfling, which would have to change, but otherwise the transition went smoothly. Then we sat down and played Into the Unknown. Life got busy. We moved on to play Starfinder Scenario #1-03: Yesteryear’s Truth, which was great fun (for details check out this blog post).
But, my kids have WAY too many characters and not enough focus.
I’m a fan of creating a character and playing them through consistently right to the end. I want to play them every week. I want them to accomplish something amazing over the course of a long campaign. And when their story is done I want to know what happened to them. Did they retire? Get married? Ascend to godhood? Go insane? When their story’s complete I’m ready to make a new character and start all over again.
But, my kids? My kids love making new characters. They like hopping from story to story. But they also don’t like letting characters go. They want to play them all at the same time. There’s tons of them. An unattainable goal if I ever heard one! Haha.
In short? We rarely have time to take our Wayfinders for a spin.
The other day my daughter informed me that she wanted to create her own adventure. This isn’t the first time. She’s GMed for us before and brutally slaughtered us all. It’s partly because she doesn’t have much experience determining appropriate CRs, but it’s also because she’s incredibly lucky. Too lucky. It’s great when she’s a fellow PC but when she’s the GM? Look out! Monsters have awesome aim, enemies are so stealthy they might as well be invisible, and no opponent ever fails a saving throw. It’s not that she’s cheating! We don’t use GM screens in my house so we can all see her rolls, and I help her every step of the way. She’s just that damned lucky.
So when she said she wanted to GM something everyone groaned.
She looked so sad.
“Oh, no! She’s going to kill us again!” my son wailed.
“Be nice!” I scolded my son. Then I whispered to my husband, “She totally is…”
But, I smiled at my daughter and said, “That sounds exciting. Let’s do it.” Because it is exciting. Of course I want my kids to want to imagine, create, and GM.
So my daughter and I went to my room and peered at my bookshelf. Making a one-shot would mean everyone would create more characters, which we didn’t really have time for at the moment, so I suggested she create a mini adventure for Starfinder. Our Wayfinders were in the middle of a journey through the Drift from the radioactive planet Elytrio to Absalom Station. The timing couldn’t be better!
But, they were SFS characters… We decided to play the entire scenario off the books, using the stats for our characters but leaving our actual SFS characters entirely untouched. And while we were at it? Tucker might as well be a halfling again (in appearance).
My daughter thought about the Drift a bit, pulled down the Alien Archive, and got browsing. She stopped on creatures she took a liking to and we chatted about them, brainstorming ideas together. Some she liked and some she didn’t. She wrote down notes in her little Pokemon notebook. When she hit the end of the book she narrowed down her ideas and made some more notes and drawings. An hour later we were picking out miniatures and prepping the table. It was game time!
I started off the session by reminding everyone what we were up to. Where we’d been, where we were going, and who we were with.
Our crew consists of four Starfinder Agents that belong to the Wayfinders Faction. Hoponisa (Hops for short), is a ysoki technomancer from the dark side of Verces who loves to dance. She’s on a mission to find herself the ‘perfect mate’ and is handy both in the pilot’s chair, the engineering bay, and at a computer console. She has a robot rabbit dubbed ‘Snowball’ who is a glorified computer with some minor mobility that she crafted herself, then wrapped in fuzzy faux fur for ultimate cuddle-ability. It’s also her spell cache. Hops has been a Starfinder for a long time and is the person who recruited the rest of the crew into the Starfinder Society (before that they were mercenaries who did work for the Starfinders on a regular basis). Together, the gang travels the Vast, deploying drift beacons for credits at the behest of the Wayfinders. After discovering new planets, collecting data on their environments, and deploying drift beacons, the group prepares a report on the planet for the Wayfinders, which allows the spacefaring faction to better prepare proper Starfinder teams for further exploration on these locations.
Hops and the crew of the Pegasus Class ship, Infinity, have gone on plenty of missions together. Led by their Captain Aya, a wise, enigmatic kasatha mystic who believes that every life is precious, they’ve charted planets and discovered new places. Their roles on the starship change a lot, with the rest of the crew rotating between pilot, engineer, science officer, and gunner as the mood strikes them. Aya and Hops are joined by Tucker Aetherfoot, a ysoki (originally a halfling) operative with the daredevil speciality who’s nimble, acrobatic, and full of boundless energy. He wears a t-shirt with a shirren design on it (to represent his long-time friendship with the shirren Vishkesh), and wears a racing helmet with a rose-tinted visor and stylized mouse ears on the side (which was given to him by Hops as a birthday gift). Tucker’s insatiably curious, and runs a blog in his spare time about his experiences exploring the Vast. He’s a devout Desnan from Absalom Station, prone to dancing when he’s idle too long. …Even in the middle of a mission. Lastly, there’s Vishkesh, a shirren mechanic with a little flying spy drone named Rijin. Rijin is trained to help Vishkesh with repairing starships, and is also outfitted with a flare thrower. He’s a chipper little thing, with a bubbly artificial personality. Vishkesh has a fondness to caring for (and rescuing) larval shirren, and currently has a dozen dangling off of him in their protective canisters at all times. Vishkesh is the proud owner of a pig stuffed animal — a rare creature he’s never seen in in the flesh! He’s also from Absalom Station, and is a long time friend of Tucker’s. Vishkesh worships Hylax.
When they joined the Starfinders the crew of Infinity decided they needed a helping hand. They hired two rookies to assist them and round out their crew: Gizdara, a half-orc technomancer who’s a whiz with computers, and Diggs Drifthopper, a burly ‘rabbitfolk’ whose planet was conquered by the Vesk years ago. Diggs was forced into the military, but was recently allowed his freedom and was looking for work. He’s good with a gun, but not much else (which he can’t use in SFS play, as a non-combatant hireling, haha). Still, my daughter insisted on hiring him because he was destined to be Hops’ mate. (Uhhh… Okay? Haha). Diggs’ job is mostly to watch the ship while we’re away from it.
There’s one other person on their ship at the moment: the Membrane Ghibrani Klarima who they were bringing from her home planet of Elytrio to join the Starfinder Society. For now she was a passenger, but the group was teaching her everything they could of the universe as they travelled the Drift.
The crew of Infinity soars through the Drift!
With the recap out of the way my daughter took over, explaining that we had been in the Drift for a few weeks. All of a sudden the alarm blared and there was a strange flash of red light nearing the ship. LAVA!
Wait, what? How could there be lava in space?
My daughter gleefully asked for a Computers check from our Science Officer — Vishkesh at the moment — revealing that a piece of the Elemental Plane of Fire had been torn off and stranded in the Drift (quite recently by the look of it)! We were about to do some more research on this phenomenon when there was a burst of light. Lava and powerful heat blasts from the shard of the Plane of Fire was flying at our ship! Our pilot, Hops (which I was running on behalf of my daughter since she was GMing), flew like a pro, dodging lava balls, and super heated waves of energy. But a few moments later Vishkesh identified that our air lock had been opened. Something was on the ship!
We turned for the elevator only have it DING pleasantly.
As the doors opened Captain Aya ordered Hops, Diggs, and Gizdara to remain at their posts. Gizadara took over as Science Officer while Diggs took on the role of gunner and blasted through the hunks of rock flying at our ship. Vishkesh, Rijin, Aya, and Tucker leapt to their feet — too late!
A trio of fire elementals roared off the lift and slammed into the kasathan captain — the nearest target.
“The elementals are so angry! They must be lost and confused!” my son (Vishkesh) pointed out. Unfortunately, his understanding did little to calm the creatures. The fire elementals tore into Aya and scored multiple critical hits — curse my daughter’s luck! Haha. My kashathan mystic went down before she even had a turn.
Captain down!
“Sorry, Mom!” my daughter said a little guiltily.
“It’s alright, baby. Aya will be fine.”
The battle continued, and wow was it a tough one! The fire elementals tore into Tucker while Aya slowly recovered on the ground with her SP. By the time she rejoined the fight her healing magic was sorely needed! Tucker was hanging on by a thread and Vishkesh was in big trouble! Not long afterwards the group rallied and took down the last of the exceptionally lucky elementals. But not before Tucker suffered some luck of his own — bad luck!
A critical fail for poor Tucker!
With the fire elementals defeated Vishkesh hurried to the airlock to get it locked down while Aya healed the wounds of her crew. Hops flew us out of the range of the planar anomaly and the journey returned to normal.
For a time…
Not much further away we came upon a strange group of asteroids that looked like they were all part of some kind of large complex — a metallic castle of some sort. It was clearly another broken planar shard torn from another world and deposited in the Drift by Drift Travel. Hesitantly, the group scanned the planar wreckage and detected signs of life. Not wanting to leave anyone stranded in the Drift, Aya ordered the ship to investigate the asteroids.
They flew past chunks of reddish rock, through space strewn with shards of glittering metal. Suddenly they saw a ship! It looked like a hunk of junk cobbled together from — well, junk! They turned on the comms to hail the ship only to be fired upon!
Battle stations!
Hops sailed the ship through space, dodging meteors and make-shift torpedoes, Vishkesh boosted the ships guns, Tucker fired upon the enemy, and Aya encouraged her crew. Although the battle shouldn’t have been challenging, it was — once again my daughter’s good luck conspired to destroy us.
Suddenly Vishkesh noticed incoming projectiles from somewhere other than the ship! One of the chunks of broken castle was inhabited! They fired cannons at the Infinity. Cannons that held… goblins in weird globs of goo! The goblin bombs splattered against the hull of Infinity! Unfortunately for the goblins our ship’s shields were too tough for them to penetrate! Most splattered on impact like giant bugs! But, armed as they were with sharp implements and hacking kits, it’s likely the goblins would have attempted to breach the hull or hack into the air locks to gain entry had our shields been depleted.
Suddenly a voice crackled over the intercom. “AHA! You smart-heads are good! You foil our goo-guns good! But we goblin pirates! Goblins attack and goblins snack! Or…. goblins want to snack! We hungry! Hand over your food and we let you go!”
Image discovered on Pinterest and chosen to represent Snowball in my home game. Art by Canadian artist DaCosta! under the studio name Chocolate Soop. Click here to check out their website.
Aya sighed in a rare show of impatience. “All lives are precious…” It sounded like she was reminding herself of this, instead of teaching the others as was typical. “We came here to lend aid to any stranded in the Drift. Surrender, Goblin Pirates, and we will forgive your attack. We have food to spare and tools to repair your Drift Engines. …If you have any.”
The goblin pirate laughed. “AHA! We win! We no shoot and you give us food! Yes! Come! Come to our home and give us many many food!”
“…” Aya decided it was best not to argue with a goblin. “Yes. Exactly. We’re coming in for a landing.” Looking at Hops she ordered. “Hops, take us down.”
“Yes, Captain!”
The gang flew their ship to the strange broken castle and landed — as best as they could. Floated nearby was a better description. After a space walk, Aya, Vishkesh, Tucker, and Rijin set out to meet the goblins. They were greeted by a snivelling, friendly little goblin — not the goblin pirate from before — and given a tour. The castle was hollow and without gravity except around its outer walls. Along these outside walls were small rooms that had both air and gravity — an anomaly the goblins couldn’t quite explain. Up near the broken ceiling (and any holes in the walls) there was a massive makeshift net — to prevent any goblins from accidentally drifting off into space.
On the tour the group discovered that the goblins weren’t just hungry, they were completely out of food! No wonder they had attacked!
But, the goblin had a plan. “Oh, you look so fat and not starving! Oh! Yum! Uh… Yum to your food! Not yum to you!” The goblin laughed, but Tucker was a little nervous. “We have much money to give you! Yes! Lots of shinies! Came here to steal shinies from castle, but ship broke! And shinies not good to eat! Nope! We have tried!” the goblin nodded. “Our King has shinies! You go see him and kill him and take them! And his pet! Must kill it too! Very smart it is. Smarter than King I think!” The goblin nods. “Then you take shinies and give us many many food! Yes! YES! Good plan! See?”
Image discovered on Pinterest to represent Rijin in our home game. Art by Jessica Madorran. Check out her website for more information.
“Did some of you want to come with us?” Vishkesh asked.
Tucker groaned. “Oh, I don’t like that plan…”
The goblins around all cheered. “Yes! Oh, give us ride! But first take shinies! You take for food! And if you not want we take it and use it to buy more food when you get to… where you go! Me not care! Me want FOOD!”
With a sigh the group headed up to bargain with the King. “All lives are precious,” Aya reminded everyone. “This need not come to a fight.
Unfortunately, Aya was wrong. It did come down to a fight. The quartet faced off against the goblin king and his (definitely smarter than him) tashtari pet. For once my daughter’s luck didn’t trump our own and we made quick work of the angry pair. With the shinies and a ton of goblins in tow, the group reboarded the Infinity for the longest, most irritating trip they would ever endure.
Words of wisdom: Never let a pack of starving goblins on your space ship!
Our family had a lot of fun playing my daughter’s Starfinder adventure. Best of all? My daughter was happy she didn’t kill everyone. (Yay!)
It’s been a while since we talked about my family’s current home campaign, Shackled City. We haven’t stopped playing — far from it. But we’ve been so busy lately it’s hard to find the time to play anything at all, let alone write about it. So while I have a free moment let me welcome you back to Cauldron, home of the The Shackled City Adventure Path!
When we last left off our heroic musicians had finally returned home to Cauldron. They had saved a lot of people and brought down an underground slave ring, but they were ill at ease. Someone else knew about the slavers and had done nothing. Who were they? And what about the people they had failed to save? The people who were sold to unknown parties before our heroes were even hired to find them… Were they gone forever? Could four kooky members of an up and coming band possibly brave the Darklands to track them down? No! Surely they couldn’t do anything so foolish! ….Or could they…?
The Shackled City Adventure Path is available for purchase in its entirety here. The first volume, Life’s Bazaar, is available for purchase here.
The Heroes
Our eccentric heroes are all members of ‘Dinorabbit,’ a musical band that changes its name frequently and was most previously known as ‘Boople Snoot.’ The band’s lead singer and song-writer is Falco Rhiavadi, a foppish noble bastard of mixed Tien descent whose father was devoured by a dragon when Falco was just a boy. A well-groomed, handsome man with an easy smile and a winning personality, Falco’s a black sheep among his family. Mechanically, Falco is an oracle of life whose familiar is a jealous and demanding thrush named Ruby. Falco is played by my husband.
Mick Frimfrocket is a gnome with dark blue skin, bright pink hair that stands straight up on his head, and light blue eyes with flecks of red around his pupils. He’s energetic, bold, and loves nothing more than a good laugh! Mick acts as the band’s pianist and creative director. He’s the driving force behind the band’s constant name changes, and over-the-top performances. Mick was born in the gnomish enclave of Jzadirune but was brought to the city of Cauldron to escape the Vanishing. Orphaned by the mysterious events and with few memories of those early years, Mick was raised in the Lantern Street Orphanage — the very same orphanage that recently had four children kidnpapped right from their beds! Determined to save those little scamps, Mick was very excited to take up this missing person’s case and follow it to its conclusion — particularly when he realized that it led through his one-time home. Mechanically Mick is a monk / bard (prankster) who attacks with wild kicks while playing his piano in battle. Partway through exploring Jzadirune he came into possession of a broken magical construct. He’s played by my seven-year old son.
Rabbity Castalle is a rabbitfolk waitress who works at the Tipped Tankard Tavern. A dancer and singer for the band Dinorabbit, Rabbity also has a pet panther named Panthy. She’s lucky, nimble, and quick, but a little skittish. A co-workers of hers, Griffin Malek, was one of the recently abducted people, so she was very keen to solve this mystery and return him home. Rabbity is a hydrokineticist played by my six-year old daughter, using the rabbitfolk race. Rabbitfolk are a Pathfinder Compatible race created by my daughter (with some help) which will one day be published in the upcoming Realms of Atrothia: Primary Expansion by Sunburst Games. Rabbity recently ‘befriended’ (she thinks) a vicious howler named Prickles. What could go wrong?!
The final member of our party is Aeris Caldyra, a local locksmith who was cajoled by her roommate, Rabbity, to join the band as a percussionist and set designer. With few friends to call her own, Aeris relented to the rabbitfolk’s request and is the least talented member of the band. The last worshipper of Alseta in Cauldron, with more than a few secrets and regrets, Aeris is a suli bloodrager with a chip on her shoulder. Always one to lend a hand, like her Grandfather Marzio once would have done, Aeris was determined to rescue the missing citizens of Cauldron. Aeris is my character for the Shackled City Adventure Path.
The jungle city of Cauldron, located in the bowl of a dormant volcano.
The members of Dinorabbit and their newly liberated Cauldronites arrived in Cauldron to little fanfare. They brought the people they had freed from slavery to the Church of Abadar — the group who had hired them to find four missing orphans — and spoke with it’s current leader, Jenya Urikas. The authorities were called and the group had just enough time to ask about Terrem Karatys, one of the four children they had been tasked to save. Terrem had been free by our heroes only a few moments before a monstrous beholder had appeared and stole him away again. They admitted their failings to the Priestess, who looked confused.
“Oh? You didn’t save Terrem? Well, he is here safe and sound. He arrived on our doorstep before any others.” She counted out the coins she owed the group for saving three of the four children and handed it to them with a smile. “A pleasure doing business with you.”
My family was more than a little confused. Why would a beholder go to the trouble of stealing an orphaned kid that they had saved from slavery just to bring the kid home? And this beholder… He wasn’t the only one interested in Terrem. The Last Laugh Thieve’s Guild also wanted the boy. In fact, they had gone as far as tasking the orphanage’s janitor, Patch, with keeping an eye on him. Strange… Our heroes tried to speak with Terrem, but the boy would say nothing.
Suddenly the town guard arrived and everyone — victims, heroes, and even some priests — were brought to the Garrison for questioning. The PCs were interviewed over and over by the authorities. The guards looked for holes in their story. Incongruities that might show they had something to do with the kidnappings… They were lectured on the legality and dangers of vigilanteism. Informed that the entirety of Jzadirune and the Malachite Fortress were off limits — it was an active crime scene, after all. The poor musicians were so busy they barely had a moment to stop and breathe. After a few days they received one last warning from Terseon Skellerang, Captain of Cauldron’s city watch, and were sent on their way.
On the way out they ran into Krylscar Endercott, a town guard who was among those that had been abducted from his home by dark folk and then saved by Dinorabbit. Although he was badly wounded when they found him, he grinned at the sight of them and asked for a blade. The stubborn fool was a big help in getting everyone home safe. They chatted with him a bit, and bid him farewell.
Upon re-entering the city for the first time in days they were shocked to discover that although their deeds were well known, their identities were not. A heinous crime! While Aeris returned to work at her locksmith shop, the rest of the band spent some time spreading word of their triumphs and of an upcoming performance — which they had yet to schedule. The next few days were marked with frivolities — writing, practising, performing, rumourmongering, and so on. Falco took these responsibilities very seriously, intent on milking their newfound fame for all it was worth.
Rabbity discovered that Griffin, the friend she had worked so hard to save, was out of a job. He had been replaced as bartender and was now stuck waiting tables. Also, Rabbity had been fired. She hadn’t been into work in nearly a week and left no word as to why, so that wasn’t too much of a surprise. Still, my daughter was a little insulted. She also worried about her pet howler, Prickles, who was currently locked inside the Malachite Fortress, hopefully not killing (or being killed by) the investigating city guards. Deciding they needed to sneak into Jzadirune and save him before he got into trouble, Rabbity concocted a plan. She looked into the people who they hadn’t saved and picked out one whose home was close to Jzadirune — 52 Ash Avenue, the home of skinner Rikaldo Veskar. Rikaldo had a tiny, blood-stained, stinky home that had been abandoned 37 nights. Knowing that he had been sold to unknown buyers in the Darklands and wouldn’t be returning, my daughter set out to purchase the building from the city. She sought guidance from her friend Ruphus Laro at the Church of Abadar and determined the steps to take to buy the building. It cost more than she had, but she managed to convince the group it was important. They pooled their money and bought the house. Then Rabbity asked Falco to start using his stone shape spells to tunnel out a passage from their new junky home to Jzadirune. With some luck and planning they’d be able to get to Prickles before he killed anyone. Hopefully….
Mick was equally busy. He spent a lot of time trying to figure out how he could legally get his hands on Jzadirune. Deciding he needed help he sought professional guidance from the Church of Abadar, just as Rabbity had. With their legal advice he put together a plan to legally acquire the underground complex. And so he set out to track down the original ownership paperwork, and the living descendants of Jzadirune’s founders. There weren’t many of them. Only six. So Mick set out to barter with them over ownership, in the hopes they would turn it over to him. Hopefully, when all is said and done, he could legally claim the property from the city.
Aeris spent her time working, patrolling the town, and looking for a sign that matched the mysterious Kingfisher symbol they had discovered on a letter written to the slaver Kazmojen. She discovered nothing.
There was plenty the group did together, as well. They visited the orphanage, Church of Abadar, and all the other people they had saved, double checking they were safe, healthy, and reintegrating back into society. Patch was fine and back at work. Apparently he had managed to keep his affiliations with the Last Laugh Thieve’s Guild a secret. The orphans were a little traumatized — all except for Terrem who seemed unconcerned over the entire ordeal.
Krylscar had returned home to find his parents hadn’t even been looking for him. Turns out they thought he had robbed them and fled the city — the jerks! He was trying to find himself a new place to live, but not having any luck. At work everyone treats him like a weirdo and he’s angry that they never saved him. In fact, he was generally an angry guy. Still, he had friends. He remained close with his pal Griffin, and often showed up to hang out with the members of Dinorabbit. They knew he wasn’t some shifty loser. They knew he was a good guy. (My family really grew to like this guy! Haha).
Jasper and Jeneer had gone back to work like nothing had happened. Jasper teaches math at Bluecrater Academy, and Jeneer is a jeweller’s apprentice. The group saw Maple, a suspected member of the Alleybashers gang, on the streets from time to time, but she never stayed to chat. And Coryston Pike, the retired adventurer, made it home, but hadn’t been seen around town since.
But, not everyone had recovered. Sondor (the dwarven cartwright), Deven Myrlzal (a teenage human lamplighter), and Irruth Mercadi (a chandler), were all traumatized by their experiences. They wouldn’t talk. They just sat still, scared, and sad. Currently they were at the Church of Abadar, but they would need to head home soon. As Priestess Jenya Urikas plainly pointed out, the Church of Abadar was not in the business of charity.
When the group discovered that Keygan Ghelve had been arrested they went to visit him. My kids were a little upset about his fate. Did he really deserve to be arrested? Out of fear he had helped the kidnappers and slavers, but he had also fought alongside our heroes to free them again. Of course, he had done that only because the group had forced him to… In time they realized that Keygan’s fate was out of their hands. Instead they offered to take care of his rat familiar, Starbrow, and his home. It took some bargaining and a signed contract, but Keygan agreed to transfer ownership of his home and locksmith shop to the members of Dinorabbit on the condition they took care of Starbrow, they did not sell any of his paintings or his grandfather clock, and they didn’t bring their meddlesome pets into his home. When he was released from prison, ownership of his home and shop would revert to Keygan. Keygan was grateful, and they began to feel a little better about this whole ordeal.
In time they discovered a vandalism problem in Cauldron. Someone had been painting words on buildings in goblin. Things like “Murrd wrote this!” “Snurk smells like dung!” and “Drakthar has bat ears!” Luckily, Mick could speak goblin and was pretty sure the culprits were a gang of goblins. Which was absurd! Everyone knew no goblins lived in Cauldron! Determined to prove he wasn’t crazy, the group stayed up late a few nights, attempting to catch the vandals red-handed. Although they came close, the only thing they managed to earn was a scolding from the guards for suspicious behaviour. Whoops!
One day the group received a summons from the Mayor’s Office. They hurried over and were told that the mayor — Lord Mayor Severen Navalant — wanted to host a ceremony in honour of their deeds. Although it was clear he was hoping to use their newfound celebrity status to bolster the public’s opinion of him, the band didn’t mind. They wanted to do the same to him, after all. Together they made some plans and the party was scheduled, with Dinorabbit making a headlining performance. The Mayor also asked about their experiences under Cauldron and their opinions on what should be done about Jzadirune, the Malachite Fortress, and the passages to the Darklands. Mick took this opportunity to share his plans to acquire full ownership of Jzadirune while Rabbity petitioned for her ‘beloved’ new pet Prickles to be returned to her at once! The Mayor smiled and assured them he would take it under advisement. The group was skeptical he would, but had little choice but to accept him at his word.
The days leading up to the festival were hectic, with even Aeris practising as much as she could. They put on a lot of other performances, both big and small. My family was happiest to earn themselves a performance at both the Cusp of Sunrise (a fancy social club that was for the nobility) and the Coy Nixie (a fancy restaurant where they first began their adventure). Before they knew it the party was upon them. Much to their surprise the mayor named them ‘Champions of Cauldron’ — a position which he later assured them had no real responsibilities to go with it — rewarded them the deed to Jzadirune, and gave them a new task: putting an end to the goblin vandals that have been irritating the town! Both shocked and pleased at this turn of events, the gang agreed. Not that they were given a choice…. Haha. After the ceremony the party began, and my family had a blast describing their performances and songs. The night ended with fireworks, and a few angry scowls from Captain Skellerang.
The next day would see them busy again. Plans had to be made for Jzadirune and Prickles had to be liberated. The Lord Mayor’s secretary informed them that the Malachite Fortress would be turned into a guard post for the Town Guard so that the entrance to the Darklands could be properly protected. This, of course, meant that they would need to have engineers remodel the entrances to both Jzadirune and the Malachite Fortress a bit. Both the members of Dinorabbit and the Town Guard had to be able to access different parts of the complex without traipsing through the others space. I handed my kids a map of Jzadirune and asked them for their ideas. They also got to make plans for the engineers to fix up some of Jzadirunes broken walls and tunnels while they were at it — courtesy of a small grant provided to them by the Mayor’s Office. A surprise my kids found very exciting! Even more exciting? The group got to visit Jzadirune and Rabbity retrieved Prickles. Happily he did not try to devour her. Yet.
By the time Dinorabbit left Jzadirune and began to walk home they were greeted by rain. More than that. It was a downpour. Fall had come to Cauldron, which meant the rains would continue for a few weeks more, at least. It was misty out. Cool and dark. There was a chilling howl on the wind — like that of a wolf. On the side of Aeris’ locksmith shop was more goblin graffiti.
“Who builds town in volcano? Stupid humans!”
The gang sighed.
Tomorrow they would need to put aside their ambitions and get to work. The had a gang of vandals to catch.
Behind the Screen
The Shackled City Adventure Path is a difficult to get your hands on adventure path published in eleven separate Dungeon Magazines, or available in hardcover from Amazon here or from Paizo Publishing’s website here. The first adventure, Life’s Bazaar is available in Dungeon Magazine #97 from Paizo Publishing’s website here. A copy of the premade player handouts is available from Paizo here.
Despite being a 3.5 Dungeons and Dragons Adventure Path, we’re running this campaign with Pathfinder (both the campaign setting and the ruleset). Our characters utilize content from many sources, some of which are listed below.
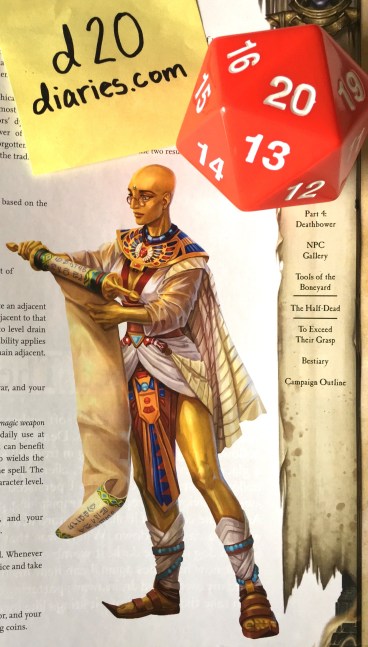
Today we’re taking an in depth look at the first book in the Tyrant’s Grasp Adventure Path! This survival horror campaign pits the players against the return of the Whispering Tyrant, the lich-king Tar-Baphon, who was defeated and sealed away long ago. Tyrant’s Grasp will be the final Pathfinder 1st Edition Adventure Path released, before the switch is made over to Pathfinder 2nd Edition in August. Intended to take characters from levels 1 to 17, Tyrant’s Grasp is six volumes long.
A wonderful Player’s Guide for Tyrant’s Grasp is available as a free download on Paizo’s website here. The Player’s Guide gives players a relatively spoiler-free way to properly prepare for and integrate their characters into the Tyrant’s Grasp Adventure Path. I highly recommend checking it out!
The Tyrant’s Grasp Adventure Path begins with Pathfinder Adventure Path: The Dead Roads (Tyrant’s Grasp 1 of 6). Written by Ron Lundeen, The Dead Roads is an adventure intended for first level characters, which should bring PCs up to level five by its conclusion. This adventure begins when the PCs awaken already defeated in the Boneyard, a land where the dead go to be judged. There’s just one problem… They’re not quite dead. Trapped inside a tomb that doesn’t belong to them, they’ll need to escape, figure out what happened to them, and find a way to return home. But, how could one possibly escape the land of the dead?
Let me start by saying that The Dead Roads — and the Tyrant’s Grasp Adventure Path — is not for everyone. Terrible tragedies will occur, and you won’t always be able to prevent them. These events are bound to have a lasting effect on your characters, so players should be prepared to consider and role-play the marks left by the trials you face. Often you’ll be in dire situations with limited resources, so players will need to be resourceful to survive. Plenty of the imagery and events in this adventure are dark, morbid, and sorrowful. It’s definitely a horror campaign — though not your typical horror. It’s suspenseful survival horror, with a good deal of body horror in the first book, as well. The Dead Roads contains imagery that is inappropriate for children and some adult gamers will even consider an image or two disturbing. It’s definitely not a campaign I could play with my family.
That said, I loved The Dead Roads. Absolutely, positively, adored it.
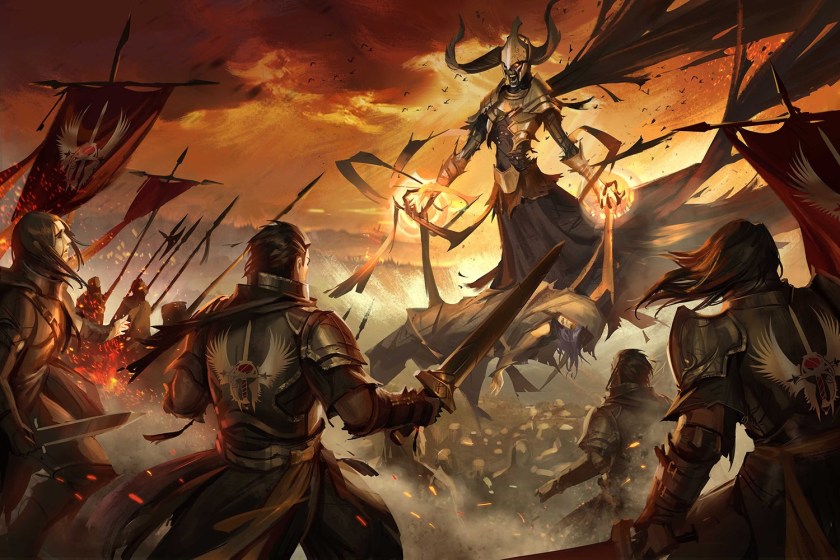
For starters, it looks great. From cover to cover it’s a wonderful, high quality book filled with nice maps, and beautiful, dark artwork. The cover depicts Mictena (a catrina psychopomp the PCs are destined to interact with) in the foreground. Behind her is an image of Seelah (the Iconic paladin) and Yoon (the iconic kineticist) battling ostovites. Both images are by Igor Grechanyi. There’s a lovely map of The Gravelands (Lastwall and parts of Ustalav) on the inside cover. There’s a ton of artwork throughout the book — of enemies, allies, and characters who could become either. I particularly enjoyed the art for Prince Uspid and Mictena. Colulus was the most disconcerting image in the book. If any image is going to bug a squeamish player it’ll be that one. There’s a few characters that I wish had art but don’t (which is expected! Art’s not cheap and there’s only so much space!). Ayuki, in particular, would have been nice to see, as well as the jitterbone creature in the bestiary. The maps, all drawn by Matthias Rothenaicher, are really nice. They look great, of course, but they’re also well thought out, executed, and each has a unique feel to it. I particularly enjoyed ‘Roslar’s Tomb’ and ‘Deathbower.’ I wish that the maps of the various Dead Roads locations were given a bit more space, though. Squishing three multi-floor maps for three different locations onto one page is good for page count, but makes some of the maps difficult to read. Part of the eastern end of the ‘Palace of Teeth’ is nearly lost in the creases of the binding, while the entrance to ‘Salishara’s Scriptorium’ is hidden in the creases. If both of those maps were a few grid squares further to the left that would have been less of a problem. Finally, flipping back and forth between the map page and the various locations depicted in it (which is spread out over 28 pages) is a bit irritating. Have a bookmark or post-it note handy and try not to tear your pages. Much to my surprise there was also two player handouts which represent puzzles the group comes across. I’m really glad they’re depicted instead of just described. They’re necessary and a really nice touch.
Part of the maps lost in the creases.
The Dead Roads starts with a bang (HA!) and doesn’t let up. The entire opening has the feel of an ominous, suspenseful mystery. Your PCs don’t know where they are, how they got there, or what’s going on. Their locations hide clues to both their situation and the history of wider events, which the PCs may or may not be able to uncover. In time they will discover the answers to some of their questions, just as they realize it’s tied to an even bigger mystery.
There’s a lot of wonderful social encounters and NPCs in this adventure. Number Three, Barple Stonebreaker, Prince Uspid, Queen Carnassial, Kishokish and his portrait, Ayuki, Salighara, Berthold, the wyrwoods, Mrs. Pedipalp, Aydie, Reedreaper, Mictena — there’s just so many great interactions in this adventure! Among them, three particularly stand out amongst the crowd: interacting with the townsfolk of Roslar’s Coffer is poignant and amazing; speaking with Barzahk the Passage; and — my personal favourite characters — Umble and Thoot! This pair of friendly psychopomps are the best!
Umble and Thoot
Prince Uspid
Deathbower
Many of the creatures and NPCs you come across don’t look friendly — which doesn’t mean they aren’t friendly. Of course, it doesn’t mean they are friendly, either. Which I love! Appearances have no bearing on what a creature acts like and I appreciate that this adventure used that so effectively. It’s bound to throw players for a bit of a loop and make them feel… off-kilter. Which is great!
There’s a lot of challenging encounters in this adventure and plenty of unique monsters to face off against. I particularly enjoyed that so many can end in ways other than violence. But, don’t let that last sentence lull you into a false sense of security! There’s a lot of combat encounters in this book that cannot be avoided.
And the ending! Oh, the ending! I love it! I cannot wait to get my hands on the next book in this Adventure Path! I have a feeling Eulogy for Roslar’s Coffer is going to be just as good.
And now it’s time for a warning:
We’ve got more to say about this adventure, but it’ll come with spoilers! Don’t want to read them? Skip on past this next section until you see the large words ‘SPOILERS OVER.’ Got it? Good! See you on the other side where we’ll talk about the extra content in this book!
SPOILERS
The Dead Roads adventure is split into four major parts: Awake in Roslar’s Tomb, Among the Dead, Walking the Dead Roads, and Deathbower. One of these parts Walking the Dead Roads is particularly dense and is made up of three major locations: The Palace of Teeth, Nine-Eaves, and Salighara’s Scriptorium. All told The Dead Roads adventure is 52 pages in length with six pages afterwards dedicated to three NPCs: Mictena, Mrs. Pedipalp, and Reedreaper. All three of these are enemies the PCs will come across, but only one of them has to stay that way. The PCs have a chance to convince the other two to step aside without violence (although it’s extremely hard to accomplish for one of those two!).
Through this adventure the PCs will get to interact with psychopomps, a type of outsider native to the Boneyard who work to ensure that the processing of souls is done accurately and efficiently. Typically functioning as guides for the souls of the deceased, the psychopomps are confused over what to do about the mysterious PCs. Some will help them along their way (especially the delightful Umble and Thoot!) , and others with hinder them — particularly Mictena, a catrina psychopomp obsessed with putting the PCs spirits properly to rest. Through a good thorough death, of course! Psychopomps aren’t the only enemies and NPCs the players will interact with. The Boneyard is a huge realm, and there’s plenty of creatures living/stranded/invading there. Other major groups of enemies include fey, vermin, sakhil, and nightmarish beings from the Dimension of Dreams.
Fittingly, The Dead Roads begins with death. Lots of it. The entire town of Roslar’s Coffer has been destroyed in one terrifying instant. Including the PCs. I’ll leave the details out of this article, but suffice to say this will have a lasting effect on your players and their characters. Any family, friends, and companions — pets included — that lived in Roslar’s Coffer are dead. Although it might be tempting to warn some players about this in advance, that also will ruin some of the surprise and likely result in players purposely making no personal connections to the town of Roslar’s Coffer — which would be a mistake in my opinion. Every GM will need to judge their players accordingly, and perhaps provide them with some hints and warnings while they build their characters and backstories. In my opinion this event is handled incredibly well throughout this adventure, and I highly recommend allowing players to make a character with personal connections to Roslar’s Coffer. It adds so much to the story. However, it is important to inform PCs that if they have animal companions, mounts, or they are a wizard with a familiar, they will not have access to their pet at the start of the campaign. Player’s who have read the Tyrant’s Grasp Player’s Guide will already be aware of this, although they won’t (accurately) know why.
Happily, the player’s experience doesn’t begin with the death of Roslar’s Coffer. Instead, Part One: Awake in Roslar’s Tomb begins with the PCs waking up in a stone coffin. Literally entombed they need to push their way out of the stone box and into a cold, dark, mausoleum. It’s a great opening. Players and characters alike are bound to be curious what has happened and where they are. Players begin with any gear they had that could reasonably fit in a coffin with them. Any familiars who share a soul with your PCs (a shaman or witch familiar) will be in a coffin of their own, while all other companions are not present (as they are dead). Eidolons and phantoms can be summoned back normally, although all other familiars and companions will need to be replaced at a later time.
Soon, the PCs will discover they’re in someone else’s tomb — Ervin Roslar, Knight of Ozem and hero of the Shining Crusade. The same man that Roslar’s Coffer is named after, in fact. Interesting! As they navigate the tomb they’ll find strange creatures, animated bones (sort of…), a trapped spirit, and a tribe of mites. They’ll also discover that Ervin Roslar may have had a few secrets of his own, although it’s unlikely they’ll unravel his history completely. This section of the adventure is a suspenseful series of explorations, mysteries, tantalizing clues, and challenging combats. It’s going to be a ton of fun to both run and play.
Part Two: Among the Dead begins when the PCs exit Roslar’s Tomb to find themselves face to face with a pair of spooky looking (and absolutely delightful) psychopomps: Umble and Thoot! Seriously, they’re awesome. This quirky pair give the PCs some answers to their most pressing questions and explains that not only are the PCs dead and not dead at the same time — weird! — the rest of Roslar’s Coffer is well and truly dead. They ask the PCs to lend them a hand in convincing the spirits of the dead of Roslar’s Coffer that they are, in fact, dead. These poor fellows need a hand moving everyone on to the afterlife in a calm and orderly fashion! The PCs get to travel to a phantom version of Roslar’s Coffer where they interact with all the people in town — now dead. This is an amazing section of the adventure. Short and poignant, the GM has a chance to show the PCs what has happened to all their family and friends. They’ll need to convince loved ones to move on, and will have a chance to say goodbye. If they have any pets they’ll find them here as well. The adventure itself provides rules for interacting with these spirits, how to convince them to move on, and some tactics that will let them do it in a timely fashion — namely convincing the town leaders of their death. Some PCs will want to stay behind and die along with their family, others won’t have personal connections to the townsfolk, and others still will want to ‘save’ some of these spirits and attempt to return them back to life. There’s plenty of guidance in this book for handling PCs of every kind. After accepting their death the people of Roslar’s Coffer — even familial loved ones — want answers for what happened to them. The PCs are uniquely positioned to uncover this. And, of course, any spirits who can’t be convinced to move on (including those your PCs may want to bring back) will deteriorate in time until they become undead ghosts and other malevolent entities. Umble and Thoot can explain this to the group and ensure no PCs attempt anything so foolhardy. Also in this section the PCs are first introduced to the antagonist of this adventure, Mictena. Overall, this section of the book is among my very favourites. It’s exceptionally well handled and sure to be an emotional experience for players and characters alike. It’s a truly unique roleplaying opportunity. I’m not an overly emotional person, but I’m quite certain that if I was playing this with any character who had even a modest amount of family or friends in Roslar’s Coffer, under an even remotely talented GM, I would cry — in a good way! It has the potential to really tug at the heartstrings.
Part Three: Walking the Dead Roads begins after the PCs have helped the people of Roslar’s Coffer accept their death. Umble and Thoot, who are grateful and believe that since the PCs are only slightly dead they’re not truly dead at all, offer the PCs a way out of the Boneyard. The Dead Roads. They explain that this secret path is only ever trod by psychopomps and gatekeepers, the beings who watch over what amounts to traveller’s checkpoints along the road. Capable of leading anywhere, the PCs can use the Dead Roads to get home to Roslar’s Coffer (so they can figure out what’s happened) by taking a certain path. They’ll need to stop at the three checkpoints along the way and get stamped by that location’s master. Convincing them to grant the stamp should be the hardest part of the journey. Unbeknownst to Umble and Thoot, politics and turmoil have overtaken the three waystations, making each location more dangerous than expected. These locations may be visited in any order, although they are presented in order of difficulty (which is also how I recommend playing them).
The Palace of Teeth is a small castle ruled over Queen Carnassial and her court of tooth fairies. Not long ago her son, Prince Uspid, led a coup against her, and the two factions have been locked in a stalemate ever since. Although Queen Carnassial is the only one with the authority to stamp the PCs (at least until her death) it’s Prince Uspid the PCs are destined to meet first. They’ll need to navigate, bargain, and battle their way through bickering fey factions. They might even get to keep all their teeth…. This location is simultaneously goofy in a crazed sort of way and disconcerting. Although the Palace of Teeth was once a beautiful castle it’s undergone a rather morbid makeover since the fey moved in. The place is creepy and it’s denizens literally want to yank your teeth out. That can make bargaining… weird. Haha. I love the art for both the tooth fairy monarchs (particularly Prince Uspid!) and the stained glass angel. But, in my opinion, the creepiest encounter involves a pair of soulbound dolls in the midst of acting out a rather bloody play about dentistry. They attempt to make the PCs their next patients, using deep slumber and some particularly creepy statements. It’s awesome! Haha. The Palace of Teeth is my favourite location on in part three.
Nine-Eaves is a three storey manor owned by an old shoki psychopomp with a fondness for games and puzzles. Unfortunately, Kishokish’s manor has been invaded by sahkil and he’s now a prisoner in his own home. They PCs will need to free him if they want to get his stamp. Luckily they’re not without allies. An animated portrait created to pose riddles to visitors can lend the PCs a hand — if they can solve his puzzles! There are three puzzles total, and each one solved can earn the PCs information and advice. They’ll need to traverse the house as they seek answers, battling vermin, sahkil, and an unfettered phantom named Ayuki. I really enjoyed the puzzle aspects of this location.
Salighara’s Scriptorium was created by Salighara, a reclusive viduus psychopomp who is studying the Dimension of Dreams and oversees a crew of wyrwood scribes. Mictena attempted to convince Salighara to kill the PCs on her behalf, but was rebuffed. Mictena then offered the same deal to Salighara’s assistant, a plump woman named Mrs. Pedipalp (actually an aranea from a nightmarish section of the Dimension of Dreams). Happy to take the powerful psychopomp up on her offer, Mrs. Pedipalp has ousted Salighara from her own scriptorium and remade the building in her own image. Now a dark place of nightmares and horror, the PCs will need to set things right. This is definitely the most horror-themed location in The Dead Roads, with traps, haunts, and horrifying enemies. Colulus, a flayed ettercap and long-time minion of Mrs. Pedipalp is by far the most horrifying. But, even the Scriptorium is not without potential allies. PCs get to meet Salighara, some upset wyrwoods, and a ratling named Berthold. Mrs. Pedipalp herself is a great opponent — a capable liar, powerful spellcaster, and nightmarish foe all wrapped up in a kindly looking package. I particularly like her tactics. That said, it’s likely Colulus who will give parties the most trouble.
After receiving their stamps the PCs can finally traverse the rest of the Dead Roads and return to the land of the living — not! Mictena refuses to let them go! She magically relocated her domain, Deathbower, right onto the Dead Roads so that she and her dangerous shabti gardeners can kill your PCs properly. Which brings us to the final section of the Dead Roads adventure, Part Four: Deathbower. I love this location and its map. I love the inhabitants — gardeners, friends, and foes. And I love Mictena herself. Despite being an enemy of your PCs she’s not a bad being. She’s a psychopomp just doing what she thinks is right. Which is cool! Although some of the hazards and enemies in this glorious garden must be confronted head on, some characters can be swayed and may even join you for a while. Reedreaper is a particularly interesting character, although it’s unlikely he sticks around long enough to play much of a role. Even Mictena can be talked down — theoretically. The chances your PCs will be able to roll high enough are incredibly slim, but it could happen. Which I really like.
After leaving Deathbower behind the PCs find themselves back on the Dead Roads and greeted by an incredibly powerful psychopomp, Barzahk the Passage, a demigod and master of the Dead Roads. This enigmatic figure whisks the PCs off to their home in a matter of moments, giving them a bit of time to ask him any questions they might have. I thought this was a great moment and a wonderful way to end the adventure.
SPOILERS OVER
In addition to The Dead Roads adventure, this volume contains two articles intended for both GMs and players, one article solely for the GM, a campaign outline, and a bestiary containing five new creatures.
The first article, Tools of the Boneyard, is written by Matt Morris. In it you’ll find new gear and character options aimed at dealing with the dead. There is one alchemical remedy, one alchemical tool, and two alchemical weapons — bone burn is my favourite, so be sure to check it out! There are two new special materials useful for crafting — cryptstone can be used for ammunition and weapons, while spiresteel can be used for ammunition, weapons, and armour. Finally, there are five new magic items: crypt rod, grim helm, harbinger’s scythe, Lady’s Mercy, and Momument’s Truth. Although I enjoyed a lot of the items, it’s the character options that I found were most exciting. Graveslinger is a gunslinger archetype that specializes in combatting incorporeal undead. Soul Shepherd is a monk archetype that calm incorporeal undead and haunts with a touch. They also gain some otherworldly resistances and interesting ways to use their ki. Reaper is a new oracle mystery which I really enjoyed. Tightly themed and flavourful it’s capable of both killing the living and destroying undead. There are also six new barbarian rage powers including the psychopomp totem powers.
Thrilled to see shabti get some attention!
The second player friendly article is written by Mikhail Rekun and entitled The Half-Dead. This section talks about four races that have a strong connection to death and the undead. In addition to providing details and character options for dhampir, duskwalkers, and shabti, it also talks about the new subtype of creatures, mortics. Dhampir appear alongside two magical items, duswalkers have access to five new feats, and shabti have access to five new feats. I was particularly excited to see shabti included.
The next article, To Exceed Their Grasp, is written by Crystal Frasier and intended for GMs only. This article discusses some of the important concepts, characters, and events of the Tyrant’s Grasp Adventure Path and the role they play in the overarching story. It also contains a timeline. This is incredibly useful for GMs an will likely be referenced throughout the entire Adventure Path.
The Death of Arazni (Herald of Aroden) during the Shining Crusade. Art courtesy of Paizo Inc.
The Bestiary is up next! It contains a random encounter chart, two interesting social encounters, and five new creatures written by Ron Lundeen, Kyle T. Raes, and Mike Welham. All of the monsters in this book have ties to death and the Boneyard and two of them are featured in The Dead Roads adventure. Bonewrought Willow is an ominous looking intelligent plant capable of growing in Boneyard. Attracted to light and more benevolent than it appears this is a great CR 3 creature I can’t wait to confront my players with. Kaicherak are nasty little fanged worm beasts with ties to Achaekek and a fondness for messily gorging themselves on blood. At CR 4 they are among the most powerful new creatures in the bestiary. Mortics are living beings with strong connections to negative energy which makes them sort of like living undead. There are two mortic stat blocks included in the bestiary — the ghoulish elf-like angheuvore (CR 2) and the incredibly flexible halfling-like jitterbone (CR 4). As previously mentioned, more information on mortics is also included in The Half-Dead article. The final creature is the tooth fairy monarch, a CR 3 version of the lowly tooth fairy.
The last article is a campaign outline, written by Crystal Frasier and Ron Lundeen, that briefly details the events of the upcoming volumes of the Tyrant’s Grasp Adventure Path. Not the sort of thing you want your players peeking at! The campaign outline is incredibly useful for GMs.
Today we’re going to take a look at the most recent Pathfinder Society Scenarios that are available for purchase, and let you know we thought. Although you’ll find references to events in each that I liked or disliked, and comments about specific characters, these scenarios are not explored in detail. It’s not my intention to spoil the events in these scenarios, or give summaries and full reviews, but to share my opinions and provide recommendations. That said, if you want to avoid even minor spoilers then I recommend clicking on a different article. Whether you intend to use them in home games of the Pathfinder Roleplaying Game, sanctioned scenarios for use with the Pathfinder Society Organized Play, or just want to read a nifty new adventure, we’ve got you covered! So let’s get started!
Pathfinder Society Scenario #10-16: What the Helm’s Hide is a Tier 1-5 repayable scenario that consists of four short one-hour long quests. “Collection,” “Autumn,” “Dust,” and “Witness.” “Collection” should always be played first, “Autumn” and “Dust” may be played in any order, and “Witness” is the thrilling finale. Each quest is penned by a different author, including Calder CaDavid, Lysle Kapp, Kendra Leigh Speedling, and Nate Wright. While Speedling and Wright have written for Paizo before, this will be the first Paizo writing credit going to CaDavid and Kapp. Each quest also comes with its own player handout, which is always nice. Also, this scenario has a lot of great artwork in it!
The first quest, “Collection,” is written by Lysle Kapp and takes place in Korvosa’s Jeggare Museum. Here PCs will need to inspect relics discovered by the famous Pathfinder Helven Leroung and uncover clues about her history and character. You also get to delve into Helven’s relationship with the famous Montlarion Jeggare, for whom the museum (and much more!) is named. His descendant, Mercival Jeggare is curator of the museum and willing to lend you a hand. There’s a lot of information you can learn here, although groups are unlikely to get all of it, which I rather enjoyed. For more information on Korvosa you can check out Pathfinder Chronicles: Guide to Korvosa.
“Autumn” is written by Calder Cadavid and takes places in Andoran’s Arthfell Forest. PCs investigate a sliver of the history of the Pathfinder Zaul Blystone. It has amazing art for an NPC, Adelyn Rhinon, which is my favourite art in the scenario. This is a fun quest although I do have one minor complaint. I feel like one of the characters gives up a bit too easily. For more information on Andoran check out Andoran, Birthplace of Freedom.
A member of the Decemvirate. Illustration by Ernanda Souza. Art courtesy of Paizo Inc.
“Dust” by Nate Wright takes place in underground Dwarven ruins on the edge of Highhelm. There players get to dig a little deeper into the history of Veldrid Goldborough. I enjoyed the NPCs in this one and adore the art for Helga Silverbrew. She’s got such a great facial expression. I like enemies in this one a lot, and the… source of information. For further details on the Five Kings Mountains check out the The Inner Sea.
The finale, “Witness,” is written by Kendra Leigh Speedling and was an absolute delight! It takes place in the Grand Lodge of Absalom and involves the PCs enacting a sort of ritual to activate a secret cache hidden by the gnome Pathfinder Eylysia. As Master of Scrolls Kreighton Shaine and two members of the Decemvirate watch on your players get to experience an important event from Eylysia’s past. I won’t say any more to prevent too many spoilers, but I will say it was awesome. I loved the final battle and the revelations it uncovered. And Eylysia’s final line! So good. For more information on the Grand Lodge check out Pathfinder Chronicles: Seekers of Secrets and Pathfinder Society Field Guide.
What the Helms Hide is a really great series of Quests. So great, in fact, that it’s my favourite series of PFS Quests. All of it’s component Quests were enjoyable, but its the finale that really ties it all together and makes it exceptional. Really well done from the whole team of writers. Each Quest has a chance for battle, a social encounter, and to uncover clues regarding their respective mini mysteries. Overall I really enjoyed this scenario. I give it four out of five stars.
Captain Sevenfingers. Illustration by Josef Kucera. Art courtesy of Paizo Inc.
Like the three scenarios before it, On Sevenfingers’s Sails features Venture-Captain Calisro Benarry, a half-orc Pathfinder who has sent plenty of Pathfinders into the depths of the Gloomspires. It also features Benarry’s quartermaster Kakikko, and Hrethnar from Pathfinder Society Scenario #8-15: Hrethnar’s Throne. New NPCs introduced include the very disturbing Thael Shivers, Vashthrexa, Nightdrinker, and Sempet Sevenfingers himself. PCs will need to enter the terrifying tomb, contend with Captain Sevenfingers, and plunder everything they can. Of course, there’s some complications in this mission, and PCs will have to contend with far more than expected. This scenario features an optional Hard Mode for all those players out there who relish a challenge.
The scenario is wonderfully creepy, morbid, and ominous, although that sort of content is not for everyone. Players who have issues with body horror will want to give this scenario a pass. It’s definitely not an scenario for kids. Any characters who played the previous Gloomspires adventures are going to get a bit more satisfaction out of this scenario than their compatriots who haven’t, and will find they get a few extra bonuses along the way. This scenario is packed full of atmospheric environments, memorable characters, and foul villains. The battles are challenging and take place in dynamic locations. I particularly enjoyed the final encounter. Really well done! Overall I think this is a really great scenario that won’t be for everyone. It’s creepy, gory, and a great high level challenge. I give it five out of five stars!


")


")


 This year Free RPG Day was held on June 15, 2019, with Paizo’s free downloads of the PDFs being available on July 1, 2019.

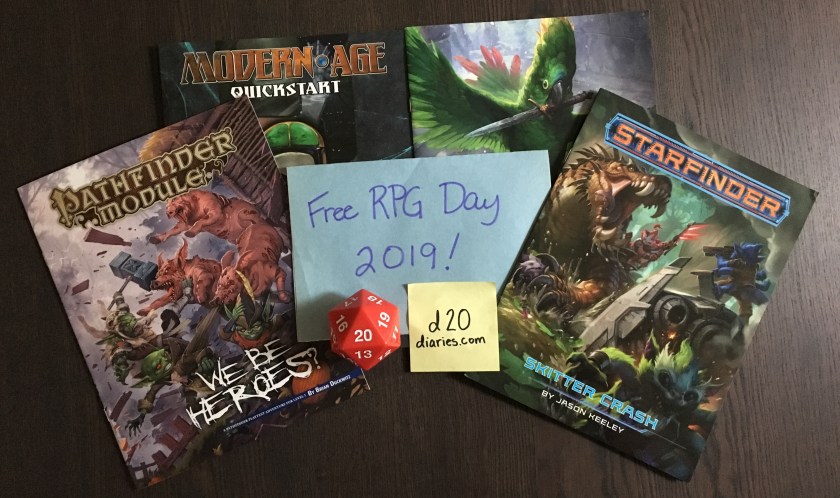


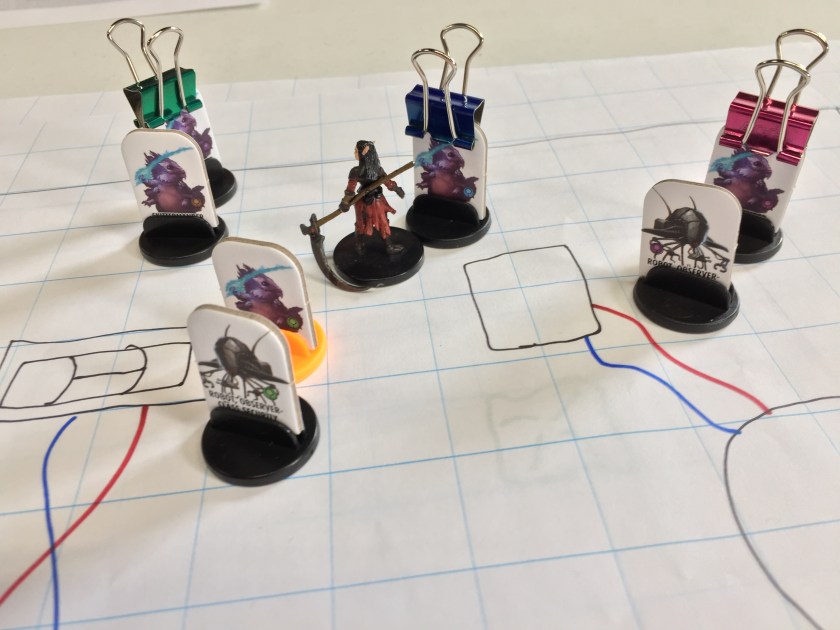


 As you may have heard, the latest issue of Wayfinder magazine was recently released. Wayfinder is full of fan-created content for the


 By the end of this chapter the PCs will have freed Cedona, made their escape from the Prison Moon, and retreated to Outpost Zed. But their mission’s not yet complete. The PCs and Cedona know they need to get back the experimental drive from the Azlanti before its too late.

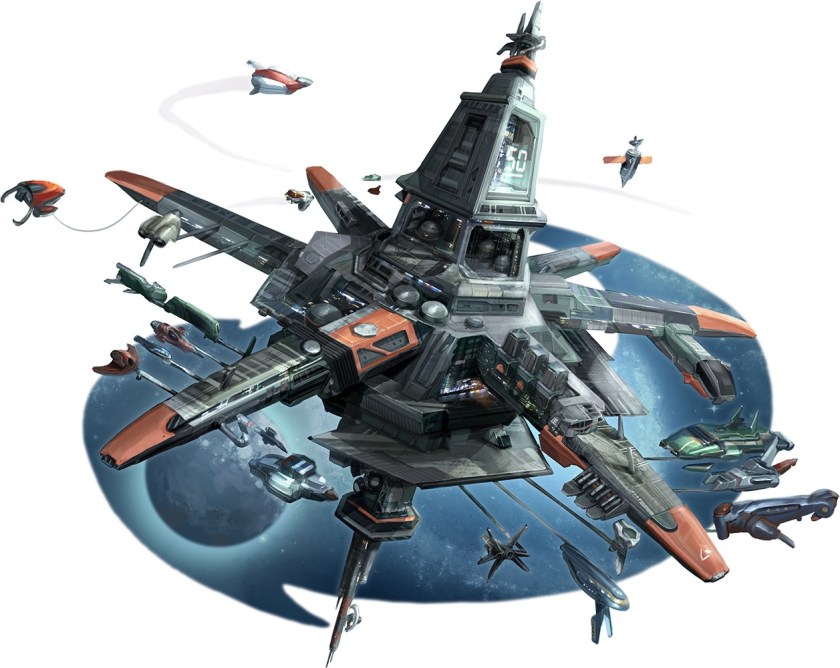


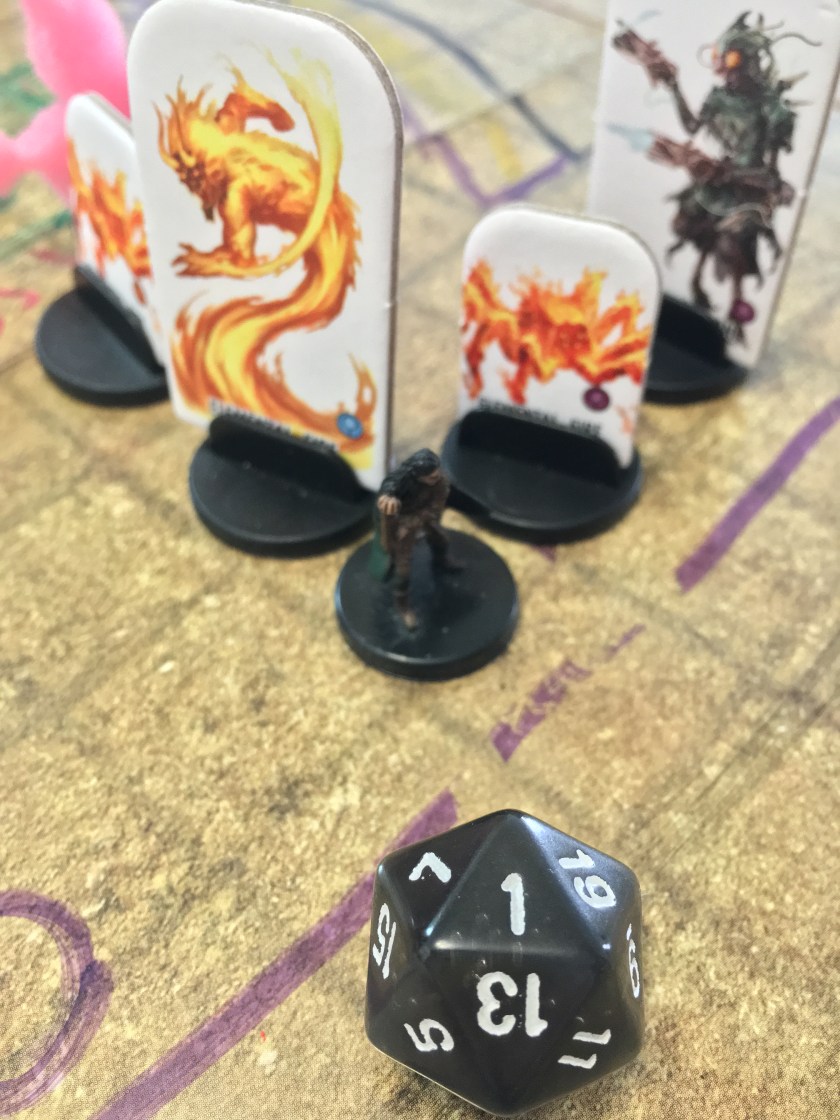


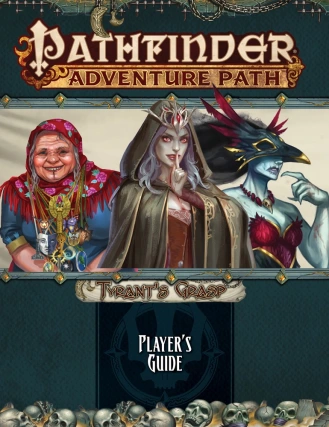 A wonderful Player’s Guide for Tyrant’s Grasp is available as a free download on Paizo’s website


 The first article, Tools of the Boneyard, is written by Matt Morris. In it you’ll find new gear and character options aimed at dealing with the dead. There is one alchemical remedy, one alchemical tool, and two alchemical weapons — bone burn is my favourite, so be sure to check it out! There are two new special materials useful for crafting — cryptstone can be used for ammunition and weapons, while spiresteel can be used for ammunition, weapons, and armour. Finally, there are five new magic items: crypt rod, grim helm, harbinger’s scythe, Lady’s Mercy, and Momument’s Truth. Although I enjoyed a lot of the items, it’s the character options that I found were most exciting. Graveslinger is a gunslinger archetype that specializes in combatting incorporeal undead. Soul Shepherd is a monk archetype that calm incorporeal undead and haunts with a touch. They also gain some otherworldly resistances and interesting ways to use their ki. Reaper is a new oracle mystery which I really enjoyed. Tightly themed and flavourful it’s capable of both killing the living and destroying undead. There are also six new barbarian rage powers including the psychopomp totem powers.