This past Wednesday it was announced on Paizo’s Twitch stream that the Starfinder Roleplaying Game would welcome new classes to its ranks and you, the fans, would get to take them for a test drive. Playtesting new classes is nothing new to Paizo. Even if we don’t count the massive Pathfinder Second Edition Playtest that’s occurring as we speak, they’ve still done plenty in the past. Playtesting new classes gives developers a chance to see how their creations work in the hands of players, how players can exploit them, and what weaknesses they’ve found. It also lets them discover if any abilities don’t work they way they were intended to, or were too under or over powered. All in all, it leads to more balanced, polished classes.
So what exactly is this playtest?
In late 2019 Paizo will release the Starfinder Operations Manual, a hardcover sourcebook packed full of new character options. This book will introduce three new classes, and its these classes that you’ll get to test out.
“This is our first opportunity to add new classes to Starfinder since the game’s release in August 2017, and we need your help to do it! Try out these new classes in Starfinder Society scenarios, Starfinder Adventure Paths, or your own adventures. Then tell us what you and your friends thought of the experience. Paizo needs your feedback to make the classes in the Character Operations Manual the best they can be,” said Starfinder Creative Director Robert G. McCreary.
To get your hands on the playtest head over to StarfinderPlaytest.com, download the free Character Operations Manual Playtest PDF and give it a read. Roll up some new characters and try them out. You can play them in Starfinder Adventure Paths or in home-brew campaigns. Want to play the in Starfinder Society organized play? Go for it! It’ll work much like pregenerated characters do during the playtest. For full details check out Paizo’s blog post on the topic: here.
When you’ve had a chance to try them out, head back to StarfinderPlaytest.com and fill out some surveys on your experience. You can also give them your feedback on the the Character Operations Manual Playtest forums, on Paizo’s website. While Paizo wants to focus on actual play feedback, they are interested in hearing all ideas about the classes. Let’s be sure to give them some constructive criticism guys. And some compliments of course! The playtest will run until January 16, 2019, and the feedback surveys will be available throughout the playtest.
So what are these classes?
First up we have the biohacker! This class is the one that my son is the most excited for! The biohacker is a scientist who can run off of either Intelligence (because they’re incredibly smart and analytical) or Wisdom (because they’re instinctive and impulsive). Biohackers can create injections which they can inject into allies to grant them benefits, or enemies to hinder them. These can be used as a consumable melee weapon (literally injecting someone with a syringe) or loaded into an injection weapon. Injection weapons shot at your allies don’t harm them if you don’t want them to. In addition, each biohacker selects a type of science as their main field of study. There’s a lot to choose from, and each gives you some nifty new types of injections you can create. Biohackers also have a medical scanner, can make injections with their science skills instead of Mysticism, and can learn ‘theorems,’ which are a wide array of special abilities that fit the scientist theme. This class looks like a lot of fun to play! I think it’s going to be the first one I playtest, actually.
Up next? The vanguard! This is definitely an interesting class. They’re a melee based character who can channel entropic forces to make their blows either crush or dissolve the enemy. This can be done through unarmed strikes, or through their melee weapons or shields. Yes! Shields are finally being introduced to Starfinder! Awesome! Similar to solarians and their ‘attunement,’ vanguards function off of a varying number of ‘entropy points’ which begin at 0 each battle and can rise through various methods. These entropy points can also increase your AC. Vanguards also get to choose an ‘aspect’ of entropy to focus on, which gives them different abilities as they level up from other vanguards. As they level up they gain ways to make themselves more durable in combat, or to further enhance their entropic strikes. They also gain a variety of abilities chosen from a large list that are known as ‘disciplines.’
Finally, there’s the witchwarper. This is a charisma-based spellcaster which uses alternate dimensions to power their magic. Cool! Basically, they can alter the world around them by drawing upon other realities. At low levels this power can make a small region into difficult terrain (thematically described depending upon the type of terrain), which at higher levels the area is larger, and the effects more powerful. You can also alter reality to cancel enemy’s critical hits, or allow you to reroll, and learn new skills. Witchwarpers also get to learn ‘paradigm shifts,’ which are unique new ways that you can alter reality. There’s a lot of options here, which is awesome to see. Their spell list includes a really nice array of spells, as well as some brand new ones, which are included in the playtest.
All in all the classes look wonderfully unique and inventive. They have a great array of abilities and options which are sure to make them just as adaptable as the current Starfinder Classes. I’m very intrigued! Definitely looking forward to seeing how they function in play!
Want to learn more? Download your own copy of the Character Operations Manual Playtest PDF on Paizo’s website right now! You can also tune into Paizo’s twitch channel on Wednesday at 4:00 p.m. PST for ‘Starfinder Wednesday.’ This week is sure to be a great show!
Let us know what you think of the new Starfinder classes in the comments below!
Now, if you’ll excuse me, I’ve got some playtesting to do!
Today we’re going to take a look at the two most recent Starfinder Society Scenarios that are currently available for purchase, and let you know we thought. Although you’ll find references to events in each that I liked or disliked, and comments about specific characters, these scenarios are not explored in detail. It’s not my intention to spoil the events in these scenarios, or give summaries and full reviews, but to share my opinions and provide recommendations. That said, if you want to avoid even minor spoilers I recommend you check out a different article. Whether you intend to use them in home games of the Starfinder Roleplaying Game, sanctioned scenarios for use with the Starfinder Society Organized Play, or just want to read a nifty new adventure, we’ve got you covered! So sit back, and get ready to explore the Pact Worlds!
Eshki, a skittermander Starfinder recently rescued from the Scoured Stars Trinary System. Art by Graey Erb.
Truth of the Seeker continues the story of the Scoured Stars plot line, and directly follows up on events from Starfinder Society Scenario #1-99: The Scoured Stars Invasion. Although playing these prior scenarios isn’t necessary, you really should! They were awesome! If you haven’t, there is a bit of important information you’ll need to know: under the guidance of First Seeker Luwazi Elsebo the Starfinder Society has rescued the their lost comrades from the Scoured Stars Trinary System. This includes rescuing the old First Seeker, a kasatha by the name of Jadnura. Surprisingly this scenario only features one recurring characters: Captain Kahir of the Void Scholar who was briefly met in Starfinder Scenario #1-19: To Conquer the Dragon. In addition it introduces a few new ones, some of which could become recurring characters. For starters, there’s the skittermander Starfinder Eshki who hires your PCs for their mission. There’s also First Seeker Jadnura, of course. Finally, there is a lashunta teashop owner by the name of Alsuka, and a serene kasathan solarian called Master Boojan. They’re all delightful — particularly Eshki! There aren’t any specific boons I recommend slotting for this mission, although there are a few important things to note when selecting characters. This mission will go a lot smoother if someone in your party is diplomatic and sensitive to the traditions of other cultures. In addition, a Starfinder trained in mysticism is also important. Lastly, you’ll want to have some way to harm something incorporeal. You have been warned! Haha.
First Seeker Jadnura, one-time leader of the Starfinder Society.
Truth of the Seeker begins in Absalom Station, as the PCs attend a fabulous dinner with Eshki, the most cultivated skittermander I’ve ever encountered. This mission briefing is great fun, and packed full of flavourful interactions. Many of Eshki’s behaviours are scripted out, which serves to immediately make him likeable, quirky, and entertaining. He’s awesome (just in case you couldn’t tell from his art! Haha). Eshki explains that he was a Starfinder trapped in the Scoured Stars System, and that First Seeker Jadnura was a friend of his. Unfortunately, since returning, Jadnura’s gone into seclusion on Idari and Eshki isn’t sure where. He wants you to head to Idari, find his pal Jadnura, and convince him to come back to the Society. After agreeing the PCs bid Eshki farewell, hop aboard a shuttle, and end up on Idari. There they have to navigate their way through the Kasathan home-ship and track down Jadnura, all while dealing with the vastly different cultural traditions around them, and (hopefully) not offending anyone too badly. This scenario does a wonderful job of immersing you in a unique, serene sort of culture with strong Asian and Middle Eastern influences. It was engaging, fun, and wonderfully handled. Vastly different than the frantic, high-tech, fast pace of most scenarios, your players time on Idari is sure to throw some players for a loop. Characters who have social skills will definitely excel in this part of the adventure, but its not only skill, but clever roleplaying that’s necessary to make progress here, so even the most awkward of characters can be helpful if they try. Personally, I felt the the entire time on Idari was wonderfully handled and a real highlight of the scenario. That said, some groups may find it tedious. In time the PCs will need to track down Jadnura. The final location has a wonderful atmosphere, but other than that I’ll leave this part of the scenario a mystery.
One of the battles has an opportunity for roleplaying with your opponents, and your actions can have an obvious effect on the battle. Most have more straight-forward enemies — not so much in mechanics, but in roles. This scenario also featured some flavourful psychological/magical traps which will be interesting to see play out at the table. I’m curious how they’ll work. Overall, I thought this was a fun adventure. I particularly enjoyed how well it immersed us in Kasathan culture. That said, unprepared groups may find the final battle too difficult, or the social interactions tedious. Because of this I give it four out of five stars.
This scenario begins when Venture-Captain Naiaj gathers a large number of Starfinder together for a mission briefing. She explains that the ancient Azlanti ether-ship ‘King Xeros’ has been sighted for the first time since the Gap. Capable of sailing through the ethereal plane and exploring other worlds at incredible speeds, King Xeros is a ship of legends. Information is sparse, but you know it’s location — around a lunar base known as Peak of Evening — and that the Azlanti Star Empire has sent a small contingent of ships after it. Determined to get the ship in the hands of the Starfinder Society and to keep the Azanti Star Empire from acquiring it, Naiaj wants your group to go in and retrieve it. Well, not just your group. This is a multi-team mission! Basically, the teams will be split into three: Scout Team, Shield Team, and Strike Team. Naiaj will also be there on her personal ship as Commander of the mission. Your players will be a part of Strike team, whose job it is to land on the base and steal King Xeros. The other ships will support and protect you from the rest of the Azlanti ships as best as they can. With the briefing out of the way the Starfinders all board their ships and set out for the lunar base. Once there Naiaj determines there are two areas that appear of particular importance to the Azlanti: the Construction Bay and the Greenhouse. Your team gets to choose which nearby Azlanti Garrison to attack, and then begin their infiltration at whichever of the two points they desire.
This scenario has a dynamic starship combat that will be quite tough. King Xeros is an awesome ship, with some cool Azlanti upgrades. Luckily, the advantages your team may have discovered in their first location will give them a much needed benefit here. Which benefits is variable though, depending on what they uncovered in their chosen location, and how efficiently they recovered it. Which is nice! With the starship battle complete they get to board King Xeros, fight the Azlanti inside, and explore the ship. But, the ship is acting erratic, and it soon becomes clear they’re on a timer for this one. They’ll need to recover what they can from the ship and make some split-second decisions about what matters to them and their mission the most. This does a wonderful job of ramping up the tension, and keeping this mission moving along at a good clip.
King Xeros, an ether-ship from Old Azlant.
Overall, I really enjoyed this scenario. It’s got awesome art of King Xeros, great interconnectedness with its prequel, and the Against the Aeon Throne Adventure Path, but is a solid and fun adventure that’s more than capable of standing on its own. It has a different feel and tone to it than most scenarios. It’s dynamic, engaging, suspenseful, and a little frantic. Players and characters should be on the edge of their seats for this one. I love that your player’s get to make decisions that have an effect on the scenario and its outcome.
There’s some wonderful new ship mechanics that players will get to see the enemy make use of, and a lot of cool gear on the chronicle — including a unique aeon stone that’s awesome! There are two boons up for offer, both of which involve the alien races you could meet, and one of which allows access to that race as a player. You’ll only be able to get one of these boons though, so make your decision wisely! I think this scenario is a great change of pace that will be fun to run at a table. I give it four out of five stars.
Today we’re taking an in depth look at the first book in the Return of the Runelords Adventure Path! Return of the Runelords is a six volume Pathfinder Adventure Path that is intended to take your characters from levels 1 to 20! The issues in this Adventure Path are longer than usual, and the final issue is supposed to be the biggest adventure of the series. Each of the six Runelords (excluding the seventh: Karzoug) is featured on one of the covers, with gorgeous artwork drawn by Ekaterina Burmak.
The Adventure Path takes place in Varisia, and is a direct sequel to the Rise of the Runelords and the Shattered Star Adventure Paths. In addition, the events of the Curse of the Crimson Throne Adventure Path, the novel Pathfinder Tales: Lord of Runes, and Season Four of the Pathfinder Society: Year of the Risen Rune, are all presumed to have taken place. Although playing through these other adventure paths first will definitely make this campaign more enjoyable, it’s not necessary. You can hop right into Return of the Runelords and still have a blast.
So, what is Return of the Runelords? For starters, you can check out a previous blog post I wrote on the topic: Return of the Runelords. Then head down to the video immediately below this paragraph and give the AWESOME Return of the Runelords trailer a watch. Trust me! It’s worth it!
Got it?
Good! Let’s dive right in!
The first book of the Return of the Runelords Adventure Path is #133: Secrets of Roderic’s Cove. Written by Adam Daigle, this adventure is intended to take you from level one right through to level five. In addition to the adventure itself the book contains an NPC Gallery which features detailed information and statistics on three major characters in the adventure, a delightful primer on Roderic’s Cove which will be invaluable to GMs, a short chapter about the Runelords (their history, how they escaped Earthfall, and what’s happened to them since), a bestiary containing four new creatures, and a campaign outline that lets GMs know what’s coming further down the road.
The layout and appearance of this book is nice. It looks good, is easy to read (which isn’t always the case with Adventure Paths), and features gorgeous artwork of the Runelord of Wrath Alaznist on the cover by Ekaterina Burmak. Behind Alaznist is an image of Jirelle (the iconic swashbuckler) and Erasmus (the iconic medium) getting ambushed by some reefclaws! Awesome!
Before we continue with a more in depth look at the book, let me point out: there will be SPOILERS.
You have been warned!
Carrying on the wrathful theme of the front cover, the inside covers feature images and information on a few key topics related to the Runelord Alaznist. The inside front cover shows two weapons: Alaznist’s Hateful Ranseur (her weapon of rule) and Garvok the Sword of Wrath. Meanwhile, the inside back cover showcases Hollow Mountain, once the capital of Alaznist’s Empire and the place within which she retreated when Earthfell drew near. In addition it contains information on Yamasoth, a qlippoth lord and ally of Alaznist’s — although whether he was her minion, or she was his unwitting pawn is debatable. After the covers we hop right into the adventure background, followed by the adventure itself.
Kolton, a citizen of Roderic’s Cove. Illustrated by Nikolai Ostertag
Secrets of Roderic’s Cove is split into five parts: Bubbling Tensions, Roderic’s Wreck, Into the Churlwood, Humbling Pride, and Calming Wrath. Unlike many premade adventures, it doesn’t really feature a ‘patron’ type character. There’s no employer or mentor around to tell the PCs what to do or where to go next. A lot of different NPCs will give you suggestions if you ask. And there’s one character who asks the PCs to help the town. Well, two if you count the dead. Instead, the entire book is driven by the PCs. This means that its imperative your players make characters who want to drive the story forward. Characters who care about the town of Roderic’s Cove — where our story begins — but will be willing to leave for a time when events lead them elsewhere. Characters who would meddle in gang politics, protect their neighbours, and put a spirit to rest. Characters who care. That doesn’t mean the characters have to be a bunch of do-gooders. It just means that players need to think of a reason that their characters would do these things voluntarily, and without the promise of monetary reward.
Welcome to the town of Roderic’s Cove! Cartography by Matthias Rotenaicher.
Our story begins in the tiny town of Roderic’s Cove, which is located along the coast very near to Riddleport. It’s a prosperous town with neither homeless or poor. However, the town is periodically home to unusual occurrences and oddities. The ghost of the town’s founder, Sir Roderic, lurks in the town, emerging from the decrepit remains of his haunted home only when the town is in great danger. Roderic’s Cove is home to two different gangs: the Horned Fangs and the Roadkeepers, both of which are little more than thugs and bullies. It’s also home to a strange but harmless scholarly society known as the Order of Resplendence. Recently, the gangs have been at each others throats, strange deformed creatures have been seen in town, Sir Roderic’s ghost has resurfaced, and there’s even been a murder!
It’s best if the PCs all know each other at the start of this adventure but, even if they don’t, all they truly need is to be in ‘Circle Market’ shopping (or passing through) on Market Day. Here they find two gangs about to come to blows. The PCs have just enough time to interfere before another joins them — the ghost of Sir Roderic himself! As the gangs and citizens run for it Sir Roderic wails about the safety of his town! Then he vanishes as quickly as he appeared. The town guard is on the scene shortly afterwards to thank you for your help before bidding you farewell.
After that the PCs are on their own. They can explore Roderic’s Cove, chat up the locals, learn about Sir Roderic, the local murders, and the gang violence. Eventually they’ll either approach or be approached by a forlorn elf and local grave digger by the name of Audrahni. She’s very concerned over the spirit of Sir Roderic, and is hopeful that the PCs can be the ones to put his spirit to rest again by bringing peace back to the town. They had the courage to stop the gangs from fighting this morning, surely they’re brave enough to do it again?
It’s assumed that the PCs take up this task with aplomb, but even if they don’t it’s a simple matter to get them back on track. After another run-in or two with the various gangs they should want to take them on — even if its not for the good of the town.
However they get involved the PCs goal for this adventure is to bring peace to Roderic’s Cove and put Sir Roderic’s spirit to rest. How they go about this is relatively free-form. The most likely place to start is with the recent murder that happened in the Circle, and the two gangs that are reputed to be involved. They’ll get to speak with witnesses, rumourmonger, search for clues, investigate the victims and their death, and question suspects. They’ll need to keep in mind that they’re citizens of Roderic’s Cove, not law enforcement, so simply busting into a suspected gang hideout and bashing in heads isn’t going to fly. They need evidence. As time passes they’ll come across strange creatures lurking in the town at night, mysterious hauntings, and even learn of some other crimes that have taken place.
This first section of the adventure is very loosely scripted. It’s got information on some witnesses and some scripted events — some of which relate to the murders, and some of which lead to further mysteries. It’s really well written, but it’s definitely a slow start to a campaign. It’s not one of those openings that will grab your characters right off the bat and send them off on some immediate, daring adventure. Don’t get me wrong, it’s enjoyable! But it’s not the mind-blowing, gripping, epic, opening I expected for this campaign. It’s subtle. It requires players who are good role-players, and a really solid GM to make this part of the adventure shine. Anyone can play it. But, it takes a solid group to make it something special. New GMs and players have the potential to flounder.
At some point during their investigation of the murders the PCs are bound to decide to investigate the dilapidated haunted house of Sir Roderic himself. The haunted house is interesting and engaging, but it’s also a grind! Only two halls don’t feature either a battle or a haunt, which is a lot for a house. This will be a tough place to explore, particularly if the PCs want to check the house out quite early in the adventure. However, there’s no immediate time constraints, so they’re welcome to leave and return at a later time, or explore the house in more than one trip.
Sir Roderic. Illustrated by Valeria Lutfullina.
Overall, I really like the haunted house. The haunts are a wonderful touch, as are some of the encounters. But, I think that some of the vermin encounters would have been better served as flavourful non-violent encounters that contain clues, and serve to set a more ominous mood. Of course, considering it will be the first chance the PCs have to actually engage in a fight, I’m sure plenty of groups will be happy for the opportunity to flex their combat muscles. Haha.
Either way, the house can give the PCs some important clues as to what’s happening in town, and allow the group a chance to speak with Sir Roderic’s ghost. Totally worth it!
In time, the PCs investigation will lead them outside of the town and into the Churlwood Forest, which is the focus of Part Three of this adventure. There’s multiple reasons they’ll want to come here. Perhaps they’ll come out one mission at a time and make a total of three or more forays out into the woods, or perhaps they’ll come out to accomplish all three at once. It all depends on how your group has proceeded with their investigation. Whatever they’re after, there are three major tasks that can be accomplished in the Churlwood. In addition, there’s a few scripted encounters that can lead the PCs onto these tasks and progress the story. For starters, they could be here to pay a visit to the Roadkeepers gang of bandits. They might also be here to find a pair of local dwarves who were kidnapped by goblins. Finally, they might be here looking for a mysterious location that Sir Roderic mentioned. As these locations are all interconnected, it’s likely that one task will lead into another. Overall I rather enjoyed this part of the adventure. It’s free-form enough to allow players to decide their own priorities and courses of action, but the actual locations are very detailed, well-scripted, and interconnected. It looks like a lot of fun. And as an added bonus? PCs will get their first taste of ancient Thassilonian ruins, and pick up some awesome treasure. In fact, they’ll pick up their first minor artifact in this place!
Eventually the characters will return to Roderic’s Cove having done some good, solved some problems, and discovered further clues that will lead them to an odd location: Peacock Manor. This is a series of houses that were connected into a large, confusing manor, and is occupied by the scholarly group known as the Order of Resplendence. On the surface they’re a bunch of obsessive scholars who study ancient Thassilon. Most folks in town think they’re a harmless cult. But, looks can be deceiving. By now your players will have more than enough reason to suspect the leader of this group as being the true culprit behind the recent murders in the Circle. How? Why? Well, I don’t want to give away everything, but I will say that it’s leader has come into possession of one of the Seven Swords of Sin — a powerful artifact she’s unable to properly wield. But, investigating Peacock Manor is not a simple task! For starters, they’re a secretive group, and are highly unlikely to allow you in. Second? Not everyone there is a criminal. Many are simple scholars. Bringing unnecessary violence against such people could put you on the wrong side of the law. And finally? Gossip! Folks who just force their way into the manor, or spend a long time fighting there are sure to attract the attention of the local citizens of Roderic’s Cove. And when supposed heroes attack a bunch of defenceless, harmless scholars and eccentrics, chances are folks won’t consider them heroes anymore. All of these factors combine to make paying a visit to Peacock Manor more difficult than it seems. I really enjoyed it! This section’s got some awesome character art! Also? Players can pick up a second super cool artifact in the halls of Peacock Manor: Baraket, the Sword of Pride!
But, that’s not the end of this adventure! There’s still a second gang to deal with! The Horned Fangs who, quite mysteriously, bear the Thassilonian sigil of Wrath as their emblem! Characters will have to find the lair of the Horned Fangs and give them what for! But, the Horned Fangs are more than what they seem! They lair in the ancient Thassilonian ruins beneath town and, although once a simple group of thugs, they’ve recently come under the control of a foul sin spawn named Mozamer who travelled there via a magical one-way portal from Hollow Mountain. It’s Mozamer himself who’s behind the strange creatures that have been terrorizing the town, and behind the Horned Fangs recent violent behaviour! The PCs will get to explore the ruins, bring down a gang, discover their surprising leader, and battle otherworldly allies. But, not before the sinspawn invites you to join his army and serve the cause of his mistress, the Runelord of Wrath. Who’s already AWAKE.
Trouble in Roderic’s Cove. Illustrated by Ekaterina Burmak.
Wanna join?
Haha.
Mozamer and the ample surrounding evidence show that the sinspawn came from Hollow Mountain, which was once the heart of Alaznist’s Empire, and is where she waited out Earthfall. Although bringing down the Horned Fangs and Mozamer is enough to put Sir Roderic to rest and save Roderic’s Cove — sort of — the Runelord of Wrath is an enemy that will have to be dealt with. Particularly since there’s that one-way portal under the town that Alaznist could send an army through at any moment…
THAT brings us to the end of the adventure. And what an adventure! It’s got urban adventure, a murder mystery, crime fighting, horror, wilderness exploration, ancient ruins, dangerous relics, awesome treasure, and you get to come out of the ordeal already the hero of your town. There’s nice, obvious, compelling reasons to continue on to the next adventure, and — unlike this series’ predecessors — the villain is already revealed and obvious from the start. From here on out you’ve got to take down the Runelord Alaznist before she can conquer Varisia and rebuild Thassilon!
Although I hoped book one of Return of the Runelords would completely blow me away and I’d give it five stars, in the end the shaky opening means I’m only giving it four out of five stars. I expected epic perfection! And, although this was a solid, super fun adventure that I can’t wait to play, perfect it was not.
But, the end of the adventure isn’t the end of the book! There’s more to look at!
After the adventure are three two-page spreads focusing on three major characters in this adventure. Two are enemies, and one is an ally. Audrahni the forlorn elf who is going to have a continuing role in book two; Corstela Rostrata, leader of the Order of Resplendence; and Mozamer, sinspawn leader of the Horned Fangs and general pain in the ass. The artwork in this section is awesome (as expected), the stat blocks are solid, and the background is useful for roleplaying these characters.
Following this is an incredibly important part of the book: a gazetteer on Roderic’s Cove. GMs will find this chapter absolutely invaluable. You need it to inject detail and interest into the entire first section of the book. In addition, you’ll reference it in between all the other sections of the book, whenever the PCs wander the town of Roderic’s Cove. The gazetteer itself is interesting. Roderic’s Cove is a neat, engaging, town with plenty of secrets and colourful characters to visit. It’s a fun place to adventure in.
Up next is one of the most fun sections for GMs to peruse — or I thought so anyway! An entire chapter on the Runelords, what they’ve been up to, how they survived Earthfall, and what Alaznist has been doing since she awakened. Which, but the way, is A LOT. It involves powerful magic, assassination, and even TIME TRAVEL! COOL! (And confusing!)
This brings us to the Bestiary, which contains three new creatures and one new creature template. My favourite of the creatures is the Cyphergull, a CR 2 magical beast that’s essentially an intelligent seagull with an innate understanding of magic and glowing Thassilonian runes upon its wings. They can devour scrolls and thereafter cast those spells. What an awesome little beast to lurk around the Lost Coast — particularly near Riddleport! Other creatures include the Nochlean, a CR 3 fey that delights in stealing children and causing terror; and the Warpglass Ooze, a CR 2 ooze that can enthral passersby and tempt them into it’s acidic body. Beware the reflection in the pool! Haha. The creature template will be incredibly useful not only in this adventure, but also in any of the others that involve the Runelords or Thassilonian ruins: a Runewarped Creature. This template can be applied to any animal, humanoid, or monstrous humanoid, and is essentially a precursor to sinspawn. They’re twisted abominations that are driven to consume magic.
Finally, this book contains a Campaign Outline, which provides GMs with information on what’s happened before this campaign, and what each of the upcoming volumes entails. Before we get into specifics, let me just say: Return of the Runelords is going to be AWESOME!
Return of the Runelords: Book Two: It Came From Hollow Mountain is written by Mike Shel and intended for levels 5-7. In it, the PCs travel to Magnimar to tell the Sihedron council about Alaznist’s rise in Hollow Mountain only to realize that they already knew! In fact, they sent a powerful group of heroes there to investigate in secret, and they haven’t returned. Your PCs are charged with travelling to Hollow Mountain to figure out what’s going on.
Return of the Runelords: Book Three: Runeplague is written by Richard Pett and intended for levels 8-11. By now the PCs know for certain that Alaznist is awakening, not only that, many of the others are as well! They need to travel to four different cities in Varisia — wonderfully familiar cities to many of us — to stop a few different groups that are related to the Runelords and are causing trouble. These groups include the Cult of the Peacock Spirit (who have ties to Xanderghul, Runelord of Pride); cultists of the qlippoth lord Yamasoth (who have ties to Alaznist, Runelord of Wrath); and the Whispering Way (who seek to rebuild Zutha, the Runelord of Sloth’s phylactery). They’ll get a chance to adventure in Korvosa, Magnimar, Riddleport, and, my personal favourite, Kaer Maga! In addition, they’ll have a chance to speak with Sorshen, Runelord of Lust in this adventure. Yes, you read that right. Speak with. Sorshen is a potential ally and source of information for the PCs!
Return of the Runelords: Book Four: Temple of the Peacock Spirit is written by Jason Keeley and is intended for levels 12-14. With intel obtained from Sorshen, the PCs discover that the most powerful Runelord, the Runelord of Pride Xanderghul, is weakened due to Alaznist’s actions. This is their chance to bring the battle to him! Cause what’s better than kicking a big bad when they’re down?! Taking down a big bad who also turns out to be a GOD! That’s right! In it we discover that Xanderghul is the Peacock Spirit himself! An ancient Thassilonian god of secrets! They’ll have to head to his hidden temple and defeat this tyrant before he regains his full powers!
Return of the Runelords: Book Five: The City Outside of Time is perhaps the book I’m most excited for. It’s written by Amanda Hamon Kunz and is intended for levels 15-17. Now that they’ve taken down Xanderghul (hopefully), your PCs will be fully aware that Alaznist is the mastermind behind pretty much everything (although it’s likely they’ll be well aware of this before hand… Haha). Alaznist is building a realm for herself in Varisia, dubbed ‘New Thassilon’, and has used powerful magic, including messing up the past with time travel, to set her plans into motion. To defeat her they’ll need to get their hands on a relic from the Shattered Star Adventure Path known as the Sihedron Star. This artifact is currently trapped in Crystilan, which is essentially a section of the Runelord of Envy Belimarius’ dominion that was locked in a time-loop since the fall of Thassilon. They’ll need to slip into the city via the Plane of Shadows and sieze the artifact. Along the way they’ll get to explore a little part of Thassilon and see what it was like in its heyday. Unfortunately, Alaznist has messed everything up with her time meddling, so the people within are no longer stuck in a time loop. Instead they’re just… stuck. With Runelord Belimarius’ hold over her people slipping the PCs will have a chance to make an ally or an enemy out of Belimarius! Plus, they get to rescue the Sihedron Heroes (your previous campaign’s heroes) from the city! This is going to be amazing! I can feel it!
Return of the Runelords: Book Six: Rise of New Thassilon is the finale of this grand campaign! It’s written by Greg A. Vaughan and is intended for levels 18-20. The PCs have a daring plan: use the Cyphergate in Riddleport to travel back in time. Once there, they can repair all the damage that Alaznist has done to the past. There’s just one problem: they don’t know how to use the Cyphergate. The person who does? Karzoug, Runelord of Greed! …Except he’s dead. The Sihedron Heroes killed him in Rise of the Runelords. Fortunately, that doesn’t mean they can’t speak to him. They’ll simply need to speak with his ghost! Yes! you get to try to convince the dead Runelord of Greed’s spirit to help you screw over Alaznist! Hahaha! I love it! And for those players who have played through Rise of the Runelords this will be a huge surprise! Once they’ve convinced Karzoug to lend his aid they’ll need to use the Cyphergate an travel to a city in the Dimension of Time, which will allow them to send copies of themselves back to the past to repair the damage done to the timeline. What becomes of these copies and how much do your players actually get to experience of the past? I don’t know, but I sincerely hope they get to play in the past for at least a little while. It’s just… awesome! Once they’ve repaired the past they can return to the present and take on Alaznist herself in Hollow Mountain!
And that’s it! The end.
I’m not sure I can express how excited I am for this campaign. Just know it’s a LOT.
Thanks for joining us today! We’ll see you later this week when we take a look at the newly releasing Pathfinder and Starfinder Society Scenarios!
See ya’!
Jessica
Want more Return of the Runelords? Check out these awesome images from the Adventure Path!
Krune Runelord of Sloth
Belimarius Runelord of Envy
Zutha Runelord of Gluttony
Sorshen Runelord of Lust
Clegg Zincher from the Second Darkness Adventure Path appears in Return of the Runelords: Book Three: Runeplague
Korvosa is originally featured in the Curse of the Crimson Throne Adventure Path and is revisited in Return of the Runelords: Book Three: Runeplague
This week brings us some exciting news in the world of Starfinder and Pathfinder. We’ve talked a lot about the changes coming to the Pathfinder Society when Pathfinder Second Edition gets released next year. Paizo has released multiple blog posts and surveys on the subject, and has some threads on their message boards where you can put forth your ideas and opinions. Which is great! Your opinions can help shape the future of the Pathfinder Society. This week brings us to the last of these blog posts.
So what did they talk about?
Lots!
Sigil of the Open Road, the symbol of the Pathfinder Society.
Although, most of the information amounted to a sort of… we’re changing this, but we haven’t quite decided how. A fair point when the rules for Pathfinder Second Edition are still in flux.
Fame and Prestige will likely follow Starfinders lead and be called Reputation and Fame. In addition, you’ll be allowed to earn fame in multiple factions if you so choose. Another nice improvement inspired by Starfinder Society play. ‘Prestige’, whatever it comes to be called, will also be more useful. You’ll be able to acquire special boons — some general and some faction specific — for your characters.
How we gain access to magical items is also going to change. Likely, this will involve item rarity and item level, but the details will depend on how Pathfinder 2 shakes out.
Infamy, much like that used in the Starfinder Society, is also going to be introduced.
One of my favourite changes? Schools. Nearly all Pathfinders undergo training at the Grand Lodge and specialize in one of three schools: Scrolls, Spells, or Swords. Scrolls is taught by Kreighton Shane and focuses on learning and diplomacy. Spells is taught by Sorrina Westyr and focuses on magical prowess. Swords is taught by Marcos Farabellus and focuses on martial might and physical fitness. Deciding which of the schools your character favours most is now going to be a choice you can make at character creation. For what? Well, they’re not sure yet. We’ll have to wait and see.
Which brings us to the most exciting aspect of this week’s Pathfinder Society changes: factions. Factions are getting a major shake-up! Some factions will be retired as their goals have been accomplished. Some will find their stories come to a close during Season 10. Others will remain but have changes of leadership. So what’s changing exactly? Unknown! That’s why they’d like your input! They’ve compiled a list of general concepts for factions and want you to let them know which ones you like best. Got an idea for another major character motivation for Pathfinders? Share them! Also, they want to know your opinions on which faction leaders should stay an go. Help them out by heading over to their survey and filling it out: Faction Survey.
In other news, Starfinder Wednesday put out another awesome episode. And this one dropped a BOMB! Starfinder will soon be putting out a playtest for NEW CLASSES!
SO EXCITING!
Want more details?
So do I! More information will be coming out on the Paizo Blog on Monday, December 3rd. Be sure to check it out! I know I will!
Exciting news around here today… Sunburst Games first book was just released! That’s right! Realms of Atrothia: Legacy Races Revisited is available for purchase! Currently, you can order it on amazon, and in the coming days you’ll be able to purchase it from the OpenGamingStore as well!
Not sure what Sunburst Games is? In short, Sunburst Games is an independent Tabletop RPG company focused on Pathfinder Compatible content for the next generation. We’re continuing the legacy of First Edition Pathfinder into the future! The Sunburst Games team consists of my brother, Kris Leonard, and myself. Our products also showcase the wonderful artwork of Rigrena. Sunburst Games will be launching a Kickstarter for our first major release Realms of Atrothia: Primary Expansion this coming February! To find out more about Sunburst Games check out my previous blog post on the topic, visit our website: sunburstgames.com, or support us on Patreon!
Building upon the legacy of the Pathfinder Roleplaying Game, and the existing d20 game system which is over 35 years in the making, Realms of Atrothia: Legacy Races Revisited includes a new look at 56 races suitable for play at 1st character level. Each race has been rebuilt using our own adaptation of the Race Point system first outlined in the Pathfinder Roleplaying Game: Advanced Race Guide, aligning each to the same power level. From the kasatha to the kobold, all races are created equal, so no matter what your character concept, you will be sure to make your mark on the world!
Although the races you’ll find in Legacy Races Revisited are familiar, nearly all of them have received additional racial traits to bring them in line with the same power level. All races also feature two alternative racial traits, so you can get the most out of your character concept. Some races also list new character options beyond racial traits, such as proficiency with brand new weapons like the acrobat spear.
My personal favourite race options? Changeling, and Halfling! My children are a huge fan of the changes to the elemental races (Ifrit, Oread, Sylph, and Undine) and Goblins.
Keep in mind, all of these races are suitable for play at 1st character level, so some races which are usually considered to be one or more levels higher than normal, such as the drow noble, svirfneblin, or trox are not included. In their place, races which are in line with other revisited races appear, such as gnoll and lizardfolk. Want more races to choose from? Don’t worry, all your favorite races which pack a little more punch will make an appearance in Realms of Atrothia: Primary Expansion, alongside other monstrous races including gargoyle, medusa, moon-beast, oni, pixie, and treant, just to name a few. These normally off-limits races will take advantage of the new Exemplar Primary Class, so you can play all your favorites right from 1st character level!
Pick up a copy of Realms of Atrothia: Legacy Races Revisited today, available from these fine sources:
Like Realms of Atrothia: Legacy Races Revisited? Watch for our Kickstarter coming in February 2019, and get ready for a whole new world of adventure, with limitless imagination!
Earlier this week I mentioned that I was working on a special project with my brother called Realms of Atrothia by Sunburst Games. Today, I’m thrilled to bring you more information!
Sunburst Games is an independent Tabletop RPG company focused on Pathfinder Compatible content for the next generation. It’s founder is a bold, enthusiastic guy near and dear to my heart: my brother, Kris Leonard. In addition to independent work, Kris is a Freelance Author who has written two Pathfinder Society Scenarios: #6-13: Of Kirin and Kraken, and #9-10: Signs in Senghor, and has contributed to the newly released Pathfinder Campaign Setting: Construct Handbook. He’s a bombastic GM, a rules guru, and a creator of exciting content and original adventures. Sunburst Games is proud to have him as our Founder and Lead Developer!
OUR STORY
Sunburst Games began with a simple vision: Continue a legacy. For over 35 years, Tabletop RPGs have inspired us to be something more than ourselves, to be heroes, villains, and sometimes even a little bit of both. They have forged friendships, made unforgettable memories, and even allowed the most timid among us to feel the freedom of being an outspoken, confident bard, or an unrelenting barbarian. Sunburst Games is proud to continue on this legacy, inspiring a whole new generation with limitless imagination.
OUR VISION
Sunburst Games was established to ensure the legacy of d20 compatible RPGs, such as the 1st edition of the Pathfinder Roleplaying Game can continue on for years to come. We aim to create original, exciting, and inspired products of only the highest quality, with stunning artwork, well-balanced character options, and unforgettable stories. Our first product, Realms of Atrothia: Legacy Races Revisited, will be available as a digital (.pdf) download! After this we’ll be releasing Realms of Atrothia: Primary Expansion which will be both a digital (.pdf) and a hard cover release. (Kickstarter on NOW!) With a successful launch, Sunburst Games will also release additional products to the line, including Realms of Atrothia: Bestiary, Realms of Atrothia: NPC Codex, and the first official full length Realms of Atrothia Campaign: Legacies of Corberus, an original adventure taking Players from 1st to 25th level!
OUR TEAM
Sunburst Games is more than a person. It’s a team. So when Kris wanted someone to help breathe life into his creations, and to enrich his world, he called me. And who am I? Well, we’ve talked about that before. Perhaps, ‘why would he call me’ is a better question. Short answer: he’s seen my work. I agreed to do some freelance work for Sunburst Games without hesitation, because I knew it would be something special. Something great. Something I’d be proud to be a part of.
And I am.
But that’s not all! We’ve teamed up with the amazing artist Rigrena, to bring the Realms of Atrothia to life!
Rigrena’s interest for games began when she made her first D&D character at the age of 10, which affected her artistic journey and inspired her to become a digital artist and an illustrator. Following her passions for gaming and art, she has been working in the gaming industry as a concept and 2D artist for almost 6 years. Thanks to her vibrant personality she brings a unique flair to the art she creates. Her work is absolutely gorgeous. You can follow Rigrena on Art Station, DeviantArt, and Twitter.
Be sure to join us later this week when I share details on Sunburst Games current projects: Realms of Atrothia: Primary Expansion, and Realms of Atrothia: Legacy Races Revisited.
See you then!
Jessica
UPDATE: Realms of Atrothia: Legacy Races Revisited is now available!! You can pick it up from these fine sources:
The holidays are on their way! For many of us that means its time to buy the people around you gifts. But, what do you buy for those d20 gamers on your list? Well, read on! We’re sharing our top picks for gift giving!
First off: books! More specifically: new books that those gamers in your life probably don’t have yet. Our favourites?
But wait! Got young ones? So do I! Here’s my favourite d20 products to pick up for your kids!
D&D: Dungeon Mayhem! This delightful card game is intended for kids ages 8 and up.
My Little Pony: Tails of Equestria. This superb d20 game is aimed at fans of My Little Pony: Friendship is magic, but honestly? It’s awesome. I recommend this book wholeheartedly.
Endless Quest by Matt Forbeck. A series of four ‘choose your own adventure’ style novels aimed at middle-grade readers. Each casts you in the role of a different class. Endless Quest: To Catch a Thief lets your kids (or you!) be a halfling rogue, Endless Quest: Into the Jungle casts you in the role of a dwarf cleric, Endless Quest: Escape the Underdark lets you play as a human fighter, and Endless Quest: Big Trouble lets you play as an elf wizard. I’ve already picked these up for my son, and I have to mention how impressed I was with the quality. The books look awesome, feature a ton of cool artwork, and are a blast! I’m kind of jealous, honestly.
D&D Dungeon Mayhem
The ABCs of D&D
The 123s of D&D
Endless Quest: Big Trouble
Endless Quest: To Catch a Thief
Endless Quest: Escape the Underdark
Endless Quest: Into the Jungle
Dungeons & Dragons: Adventures Outlined
My Little Pony: Tails of Equestria
We hope you enjoyed our top picks for holiday gift giving!
Today we’re going to take a look at two of the most recent Pathfinder Society Scenarios that are currently available for purchase, and let you know we thought. Although you’ll find references to events in each that I liked or disliked, and comments about specific characters, these scenarios are not explored in detail. It’s not my intention to spoil the events in these scenarios, or give summaries and full reviews, but to share my opinions and provide recommendations. That said, if you want to avoid even minor spoilers then I recommend clicking on a different article. Whether you intend to use them in home games of the Pathfinder Roleplaying Game, sanctioned scenarios for use with the Pathfinder Society Organized Play, or just want to read a nifty new adventure, we’ve got you covered! So let’s get cracking!
Katapesh is a strange place, and the city itself if home to not one, but four Pathfinder Lodges. The most senior Venture-Captain is Roderus who runs a lodge out of his inn and handles all missions that take place outside of the city. The most secure and respected Venture-Captain is Aurora Steelbloom, who runs the grandest lodge in the city at the ruins known as the Twilight Gate. Jurisdiction for the rest of the city is split between Venture-Captain Wulessa Yuul, and Venture-Captain Phlegos Dulm. Unfortunately, these two bicker and fight constantly. So, when the aged Venture-Captain Roderus decides its finally time for him to retire, he’s more than a little uneasy! How can he leave the fate of Pathfinders in Katapesh in the hands of a pair of agents who can’t even follow one of the three main Pathfinder creeds: COOPERATE? This adventure tasks the PCs with working at Roderus’ retirement party. They’ll have to serve drinks, entertain guests, clean up, keep order, and perform other menial tasks. Using their mundane duties as a cover they’ll need to spy on the Venture-Captains in question (Dulm and Yuul), ferret out the truth from rumours, and determine if these two Pathfinders can work together, or are trying to sabotage one another. If the PCs uncover any wrongdoing they’ll need to report to Roderus and delve deeper into the investigation, until the facts come to light and Roderus has enough peace of mind to retire. Players and GMs looking for more information on the featured Venture-Captains can check out Seekers of Secrets or (to a lesser extent) Dark Markets: A Guide To Katapesh.
This scenario had a lot going for it. It has a lot of fun, engaging social encounters that feature a ton of colourful characters. Zig and Yigrig Moneymaker were particular favourites of mine (as I suspect they will be for many players). Zig’s scripted examples of assistance he can lend during the opening retirement party are adorable. There’s a great dynamic evening battle featuring both allies and enemies which promises to be entertaining. Finally, the inclusion of Yigrig Moneymaker’s family is a great segue that can lead to goblins becoming a core race in Pathfinder Second Edition next year. Overall, I really enjoyed this scenario. I give it four out of five stars.
In the previous adventure, Magnimar found its beloved monuments corrupted by some foul source. The PCs worked for Venture-Captain Shiela Heidmarch and the Varisian Council, made an enemy of the occult investigator Theodorus Ichonvarde, saved a servant of the goddess Ashava, discovered the identity of the being behind the corruption (whom we will call only by their name, Tulvhatha, to avoid too many spoilers), and the place they can be found (The Glade of Silver Sparks) which was once a holy site to Ashava. In addition, the PCs were likely granted a blessing, which can be granted to all characters participating in this adventure if they will allow him to do so. This adventure tasks the PCs with travelling through the Mushfens, confronting Tulvhatha, and doing what they can to cleanse the area of evil. Characters who have already played the first in this series of adventures will of course have more reason to participate in this one. But, characters who worship Ashava, have an interest in moonlight, dancing, or putting spirits to rest, or have connections to lycanthropy will all find something special to interest them in this scenario. On a similar note, if you have any characters who have a lot of fears, or who you would enjoying roleplaying their response to their fears at a table, I highly recommend you bring them! This is a spooky adventure, and embracing that atmosphere can be a lot of fun. One final note, if you happen to have a horrible fear of werewolves (like my daughter) or spirits this is NOT the scenario for you!
This scenario had an wonderful haunting tone to it. The environment was appropriately ominous, of course, but many of the encounters themselves often played into the horror theme. Not a gory sort of horror. More of a moody, hopeless, suspenseful sort of horror. I ADORED it. The scenario starts with some minor (but fun) roleplaying encounters. The blessing which your characters can accept is awesome! I adored the first major encounter of this scenario. In addition to bringing back another character from the first scenario in this series, it could cause some healthy discussion as to the fate of your opponents (depending upon the alignments we see on the player’s side of the table). There’s a delightful chase in this scenario, which has very clear repercussions for failure. I absolutely loved it! Although, it should be noted, I’m a sucker for a good, purposeful chase. The haunts in this scenario were exceptionally well-done. Particularly the one that plays upon your character’s fears. Embracing that horror theme with my characters is something I always enjoy as a player, so I can’t wait to toss one of my more expressive characters into this mission! And the final battle with the main villain was both memorable, flavourful, an mechanically difficult. Just awesome. But my favourite part? This scenario features the coolest wolf encounter in existence! It’s going to be so much fun! Overall I loved this scenario. Seriously. Loved it. I give it five out of five stars!
I hope you enjoyed taking a peek at this months newest Pathfinder Society Scenarios with me. I know I enjoyed reading them!
Or, more accurately, the last scheduled one. Although Paizo has no plans to do so, they might release another update in the future.
So what does this mean?
For starters, the final chapter of the Doomsday Dawn playtest surveys are open. You can head down to the Pathfinder Playtest website after completing Doomsday Dawn and fill them out.
For those of us who aren’t done Doomsday Dawn (or the Pathfinder Playtest Society Scenarios) don’t worry about it. You can still fill out feedback surveys until the end of the year. That’s two more months of time for playtesting and feedback.
And finally?
Well, you get a bunch of cool new updates! And by a bunch I mean a LOT. More specifically, each of the classes in the Pathfinder Playtest have some new changes. For some classes the changes are minor, and for others they’re HUGE. Seriously! Alchemist got a whole overhaul and Paladins? Well, we’ll get there…
So read on, and see some of what’s new!
Alchemists have a huge number of changes! In fact, they have a whole new progression chart. But, we’re only going to take a peek at some of them. No longer running off of resonance, they used infused reagents to create a certain number of alchemical creations each day for free. This brings about a bunch of changes to many alchemical items, including different level versions of many items such as acid, alchemist’s fire, and mutagens. Another neat addition is essentially a specialty — are you good with bombs, healing, mutagens, or poisons? This selection will give you some cool abilities along the way, tailored to your alchemist’s style of play. I ADORE the changes to alchemist, so be sure to give them a thorough look-see.
Barbarians have very few changes. Their proficiencies have become more broad, and most noticeably, barbarian’s rage has an update which is going to make it feel more… unpredictable. After each round spent in a rage you’ll need to make a flat check to see if you remain in your rage. This check will get harder the longer you’re raging. It’s a flavourful change that I think will be great.
Bards have minor changes. Like all spellcasters they’re going to be getting one extra cantrip at first level. They also have some changes to their muses. Clerics also get one more cantrip. Their change is a removal though, they can use less channel energy per day. Sad! Haha. On the plus side there’s been a change to somatic spell casting which will allow all those clerics (and paladins) who use a weapon and shield to cast without difficulty. (The changes are more intricate than that, so be sure to read them!).
Druids have a lot of changes, particularly to the wild order and wild shape. Seriously. There’s lots. Haha. There’s also changes to the spell goodberry, and to animal companions.
Fighters only real change is to stances, while Monks have they ki strike improved (YES!), and some other changes to their ki pool and ki powers. Skipping around a bit, rangers have some minor changes to their hunt target ability, rogues have some awesome expansions to their rogue specializations, and sorcerers have some new feats and a new infernal bloodline (called diabolic). Wizards have some awesome new abilities, and gain the quick preparation ability right from level one. They can swap out spells they’ve prepared for others, and can give up lower level spell slots to prepare higher level spells. Just AWESOME! I’m super excited to give them a try.
But wait? What about paladins?
Paladins no longer need to be LG. Instead, they can also be CG, or NG. Each of these options will affect some of their abilities, as well as their paladin code. Exciting!
Of course, there’s many more changes than we’ve mentioned. So be sure to snag yourself a copy of the update and give it a read. Pathfinder Playtest Update 1.6 is available as a free download here.
Today we’re going to take a look at the two most recent Starfinder Society Scenarios that are currently available for purchase, and let you know we thought. Although you’ll find references to events in each that I liked or disliked, and comments about specific characters, these scenarios are not explored in detail. It’s not my intention to spoil the events in these scenarios, or give summaries and full reviews, but to share my opinions and provide recommendations. That said, if you want to avoid even minor spoilers I recommend you check out a different article. Whether you intend to use them in home games of the Starfinder Roleplaying Game, sanctioned scenarios for use with the Starfinder Society Organized Play, or just want to read a nifty new adventure, we’ve got you covered! So sit back, and get ready to explore the Pact Worlds!
Starfinder Society Scenario #1-24: Siege of Enlightenment is a Tier 1-4 adventure written by Tineke Bolleman. It takes place on Sansorgis, which is a planet in the Acalata system. It’s a dry place poorly suited to agriculture, but rich in mineral deposits. There players will help with the evacuation of a mining colony, attempt to peacefully navigate some space politics, and explore some Pre-Gap ruins. This scenario features starship combat. It utilizes Starfinder Flip-Mat: Basic Starfield , Starfinder Flip-Mat: Space Station, and Pathfinder Flip-mat: Ancient Dungeon. It makes use of the Starfinder Core Rulebook, Starfinder Alien Archive, Starfinder Alien Archive 2, and the Starfinder Armory. That said, all of the relevant information from both Alien Archives is included within the scenario itself. Siege of Enlightenment does not continue any ongoing storylines, and the only recurring character within it is Venture-Captain Arvin. There are a few interesting characters introduced in this scenario, including then hobgoblin Captain Odrakor of Susumu’s Sword, half-elven Corporal Kalyavata, and the human Chief Engineer Kerchatu. Unfortunately, roleplaying with such characters will be quite brief. There’s also some delightfully entertaining enemies (the first one is particularly fun)! There are no specific boons I’d suggest slotting for this scenario, although I will say that having a few characters trained in Computers and Engineering on your team is very important, and that such characters with have the opportunity to do something special during parts of the adventure. On a similar note, scholarly and studious characters — particularly those interested in archaeology, cartography, chronicling, history, and scribing — will also find opportunity to showcase their interests in this scenario.
Siege of Enlightenment begins in a mission briefing with Venture-Captain Arvin, where he tasks the PCs with helping a mining colony in Near Space evacuate, and then exploring a ruin. Sounds simple, right? Not quite. This scenario involves a bit of space politics which mostly occurs behind the scenes, but is important to understanding the mission. Basically, it involves two different groups who have each have their own space empire in Near Space: the Marixah Republic (a multi-cultural group containing many races from lost Golarion which the Pact Worlds trades with), and the Gideron Authority (a militaristic, predominantly hobgoblin group that the Pact Worlds has few ties with). Both of these groups are independent of the Pact Worlds, rule their own star systems, and have colonies outside of their systems. Following a military coup, the Gideron Authority turned its attentions to conquest, and the two space governments have been cautiously circling each other since. Recently, the Gideron Authority appeared around the planet Sansorgis, collected information on the Marixah Republic’s mining colonies with their long-range sensors, then left. Worried that they would soon fall under attack, the Marixah Republic ordered the evacuation of the colonies. Knowing that they wouldn’t have time to excavate a nearby ruin on their own (and not wanting it to fall into the Gideron Authority’s hands), the Marixah Republic offered the right of exploration to the Starfinder Society in exchange for aid with evacuating the final colony. It is into this political turmoil that your players will travel. Characters will get to interact with both the Marixah Republic and the Gideron Authority, lend a hand to some people in need, explore an important historical site, learn some secrets, and kick some ass. The first physical combat is very interesting and should be a lot of fun at the table, but it’s very complex, so GMs will need to familiarize themselves with it thoroughly before attempting to run the battle. Despite the complexity (and the very dense map), I think it’s going to be a hoot! In the ruins there’s the addition of a simple new mechanic called Discovery Points, which are meant to track how much your players discover and catalogue about the ruins, without bogging down gameplay too much. Although such tracking will all happen on the GM side of the screen, I think it’s wonderful that your player’s thoroughness will be rewarded. It is supposed to be an archaeological investigation, after all. I love that this scenario featured so many new creatures from the recently released Alien Archive 2. I did have one major complaint, though. This scenario is very combat heavy! It contains one starship battle, four other combats, two traps, plus one of those listed combats is likely to also contain at least two hazards and traps (possibly more). That’s a LOT. All in all, even though this isn’t my favourite scenario it has some fun encounters and is a great choice for characters who just want to get into some good old fashioned fights. As an added bonus this scenario is perfectly set up to lead to more scenarios involving the Marixah Republic, the Gideron Authority, and the ancient ruins, which is always great to see. I give this scenario three out of five stars.
Starfinder Society Scenario #1-25: The Beacon Code Dilemma is a Tier 3-6 adventure written by Adrian Ng. It begins in The Starfinder Society’s Lorespire Complex in Absalom Station where you’ll do some research for an upcoming mission, and heads into the Drift where you’ll explore a recently discovered Starfinder vessel that’s been missing in action for over a hundred years. This scenario features the REPEATABLE tag. That’s right. It’s a tier 3-6 repeatable adventure! AWESOME! Although this scenario doesn’t continue any ongoing storylines it does have cameos from a lot of different characters featured in other adventures which I absolutely adore. The Beacon Code Dilemma doesn’t have starship combat. It makes use of one custom map and heavy use of Starfinder Flip-Mat: Ghost Ship. In addition to the Starfinder Core Rulebook this scenario uses content from the Starfinder Alien Archive, Starfinder Alien Archive 2, Starfinder Armory, and Starfinder Pact Worlds. That said, all of the information from the Alien Archives that is needed to run this scenario is included within the scenario itself.
As already mentioned, this scenario features a lot of recurring characters. The bleaching gnome Venture-Captain Naiaj is certain to appear. Of the other four major recurring characters, two will appear in each playthrough (because it’s a repeatable scenario which two are featured will be determined at random by your GM). Depending on which two are featured you’ll want to have different boons slotted, and possibly even bring along different characters. If the ysoki Royo is featured you’ll want to slot ‘High Society Influence (Royo)’ which is from Starfinder Society Scenario #1–05: The First Mandate. If Whisperer of Solar Winds is featured you’ll want to slot the ‘Dream Whispers’ boon which is from Starfinder Society Scenario #1–16: Dreaming of the Future. If the shirren Chiskisk is featured you’ll want to slot a chronicle sheet from Starfinder Adventure Path 1: Incident at Absalom Station (Dead Suns Book 1 of 6). And finally, if Venture-Captain Arvin is featured you’ll want to slot the ‘Starfinder Insignia’ boon from Starfinder Society Quests: Into the Unknown. Unfortunately, although you can choose which boons to slot after the briefing (and therefore can slot appropriate boons) there’s no way to know which characters you’ll be interacting with beforehand (so you might not slot the characters with the appropriate boons). Luckily, it’s repeatable, so you can give it a shot with all of your characters if you want to. And, if you’re really lucky, perhaps your GM will tell you ahead of time.
The Beacon Code Dilemma begins when Venture-Captain Naiaj calls you in for a mission briefing in the Lorespire Complex. There they meet a new character: an SRO priest of Triune by the name of MP-8 from Aballon. MP-8 was blessed with a holy vision from which he deciphered a beacon code. Knowing that this must be a mission of the utmost importance he put together a team and followed the coordinates into the Drift where they found a lost Starfinder vessel called the Amber Reconnoiter. Unfortunately, the ship opened fire on them. Surprised, an not wanting to risk damaging the very ship they were sent to find, MP-8 retreated and contacted the Starfinder Society. Naiaj tasks the group with researching the ship, then heading out into the Drift to explore the vessel, find out what happened to it, and retrieve whatever object it is within that MP-8 is after. As this scenario is repeatable, a lot of aspects are determined randomly. Where you need to do your research within the Lorespire Complex, who you interact with, the crew of the Amber Reconnoiter, their mission’s purpose, and how they met their end (and therefore which handouts you receive), are all obvious examples of randomized aspects. In addition, there’s a wide variety of environmental factors and enemy abilities that are also determined randomly. I absolutely loved this, and was surprised how thorough it was. Really well done!
Whatever random options are determined for your playthrough, characters will need to do some research on the Amber Reconnoiter in two different locations in the Lorespire Complex in order to learn what they can about the ship and determine the codes to shut down the ship’s automated defences. Some of those locations feature new characters as well, my favourite of which is the overly chipper Recordbot-128 in the Halls of Discovery. From there you’ll head out into the Drift and travel to the Beacon Code. Once there you’ll need to navigate through a planar storm, then spacewalk over to the wreck through a debris field (which has an awesome map!), fight off some creatures native to the Drift, and board the Amber Reconnoiter. But, that’s just the start of your mission. You’ll need to explore the wreck, figure out what happened to its crew, and find the object MP-8 is after.
I really enjoyed this mission. I love that is gives you a chance to explore some locations within the Lorespire Complex and actually research something — which should be an important part of being a Starfinder. I loved that we got to really engage in some of the hazards of Drift travel through the planar hazards, battle, and exploring the debris field (which I thought was super cool!). And finally, I loved the how the purpose and fate of the Amber Reconnoiter changes in each playthrough, along with the wonderful player handouts that come with each of those options. One of my only pet peeves was that some of the interactions on the Amber Reconnoiter mention sound when the ship does not currently have artifical atmosphere. It is mentioned that the PCs can repair the power core enough to restore atmosphere (and therefore let sound travel), but many of the things that happen before you’ll have a chance to do so (including enemy tactics) mentions or presupposes sound travelling through the ship. I found it odd. Still, it’s a small quibble that GMs should make note of before running it. Visual cues can easily be used in place of audible ones until atmosphere is restored. In terms of boons there are two up for offer. One is a nice Starship boon that’s useful in the Drift, and one is a slotless limited use boon that can help you get a bit more bang for your buck. Again, this scenario has a lot of gear options available on its chronicle sheet. Overall, I really enjoyed this scenario and can’t wait to give it a play. I give it four out of five stars.
I hope you enjoyed taking a look at these new scenarios with us. We’ll see you again soon when we dive into the new Pathfinder Society Scenarios!
Until then,
Jessica
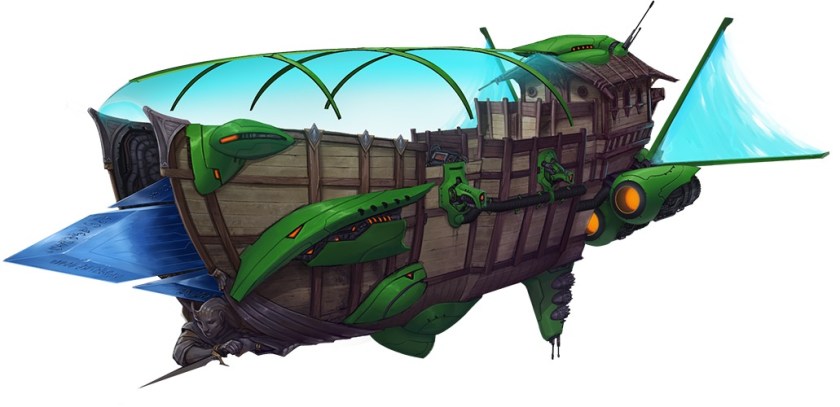
Susumu’s Sword is a Gideron Authority ship under the command of Captain Odrakar. Featured in Starfinder Society Scenario #1-24: Siege of Enlightenment. Art by Graey Erb.MP-8 a, SRO devotee of Triune appearing in Starfinder Society Scenario #1-25: The Beacon Code Dilemma. Art by Michele Giorgi.

 When you’ve had a chance to try them out, head back to StarfinderPlaytest.com and fill out some surveys on your experience. You can also give them your feedback on the the Character Operations Manual Playtest forums, on Paizo’s website. While Paizo wants to focus on actual play feedback, they are interested in hearing all ideas about the classes. Let’s be sure to give them some constructive criticism guys. And some compliments of course! The playtest will run until January 16, 2019, and the feedback surveys will be available throughout the playtest.


 Although the races you’ll find in Legacy Races Revisited are familiar, nearly all of them have received additional racial traits to bring them in line with the same power level. All races also feature two alternative racial traits, so you can get the most out of your character concept. Some races also list new character options beyond racial traits, such as proficiency with brand new weapons like the acrobat spear.


