The Wayfinders: Part Three: Danger in the Drift

Last year I shared my family’s experiences creating their first Starfinder characters. We had a lot of fun making a kooky crew, and tried them out a bit before deciding they would join the Starfinder Society. There were some changes that needed to be made. Tucker was a halfling, which would have to change, but otherwise the transition went smoothly. Then we sat down and played Into the Unknown. Life got busy. We moved on to play Starfinder Scenario #1-03: Yesteryear’s Truth, which was great fun (for details check out this blog post).

But, my kids have WAY too many characters and not enough focus.

I’m a fan of creating a character and playing them through consistently right to the end. I want to play them every week. I want them to accomplish something amazing over the course of a long campaign. And when their story is done I want to know what happened to them. Did they retire? Get married? Ascend to godhood? Go insane? When their story’s complete I’m ready to make a new character and start all over again.

But, my kids? My kids love making new characters. They like hopping from story to story. But they also don’t like letting characters go. They want to play them all at the same time. There’s tons of them. An unattainable goal if I ever heard one! Haha.

In short? We rarely have time to take our Wayfinders for a spin.

The other day my daughter informed me that she wanted to create her own adventure. This isn’t the first time. She’s GMed for us before and brutally slaughtered us all. It’s partly because she doesn’t have much experience determining appropriate CRs, but it’s also because she’s incredibly lucky. Too lucky. It’s great when she’s a fellow PC but when she’s the GM? Look out! Monsters have awesome aim, enemies are so stealthy they might as well be invisible, and no opponent ever fails a saving throw. It’s not that she’s cheating! We don’t use GM screens in my house so we can all see her rolls, and I help her every step of the way. She’s just that damned lucky.

So when she said she wanted to GM something everyone groaned.

She looked so sad.

“Oh, no! She’s going to kill us again!” my son wailed.

“Be nice!” I scolded my son. Then I whispered to my husband, “She totally is…”

But, I smiled at my daughter and said, “That sounds exciting. Let’s do it.” Because it is exciting. Of course I want my kids to want to imagine, create, and GM.

So my daughter and I went to my room and peered at my bookshelf. Making a one-shot would mean everyone would create more characters, which we didn’t really have time for at the moment, so I suggested she create a mini adventure for Starfinder. Our Wayfinders were in the middle of a journey through the Drift from the radioactive planet Elytrio to Absalom Station. The timing couldn’t be better!

But, they were SFS characters… We decided to play the entire scenario off the books, using the stats for our characters but leaving our actual SFS characters entirely untouched. And while we were at it? Tucker might as well be a halfling again (in appearance).

My daughter thought about the Drift a bit, pulled down the Alien Archive, and got browsing. She stopped on creatures she took a liking to and we chatted about them, brainstorming ideas together. Some she liked and some she didn’t. She wrote down notes in her little Pokemon notebook. When she hit the end of the book she narrowed down her ideas and made some more notes and drawings. An hour later we were picking out miniatures and prepping the table. It was game time!

I started off the session by reminding everyone what we were up to. Where we’d been, where we were going, and who we were with.

Our crew consists of four Starfinder Agents that belong to the Wayfinders Faction. Hoponisa (Hops for short), is a ysoki technomancer from the dark side of Verces who loves to dance. She’s on a mission to find herself the ‘perfect mate’ and is handy both in the pilot’s chair, the engineering bay, and at a computer console. She has a robot rabbit dubbed ‘Snowball’ who is a glorified computer with some minor mobility that she crafted herself, then wrapped in fuzzy faux fur for ultimate cuddle-ability. It’s also her spell cache. Hops has been a Starfinder for a long time and is the person who recruited the rest of the crew into the Starfinder Society (before that they were mercenaries who did work for the Starfinders on a regular basis). Together, the gang travels the Vast, deploying drift beacons for credits at the behest of the Wayfinders. After discovering new planets, collecting data on their environments, and deploying drift beacons, the group prepares a report on the planet for the Wayfinders, which allows the spacefaring faction to better prepare proper Starfinder teams for further exploration on these locations.

Hops and the crew of the Pegasus Class ship, Infinity, have gone on plenty of missions together. Led by their Captain Aya, a wise, enigmatic kasatha mystic who believes that every life is precious, they’ve charted planets and discovered new places. Their roles on the starship change a lot, with the rest of the crew rotating between pilot, engineer, science officer, and gunner as the mood strikes them. Aya and Hops are joined by Tucker Aetherfoot, a ysoki (originally a halfling) operative with the daredevil speciality who’s nimble, acrobatic, and full of boundless energy. He wears a t-shirt with a shirren design on it (to represent his long-time friendship with the shirren Vishkesh), and wears a racing helmet with a rose-tinted visor and stylized mouse ears on the side (which was given to him by Hops as a birthday gift). Tucker’s insatiably curious, and runs a blog in his spare time about his experiences exploring the Vast. He’s a devout Desnan from Absalom Station, prone to dancing when he’s idle too long. …Even in the middle of a mission. Lastly, there’s Vishkesh, a shirren mechanic with a little flying spy drone named Rijin. Rijin is trained to help Vishkesh with repairing starships, and is also outfitted with a flare thrower. He’s a chipper little thing, with a bubbly artificial personality. Vishkesh has a fondness to caring for (and rescuing) larval shirren, and currently has a dozen dangling off of him in their protective canisters at all times. Vishkesh is the proud owner of a pig stuffed animal — a rare creature he’s never seen in in the flesh! He’s also from Absalom Station, and is a long time friend of Tucker’s. Vishkesh worships Hylax.

When they joined the Starfinders the crew of Infinity decided they needed a helping hand. They hired two rookies to assist them and round out their crew: Gizdara, a half-orc technomancer who’s a whiz with computers, and Diggs Drifthopper, a burly ‘rabbitfolk’ whose planet was conquered by the Vesk years ago. Diggs was forced into the military, but was recently allowed his freedom and was looking for work. He’s good with a gun, but not much else (which he can’t use in SFS play, as a non-combatant hireling, haha). Still, my daughter insisted on hiring him because he was destined to be Hops’ mate. (Uhhh… Okay? Haha). Diggs’ job is mostly to watch the ship while we’re away from it.

There’s one other person on their ship at the moment: the Membrane Ghibrani Klarima who they were bringing from her home planet of Elytrio to join the Starfinder Society. For now she was a passenger, but the group was teaching her everything they could of the universe as they travelled the Drift.

Travel aboard the Infinity
The crew of Infinity soars through the Drift!

With the recap out of the way my daughter took over, explaining that we had been in the Drift for a few weeks. All of a sudden the alarm blared and there was a strange flash of red light nearing the ship. LAVA!

Wait, what? How could there be lava in space?

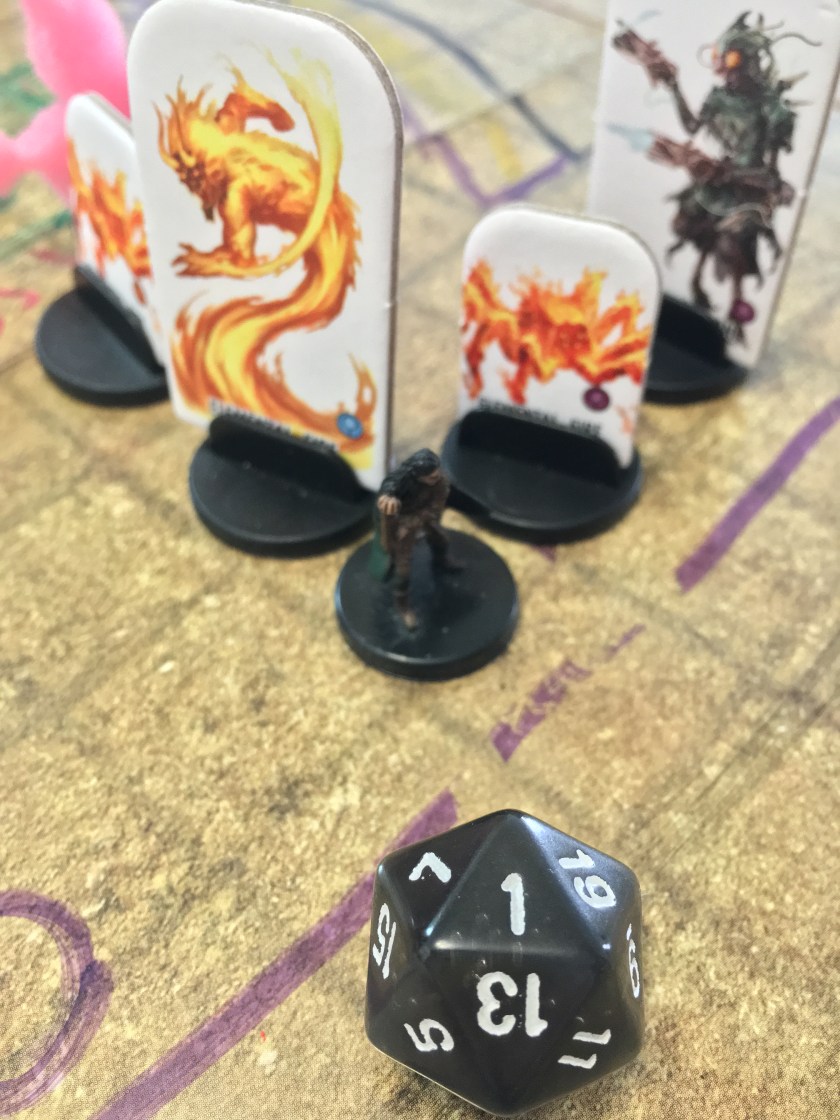
My daughter gleefully asked for a Computers check from our Science Officer — Vishkesh at the moment — revealing that a piece of the Elemental Plane of Fire had been torn off and stranded in the Drift (quite recently by the look of it)! We were about to do some more research on this phenomenon when there was a burst of light. Lava and powerful heat blasts from the shard of the Plane of Fire was flying at our ship! Our pilot, Hops (which I was running on behalf of my daughter since she was GMing), flew like a pro, dodging lava balls, and super heated waves of energy. But a few moments later Vishkesh identified that our air lock had been opened. Something was on the ship!

We turned for the elevator only have it DING pleasantly.

As the doors opened Captain Aya ordered Hops, Diggs, and Gizdara to remain at their posts. Gizadara took over as Science Officer while Diggs took on the role of gunner and blasted through the hunks of rock flying at our ship. Vishkesh, Rijin, Aya, and Tucker leapt to their feet — too late!

A trio of fire elementals roared off the lift and slammed into the kasathan captain — the nearest target.

“The elementals are so angry! They must be lost and confused!” my son (Vishkesh) pointed out. Unfortunately, his understanding did little to calm the creatures. The fire elementals tore into Aya and scored multiple critical hits — curse my daughter’s luck! Haha. My kashathan mystic went down before she even had a turn.

Captain down!!
Captain down!

“Sorry, Mom!” my daughter said a little guiltily.

“It’s alright, baby. Aya will be fine.”

The battle continued, and wow was it a tough one! The fire elementals tore into Tucker while Aya slowly recovered on the ground with her SP. By the time she rejoined the fight her healing magic was sorely needed! Tucker was hanging on by a thread and Vishkesh was in big trouble! Not long afterwards the group rallied and took down the last of the exceptionally lucky elementals. But not before Tucker suffered some luck of his own — bad luck!

Crit Fail for Tucker
A critical fail for poor Tucker!

With the fire elementals defeated Vishkesh hurried to the airlock to get it locked down while Aya healed the wounds of her crew. Hops flew us out of the range of the planar anomaly and the journey returned to normal.

For a time…

Not much further away we came upon a strange group of asteroids that looked like they were all part of some kind of large complex — a metallic castle of some sort. It was clearly another broken planar shard torn from another world and deposited in the Drift by Drift Travel. Hesitantly, the group scanned the planar wreckage and detected signs of life. Not wanting to leave anyone stranded in the Drift, Aya ordered the ship to investigate the asteroids.

They flew past chunks of reddish rock, through space strewn with shards of glittering metal. Suddenly they saw a ship! It looked like a hunk of junk cobbled together from — well, junk! They turned on the comms to hail the ship only to be fired upon!

Battle stations!

Hops sailed the ship through space, dodging meteors and make-shift torpedoes, Vishkesh boosted the ships guns, Tucker fired upon the enemy, and Aya encouraged her crew. Although the battle shouldn’t have been challenging, it was — once again my daughter’s good luck conspired to destroy us.

Suddenly Vishkesh noticed incoming projectiles from somewhere other than the ship! One of the chunks of broken castle was inhabited! They fired cannons at the Infinity. Cannons that held… goblins in weird globs of goo! The goblin bombs splattered against the hull of Infinity! Unfortunately for the goblins our ship’s shields were too tough for them to penetrate! Most splattered on impact like giant bugs! But, armed as they were with sharp implements and hacking kits, it’s likely the goblins would have attempted to breach the hull or hack into the air locks to gain entry had our shields been depleted.

Suddenly a voice crackled over the intercom. “AHA! You smart-heads are good! You foil our goo-guns good! But we goblin pirates! Goblins attack and goblins snack! Or…. goblins want to snack! We hungry! Hand over your food and we let you go!”

Snowball Easter Bunny Chocolate Soop
Image discovered on Pinterest and chosen to represent Snowball in my home game. Art by Canadian artist DaCosta! under the studio name Chocolate Soop. Click here to check out their website.

Aya sighed in a rare show of impatience. “All lives are precious…” It sounded like she was reminding herself of this, instead of teaching the others as was typical. “We came here to lend aid to any stranded in the Drift. Surrender, Goblin Pirates, and we will forgive your attack. We have food to spare and tools to repair your Drift Engines. …If you have any.”

The goblin pirate laughed. “AHA! We win! We no shoot and you give us food! Yes! Come! Come to our home and give us many many food!”

“…” Aya decided it was best not to argue with a goblin. “Yes. Exactly. We’re coming in for a landing.” Looking at Hops she ordered. “Hops, take us down.”

“Yes, Captain!”

The gang flew their ship to the strange broken castle and landed — as best as they could. Floated nearby was a better description. After a space walk, Aya, Vishkesh, Tucker, and Rijin set out to meet the goblins. They were greeted by a snivelling, friendly little goblin — not the goblin pirate from before — and given a tour. The castle was hollow and without gravity except around its outer walls. Along these outside walls were small rooms that had both air and gravity — an anomaly the goblins couldn’t quite explain. Up near the broken ceiling (and any holes in the walls) there was a massive makeshift net — to prevent any goblins from accidentally drifting off into space.

On the tour the group discovered that the goblins weren’t just hungry, they were completely out of food! No wonder they had attacked!

But, the goblin had a plan. “Oh, you look so fat and not starving! Oh! Yum! Uh… Yum to your food! Not yum to you!” The goblin laughed, but Tucker was a little nervous. “We have much money to give you! Yes! Lots of shinies! Came here to steal shinies from castle, but ship broke! And shinies not good to eat! Nope! We have tried!” the goblin nodded. “Our King has shinies! You go see him and kill him and take them! And his pet! Must kill it too! Very smart it is. Smarter than King I think!” The goblin nods. “Then you take shinies and give us many many food! Yes! YES! Good plan! See?”

Rijin Jessica Madorran
Image discovered on Pinterest to represent Rijin in our home game. Art by Jessica Madorran. Check out her website for more information.

“Did some of you want to come with us?” Vishkesh asked.

Tucker groaned. “Oh, I don’t like that plan…”

The goblins around all cheered. “Yes! Oh, give us ride! But first take shinies! You take for food! And if you not want we take it and use it to buy more food when you get to… where you go! Me not care! Me want FOOD!”

With a sigh the group headed up to bargain with the King. “All lives are precious,” Aya reminded everyone. “This need not come to a fight.

Unfortunately, Aya was wrong. It did come down to a fight. The quartet faced off against the goblin king and his (definitely smarter than him) tashtari pet. For once my daughter’s luck didn’t trump our own and we made quick work of the angry pair. With the shinies and a ton of goblins in tow, the group reboarded the Infinity for the longest, most irritating trip they would ever endure.

Words of wisdom: Never let a pack of starving goblins on your space ship!


Our family had a lot of fun playing my daughter’s Starfinder adventure. Best of all? My daughter was happy she didn’t kill everyone. (Yay!)

Space goblins and fire elementals are from Starfinder: Alien Archive while tashtari are from Starfinder: Alien Archive 2. Pawns for all the mentioned creatures are available in Alien Archive Pawn Box and Alien Archive 2 Pawn Box. The statistics we used for the goblin spaceship came from Starfinder: Core Rulebook.

Thanks for joining us today! I hope you enjoyed hearing about my daughters adventures in GMing as much as we enjoyed playing it.

Jessica


5-Minute Dungeon

Welcome to d20diaries!

5 Minute Dungeon

Today we’re taking a look at a board game my kids recently got for their birthday: 5-Minute Dungeon! This real-time card game tasks up to five players with working together to escape a dungeon in under five minutes. Each dungeon consists of a randomized deck of cards that features obstacles, monsters, people, and events to overcome. At the end of each dungeon is a powerful boss to defeat. To beat the game you’ll need to triumph over five separate dungeons.

This game is frantic, fast-paced, and more than a little chaotic! Communication and teamwork are essential to your success. Player’s win or lose as a team. 5-Minute Dungeon is intended for players ages eight and up. Although a single dungeon takes five minutes, playing through a whole game takes about thirty to forty-five minutes, depending how many times you fail to escape a dungeon.

Box Contents

Players take on the role of one of ten characters by selecting a character board. Each board is colour-coded and double-sided, with one male and one female character per board. Every character board makes use of one of five matching decks, and every character has their own unique ability which can be triggered by discarding three cards from your hand. That means that up to five people can play at a time.

Characters include the blue sorceress and wizard, green huntress and ranger, purple ninja and thief, red barbarian and gladiator, and yellow paladin and valkyrie. Most of the special abilities of these characters fall into two types: those that help get someone in your group extra cards and those that automatically defeat a certain category of card. There’s also the wizard’s unique ability to stop time. We found that it was very helpful to play with the wizard and a character who can help the group draw cards, with the rest of the players taking on abilities that can auto-defeat either monsters, obstacles, or people. Once you’ve got your character picked out you place the matching deck on their board.

Next you set up the dungeon. Start by selecting a boss. There are five to choose from and each is numbered 1 though 5. You simply start at Boss #1: Baby Barbarian and work your way up to Boss #5: Dungeon Master. Each boss also has a number of cards written on it. Baby Barbarian has 20, The Grime Reaper has 25, Zola the Gorgon has 30, and so on. This is the number of dungeon cards you’ll randomly select and place on the boss board. Then you’ll pick out two challenge cards per player and shuffle them into the deck of dungeon cards. This is the boss’s dungeon. You simply place the deck of cards into the space marked with the dotted line and you’re ready to begin.

Boss

Player’s begin by drawing a number of cards. This number is variable and determined by how many people are playing the game. Chances are you’ll start with three or four cards. Then you start the five minute timer, flip over the first card in the dungeon deck, and get adventuring!

Cactus wants a hug!
To reach ‘The Grime Reaper’ you’ll need to defeat the ‘A Cactus that wants a hug.’ Oh, no! I hope you’ve got some shields….

This game doesn’t come with a physical timer. Instead there’s a timer app you can download on your phone, tablet, and other handheld device. It’s a quick download and easy to use. You simply select a voice for the announcer (I love the ‘fearful’ voice, but my daughter’s a fan of ‘spiteful’) and click start. Sometimes you’ll need to pause the game (such as with the wizard’s ‘time stop’ ability) in which case you simply push pause. If you defeat the dungeon you click ‘We Won,’ if you lose you click ‘We Lost’ and if you run out of time you don’t need to click a thing. It’s an enjoyable, humorous little timer app and my kids really like it.

There are four major categories of dungeon cards: event, person, monster, and obstacle. Events are the simplest to resolve. They each have a sentence explaining what you need to do, you do it, then you move on to the next card. Examples of events are ‘Sudden Illness’ which forces every player to discard their hand, or ‘Trap Door’ which forces all players to discard three cards. The rest of the cards — monster, obstacle, and person — have circular symbols on them. These symbols match the cards that you must play to defeat them. These cards can be played in any order and by any player. There are no turns. As soon as all the needed cards are played you have defeated the card, it gets moved to the discard pile, and you flip over the next dungeon card. Once all of the dungeon cards are defeated you will see the symbols needed to defeat the Boss.

This makes gameplay fast and chaotic, with players slapping down cards, shouting out what they’re playing, and calling out what’s still needed to defeat the card. It’s the sort of game where everyone feels a sense of urgency and excitement, and get’s a thrill of triumph when a card is defeated.

Enemy Types
The four types of cards you’ll find in a dungeon.

So what the heck are all these symbols?

There are five major symbols in the game, which are colour coded. These same symbols are seen across all the boss cards and all character decks. Called ‘Resources’ they include the red sword, yellow shield, green arrow, blue scroll, and purple jumping person (which my family always calls ‘sprint’ or ‘dash’ but is probably called ‘leap’). Every deck will have cards of these five types, although they will have them in different combinations. The red barbarian/gladiator deck will have a lot of red swords, for example, while the blue sorceress/wizard deck will have a lot of blue scrolls. In addition to these single symbol cards there’s double symbol cards — cards that have two red swords, two blue scrolls, and so on. These are seen in much lower quantities than the single symbol cards, and not every deck will have them in every kind. While the sorceress/wizard deck may have a few double scroll cards, the huntress/ranger deck won’t. One of the decks — the red barbarian/gladiator has special double symbol cards which consist of a red sword and a second other symbol.

The rest of the cards found in the character decks are black bordered and have a special ability written on them. The most common are abilities that let you auto-defeat a certain category of dungeon card. ‘Fireball’ defeats a monster, ‘Backstab’ defeats a person, and ‘Mighty Leap’ defeats an obstacle. These are super useful cards which can be found throughout all of the different coloured decks in differing quantities. While the sorceress/wizard has a lot of ‘Fireballs’ the ninja/thief has more ‘Mighty Leap’ and ‘Backstab’ cards. Finally, every colour deck has some unique black bordered ability cards. ‘Enrage’ from the red barbarian/gladiator deck lets you choose two players who may draw three cards each. ‘Divine Shield’ from the yellow paladin/valkyrie deck pauses time until someone plays a card and lets every player draw one card. ‘Magic Bomb’ from the blue sorceress/wizard deck counts as one of each type of resource. My personal favourite card? ‘Heal’ which lets you select a player who can put their entire discard pile back on top of their draw pile. Awesome!

Card Types 2
The many card types found in 5-Minute Dungeon

As mentioned, every deck is different but equally useful. You’ll soon discover which play style you prefer and find a favourite, so I highly recommend trying each deck out. I love the yellow paladin/valkyrie deck best — particularly when played with the valkyrie character who can help her fellow players draw cards. The yellow deck has a lot of different healing cards, which I find can be incredibly helpful. My son, on the other hand, prefers the to play as the blue wizard. He’s a huge fan of the wizard’s ‘Time Stop’ ability — which is so helpful I’d go as far as to call it a necessity. He also loves the ‘Magic Bomb’ card which can only be found in the blue deck. Finally, my daughter prefers to play as the green huntress — solely because she loves the art. To each their own, I guess. Haha.

With all the decks in their places, cards in hand, and the timer started, play can begin. There’s a few other rules you need to know, but not many. Whenever you have less cards than your opening hand consisted of you can immediately draw cards to fill your hand back up to maximum. Discard piles do not get shuffled back into the draw pile once the draw pile is empty. This means that if your deck ever runs out you can no longer draw cards — unless someone plays a card that gives you cards from your discard pile or something similar.

Winning will take teamwork, speed, and luck. If you win you reshuffle your decks, select your character (you do not need to keep the same character throughout all the dungeons), set your boards back up, and build the dungeon for the next Boss. When everything’s ready you begin play again. If you defeat all five dungeons you win the game.

If you ever fail to defeat a dungeon you’re supposed to reset, going all the way back to the Baby Barbarian and his dungeon again, but my family didn’t like this rule. Instead we just replayed the dungeon we were on.

We’ve played this game quite a few times. Sometimes we finish it all the way through, and sometimes we only play a round or two. My kids and I really like it. They enjoy the teamwork aspect, and that they can always be playing. There’s no waiting for your turn or getting beat on by your friends. It’s fun and fast. It’s not a game for everyone, though. My husband doesn’t really like it. He’s a fan of strategic, complex games. Chances are whatever game we’re playing he’s going to be that player taking the longest turns. Unsurprisingly, the chaotic, real-time gameplay of 5-Minute Dungeon is not to his tastes. It’s also not the kind of game you can play anywhere. Players are going to get loud. Although you could bring to a party, family gathering, or friend’s house, it’s not the sort of thing you’re going to bring to play at the library, local coffee shop, laundromat, or airport. Finally, it’s not the sort of game you want to let the kids play late at night. Mine get antsy, excited, and leap and jump around. Not really a relaxing, winding-down sort of game.

All in all, we really liked 5-Minute Dungeon — especially my son. It’s fast paced, easy to learn, and enjoyable. My only complaints? I wish the boss cards were double sided so you could choose which of the two to face off against and I wish there were more dungeon and challenge cards included in the game so the dungeons felt more varied. But, I suppose wanting more of a game isn’t much of a complaint. More like a wish list. Haha. 5-Minute Dungeon is a pretty easy game to find that currently retails for around $30 Canadian. Our copy belongs to my eight-year old son, and made an excellent gift. He loves it.

Happy gaming!

Jessica

Review: Tyrant’s Grasp: The Dead Roads!

Today we’re taking an in depth look at the first book in the Tyrant’s Grasp Adventure Path! This survival horror campaign pits the players against the return of the Whispering Tyrant, the lich-king Tar-Baphon, who was defeated and sealed away long ago. Tyrant’s Grasp will be the final Pathfinder 1st Edition Adventure Path released, before the switch is made over to Pathfinder 2nd Edition in August. Intended to take characters from levels 1 to 17, Tyrant’s Grasp is six volumes long.

Tyrant's Grasp - Player's Guide
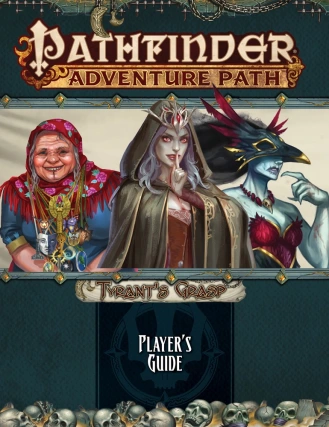
A wonderful Player’s Guide for Tyrant’s Grasp is available as a free download on Paizo’s website here. The Player’s Guide gives players a relatively spoiler-free way to properly prepare for and integrate their characters into the Tyrant’s Grasp Adventure Path. I highly recommend checking it out!

The Tyrant’s Grasp Adventure Path begins with Pathfinder Adventure Path: The Dead Roads (Tyrant’s Grasp 1 of 6). Written by Ron Lundeen, The Dead Roads is an adventure intended for first level characters, which should bring PCs up to level five by its conclusion. This adventure begins when the PCs awaken already defeated in the Boneyard, a land where the dead go to be judged. There’s just one problem… They’re not quite dead. Trapped inside a tomb that doesn’t belong to them, they’ll need to escape, figure out what happened to them, and find a way to return home. But, how could one possibly escape the land of the dead?

Let me start by saying that The Dead Roads — and the Tyrant’s Grasp Adventure Path — is not for everyone. Terrible tragedies will occur, and you won’t always be able to prevent them. These events are bound to have a lasting effect on your characters, so players should be prepared to consider and role-play the marks left by the trials you face. Often you’ll be in dire situations with limited resources, so players will need to be resourceful to survive. Plenty of the imagery and events in this adventure are dark, morbid, and sorrowful. It’s definitely a horror campaign — though not your typical horror. It’s suspenseful survival horror, with a good deal of body horror in the first book, as well.  The Dead Roads contains imagery that is inappropriate for children and some adult gamers will even consider an image or two disturbing. It’s definitely not a campaign I could play with my family.

That said, I loved The Dead Roads. Absolutely, positively, adored it.

The Dead Roads Cover

For starters, it looks great. From cover to cover it’s a wonderful, high quality book filled with nice maps, and beautiful, dark artwork. The cover depicts Mictena (a catrina psychopomp the PCs are destined to interact with) in the foreground. Behind her is an image of Seelah (the Iconic paladin) and Yoon (the iconic kineticist) battling ostovites. Both images are by Igor Grechanyi. There’s a lovely map of The Gravelands (Lastwall and parts of Ustalav) on the inside cover. There’s a ton of artwork throughout the book — of enemies, allies, and characters who could become either. I particularly enjoyed the art for Prince Uspid and Mictena. Colulus was the most disconcerting image in the book. If any image is going to bug a squeamish player it’ll be that one. There’s a few characters that I wish had art but don’t (which is expected! Art’s not cheap and there’s only so much space!). Ayuki, in particular, would have been nice to see, as well as the jitterbone creature in the bestiary. The maps, all drawn by Matthias Rothenaicher, are really nice. They look great, of course, but they’re also well thought out, executed, and each has a unique feel to it. I particularly enjoyed ‘Roslar’s Tomb’ and ‘Deathbower.’ I wish that the maps of the various Dead Roads locations were given a bit more space, though. Squishing three multi-floor maps for three different locations onto one page is good for page count, but makes some of the maps difficult to read. Part of the eastern end of the ‘Palace of Teeth’ is nearly lost in the creases of the binding, while the entrance to ‘Salishara’s Scriptorium’ is hidden in the creases. If both of those maps were a few grid squares further to the left that would have been less of a problem. Finally, flipping back and forth  between the map page and the various locations depicted in it (which is spread out over 28 pages) is a bit irritating. Have a bookmark or post-it note handy and try not to tear your pages. Much to my surprise there was also two player handouts which represent puzzles the group comes across. I’m really glad they’re depicted instead of just described. They’re necessary and a really nice touch.

Maps in the Crease
Part of the maps lost in the creases.

The Dead Roads starts with a bang (HA!) and doesn’t let up. The entire opening has the feel of an ominous, suspenseful mystery. Your PCs don’t know where they are, how they got there, or what’s going on. Their locations hide clues to both their situation and the history of wider events, which the PCs may or may not be able to uncover. In time they will discover the answers to some of their questions, just as they realize it’s tied to an even bigger mystery.

There’s a lot of wonderful social encounters and NPCs in this adventure. Number Three, Barple Stonebreaker, Prince Uspid, Queen Carnassial, Kishokish and his portrait, Ayuki, Salighara, Berthold, the wyrwoods, Mrs. Pedipalp, Aydie, Reedreaper, Mictena — there’s just so many great interactions in this adventure! Among them, three particularly stand out amongst the crowd: interacting with the townsfolk of Roslar’s Coffer is poignant and amazing; speaking with Barzahk the Passage; and — my personal favourite characters — Umble and Thoot! This pair of friendly psychopomps are the best!

Many of the creatures and NPCs you come across don’t look friendly — which doesn’t mean they aren’t friendly. Of course, it doesn’t mean they are friendly, either. Which I love! Appearances have no bearing on what a creature acts like and I appreciate that this adventure used that so effectively. It’s bound to throw players for a bit of a loop and make them feel… off-kilter. Which is great!

There’s a lot of challenging encounters in this adventure and plenty of unique monsters to face off against. I particularly enjoyed that so many can end in ways other than violence. But, don’t let that last sentence lull you into a false sense of security! There’s a lot of combat encounters in this book that cannot be avoided.

And the ending! Oh, the ending! I love it! I cannot wait to get my hands on the next book in this Adventure Path! I have a feeling Eulogy for Roslar’s Coffer is going to be just as good.


And now it’s time for a warning:

We’ve got more to say about this adventure, but it’ll come with spoilers! Don’t want to read them? Skip on past this next section until you see the large words ‘SPOILERS OVER.’ Got it? Good! See you on the other side where we’ll talk about the extra content in this book!


SPOILERS

The Dead Roads adventure is split into four major parts: Awake in Roslar’s Tomb, Among the Dead, Walking the Dead Roads, and Deathbower. One of these parts Walking the Dead Roads is particularly dense and is made up of three major locations: The Palace of Teeth, Nine-Eaves, and Salighara’s Scriptorium. All told The Dead Roads adventure is 52 pages in length with six pages afterwards dedicated to three NPCs: Mictena, Mrs. Pedipalp, and Reedreaper. All three of these are enemies the PCs will come across, but only one of them has to stay that way. The PCs have a chance to convince the other two to step aside without violence (although it’s extremely hard to accomplish for one of those two!).

Through this adventure the PCs will get to interact with psychopomps, a type of outsider native to the Boneyard who work to ensure that the processing of souls is done accurately and efficiently. Typically functioning as guides for the souls of the deceased, the psychopomps are confused over what to do about the mysterious PCs. Some will help them along their way (especially the delightful Umble and Thoot!) , and others with hinder them — particularly Mictena, a catrina psychopomp obsessed with putting the PCs spirits properly to rest. Through a good thorough death, of course! Psychopomps aren’t the only enemies and NPCs the players will interact with. The Boneyard is a huge realm, and there’s plenty of creatures living/stranded/invading there. Other major groups of enemies include fey, vermin, sakhil, and nightmarish beings from the Dimension of Dreams.

Fittingly, The Dead Roads begins with death. Lots of it. The entire town of Roslar’s Coffer has been destroyed in one terrifying instant. Including the PCs. I’ll leave the details out of this article, but suffice to say this will have a lasting effect on your players and their characters. Any family, friends, and companions — pets included — that lived in Roslar’s Coffer are dead. Although it might be tempting to warn some players about this in advance, that also will ruin some of the surprise and likely result in players purposely making no personal connections to the town of Roslar’s Coffer — which would be a mistake in my opinion. Every GM will need to judge their players accordingly, and perhaps provide them with some hints and warnings while they build their characters and backstories. In my opinion this event is handled incredibly well throughout this adventure, and I highly recommend allowing players to make a character with personal connections to Roslar’s Coffer. It adds so much to the story. However, it is important to inform PCs that if they have animal companions, mounts, or they are a wizard with a familiar, they will not have access to their pet at the start of the campaign. Player’s who have read the Tyrant’s Grasp Player’s Guide will already be aware of this, although they won’t (accurately) know why.

Happily, the player’s experience doesn’t begin with the death of Roslar’s Coffer. Instead, Part One: Awake in Roslar’s Tomb begins with the PCs waking up in a stone coffin. Literally entombed they need to push their way out of the stone box and into a cold, dark, mausoleum. It’s a great opening. Players and characters alike are bound to be curious what has happened and where they are. Players begin with any gear they had that could reasonably fit in a coffin with them. Any familiars who share a soul with your PCs (a shaman or witch familiar) will be in a coffin of their own, while all other companions are not present (as they are dead). Eidolons and phantoms can be summoned back normally, although all other familiars and companions will need to be replaced at a later time.

Soon, the PCs will discover they’re in someone else’s tomb — Ervin Roslar, Knight of Ozem and hero of the Shining Crusade. The same man that Roslar’s Coffer is named after, in fact. Interesting! As they navigate the tomb they’ll find strange creatures, animated bones (sort of…), a trapped spirit, and a tribe of mites. They’ll also discover that Ervin Roslar may have had a few secrets of his own, although it’s unlikely they’ll unravel his history completely. This section of the adventure is a suspenseful series of explorations, mysteries, tantalizing clues, and challenging combats. It’s going to be a ton of fun to both run and play.

Part Two: Among the Dead begins when the PCs exit Roslar’s Tomb to find themselves face to face with a pair of spooky looking (and absolutely delightful) psychopomps: Umble and Thoot! Seriously, they’re awesome. This quirky pair give the PCs some answers to their most pressing questions and explains that not only are the PCs dead and not dead at the same time — weird! — the rest of Roslar’s Coffer is well and truly dead. They ask the PCs to lend them a hand in convincing the spirits of the dead of Roslar’s Coffer that they are, in fact, dead. These poor fellows need a hand moving everyone on to the afterlife in a calm and orderly fashion! The PCs get to travel to a phantom version of Roslar’s Coffer where they interact with all the people in town — now dead. This is an amazing section of the adventure. Short and poignant, the GM has a chance to show the PCs what has happened to all their family and friends. They’ll need to convince loved ones to move on, and will have a chance to say goodbye. If they have any pets they’ll find them here as well. The adventure itself provides rules for interacting with these spirits, how to convince them to move on, and some tactics that will let them do it in a timely fashion — namely convincing the town leaders of their death. Some PCs will want to stay behind and die along with their family, others won’t have personal connections to the townsfolk, and others still will want to ‘save’ some of these spirits and attempt to return them back to life. There’s plenty of guidance in this book for handling PCs of every kind. After accepting their death the people of Roslar’s Coffer — even familial loved ones — want answers for what happened to them. The PCs are uniquely positioned to uncover this. And, of course, any spirits who can’t be convinced to move on (including those your PCs may want to bring back) will deteriorate in time until they become undead ghosts and other malevolent entities. Umble and Thoot can explain this to the group and ensure no PCs attempt anything so foolhardy. Also in this section the PCs are first introduced to the antagonist of this adventure, Mictena. Overall, this section of the book is among my very favourites. It’s exceptionally well handled and sure to be an emotional experience for players and characters alike. It’s a truly unique roleplaying opportunity. I’m not an overly emotional person, but I’m quite certain that if I was playing this with any character who had even a modest amount of family or friends in Roslar’s Coffer, under an even remotely talented GM, I would cry — in a good way! It has the potential to really tug at the heartstrings.

Part Three: Walking the Dead Roads begins after the PCs have helped the people of Roslar’s Coffer accept their death. Umble and Thoot, who are grateful and believe that since the PCs are only slightly dead they’re not truly dead at all, offer the PCs a way out of the Boneyard. The Dead Roads. They explain that this secret path is only ever trod by psychopomps and gatekeepers, the beings who watch over what amounts to traveller’s checkpoints along the road. Capable of leading anywhere, the PCs can use the Dead Roads to get home to Roslar’s Coffer (so they can figure out what’s happened) by taking a certain path. They’ll need to stop at the three checkpoints along the way and get stamped by that location’s master. Convincing them to grant the stamp should be the hardest part of the journey. Unbeknownst to Umble and Thoot, politics and turmoil have overtaken the three waystations, making each location more dangerous than expected. These locations may be visited in any order, although they are presented in order of difficulty (which is also how I recommend playing them).

The Palace of Teeth is a small castle ruled over Queen Carnassial and her court of tooth fairies. Not long ago her son, Prince Uspid, led a coup against her, and the two factions have been locked in a stalemate ever since. Although Queen Carnassial is the only one with the authority to stamp the PCs (at least until her death) it’s Prince Uspid the PCs are destined to meet first. They’ll need to navigate, bargain, and battle their way through bickering fey factions. They might even get to keep all their teeth…. This location is simultaneously goofy in a crazed sort of way and disconcerting. Although the Palace of Teeth was once a beautiful castle it’s undergone a rather morbid makeover since the fey moved in. The place is creepy and it’s denizens literally want to yank your teeth out. That can make bargaining… weird. Haha. I love the art for both the tooth fairy monarchs (particularly Prince Uspid!) and the stained glass angel. But, in my opinion, the creepiest encounter involves a pair of soulbound dolls in the midst of acting out a rather bloody play about dentistry. They attempt to make the PCs their next patients, using deep slumber and some particularly creepy statements. It’s awesome! Haha. The Palace of Teeth is my favourite location on in part three.

Nine-Eaves is a three storey manor owned by an old shoki psychopomp with a fondness for games and puzzles. Unfortunately, Kishokish’s manor has been invaded by sahkil and he’s now a prisoner in his own home. They PCs will need to free him if they want to get his stamp. Luckily they’re not without allies. An animated portrait created to pose riddles to visitors can lend the PCs a hand — if they can solve his puzzles! There are three puzzles total, and each one solved can earn the PCs information and advice. They’ll need to traverse the house as they seek answers, battling vermin, sahkil, and an unfettered phantom named Ayuki. I really enjoyed the puzzle aspects of this location.

Salighara’s Scriptorium was created by Salighara, a reclusive viduus psychopomp who is studying the Dimension of Dreams and oversees a crew of wyrwood scribes. Mictena attempted to convince Salighara to kill the PCs on her behalf, but was rebuffed. Mictena then offered the same deal to Salighara’s assistant, a plump woman named Mrs. Pedipalp (actually an aranea from a nightmarish section of the Dimension of Dreams). Happy to take the powerful psychopomp up on her offer, Mrs. Pedipalp has ousted Salighara from her own scriptorium and remade the building in her own image. Now a dark place of nightmares and horror, the PCs will need to set things right. This is definitely the most horror-themed location in The Dead Roads, with traps, haunts, and horrifying enemies. Colulus, a flayed ettercap and long-time minion of Mrs. Pedipalp is by far the most horrifying. But, even the Scriptorium is not without potential allies. PCs get to meet Salighara, some upset wyrwoods, and a ratling named Berthold. Mrs. Pedipalp herself is a great opponent — a capable liar, powerful spellcaster, and nightmarish foe all wrapped up in a kindly looking package. I particularly like her tactics. That said, it’s likely Colulus who will give parties the most trouble.

After receiving their stamps the PCs can finally traverse the rest of the Dead Roads and return to the land of the living — not! Mictena refuses to let them go! She magically relocated her domain, Deathbower, right onto the Dead Roads so that she and her dangerous shabti gardeners can kill your PCs properly. Which brings us to the final section of the Dead Roads adventure, Part Four: Deathbower. I love this location and its map. I love the inhabitants — gardeners, friends, and foes. And I love Mictena herself. Despite being an enemy of your PCs she’s not a bad being. She’s a psychopomp just doing what she thinks is right. Which is cool! Although some of the hazards and enemies in this glorious garden must be confronted head on, some characters can be swayed and may even join you for a while. Reedreaper is a particularly interesting character, although it’s unlikely he sticks around long enough to play much of a role. Even Mictena can be talked down — theoretically. The chances your PCs will be able to roll high enough are incredibly slim, but it could happen. Which I really like.

After leaving Deathbower behind the PCs find themselves back on the Dead Roads and greeted by an incredibly powerful psychopomp, Barzahk the Passage, a demigod and master of the Dead Roads. This enigmatic figure whisks the PCs off to their home in a matter of moments, giving them a bit of time to ask him any questions they might have. I thought this was a great moment and a wonderful way to end the adventure.

SPOILERS OVER


In addition to The Dead Roads adventure, this volume contains two articles intended for both GMs and players, one article solely for the GM, a campaign outline, and a bestiary containing five new creatures.

Tools of the BoneyardThe first article, Tools of the Boneyard, is written by Matt Morris. In it you’ll find new gear and character options aimed at dealing with the dead. There is one alchemical remedy, one alchemical tool, and two alchemical weapons — bone burn is my favourite, so be sure to check it out! There are two new special materials useful for crafting — cryptstone can be used for ammunition and weapons, while spiresteel can be used for ammunition, weapons, and armour. Finally, there are five new magic items: crypt rod, grim helm, harbinger’s scythe, Lady’s Mercy, and Momument’s Truth. Although I enjoyed a lot of the items, it’s the character options that I found were most exciting. Graveslinger is a gunslinger archetype that specializes in combatting incorporeal undead. Soul Shepherd is a monk archetype that calm incorporeal undead and haunts with a touch. They also gain some otherworldly resistances and interesting ways to use their ki. Reaper is a new oracle mystery which I really enjoyed. Tightly themed and flavourful it’s capable of both killing the living and destroying undead. There are also six new barbarian rage powers including the psychopomp totem powers.
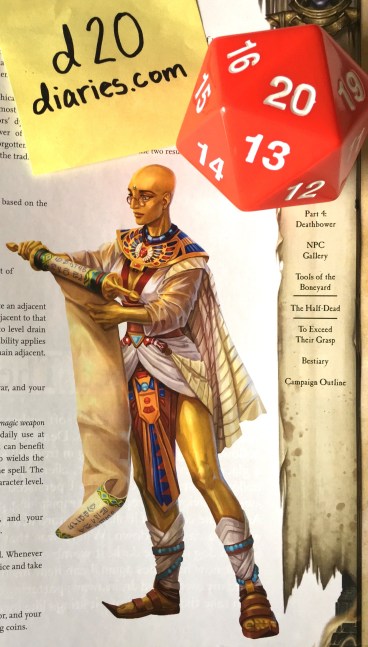
shabti-1.jpg
Thrilled to see shabti get some attention!

The second player friendly article is written by Mikhail Rekun and entitled The Half-Dead. This section talks about four races that have a strong connection to death and the undead. In addition to providing details and character options for dhampir, duskwalkers, and shabti, it also talks about the new subtype of creatures, mortics. Dhampir appear alongside two magical items, duswalkers have access to five new feats, and shabti have access to five new feats. I was particularly excited to see shabti included.

The next article, To Exceed Their Grasp, is written by Crystal Frasier and intended for GMs only. This article discusses some of the important concepts, characters, and events of the Tyrant’s Grasp Adventure Path and the role they play in the overarching story. It also contains a timeline. This is incredibly useful for GMs an will likely be referenced throughout the entire Adventure Path.

Tyrant's Grasp -Shining Crusade - Death of Arazni
The Death of Arazni (Herald of Aroden) during the Shining Crusade. Art courtesy of Paizo Inc.

The Bestiary is up next! It contains a random encounter chart, two interesting social encounters, and five new creatures written by Ron Lundeen, Kyle T. Raes, and Mike Welham. All of the monsters in this book have ties to death and the Boneyard and two of them are featured in The Dead Roads adventure. Bonewrought Willow is an ominous looking intelligent plant capable of growing in Boneyard. Attracted to light and more benevolent than it appears this is a great CR 3 creature I can’t wait to confront my players with. Kaicherak are nasty little fanged worm beasts with ties to Achaekek and a fondness for messily gorging themselves on blood. At CR 4 they are among the most powerful new creatures in the bestiary. Mortics are living beings with strong connections to negative energy which makes them sort of like living undead. There are two mortic stat blocks included in the bestiary — the ghoulish elf-like angheuvore (CR 2) and the incredibly flexible halfling-like jitterbone (CR 4). As previously mentioned, more information on mortics is also included in The Half-Dead article. The final creature is the tooth fairy monarch, a CR 3 version of the lowly tooth fairy.

The last article is a campaign outline, written by Crystal Frasier and Ron Lundeen, that briefly details the events of the upcoming volumes of the Tyrant’s Grasp Adventure Path.  Not the sort of thing you want your players peeking at! The campaign outline is incredibly useful for GMs.

Which brings us to the end of  Pathfinder Adventure Path: The Dead Roads (Tyrant’s Grasp 1 of 6). Want more? So do I! Tyrant’s Grasp continues with Eulogy for Roslar’s Coffer (Tyrant’s Grasp 2 of 6) by Jason Keeley, Last Watch (Tyrant’s Grasp 3 of 6) by Larry Wilhelm, Gardens of Gallowspire (Tyrant’s Grasp 4 of 6) by Crystal Frasier, Borne by the Sun’s Grace (Tyrant’s Grasp 5 of 6) by Luis Loza, and Midwives to Death (Tyrant’s Grasp 6 of 6) by John Compton. You can also check out a previous blog post I wrote on the upcoming Tyrant’s Grasp volumes here.

Thanks for joining us today!

Jessica


EDIT: Check out the Tyrant’s Grasp trailer!

April New Releases

Spring is in the air, April is here, and plethora of new gaming products are hitting shelves! Check out this month’s new d20 releases!


Dungeons and Dragons

Last month was full of exciting product announcements for Dungeons and Dragons, but only one major product was released, D&D Icons of The Realms: Waterdeep: Dungeon of The Mad Mage miniatures! Produced by WizKids these pre-painted minis come in blind boosters, each of which contains four figures — one large or huge figure and three medium or small figures. In addition to a single booster box you can pick up a standard booster brick, which consists of eight booster boxes. Also released was a special collection of minis and set dressing, D&D Icons of The Realms: Waterdeep: Dungeon of The Mad Mage: Halasters Lab .

There are no major product releases for Dungeons and Dragons this month (as far as I know).


Pathfinder

Highlights from last months Pathfinder releases include the Return of the Runelords Pawn CollectionPathfinder Player Companion: Heroes of Golarion, and Pathfinder Adventure Path 140: Eulogy for Roslar’s Coffer (Tyrant’s Grasp 2 of 6).

.

April will see the release of two Pathfinder books. Pathfinder Adventure Path 141: Last Watch by Larry Wilhelm continues the ongoing Tyrant’s Grasp Adventure Path. Pathfinder Campaign Setting: Concordance of Rivals takes an in depth look at monitors — neutral outsiders — including aeons, proteons, and psychopomps. In addition to details on a variety of monitor demigods, this book also contains occult rituals, details on monitor sects, a prestige class, and a bestiary.

Map releases for April include Pathfinder Flip-mat Classics: Deep Forest and Pathfinder Flip-Tiles: Dungeon Vaults Expansion, which is compatible with Pathfinder Flip-Tiles: Dungeon Starter Set.

Organized Play releases include Pathfinder Society Scenario #10-18: The Daughters’ Due and Pathfinder Society Scenario #10-19: Corpses in Kalsgard. The Daughters’ Due is a Tier 5-9 scenario written by Thurston Hillman that involves the infamous Blakros family, their enemies in the Onyx Alliance, and Shadow Absalom! Corpses of Kalsgard is a Tier 5-9 scenario written by Alex Riggs that takes place in the Land of the Linnorm Kings and involves a sudden outbreak of gnomes dying from the Bleaching.

The most exciting Pathfinder release of April is Pathfinder Battles: Ruins of Lastwall! This brand new set of pre-painted miniatures comes in blind booster boxes that contain four minis each — one large figure and three small or medium figures. In addition to buying a single standard booster box you can order a brick of boosters (which contains eight boosters) or a case of boosters (four bricks for a total of 32 boosters). Anyone who orders an entire case of boosters may also order Pathfinder Battles: Ruins of Lastwall: Cemetery of the Fallen Set which is a collection of graveyard themed set dressing.

There have been a lot of wonderful renderings of this product’s miniatures released over the past month or so. Far too many to share here. Be on the lookout for further details on Pathfinder Battles: Ruins of Lastwall in a future blog post!

NOTE: According to WizKids, Pathfinder Battles: Ruins of Lastwall will be available in MAY, not April. The release date seems to have been pushed back a month.


Starfinder

Highlights from last months Starfinder releases include Starfinder Adventure Path 14: Soldiers of Brass (Dawn of Flame 2 of 6) and the Starfinder Critical Fumble Deck!

This months releases include Starfinder Adventure Path 15: Sun Divers (Dawn of Flame 3 of 6), the Signal of Screams Pawn Collection, and the highly anticipated Starfinder Beginner Box!!! (Yes, it deserves all those exclamation points). Organized Play releases are Starfinder Society Scenario #1-36: Enter the Ashen Asteroid (a Tier 1-4 scenario written by Larry Wilhelm that tasks the PCs with investigating a Duergar complex discovered on an asteroid by dwarven space-miners), and Starfinder Society Scenario #1-37: Siege of Civility (a Tier 5-8 scenario written by Kalervo Oikarinen that sends the PCs on a trip to visit the Gideron Authority Republic previously featured in Starfinder Society Scenario #1-24: Siege of Enlightenment).


Enjoy!

Jessica

Pathfinder Society Scenarios: What the Helms Hide and On Sevenfingers Sails

Today we’re going to take a look at the most recent Pathfinder Society Scenarios that are available for purchase, and let you know we thought. Although you’ll find references to events in each that I liked or disliked, and comments about specific characters, these scenarios are not explored in detail. It’s not my intention to spoil the events in these scenarios, or give summaries and full reviews, but to share my opinions and provide recommendations. That said, if you want to avoid even minor spoilers then I recommend clicking on a different article. Whether you intend to use them in home games of the Pathfinder Roleplaying Game, sanctioned scenarios for use with the Pathfinder Society Organized Play, or just want to read a nifty new adventure, we’ve got you covered! So let’s get started!

PFS #10-16 - What the Helms Hide
Pathfinder Society Scenario #10-16: What the Helm’s Hide.

Pathfinder Society Scenario #10-16: What the Helm’s Hide is a Tier 1-5 repayable scenario that consists of four short one-hour long quests. “Collection,” “Autumn,” “Dust,” and “Witness.” “Collection” should always be played first, “Autumn” and “Dust” may be played in any order, and “Witness” is the thrilling finale. Each quest is penned by a different author, including Calder CaDavid, Lysle Kapp, Kendra Leigh Speedling, and Nate Wright. While Speedling and Wright have written for Paizo before, this will be the first Paizo writing credit going to CaDavid and Kapp. Each quest also comes with its own player handout, which is always nice. Also, this scenario has a lot of great artwork in it!

What the Helms Hide delves into the history of the mysterious masked leaders of the Pathfinder Society, The Decemvirate! Three hundred years ago violence and assassinations directed at Pathfinder Society leaders caused them to don masks to hide their identities. When Master of Scrolls Kreighton Shaine discovers clues that one such assassination attempt may not have happened the way the history books have recorded he seeks the Decemvirate’s blessing and tasks a group of Pathfinders with investigating the clues, digging up the past,  and discovering the truth. This series of quests will take PCs to a variety of locations throughout Golarion’s Inner Sea Region, including Absalom, Andoran, the Five Kings Mountains, and Varisia. It features creatures from BestiaryBestiary 4, and Monster Codex (although all of the necessary stat blocks are included within the scenario). It contains content from Pathfinder Core RulebookAdvanced Player’s GuideAdvanced Race GuideOccult AdventuresUltimate Equipment, and Pathfinder Player Companion: Champions of Corruption (although all the content needed from Champions of Corruption is included in the scenario itself). It utilizes the Pathfinder Flip-Mat: MuseumPathfinder Flip-Mat: Cavernous LairPathfinder Flip-Mat: Arcane Library, and Pathfinder Flip-Tiles: Forest Starter Set. This mission contributes to this years Season of the Ten metaplot and builds on events from the always popular evergreen scenario #6-10: The Wounded Wisp (and, to a lesser extent, #8-04: Wardens of Sulfur Gulch and #9-11: The Jarlsblood Witch Saga).

The first quest, “Collection,” is written by Lysle Kapp and takes place in Korvosa’s Jeggare Museum. Here PCs will need to inspect relics discovered by the famous Pathfinder Helven Leroung and uncover clues about her history and character. You also get to delve into Helven’s relationship with the famous Montlarion Jeggare, for whom the museum (and much more!) is named. His descendant, Mercival Jeggare is curator of the museum and willing to lend you a hand. There’s a lot of information you can learn here, although groups are unlikely to get all of it, which I rather enjoyed. For more information on Korvosa you can check out Pathfinder Chronicles: Guide to Korvosa.

“Autumn” is written by Calder Cadavid and takes places in Andoran’s Arthfell Forest. PCs investigate a sliver of the history of the Pathfinder Zaul Blystone. It has amazing art for an NPC, Adelyn Rhinon, which is my favourite art in the scenario. This is a fun quest although I do have one minor complaint. I feel like one of the characters gives up a bit too easily. For more information on Andoran check out Andoran, Birthplace of Freedom.

Decemvirate - Illustration by Ernanda Souza
A member of the Decemvirate.  Illustration by Ernanda Souza. Art courtesy of Paizo Inc.

“Dust” by Nate Wright takes place in underground Dwarven ruins on the edge of Highhelm. There players get to dig a little deeper into the history of Veldrid Goldborough.  I enjoyed the NPCs in this one and adore the art for Helga Silverbrew. She’s got such a great facial expression. I like enemies in this one a lot, and the… source of information. For further details on the Five Kings Mountains check out the The Inner Sea.

The finale, “Witness,” is written by Kendra Leigh Speedling and was an absolute delight! It takes place in the Grand Lodge of Absalom and involves the PCs enacting a sort of ritual to activate a secret cache hidden by the gnome Pathfinder Eylysia. As Master of Scrolls Kreighton Shaine and two members of the Decemvirate watch on your players get to experience an important event from Eylysia’s past. I won’t say any more to prevent too many spoilers, but I will say it was awesome. I loved the final battle and the revelations it uncovered. And Eylysia’s final line! So good. For more information on the Grand Lodge check out Pathfinder Chronicles: Seekers of Secrets and Pathfinder Society Field Guide.

What the Helms Hide is a really great series of Quests. So great, in fact, that it’s my favourite series of PFS Quests. All of it’s component Quests were enjoyable, but its the finale that really ties it all together and makes it exceptional. Really well done from the whole team of writers. Each Quest has a chance for battle, a social encounter, and to uncover clues regarding their respective mini mysteries. Overall I really enjoyed this scenario. I give it four out of five stars.

PFS #10-17 - On Sevenfingers's Sails by Tom Phillips
Pathfinder Society Scenario #10-17: On Sevenfingers’s Sails

Pathfinder Society Scenario #10-17: On Sevenfingers’s Sails is a Tier 7-11 adventure written by Tom Phillips. During his time on RPG Superstar 2012 Phillips created the Gloomspires, the haunted, mist-shrouded resting place of the infamous Pirate Captain Sempet Sevenfingers. Rising out of the stormy seas of the Shackles, the Gloomspires are a place of unstable dimensional magic, dark horror, and menacing undead, with connections to the nightmare realm of Leng. The Gloomspires were further explored in Pathfinder Society Scenario #6-06: Hall of the Flesh Eaters, Pathfinder Society Scenario #7-19: Labyrinth of Hungry Ghosts, and Pathfinder Society Scenario #8-15: Hrethnar’s Throne. On Sevenfingers’s Sails marks the finale of this series of linked scenarios and finally features Captain Sevenfingers himself. For more information on the Shackles check out Pathfinder Campaign Setting: Isle of the Shackles and for more information on Leng check out Planar Adventures or Pathfinder Adventure Path 65: Into the Nightmare Rift (Shattered Star 5 of 6).

On Sevenfingers’s Sails features creatures from Pathfinder Roleplaying Game: Bestiary, and Bestiary 2Bestiary 3Bestiary 4Bestiary 5Bestiary 6, and the Monster Codex (although all of the necessary stat blocks are included within the scenario). It contains content from the Pathfinder Core RulebookAdvanced Player’s GuideOccult Adventures, and Ultimate Equipment. This scenario utilizes the Pathfinder Flip-Mat Classics: ShipPathfinder Map Pack: Perilous Paths, two custom half-page maps, and (perhaps) Pathfinder Map Pack: Armada.

Sevenfingers - Illustration by Josef Kucera
Captain Sevenfingers. Illustration by Josef Kucera. Art courtesy of Paizo Inc.

Like the three scenarios before it, On Sevenfingers’s Sails features Venture-Captain Calisro Benarry, a half-orc Pathfinder who has sent plenty of Pathfinders into the depths of the Gloomspires. It also features Benarry’s quartermaster Kakikko, and Hrethnar from Pathfinder Society Scenario #8-15: Hrethnar’s Throne. New NPCs introduced include the very disturbing Thael Shivers, Vashthrexa, Nightdrinker, and Sempet Sevenfingers himself.  PCs will need to enter the terrifying tomb, contend with Captain Sevenfingers, and plunder everything they can. Of course, there’s some complications in this mission, and PCs will have to contend with far more than expected. This scenario features an optional Hard Mode for all those players out there who relish a challenge.

The scenario is wonderfully creepy, morbid, and ominous, although  that sort of content is not for everyone. Players who have issues with body horror will want to give this scenario a pass. It’s definitely not an scenario for kids. Any characters who played the previous Gloomspires adventures are going to get a bit more satisfaction out of this scenario than their compatriots who haven’t, and will find they get a few extra bonuses along the way.  This scenario is packed full of atmospheric environments, memorable characters, and foul villains. The battles are challenging and take place in dynamic locations. I particularly enjoyed the final encounter. Really well done! Overall I think this is a really great scenario that won’t be for everyone. It’s creepy, gory, and a great high level challenge. I give it five out of five stars!

Thanks for joining us today!

Jessica

Starfinder Society Scenarios: Heart of the Foe and Rasheen’s Riches

Today we’re going to take a look at the two most recent Starfinder Society Scenarios that are available for purchase, and let you know we thought. Although you’ll find references to events in each that I liked or disliked, and comments about specific characters, these scenarios are not explored in detail. It’s not my intention to spoil the events in these scenarios, or give summaries and full reviews, but to share my opinions and provide recommendations. That said, if you want to avoid even minor spoilers I recommend you check out a different article. Whether you intend to use them in home games of the Starfinder Roleplaying Game, sanctioned scenarios for use with the Starfinder Society Organized Play, or just want to read a nifty new adventure, we’ve got you covered! So sit back, and get ready to explore the Pact Worlds!

SFS #1-34 - Heart of the Foe by Nicholas Wasko
Starfinder Society Scenario #1-34: Heart of the Foe by Nicholas Wasko

Starfinder Society Scenario #1-34: Heart of the Foe is a Tier 3-6 adventure written by Nicholas Wasko. It takes place on Rax, an inhospitable planet the jinsul are known to visit on occasion. There you will explore a ruined city that shows signs of life for any information you can scrounge up on the jinsul and their society. This scenario features the Faction (Second Seekers [Jadnura]) and Faction (Second Seekers [Luwazi Elsebo]) tags making it the first mission to prominently feature both First Seekers. This scenario continues the ongoing Scoured Stars storyline (#1-05: The First Mandate, #1-11: In Pursuit of the Scoured Past, #1-13: On the Trail of History, #1-17: Reclaiming the Time-Lost Tear, #1-99: The Scoured Stars Invasion, #1-23: Return to Sender, #1-29: Honorbound Emissaries, and #1-31: Treading History’s Folly). As such you’ll want to bring along characters who have an interest in the Scoured Stars Trinary System or storyline, who have interacted with the jinsul, or are working on collecting the ‘Journey to Scoured Stars’ boons. I also recommend bringing a character who does not have a Personal Boon permanently slotted. This scenario does NOT involve starship combat, but it MIGHT feature a vehicle chase (more on that shortly). It makes use of Pathfinder: Map Pack: Frozen SitesPathfinder: Flip Mat: Tech Dungeon, and an awesome full page custom map that has a very ‘Borderlands‘ feel to it. This scenario features content from Starfinder Core RulebookAlien Archive, and Armory. All of the necessary stat blocks are included in the scenario itself. However, GMs will definitely need the Core Rulebook for this one. Although this scenario doesn’t include a vehicle chase (but it could) it does use modified vehicle chase rules, which most players do not have internalized (in my experience). GMs will likely need to brush up on the vehicle chase rules and be prepared to teach it to their players as needed. Be aware that this is a rather dense scenario, so groups that are unfamiliar with chases could cause it to run long.

Heart of the Foe begins when both First Seeker Luwazi Elsebo and First Seeker Jadnura task the PCs with travelling to a planet the jinsul are known to occassionally visit in order to discover actionable intel and information about the jinsul themselves. For those of you who don’t know, the jinsul are a violent race of aliens that conquered the Scoured Stars Trinary system while the Starfinder Society rescued their comrades during the #1-99: The Scoured Stars Invasion. The jinsul have been a thorn in the side of the Starfinder Society ever since and the First Seekers are worried at the threat they pose to the Pact Worlds. Your PCs will need to travel to the mysterious planet — alongside both First Seekers and three other Starfinder teams — investigate a few sites that show signs of life, and uncover what they can about the jinsul and their society. Neither the Starfinder Society nor the players know a whole lot about these insectile fellows, so I was thrilled to dig a little deeper into the history of the jinsul themselves. Exciting stuff! Throughout the course of this scenario PCs will get to learn about jinsul anatomy, culture, history, religious beliefs, and — oh yeah — fight a whole lot of jinsul! It’s an action packed, exciting scenario that’s going to be a lot of fun. The battles all serve a purpose, the chase scene is both exciting and complex, and the world itself is very atmospheric. The finale is exciting and challenging, with a lot of moving parts. It’s chaotic and really well done. Dare I say… epic? Yeah, I do. Haha. There’s only one real social encounter, but the character you get to interact with is really… enjoyable so it strikes a nice balance. I love their demeanour and attitude towards the PCs. So good!

Ekkerah - Illustrated by Bryan Syme
Ekkerah, illustrated by Bryan Syme. Art courtesy of Paizo Inc.

But, it’s not all sunshine and roses radiation and bullets. I do have a few minor complaints with this one. First off, it’s tough to run. Now, this isn’t really a complaint. It’s an observation and potential warning. This is not the kind of scenario an inexperienced GM should attempt. There’s vehicle chase rules, modifications to the vehicle chase rules, environmental conditions, a whole lot of dice rolling during travel scenes, plenty of hopping around between pages for potential clues and intel, and complex battles with lots of enemies and allies to track. Not easy. Second, it has a bit of a slow start. Not the immediate start, but the… well let’s call it the travel scene. There’s a lot of dice rolling done every hour, which runs the risk of becoming a boring sort of routine if not handled right (particularly when you take into account the flipping between pages that might have to occur). That said, I do like the information your group could uncover about the jinsul along the way. Third, environmental protections. Chances are your characters have them. They protect us from a lot, but there’s also things it won’t protect you from. Fair. But in this one it feels like you get penalized for using them. You either use them and suffer X or don’t use them and suffer Y. Which is unfortunate. The scenario refers to snow clinging to your environmental protections’ helmet — when many armour’s environmental protections use a force field instead of helmets — and even if you are wearing armour that has a helmet, couldn’t you just wipe it off? And if you are wearing armour that has an environmental forcefield for it’s environmental protections, can it seriously not handle a bit of clingy snow? Sounds like that armour has a pretty big design flaw to me. I hope my Starfinder kept their receipt. Haha. It felt sort of arbitrary to me. I’m totally cool with some environmental hazards going through your protections, but this snow thing just wasn’t one of them. Contrariwise, if they wanted the snow to hamper visibility, I’m totally fine with that. I am no stranger to snow and yeah, it’s hard to see sometimes. And finally…. I love that baby jinsul on the cover! Except it’s not a baby jinsul at all. It’s a jinsul’s pet. I 100% thought it was a baby jinsul and was thrilled by it’s oddly adorable appearance. Jokes on me, I guess. Haha. Seriously though, I really like the creature, it’s stats, and it’s tactics. Overall, I thought this was a really great, exciting scenario that’s going to be a challenge to run — but well worth it! I give it 5 out of 5 stars.

SFS 1-35 - Rasheen's Riches by Mara Lynn Butler
Starfinder Society Scenario #1-35: Rasheen’s Riches by Mara Lynn Butler.

Starfinder Society Scenario #1-35: Rasheen’s Riches is a Tier 5-8 adventure written by Mara Lynn Butler. It takes place on Aratrosim, a unexplored moon in the Vast where you investigate claims of great wealth! Sort of… This scenario features the Faction (Acquisitives) tag and DOES feature starship combat. It makes use of Starfinder Flip-Mat: Basic StarfieldStarfinder Flip-Mat: Starship, and Pathfinder Flip-Mat: Hill Country. It includes content from Starfinder Core RulebookAlien ArchiveAlien Archive 2ArmoryStarfinder Adventure Path 3: Splintered Worlds (Dead Suns 3 of 6), and even Pathfinder Campaign Setting: The First World, Realm of the Fey. All of the necessary stat blocks are included in this scenario. Although this scenario doesn’t really continue an ongoing storyline, it does feature a social encounter that has ties to the Scoured Stars storyline — particularly Starfinder Society Scenario #1–13: On the Trail of History, #1–99: The Scoured Stars Invasion. It’s brief, but it’s something of interest to characters who have played a lot of the Scoured Stars. This scenario only features one recurring character, Radaszam (leader of the Acquisitives), although it also name-drops Historia-7 (leader of the Dataphiles). It introduces one new character that I rather liked, Captain Xizzvee of Tinker’s Path, a bulabar that runs a ship of fey salvagers.

Rasheen’s Riches sounds at first like a classic treasure hunt — in space! Which is only partly true. Radaszam recently discovered a treasure map said to lead to one of the last places the infamous space explorer Jelev Rasheen explored before disappearing. Presumed to house a treasure trove of unimaginable proportions, Radaszam’s taking a more measured approach. Although he doesn’t believe it’s actually the final resting place of Rasheen or her fabulous riches, he does hope that there you’ll find a claim beacon that she placed on planets she discovered but never fully explored. This beacon should be able to lead you to the next place Rasheen went. But, that’s another mission… Rasheen’s Riches is more accurately described as a treasure hunt where you’re aiming to find another piece of the treasure map. As long as this is clear to your players by the end of the mission briefing (which it should be) you won’t have a problem with any players feeling let down. However, if players think they’re off to find unimaginable riches they might be a little disappointed. I know my kids would say “That’s it? But where’s the treasure?!” Be sure to adjust those expectations a little. Haha. I enjoyed this scenario. It’s got some environmental challenges to overcome, an interesting investigation, illuminating player handouts, and a battle against some tragic enemies. It’s got the air of a mystery about it, which I liked. I absolutely adored the descriptions of this moon. The entire atmosphere of it — and the creatures that you encounter there — worked really well together. Definitely a highlight of the scenario for me. The starship combat was straightforward but enjoyable. I like the social encounter it begins with and the artwork of the ship! It looks like some kind of skeletal Batplane! Seriously cool. Overall I thought this was a really solid scenario that will — hopefully — lead to further adventures on the hunt for Rasheen’s riches! I give it four out of five stars.

Glaciomonitor - Illustration by William Marton
Glaciomonitor, illustrated by William Martin. Art courtesy of Paizo Inc.

Thanks for joining us today! Be sure to tune it again soon to check out our reviews on the newest Pathfinder Society Scenarios!

See you in the Drift!

Jessica

Wilderness Origins

Wilderness OriginsReady to get wild?

Today we’re taking a peek between the covers of Pathfinder Player Companion: Wilderness Origins! If you’ve been reading d20diaries since its beginning you’ll know that my family and I adore Ultimate Wilderness. My kids love the races introduced — particularly the adorable vine leshys — and my entire family enjoys the shifter class. In fact, each of us have at least two shifters. Needless to say we were excited to get our hands on Wilderness Origins. My husband was hoping for more shifter options, my kids were hoping for more vine leshy options, and I was… Well, I was just hoping someone in my family would find something inside the book that they’d make use of right away.

We were not disappointed.

Pathfinder Player Companion: Wilderness Origins is a soft cover book that is 32 pages in length. As a book in the Player Companion line, it’s aimed at players, which means that you won’t find a ton of world lore or secrets inside. You’ll find archetypes, feats, traits, spells, and more! Wilderness Origins features amazing cover art by David Alvarez, which showcases the iconic shifter, Zova,  engaged in battle against an earth elemental.

Wilderness Origins - Plant Journal
The inside front over of Wilderness Origins.

The front inside cover features brief information on a few plants described in the book alongside some sketches. The entire page is presented as if they were entries in a scholar’s journal, which is a nice touch. Although no important information is contained here that can’t be found later in the book, it’s nicely showcased. Plants depicted include ambrosial lotus, cleanthistle, ghostblossom, and a ghoran seed. There’s also art of a gathlain’s wing and a leaf leshy.

After this is the table of contents, the rules index, and the introduction which contains eight new regional traits themed around different terrains. Each trait is printed alongside an example background for each terrain, that emphasize how you can embrace nature and your environment. Guerilla tactics and surefooted ascent are sure to be popular, but fruit merchant and strong stomach turned out to be my favourites. Environments covered by these traits include the desert, road, forest, jungle, mountain, swamp, tundra, and coast.

Moving on from the introduction we come to six pages of new shifter options. It features a whopping nine new shifter aspects, all of which are pretty cool. The new shifter aspects are boar, crocodile, dolphin, dragonfly, electric eel, mantis, octopus, scorpion, and spider. Electric eel is my favourite, but my son LOVES the boar aspect. He immediately made a gnomish boar shifter for Pathfinder Society Organized Play and was super excited to give it a shot. Unfortunately, we suffered a TPK that weekend and poor Sid’s career was cut short. Still, my son loved the character and made a ton of use out of the boar’s minor aspect, which gives you diehard as a bonus feat.

Wilderness Origins - Feyform Shifter
A half-orc feyform shifter from Wilderness Origins.

After the shifter aspects are three new archetypes, dragonblood shifter, feyform shifter, and swarm shifter. They’re all pretty self-explanatory, with the dragonblood shifter allowing  you to take on the aspects and forms of a variety of dragons, feyform shifter granting you some tricky defences and the ability to transform into fey beings, and swarm shifter allowing you to turn into a swarm of bugs. They’re all really cool, but dragonblood shifter turned out to be my favourite. My husband’s a big fan of the swarm shifter, though, and he’s not going to be the only one. It’s a really useful archetype which is sure to see a lot of play.

Also in the shifter chapter are thirteen new favoured class options, seven new feats (be sure to check out chimeric aspect, greater weapon shift, and raking claws), and my favourite new option for shifters: alternate natural attacks. Each shifter aspect currently released (new and old) has a list of alternate attack forms they can select in place of claw attacks. Bears have a bite attack, for example, while boars have a gore and a hoof. Any time you activate your shifter claws you can choose to take an alternate natural attack from your animal aspect options in place of one of your claw attacks. This changes the damage type and the way your natural attacks look, but otherwise functions as the shifter’s regular claw attacks. It’s a really nice option I’m happy to see available.

Up next are two pages on each of the races introduced in Ultimate Wilderness — gathlain, ghoran, and vine leshy. The new gathlain options include five alternate race traits (arboreal vitality, fey resilience, and whimsical outlook are my favourites), seven new feats (mighty boughs and strength of wood are my favourites), and one new archetype. Sworn of the Eldest is a Charisma-based inquisitor archetype that I really enjoyed. Particularly the magic of the Eldest ability, which swaps out teamwork feats for some extra spells and spells per day.

Ghoran options include four alternate race traits (check out intoxicating aroma and magical absorption), three feats (I love spell mirror), two new spells (pinecone bomb and woodland rune), and the new ninja archetype petal ninja, which lets you transform into a cloud of flower petals.

Wilderness Origins - Leshy - Nathanael James
Vine leshy verdivant. Illustration by Nathanael James. Art courtesy of Paizo Inc.

Vine Leshy options include four alternate race traits (lashvine and writhing eye are awesome!), four new feats (we like bounteous body best), and the cavalier archetype verdivant. This turned out to be both my kids’ favourite archetype — which came as no surprise since they both love vine leshys. The verdivant archetype lets you to have a plant mount, and enables you create effloresces, which are explosive plant growths that can be used a number of times per day and have some cool effects. While one might form a wall of vines to prevent attacks of opportunity, others can make you walk on air, or even give you and your allies fast healing. Effloresce replaces the cavalier’s banner and tactician abilities.

Up next in Wilderness Origins are two pages themed around flowers. It starts by introducing four new magical plants, ambrosial lotus, cleanthistle, ghostblossom, and gravebane petals. All four are surprisingly useful, but I think I like the cleanthistle best. It’s a great plant to add into my family game of Iron Gods. There’s also five awesome new witch hexes. I honestly had a hard time picking my favourite. My daughter loves leshy summoning, my son loves verdant familiar, and heralding bloom is going to be really useful for some characters. In the end its the floating lotus and iceplant hexes I’m most likely to use. Floating lotus conjures a flower that you can stand on to walk over water or gain a bonus on jump checks while Iceplant makes the witch and her familiar’s flesh harden, granting them a natural armour bonus and and the effects of endure elements. Finally, there’s a new alchemist archetype in this section: perfumer. This alchemist creates atomized perfumes in place of potions, an can distill pheromones that augment your Charisma, diplomacy, and bluff checks in place of mutagens. Very cool!

The next two pages are entitled Wardens of the Wild and involve kami. There’s a new kami eidolon subtype for unchained summoners, ward aspects for hunters to make use of, and the new spiritualist archetype ward spiritualist. This archetype allows a spiritualist to purposesly seek out a kami to bond with, and grants them a ward implement which can either be an object or their own body. With their ward implement they can gain occultist focus powers. They can also merge their kami with their implement to empower their implement in battle. I’m a huge fan of both spiritualists and occultists, so I’m totally biased to love this archetype. Haha.

Wilderness Origins - Scorpion - Beatrice Pelagatti
Scorpion familiar. Illustration by Beatrice Pelagatti. Art courtesy of Paizo Inc.

The next four pages are packed full of options for our animalistic pals — animal companions, familiars, and mounts. It starts with two animal companion archetypes: apex species (which gives your companion benefits in certain terrains) and unexpected intellectual (which makes a vermin companion more intelligent). Then there’s three familiar archetypes: occult messenger, the super creepy parasite, and arcane amplifier (my personal favourite) which grants your familiar the ability to use some metamagic feats on touch spells they deliver. Following these are seven feats which can be taken by animal companions, familiars, and their owners. Three are relevant to familiars, three to animal companions, and one is relevant to both. I really like the animal companion feats curious companion and friendly face, but it was two familiar feats that turned out to be my favourite. Changeling familiar gives any familiar capable of changing shape the ability to transform into a child or teenager of their master’s race, while spark of the uncanny gives your familiar the ability to speak. Awesome! (My kids are absurdly excited for this one!) A few levels later you can swap it out for improved familiar. Next up are descriptions of five breeds of mounts along with a trait for each of them (these traits count towards their master’s total number of traits). Finally, there’s an expanded companion list for cavaliers paladins, and rangers.

The following two pages talk about the totem spirits of the Shoanti, with nine new totem rage powers geared at members of the Lyrune-Quah (moon clan), Shundar-Quah (spire clan), and any ancestor-revering character. There’s also a new shaman spirit, tribe.

Wilderness Magic is up next, with five new arcanist exploits, three disaster themed spells, and the psychic archetype Magaambyan telepath, which blends druidic magic and wilderness themed powers with the psychic. Wild stride and wooden flesh are my favourite arcanist exploits, while flash flood — a sixth level spell on the druid, shaman, and sorcerer/wizard spell list — is my favourite spell.

Wilderness Origins - Fire Steed
The iconic kineticist Yoon riding a fire steed.

Similar to magic, the following two pages are all about elemental power — specifically fire. First up is the flame steed spell, which conjures a mount made of fire. Continuing this theme is a new archetype, the cinderlands adept, a fire-based kineticist that gains a loyal mount and is based on the Burn Riders of the Sklar-Quah (sun clan). Finally, there are eight new kineticist talents — one form infusion (elemental trap) and seven utility talents. My favourites included fire corridor and the fire steed tree. I’m a huge fan of both the Shoanti and kineticists, so I was pleasantly surprised to discover these new options.

By now there’s only a few pages left. Two pages of character options themed around the sea and sky. It starts with two more archetypes — a very interesting paladin archetype called champion of the cascade and esoteric starseeker, a psychic archetype based around Golarion’s constellations. Following this are two very cool (and disconcerting) oracle curses that have to do with decay: putrid and scourge. Finally, there’s three new ki powers: floating breath, racing current, and zephyr blow.

And that’s it! The end of Pathfinder Player Companion: Wilderness Origins! My whole family loves this player companion. It contains a lot of fun options for all our favourite parts of Ultimate Wilderness — shifters, gathlain, ghoran, and vine leshys — and pays some loving attention to the many different pets you can acquire. It’s rare that we get to make in-game use of a d20 book right after reading it, but this one immediately inspired us to create something new. It was well worth the investment for my family.

Thanks for joining us today! I hope you enjoyed taking a peek behind the covers of Wilderness Origins.

Until next time,

Jessica


Mantisbane Pact: Release

One of the play-by-post campaigns I am lucky enough to take part in is run by the wonderful GM Zek on Paizo’s messageboards. The campaign is called the Mantisbane Pact, and it takes place in Golarion, the world of Pathfinder. Mantisbane Pact involves an alliance of powerful monarchs and rightful rulers who come together to destroy the Red Mantis Assassins and their god, Achaekek. Our players would act as their agents, travel to Ilizmagorti (a city firmly in the grasp of the Red Mantis Assassins), and work to bring the entire organization crumbling down.

A few weeks ago I shared a short story I wrote as part of the application process to get to play in the Mantisbane Pact. In it we met my character, a smart-ass, jaded slayer named Kilarra Calvennis. Throughout the course of this campaign the GM and players have had the opportunity to write a variety other vignettes and flashbacks, often from the perspective of our shaman, who can view moments from the past by using the Akashic Record.

Today I’m sharing with you a flashback from Kilarra’s life I wrote when our shaman (Talia) attempted to discover why Kilarra was out of prison, despite being sentenced to life in jail for patricide. After today it will be available on the d20 Stories section on our website. Enjoy!

Jessica


Release

Its dark.

Cold.

Talia feels like she’s laying on something hard and rough. A stone floor?

There’s sounds. Women crying, wailing voices, a distant scream of pain. Breathing close by — Kilarra perhaps — it’s hard to tell in the dark.

Time passes. There’s the sound of something falling to the ground and tumbling around. It sounds like a dice, but it’s likely a stone. There’s a bit of a slapping sound, then a scraping, as if whoever dropped it was picking it back up.

It falls again. Slap. Scrape. Silence.

It falls again. Slap. Scrape. Silence.

In the distance the crying continues. Different voices, the same sounds. A sigh, a scream, denials, and tears.

“Please! I’m innocent!” someone can be heard to call above the din. A young woman by the sounds of it. “I didn’t kill him!”

Nearby someone scoffs. Talia recognizes it as Kilarra. “No one cares,” she mutters under her breath.

“Yeah, I’m innocent, too!” a different voice calls out. It’s deeper, and clearly mocking the crying woman. “I didn’t kill nobody!” The voice breaks out into a cackling laugh.

The young woman devolves into sobs.

The stone falls. Slap. Scrape. Silence.

Eventually something changes. There’s a lightening of the room. It’s subtle at first, but soon becomes light enough to see vague shapes.

Kilarra’s pale and thin. Her lip is cut and swollen, and a poorly healing wound on her face is clearly going to become the familiar scar she bears to this day. Kilarra lays on her back in a bare, stone cell, staring up at the ceiling. She fiddles with a tiny dice in her fingers, dropping it on the floor, covering it, and picking it back up again. Her other fingers tug on the hem of her ‘dress.’ She wears a filthy sack with a few holes cut in it for her arms and head that looks like it once held potatoes. The fabric’s rough and little bugs scurry around amongst it’s loose fibres.

Behind her is a wall of bars. Outside there are other cells, filled with women of varying ages. Some cry, some speak to themselves, but most sit in resigned silence. The other woman across the hall wears pants and a shirt, has a pallet of hay, a blanket, and a chamber pot — luxuries Kilarra’s cell does not possess.

The world continues to brighten. The walls turn red and the flickering of an open flame can be heard. The light suddenly spills into Kilarra’s cell, and stops.

From her place on the floor Kilarra raises an eyebrow. She rolls onto her stomach, pushes herself up to standing and stalks over to the bars. She grabs hold of them, her knuckles bloody and bruised, and leans her face up against the bars.

Outside her cell is a man in shining armour. He holds a torch in one hand, and a bag in the other. Kilarra’s eyes drift to his belt where she sees a keyring and an empty scabbard — the sword is nowhere to be seen. She smirks, apparently finding that funny.

As Kilarra grabs hold of the bars the guard — a young man, really — steps back quickly. He’s jumpy and nervous.

“You forgot your sword, kid,” Kilarra remarks with a curled lip. “Better go get it before the warden finds out. Don’t worry, I’ll wait. I’ve got nowhere else to be.”

The man shifts uncomfortably, then straightens himself. “It’s not lost. I — “

Kilarra chuckles then nods at the package. “You bring me a gift?”

The young guard clears his throat. “Step back,” he orders.

Kilarra smirks and takes a few steps back. She leans against a nearby wall and crosses her arms. The man steps closer, pauses, and looks at her, then quickly shoves the bag between the bars and steps back.

“You finally returning my chamber pot?” she asks.

“What? No, its…”

As the guard stutters Kilarra opens the bag and pulls out a blouse. She scoffs in disgust and shoves it back in the bag. “What’s the matter? Warden tire of his other whores?” She tosses the bag on the floor. “Tell him I bite. Hard.”

The fresh-faced guard looks confused for a moment, either unsure what Kilarra’s talking about or unsure why she’s angry. “No, it’s… You’re free.”

Kilarra scoffs aloud. “Free. Seriously?” She scoffs again and shakes her head.

The man nods. “By order of the Warden, you’re to be set free.”

“Why?” she asks skeptically.

“Good behaviour.”

Kilarra bursts out laughing.

The guard shifts uncomfortably. “Could you… put on your clothes? You can’t go outside like that. It’s unseemly.”

Kilarra’s laughter fades to silence. She watches the guard for a moment, wary and on edge. Eventually she takes off the rough sack and tosses it to the ground, then empties the bag out and starts getting dressed. There’s a blouse, pants, boots — familiar looking clothes Talia’s seen Kilarra wear every day.

The guard blushes and turns around, giving her privacy — an act which causes her to let out another cackling laugh.

“This place is going to eat you alive, kid.” She laughs some more, then approaches the bars. “Ready.”

The guard unlocks the cell. “Follow me.”

Taldor
The flag of Taldor. Image courtesy of Paizo Inc.

Kilarra slips out behind him, following the guard down the hall. His torch illuminates the cells they pass — some of which are as spartan as Kilarra’s, but most of which have hay, pallets, chairs, simple beds, blankets, one even has a flickering candle and a pile of books. The prisoners are all female of varying ages, some cry, some beg, but most simply watch with tired, hopeless eyes. A few of the prisoners give Kilarra a nod as she goes. A few others step back in fear.

At the end of the hall is a pair of barred doors flanked by armoured guards. Above them is a massive painting of Grand Prince Stavian the third. Words underneath it read: A crime against the empire is a crime against yourself. Repent, Obey, Serve.

Unlike the guard walking with Kilarra, these men are hardened and unafraid. They each draw their swords at her approach. One sports a broken nose and a missing front tooth. He snarls at the sight of her.

She smirks. “Love the new look.”

“Listen up, you bit—“

Kilarra’s laughter drowns out the man’s words as the young guard quickly unlocks the door and ushers Kilarra through it.

They travel through more corridors and gates, up stairs and through a few checkpoints. Wherever Kilarra was being held, it was a long ways underground. The sort of place where the prisoners are never expected to leave alive.

As they travel the halls get lighter, and the torch is left behind. Kilarra squints into the dim light as if she were looking into the sun. In time they reach a large room. One final gate blocks the way to the prison’s main hall. One final gate to freedom.

A rotund man wearing nobleman’s finery and a deep sneer scowls at her. “I don’t know what strings you’ve pulled, but it won’t last.”

Kilarra smirks. “Hello, Warden. Fancy seeing you here.”

“You’re a degenerate!” the man spits. “You may be free now, but you’ll be back. Scum like you always comes back.”

“Aww,” she replies with a sarcastic pout. “I’ll miss you too.”

The warden stands seething in front of the gate. He takes a deep breath, nods at the guards, and clenches his fists. As the guards unlock the doors he speaks in a grand voice. “Kilarra Calvennis. In the name of Grand Prince Stavian the third, long may he rule, you are hereby released for… good behaviour…” he spits at Kilarra’s feet then straightens himself. He waves his arms through the air, clearly deciding she’s not worth reciting the rest of the words. “I hereby release you. Now go, before I arrest you for loitering.”

Kilarra strides out of the gate, hurries through the waiting room and bursts out of the doors onto the busy streets of Oparra. She squints into the sun and takes a deep breath. Slowly, a smile spread across her scarred face.

“Kilarra Calvennis?” a voice calls out.

Blinded by the sun, Kilarra’s smile slips. A fleeting look of panic crosses her face. A moment later it’s replaced by a look of determination.

“Who wants to know?” she calls back.

But before the voice can reply the vision blurs and fades, leaving Talia back in her own body.


Want to read more about Kilarra? Be on the look out for more vignettes and flashbacks in the coming weeks!

Want to learn more about Golarion, Taldor, Grand Prince Stavian III, Kyonin, Ilizmagorti, Mediogalti, and the Red Mantis Assassins? Check out Pathfinder Campaign Setting: The Inner Sea and explore Golarion for yourself! For more information on Taldor you can also check out Pathfinder Companion: Taldor, Echoes Of GloryPathfinder Campaign Setting: Taldor, The First Empire, or play the War for the Crown Adventure Path which begins with Pathfinder Adventure Path 127: Crownfall (War for the Crown 1 of 6).

The ABCs and 123s of D&D

Today we’re taking a look at two delightful books released by Dungeons & Dragons for kids: The ABCs of D&D and The 123s of D&D. Intended for young children, these books offer kids a first glimpse at the world of Dungeons & Dragons while teaching the alphabet and counting to ten. Both books feature whimsical artwork by Caleb Cleveland, and catchy rhyming couplets written by Ivan Van Norman.

The ABCs and 123s of D&D

I recently picked up both of these books for my young nephew, who is soon to turn five. Not only does he adore them, but both of my children (a boy aged eight and a girl aged seven) also found them thoroughly entertaining. I was impressed by their quality and content. The art is perfect for kids, with colourful, whimsical illustrations that hide all kinds of secrets — clouds shaped like dice and towers made of books, for example. Delightful little tidbits that kids will discover as they get a bit older.

I is for Imagination

“I is for IMAGINATION. What’s YOUR favorite tale?”

B is for Book

“A is for ADVENTURE, our journey has begun.
B is for BOOK, the source of all our fun!
C is for CREATURES of every shape and size.”

Although I expected The 123s of D&D to be shorter than The ABCs of D&D, that wasn’t the case. Yes, the ABCs of D&D covers the entire alphabet, with typically a letter per page. And yes, the 123s of D&D covers the numbers one through 10, with one number per two pages. Technically that would make it shorter, but after counting to to ten there’s a lovely mini bestiary that features a sentence or two about the creatures depicted throughout the book — all written in rhyming couplets. What a pleasant surprise! I’m really happy they included it and all the kids loved it. It immediately inspired them to start making up stories of their own with the creatures. My daughter’s favourite was the almiraj, of course (she adores rabbits and rabbit-creatures of all kinds).

123s of D&D

“We begin with ONE Dungeon Master telling a story of daring deeds, the adventure of TWO heroes and their brave and noble steeds.”

Bestiary

“All these monsters you can meet when playing D&D. So have fun on your adventures, and save a spot for me!”

My kids and I thought that The ABCs of D&D and The 123s of D&D were wonderful, entertaining, inspiring little books. Despite being written for young children, they’re of interest to any kids that still love a picture book. Really wonderful work!

Jessica

Mists of Akuma: Trade War

Hello, and welcome to d20diaries! Today we’re taking a look at a dark and dramatic adventure path filled with political intrigue and horrifying monsters. Trade War for the Mists of Akuma campaign setting.


What is Mists of Akuma?

Mists of Akuma is an Eastern fantasy noir steampunk campaign setting that’s compatible with fifth edition Dungeons and Dragons. Created by Mike Myler and published by Storm Bunny Studios, Mists of Akuma is based in a fictional nation called Soburin which is very closely based on Japanese culture of… oh, the Sengoku period of the 16th century if I had to guess (but I’m no expert). Soburin’s many prefectures are locked in a tenuous peace, torn between tradition and new technology, and beset on all sides by the terrifying Mists of Akuma, which corrupt everything they touch. Capable of transforming the land into a poisoned wasteland, peaceful dead into undead monstrosities, helpful spirits into foul oni, family heirlooms into cunning living objects, and people into terrifying monsters, the Mists of Akuma are a malignant evil. The Mists of Akuma campaign setting also features a wide variety of new character options, rules, technological items, magical objects, and creatures.

It’s a sorrowful, rich setting that pays close attention to eastern traditions and culture, and brings it into an exciting fictional fantasy world. Manners, honour, and lack of, all play a part, as do kami, oni, and a variety of other Japanese myths and traditions. Mists of Akuma is a setting bursting with creativity, intrigue, mythology, and tragedy that fills a niche all it’s own. For more information on the Mists of Akuma campaign setting you can visit Storm Bunny Studios. To pick up a copy of Mists of Akuma you can visit the Open Gaming Store, Paizo, and Drive Thru RPG. There’s also a few FREE primers available. I highly recommend picking up Mists of Akuma: Soburin Primer  for a glimpse at the world of Soburin and the Mists of Akuma campaign setting, Mists of Akuma: Primer for a sampling of character options, and Mists of Akuma: Tsukumogami for a collection of new creatures (objects transformed into fell beasts by the corrupting Mists of Akuma).

Mists of Akuma
Mists of Akuma by Mike Myler and Storm Bunny Studios

But, enough about the campaign setting. Let’s talk Trade War.


Trade War

Mists of Akuma: Trade War is a 375-page adventure for the Mists of Akuma campaign setting written by Mike Myler, along with Christopher Rippee, Andrew Engelbrite, and Dirk van de Rijt. Intended for 4-6 players, Trade War should bring characters from levels three all the way to level twelve or so. Although Trade War contains everything you need to play the adventure path, I highly recommend picking up the Mists of Akuma campaign setting or downloading the free primers mentioned above. They really enrich the adventure and your players understanding of their world and the beings in it.

Mists of Akuma - Trade War
Trade War: A Mists of Akuma Adventure Path

Trade War is a campaign focused on politics, intrigue, and tragedy, with it’s true plot is hidden under layers of other stories and adventures. Players uncover threads of the mystery and its villains right from the beginning of the adventure path, with time weaving these seemingly disparate tales into a wonderful, layered story. The adventures are all open ended, providing information on a variety of paths your players might choose to follow instead of just assuming one ‘ending’ occurs. There’s plenty of important NPCs to interact with — both allies and enemies — and monsters to battle, with the lines between good and evil becoming increasingly blurred. Alliances can be forged, loyalties swayed, promises betrayed, and throughout it all your PCs will need to make difficult choices. For doing the right thing isn’t always easy — if you can even determine what the ‘right thing’ is.  These tough decisions, moral dilemmas, and pyrrhic victories are truly a highlight of the adventure path.

Before we get any further into this review it’s important to note that not all of the content of Trade War is new. In fact, Trade War consists of six previously released adventure modules bound together with new adventures, side quests, and connections, all culminating in a brand new, epic conclusion. And when I say ‘epic’ I truly do mean it. The final adventure is exceptionally well done.

The six previously published adventures contained in Trade War are Scourge of Róbai Shita TempleFeud Primordial, Fangs of Revenge, Curse of the Scorpion Samurai, Yai Sovereign of Storms, and Revenge of the Pale Master. The finale is entitled Hone-Noroi Keep Ascends. There are also two side trek adventures (Golden Carp and Cursed Well of Itami) which have varying difficulty levels and are intended to be inserted by the GM when they need to get the players back on track (or whenever they feel is most dramatic). There’s also a series of five ‘Connections,’ which are basically a collection of short social and combat encounters which occur on the journey between adventures and all tie in with the various ongoing plots and events of the adventure path. In addition to these adventures and connections, Trade War contains a bit of important information on the Mists of Akuma campaign setting, some new rules, a wide array of new character options, a player handout, and a character sheet. Finally, Trade War contains some quick and simple instructions for those GMs who want to run Trade War without the steampunk components. 

Because Trade War is a mystery I won’t get into the plot just yet. Instead, information on the adventure’s storyline and various adventures will all be contained at the end of this blog post after a large spoiler warning. So, without spoilers, what do I think about Trade War?

For starters, Mists of Akuma is a really great, atmospheric setting. I love it. Trade War is grand campaign that’s much more layered than it originally appears. Despite it’s rather tightly constructed meta-plot it leaves a lot of room for players to make their own decisions, managing to continue the events of the adventure path no matter how honourable or disreputable your players turn out to be. It’s got a lot of climatic moments, dynamic battles, moral dilemmas, betrayals, and surprises. All of the scripted social encounters matter, playing a role in either the meta-plot, current adventure, or foreshadowing other important events. Many NPCs — both ally and enemy — have chances to make return appearances, and players will often be surprised at the role some of the people they meet will come to have. There’s a variety of factions your players could ally themselves with throughout the course of the adventure, all of which are very different.

However, all that open-ended storytelling does come with a downside. This is a rather loosely scripted campaign, with plenty of decisions for GMs to make, NPCs for GMs to create, and plenty of downtime for GMs to fill. While many GMs will be thrilled with this, I do prefer my adventures have a tighter narrative. Why your characters are travelling from one region to another between adventures is left for GMs to determine in most instances and, although the journey and ‘Connections’ themselves are filled with engaging encounters, the motivations behind the journeys are lacking (until the later adventures). In addition to this, many of the adventures utilize the same opening plot hook: a bengoshi told you to. Bengoshi in Mists of Akuma are essentially government officials who have the power to deputize citizens into performing tasks on their behalf. Refusal is met with execution. Obviously “do this because I said so or you die” is not really an engaging motivator. Although for some of these adventures it makes sense that a bengoshi would hire your PCs, at other times it’s unnecessary. There’s plenty of other PCs who could have acted as quest givers and, in many instances, the plot of the adventure itself or a few social encounters could have done a better job.

As previously mentioned, many of the battles are dynamic and complex. Although thrilling and rewarding, they aren’t easy to run. If you’re a beginner GM this is not the campaign for you to start with. Trade War has a lot of cool new creatures, some of which can transform into more powerful forms. Overall, the battles in this adventure path are challenging, memorable, and very well-crafted.

Mists of Akuma is not for the feint of heart. There are strong themes of tragedy, decay, corruption, and sorrow. There’s also some rather gross, horrific depictions (particularly in the finale), and body horror (as the Mists of Akuma can transform even your PCs into terrifying monsters). Although I thoroughly enjoyed the atmospheric, mature tone, it’s not for everyone. And certainly not a child-friendly or family campaign.

Mists of Akuma utilizes many Japanese terms throughout its length, which I really enjoyed. Particularly for names of people, locations, monsters, weapons, and titles. That said, I found that some terms are used but not explained, so I had to stop and look them up. In a few instances the Japanese version of an English loan word is used, instead of just using the English word, which was both jarring and a strange choice. I’m a fan of using culturally appropriate terms and naming conventions whenever possible, but in my opinion Trade War took it a bit too far. It hindered my comprehension of the material on more than a few occasions, which in turn made it less useful for me as a GM and less enjoyable for me as a reader. This adventure would have greatly benefitted from a glossary.

All in all I thought this was a wonderful, challenging, dramatic campaign that mature players are going to really enjoy. It’s set in an atmospheric fantasy world filled with tragedy, desperation, and corruption, wherein players get to make important, complicated decisions — and live with the consequences.  I really enjoyed Mists of Akuma: Trade War.


SPOILERS


Be warned! The following section contains information on the plot and component adventures of Trade War. If you don’t want any spoilers, stop reading!

Trade War‘s metaplot involves an ancient necromancer called the Pale Master, whose minions are working to bring him back into the world of the living. Fortunately for the world of Soburin, a powerful figure (who I won’t mention by name to prevent too many spoilers) has foreseen the return of the Pale Master and set events into motion that they hope will allow the people of Soburin to have a future. It’s the machinations of both the Pale Master and this other figure that drive the events of the Trade War adventure path. Set amongst this turmoil is a variety of other groups and factions which become embroiled in the growing conflict, either as allies, enemies, minions, pawns, or victims. PCs will have the chance to interact with members of all of the above mentioned groups on multiple occasions and forge relationships with them as they see fit (for good or ill).

Throughout this adventure PCs will face off against scheming humanoids, dark magic, ancient evil, corrupting fog, terrifying oni, powerful demons, unquiet spirits, animated dead, ninja, samurai, dragons, and even the undead army of a necromancer.

Trade War begins with Scourge of Robai Shita Temple, an adventure for third level characters. Tasked by a bengoshi to investigate the village of Shibai, PCs will need to determine why the village —  which was mystically protected from the Mists of Akuma — has suddenly become overrun by the mists, the monsters that stalk within it, and a powerful wind demon named Fukō. This mystery is fun and pretty free-form, although I think having a bengoshi give your PCs their task is unnecessary. The various NPCs (or even just the events of this adventures) could have motivated the PCs just as easily. I particularly enjoyed the interactions with another group hired to protect the town, the boisterous Mubō Brothers. My only complaint is that there are a lot of battles with tsukumogami in this one (a bit too many, in my opinion).

From there your PCs travel East over the course of the winter, having a variety of adventures on their journey. Some important events in the adventure path are foreshadowed with social encounters, which was nice to see, and important rumours are already flying. I particularly enjoyed the encounters with the elemental oni Kumo-Rui, an ice-themed spider-like monster who has brought about an unnaturally cold winter. In this section the PCs also meet another bengoshi, Akia the Iron Shell, who tasks them with tracking down an oni-touched sorcerer who has formed his own cult and bringing her anything of value in his possession. This task is trickier than it seems, continuing on into the next adventure, Feud Primordial. It should be noted that the inclusion of Akia the Iron Shell is one I support, as she is important to the ongoing plot line and the next adventure, and it makes sense for her to hire the PCs in order to see her goals accomplished.

Feud Primordial is intended for fifth level characters, and begins with the PCs already in the middle of tracking down a cult-leader. Unfortunately, he has way too many possessions for the PCs to easily carry, making them unable to bring everything back to Akia the Iron Shell. They need to determine what’s valuable and sell the rest. Unfortunately, turns out the object Akia most wanted — in fact the whole reason she sent you after the cult-leader — was to fetch a specific object that was valuable to her, but not actually valuable. An object PCs have either sold (most likely) or was stolen from them (less likely). Furious, the bengoshi sends your PCs back out to hunt down the missing object. This adventure leads the PCs to a town where a murderer stalks the streets, and eventually casts them as pawns locked in a power struggle between two incredibly powerful ancient beings.

After finally appeasing Akia the Iron Shell the PCs accept work as a caravan guard and travel north. Along the journey they get involved in some interesting events, my favourite of which involves a corpse-eating oni.

In time the PCs arrive in Samon, home of the Tazuki Rail Company, where they become embroiled in the events of the next adventure, Fangs of Revenge. Once again, they’re hired by a bengoshi, although this time they’re asked to investigate a growing unrest among the labourers of Samon, discover the leader of the workers growing rebellion, and put and end to their uprising before it begins. This leads to a complex web of intrigue and a large cast of interesting characters. PCs will soon discover that there’s more going on in Samon that meets the eye as they clash with shapeshifting snake-folk, and dark rituals.

Leaving Samon behind the group travels south, working as guards for two different groups at different times. By now they’re likely catching wind of a smuggling operation that’s apart of this campaigns meta-plot, although they won’t necessary understand all the movers and shakers behind it. The PCs actions will continue to affect how a few factions see them later in the campaign.

The next adventure, Curse of the Scorpion Samurai, is intended for 7th-level characters and begins when the PCs are hired by a bengoshi from Fuson prefecture to sneak into Fuson, investigate a series of grisly murders, and lay a trap for the killer using his intended victims as bait. But their enemy, the Scorpion Samurai, was once a local folk hero with a tragic past. PCs will need to be exceptionally canny to prevent the people of Shinjitsu from informing the Scorpion Samurai of their presence lest they go from the hunters to the hunted.

From Fuson prefecture the PCs take a mountainous journey at the behest of a poor woman.  Although their mission does not reach its conclusion, they do make some important discoveries related to a series of black torii gates that have been popping up throughout Soburin since the start of Trade War.

The next adventure, Yai Sovereign of Storms, is intended for 8th-level characters and takes place in a mountainous region of the GMs choosing, likely the same mountains that PCs were just travelling through. The PCs find themselves ambushed by a fearsome oni bengoshi who wants to hire them (this marks the second instance where I thought using a bengoshi quest giver was particularly important to the story). Xiqzoxix has heard of the PCs recent exploits and needs their aid to oust a powerful storm demon who usurped the throne from the previous warlord that ruled the oni city of Tsukisasu. Unfortunately, the storm demon is a hate-filled beast who gets more powerful by the day. PCs will need to sneak into the city of monsters in disguise, undo the storm demons magic circles, and defeat him before he becomes too powerful. In the end they’ll get to decide who will rule in the storm demons place — the original oni warlord or Xiqzoxix himself.

Leaving the magically hidden city of Tsukisasu behind the PCs suddenly find themselves in a forest near a newly laid rail track. In this series of connections they’ll have to battle an enemy atop a moving train, punish the oni behind the corrupted black torii gates, and discover that the various factions of Soburin are preparing for war.

Revenge of the Pale Master begins in the city of Kizaki immediately before the annual Festival of Falling Hawks. Intended for 8 – 10th level characters, this adventure once again sets the PCs on the trail of an infamous murderer. This time the murderer has come back from the dead to sacrifice six children whose relatives he tried to sacrifice in life exactly ten years ago. Although the local government has already placed three of these children in protective custody, the other three were kidnapped and need to be rescued. Except… that’s not really what’s going on at all. Haha. This adventure is full of twists, surprises, and betrayals. Whether the PCs ever figure out what’s really going on is entirely up to them. Revenge of the Pale Master is my favourite adventure in Trade War.

Which brings us to the all new finale to Trade War: Hone-Noroi Keep Ascends. In this adventure intended for 12th level characters the Pale Master’s bone tower rises from the earth and towers above Soburin, disappearing into the clouds. Undead march from the tower, the land becomes tainted, and dark magic is seen roiling in the skies. Villagers are evacuated by the government and the various factions met in this adventure path put their brewing war on hold to combat this ancient evil. The PCs may be able to ally with one or more of these armies and gain advantages (and disadvantages) based on how they treated the various groups. Some may be trusted allies, while others may be bitter enemies. Together with these armies your PCs will assault the Pale Master’s undead armies, storm the tower, ascend to the top, and defeat the Pale Master. It’s a gross and horrific gauntlet that’s packed full of challenging encounters and foul enemies. Such a great conclusion to this campaign!

Although that’s the end of the adventure path there are two more adventures in this book. Each is a short side quest intended for varying level difficulties. The first, Cursed Well of Itami, is best played at 5th level, and fits well between Feud Primordial and Fangs of Revenge. In it the PCs find themselves in a village whose well has been corrupted and now holds only blood and other vile substances. PCs need to descend into the well — and the hidden chambers connected to it — in order to cleanse the well and save the town. The second adventure, which is my favourite of the side quests, is Golden Carp. Intended for 7th-level characters, this adventure fits well between either Fangs of Revenge and Curse of the Scorpion Samurai or between Curse of the Scorpion Samurai and Yai Sovereign of Storms. In this adventure the PCs find a magical golden carp who begs them to prevent a noblewoman from catching him in her fishing net. If they choose to save the little fish from the woman — who’s actually an oni in disguise — they discover it is a powerful dragon on a pilgrimage back to its home. The dragon must undertake the journey in the humble form of a carp once every century in order to maintain is powers. They’ll need to protect the fish on it’s trip up to it’s mountain shrine without physically interfering in its journey.

Which brings us to the end of Mists of Akuma: Trade War!

Thanks for joining us today. I hope you enjoyed checking out the dark fantasy world of Mists of Akuma as much as I have.

Jessica