Today we’re going to take a look at the two most recent Starfinder Society Scenarios that are currently available for purchase, and let you know we thought. Although you’ll find references to events in each that I liked or disliked, and comments about specific characters, these scenarios are not explored in detail. It’s not my intention to spoil the events in these scenarios, or give summaries and full reviews, but to share my opinions and provide recommendations. That said, if you want to avoid even minor spoilers I recommend you check out a different article. Whether you intend to use them in home games of the Starfinder Roleplaying Game, sanctioned scenarios for use with the Starfinder Society Organized Play, or just want to read a nifty new adventure, we’ve got you covered! So sit back, and get ready to explore the Pact Worlds!
Starfinder Society Scenario #1-36: Enter the Ashen Asteroid is a Tier 1-4 adventure written by Larry Wilhelm. It takes place on Sledgehammer, a mining facility and exploration vessel owned by Ulrikka Clanholdings, a dwarven mining consortium that may be familiar to PCs who’ve played Starfinder Society Scenario#1-12: Ashes of Discovery. From there the PCs enter Asteroid AA-126D, an asteroid in the Diaspora that contains duergar ruins dating back to the time of the Gap — and marked with the unholy symbol of Droskar. There you will explore the the site and collect any objects of archaeological importance. This does not feature any tags and does not contribute to the ongoing Scoured Stars storyline. PCs who are dwarves, speak dwarven, or have the Contractor’s Respect (Ulrikka Clanholdings) boon from Starfinder Society Scenario #1-12: Ashes of Discovery will find they have an edge in this scenario. Enter the Ashen Asteroid does not feature starship combat. It includes two custom half-page maps (which are beautifully detailed!) and Pathfinder Flip-Mat: Elemental Planes. It makes use of the Starfinder Core Rulebook, Starfinder Armory, and Alien Archive 2.Although this scenario doesn’t feature any recurring characters it does introduce a new NPC of importance, dwarven Venture-Captain Thromkendal. In addition, five other NPCs you’ll have a chance to influence are introduced, most of which (but not all!) are dwarves.
Venture-Captain Thromkendal. Illustrated by Bryan Syme. Art courtesy of Paizo Inc.
At it’s core, Enter the Ashen Asteroid is a dungeon delve. PCs enter an enclosed location, look around, unearth some secrets, and fight some bad guys. It’s a type of adventure that’s underrepresented in Starfinder, so I think it’s a nice change of pace. Happily this delve is packed full of opportunities to use a wide variety of skill checks, has interesting environmental hazards, and features a few obstacles in it that can be overcome in multiple ways. There’s some complex devices and backstory to untangle, which keeps the dungeon interesting, and plenty of important finds to collect. I particularly enjoyed the interconnectivity of the dungeon. Each room has ties to those around it, which is really nice to see. The battles in this scenario are challenging, particularly one against an old foe from Pathfinder whose new art looks amazing! At the end of the scenario PCs will have to report to some Ulrikka Clanholdings bigwigs and offer them a recommendation in regards to the fate of the asteroid. It should be noted that this is a complex adventure to run. There’s some subsystems at work here that new or inexperienced GMs could find confusing — luckily this is mitigated by a super handy player handout. One of the locations also has a complex obstacle some PCs might struggle with. Overall I really enjoyed this scenario. I give it four out of five stars.
Starfinder Society #1-37: Siege of Civility is a Tier 5-8 adventure written by Kalervo Oikarinen. It takes place on a fortress moon named the Eye of Gideron, that orbits a gas giant named Maelstrom’s Maw. These areas are located within the territory of the Gideron Authority, a mostly-hobgoblin militant space empire at war with the Marixah Republic, both of which are introduced in Starfinder Society #1-24: Siege of Enlightenment. Although the two scenarios are linked, playing them is order isn’t necessary. In fact, characters who haven’t played Siege of Enlightenment are likely to have a different outlook on the Gideron Authority than those who have, which can make for some fun roleplaying between the party members. I think it’s best to have a mix of PCs who have and haven’t played Siege of Enlightenment. Whatever the party composition, your PCs mission is to convince representatives of the Gideron Authority to lend the Starfinder Society their aid — the Wayfinders flagship Master of Stars needs a drift engine only the Gideron Authority can provide, and the Starfinder Society would like exploration rights to some of their archaeological sites. This scenario features the Faction (Wayfinders) tag and does not contain starship combat. It makes use of one half-page custom map and no flip-mats. It includes content from Starfinder Core Rulebook, Alien Archive, and Alien Archive 2. There are two recurring characters in this scenario: Fitch, leader of the Wayfinders Faction, and Ceobarn Zeizerer, a drow who first appeared in Starfinder Society Scenario #1-06: A Night in Nightarch. There are five other new NPCs from the Gideron Authority who are likely to be of further importance in the future. PCs who have the Victory Over Authority boon will need to slot it for this mission.
Commander Imako. Illustrated by Bryan Syme. Art courtesy of Paizo Inc.
Overall, this is a really fun social scenario. There’s plenty of interesting NPCs to talk to and sway to your side. The social engagements are well planned out, and interspersed with opportunities for other skill checks and a really cool combat encounter. It think it’s going to be an absolute blast to play! This is a great scenario to crack out your diplomats, envoys, and other charismatic characters. PCs who prefer to pound face all day are better suited to other scenarios, but that doesn’t mean they won’t have a chance to shine. The Gideron Authority is an aggressive, military-based society that values strength and experience, so even PCs with a martial focus will find someone they get along with. Overall, I give this scenario four out of five stars. It’s one of my favourite influence-based Starfinder Scenarios.
Thanks for joining us today! Tune in later this week when we take a look at the newest Pathfinder Society Scenarios!
A lucky skittermander! Illustrated by Taylor Fischer. Art courtesy of Paizo Inc.
Starfinder Critical Hit Deck is the size and shape of a deck of playing cards. It retails for around $10.99 USD (or around $15 Canadian dollars). There’s an adorable little skittermander playing with a d20 on the box, with some product information on the back.
The cards inside are high quality and easy to read with a colour scheme matching the Starfinder Core Rulebook. There’s fifty-five cards inside. One contains product information, the open game license, and cites Owen K.C. Stephens as the author and Taylor Fischer as the illustrator. The second card lists the rules of using the Critical Hit Deck. And the other 53 cards are Critical hit Cards.
All of the cards follow a specific set of rules laid out on the rules card. All critical hits deal double damage unless the card specifies otherwise. Any effects listed as ‘Crit Effect’ can replace your weapons regular critical hit effect (if it has one) if you want it to, but you don’t get both. Any effects listed as ‘Bonus Effect’ apply in addition to the critical hit effects of your weapons. There’s some other simple rules for DCs, scaling, and so on, but they’re all easy to get a handle on.
You’ll also need to decide ahead of time how to use the Critical Hit Deck. That is to say, when you use it. For players that’s simple. Every time you score a critical hit (a natural 20 on a d20 dice) you draw a card and apply it’s effects. For GMs it works a little differently. The deck provides three options for the GM to select from. First, the GM draws a card whenever a major villain, creature, or NPC scores a critical hit. Second, drawing a critical hit card is a special ability that NPCs can take, and the GM selects which NPCs have it. And third, the GM draws a card every time a villain, creature, or NPC scores a critical hit. Personally, my family uses it for all PC critical hits and for major villain, creature, and NPC critical hits, but I like that there’s a variety of ways to integrate this deck into your game.
When you score a critical hit you draw a card. Each card has four different critical hit effects. One for energy attacks, one for kinetic attacks, and one for spell attacks. The fourth critical hit effect is an ‘extreme blow’ and lists a single specific damage type (such as electricity or slashing). You simply read the card, select the critical hit effect that matches your damage type, and carry out the effect listed. If you happen to deal the exact same type of damage as the extreme blow you use that critical effect instead. Easy.
Most importantly? It’s fun! My family loves pulling out a card and getting some extra effects. Particularly the extreme blows. It always ends in laughter. Of course, they’re not so thrilled when an enemy does it, but hey, that’s the way the dice land. Haha.
Some of our favourite effects include blast back (energy), lodged in the bone (kinetic), shrapnel by the bone (kinetic), blood magic (spell), vampiric magic (spell), disintegrate (extreme spell), it’s a gusher (extreme melee), mega-smash (extreme bludgeoning), punctured lung (extreme piercing), sound of victory (extreme sonic), severed spine (extreme slashing), and disarmed (literally!)(extreme slashing).
Got a favourite critical hit card? Let us know in the comments!
So it should come as no surprise that Easter is her very favourite holiday. Stores that she would normally take no interest in are packed full of rabbit clothes, rabbit knick-knacks, rabbit pictures — rabbit everything! Add to that the chocolate, the treats, the family celebrations, and the high probability someone will give her a new stuffed rabbit, and she couldn’t be happier.
And then yesterday she got sick. Headache, nausea, stomach pain, fatigue. Nothing fun. The poor dear’s curled up on the couch whimpering on her favourite day of the year.
So we’re having a quiet Easter this year. I’m resting at home with my family, comforting my daughter, trying to prevent my son from gorging himself on chocolate, and tidying up the house.
But, we’re taking some time out of our (not) busy day to say thanks.
THANKS.
And thanks again.
Whoever you are, wherever you’re from, and however you celebrate, we’d like to take the time to wish you a Happy Easter. (Or as my daughter would say if she was feeling better: “HOPPY Easter! BOING BOING!”).
For those of you who don’t celebrate Easter, we’d like to wish you a wonderful day.
Against the Aeon Throne is a shorter campaign than most. Typically six books in length, this Adventure Path is only three. It’s a great change of pace that will allow the folks at Starfinder to tell shorter, more personal stories. In addition, this three part length makes it easier to purchase and play through an entire adventure path. It’s awesome for gift giving and the budget conscious! Six books is a huge investment, but three? Well, that’s a lot more manageable for those of us without much extra cash laying around. On the other hand, with the three book format I feel like I blinked and the whole adventure path was over. I didn’t get my hands on the first book until the third came out and I missed the Signal of Screams Adventure Path completely. In general, it’s both easier to collect and easier to miss. Although I enjoy the three book format, I also enjoy the six book format, so I hope they continue to rotate between the campaign lengths.
So what exactly is Against the Aeon Throne: Escape from the Prison Moon all about? In short, the PCs defeated an Azlanti military force that had annexed the small colony of Madelon’s Landing on the planet of Nakondis. But saving the fledgeling colony is just the beginning. The PCs have discovered that an experimental starship engine and their friend, the android Cedona, were already transported off of Nakondis and back to the Azlanti Star Empire. Determined to rescue Cedona and retrieve the starship drive the PCs travel to the Azlanti Star Empire and attempt to rescue Cedona from the prison moon she’s being held on. Exciting stuff!
Now, let me take a moment to be clear. The Azlanti Star Empire is a pack of giant, pompous, jerks. They’re great villains for the PCs to clash with, but an overwhelming opponent. This adventure path does not send your PCs off to take down the entire Azlanti Star Empire. It’s much smaller in scale than that. And frankly? I love it. It lends a sense of suspense to the series and makes it feel like you’re playing real people in a living breathing world universe doing what they can, rather than heroes so powerful they change the whole world universe. It’s a wonderful change of pace and scope. It’s got a very Firefly / Star Wars feel to it.
But, before we get into that too much, let’s take a look at the book itself. Starfinder Adventure Path 8: Escape from Prison Moon (Against the Aeon Throne 2 of 3) is a softcover adventure written by Eleanor Ferron that is 63 pages in length. It’s intended to take players from level three to level five. The adventure itself is around 35 pages long, and split into three main parts: A Distant Call, in which the players travel to the Azlanti Star Empire; Outpost Zed, in which the players explore a space station and plan their caper; and Jailbreak, in which the players infiltrate the Prison Moon to free Cedona. After the adventure there’s an eight page primer on the Azlanti Star Empire and an eight page primer on the non-human races of the Azlanti Star Empire. There’s also seven new creatures in the Alien Archive, and a short Codex of Worlds article on Outpost Zed. Lastly, the inside front and back covers feature information and a layout for a tier 3 starship: the Vanguard Parapet.
My favourite parts of this book are the large number of new player races (there’s six of them), the incredibly varied and quirky NPCs (Glest, Half-Red, Xaarb, and Talmrin are all great fun), and how free-form the locations are. Yes, you have to go to ‘A’ place, and accomplish ‘B’ goal, then go to ‘C’ place, and accomplish ‘D’ goal, but how you go about achieving your goals in ‘A’ and ‘C’ — the order and methods — are up to you. I really like that. Another minor thing I really enjoyed is that every enemy has a name. It sounds like a silly thing to enjoy in an adventure, but giving every villain a name allows for PCs to take approaches to dealing with them that amount to more than ‘attack’ and ‘loot.’ That’s incredibly important in this adventure, particularly in Part Three: Jailbreak.
Before we continue with a more in depth look at the book, let me point out: there will be SPOILERS.
You have been warned.
For starters, I love the look of this book. I like the colours and the layout. The text inside is easy to read and the colours are easy on the eyes. The cover art is wonderful. It showcases Cedona, an android, retired Steward, and ally of the PCs, as drawn by Anna Christenson. Behind her is an awesome image of Raia (the iconic lashunta technomancer) and Quig (the iconic ysoki mechanic) fighting off Azlanti prison guards.
The starship showcased on the inside covers is a Vanguard Parapet. This tier 3 medium transport is destined to be the final enemy the PCs face in this adventure. All in all it’s a well-built ship, that packs some serious firepower. I particularly like how it’s shield points are balanced, with barely any shields in the quadrants where they have the most guns, and the excess shields where they have the least guns. The art is nice and the ship layout is useful.
After that we hop right into the adventure itself. This adventure starts a bit slower than its predecessor. It begins with some necessary bookkeeping. The PCs likely have some loose ends and social encounters to wrap up in Madelon’s Landing after the conclusion of Reach of the Empire (Against the Aeon Throne 1 of 3) and they’ll need to upgrade their starship to tier 3. Afterwards they receive a recorded transmission from The Stewards which should help nudge them on their way and get the adventure going. For many groups this transmission is unnecessary. PCs should already know their goals for this one: retrieve the drive and rescue their friend. But, for those groups that need a little more guidance, this recording gets the job done quick and efficiently. The PCs will need to fly to the Azlanti Star Empire, get their bearings, and find their way to the Prison Moon Cedona is being held at. On the way they run into a witchwyrd merchant ship where they’ll have a chance to make friends, barter, and pick up some valuable intel. This social encounter also gives them a destination where they can learn some more about the Azlanti: Outpost Zed.
Glest, a nervous screedreep from Outpost Zed.
Which brings us to part two of the adventure: Outpost Zed. In this section PCs will need to travel to Outpost Zed, a rebellious little space station on the fringes of Azlanti space, figure out where Cedona was taken, and determine a way to properly disguise their ship. This is done primarily through interacting with the locals. Of course, not all the locals are friendly or willing to talk to obvious foreigners. Other hurdles the PCs will come up against are learning how to communicate with the locals, and figuring out Outpost Zed’s societal structure. As previously mentioned, this section of the adventure is a little free-form. There’s plenty of people to talk to, a section of the spaceport to explore, some quick battles (some of which can be avoided), and the PCs can go about their socializing in any order. However, they can’t really stray outside this area or get too off track. Still, it’s fun and enjoyable. Many of the NPCs they’re destined to meet are from races the PCs know nothing about. I particularly enjoyed Glest (a nervous, shifty screedreep), Half-Red (a tiny squid-like stellifera that floats in an orb of water), Xaarb (an agressive creature who’s mostly mouth), and Talmrin (a very useful NPC who looks like a weasel-person). This section does a great job of showcasing that your PCs are obvious outsiders, which is something they’ll need to address if they want to break their friends out of prison without fighting their way through the whole place. Overall, it’s a fun, flavourful place to explore, filled with plenty of memorable social encounters. Before you move on, the PCs will need to take what they’ve learned and concoct a plan to travelling to and infiltrating the Prison Moon Gulta, for rescuing Cedona, and for escaping alive. Good luck! Haha. In all seriousness, the pieces of the puzzle the PCs need should come relatively easily, and there’s an NPC around who can help with the planning in a major way if the PCs are in need of inspiration or assistance. The actual planning shouldn’t be too hard once they’ve got their ducks in a row.
One of the many denizens of Outpost Zed!
Which brings us to part three: Jailbreak. This is by far the longest and most challenging section of the adventure. As the PCs approach Gulta, the prison moon, they should already know that non-Azlanti are typically held in Cell Block J. With their destination narrowed down considerably, they’ll need to disguise their ship, approach Gulta, and dock in Cell Block J. From there it’s more free-form. Depending upon what races the PCs are they’ll need disguises to manage any kind of infiltration mission. They’ll also need a way to speak Azlanti, someone who’s decent at lying, and someone who’s handy with a computer or at engineering. Then they’ll need to explore Cell Block J without tipping off the guards or raising an alarm. Plus there’s the security cameras and patrols to worry about. PCs who choose to go in guns blazing will instead need to be quick and get the security feeds shut down as soon as possible. Either way, once the PCs manage to get Cedona free (and hopefully some other prisoners as well), they’ll need to find a way to escape with her — a job much harder than getting in. Finally, before they escape they’ll need to contend with this volume’s big bad — an Azlanti woman named Iolastrila — and the Zandamant, a prison ship that pursues the PCs as they make their escape.
This section of the adventure is incredibly well presented, but not easy for GMs to run. It lays out the entirety of Cell Block J, what security measures are in place, labels every security camera, and shows where guards are located. Every guard has a name and some information about them — all useful information for PCs attempting an infiltration. There’s also notes on what things the PCs can do to raise or lower the alertness of guards, and cause alarms to sound. It describes what changes throughout the Cell Block in such circumstances, and what the various guards do. It’s really detailed, and really well thought out. Which is incredibly important! Your PCs are going to go in there and going to make a scene. GMs will need to keep track of what cameras are in operation, who’s suspicious of them, what the various guards are doing, and so on. It’s complex, and a lot to track. But pulling off this caper — both for the PCs and the GM — is a rewarding, exciting, experience. This place is dynamic, detailed, and reacts to the PCs. It will be different for every group and I really, really enjoyed it.
By the end of this chapter the PCs will have freed Cedona, made their escape from the Prison Moon, and retreated to Outpost Zed. But their mission’s not yet complete. The PCs and Cedona know they need to get back the experimental drive from the Azlanti before its too late.
Which brings us to the end of Escape the Prison Moon! But, that’s not the end of Against the Aeon Throne, or the book. Up next, as previously mentioned, is an incredibly useful primer on the Azlanti Star Empire entitled Empire of the Aeon Throne. This eight page article provides a short history of the Azlanti Star Empire, information on the solar systems under it’s control (there’s twelve of them!), and information on their culture, and society. Finally, it’s got some new gear, including five new aeon stones, four new magitech augmentations, and two new weapons.
Talmrin, a gosclaw from Outpost Zed.
The second primer is entitled Citizens of the Star Empire. Also eight pages in length, this section describes a whopping nineteen races common to the Azlanti Star Empire, most of which are new. Six of these races is also given much more information and full racial traits to allow you to play these races. Playable races include the brakim, gosclaw, neskinti, screedreep, stellifera, and vilderaros. I really enjoyed all of these races, but the brakim and screedreep turned out to be my favourites. The brakim are also featured in Starfinder Society Scenario #1-27: King Xeros of Star Azlant.
The Alien Archive is up next, which is always one of my favourite sections of an Adventure Path. It contains seven new creatures, four of which are featured in the adventure itself. The creatures include: Aeon Stone Network, a CR 7 construct made from a swarm of aeon stones; Radiation Drake, a CR 9 drake; Iztheptar, a CR 6 shellfish-like humanoid that’s featured in both Escape from the Prison Moon and Starfinder Society Scenario #1-27: King Xeros of Star Azlant; Ooheo, a tiny CR 1 vermin with a long harpoon-like tongue; Paralith, a CR 4 aberration they’ll meet on Outpost Zed; Void Palm, a CR 7 gravity controlling plant; and Xaarb, an aggressive CR 5 magical beast they’ll meet on Outpost Zed.
Paralith by David Franco. Art courtesy of Paizo Inc.
Finally, there’s a short, one page Codex of Worlds entry on the Outpost Zed. Despite its short length, the information contained therein is useful for this adventure, and a must read for any GMs who expect their PCs to do a bit more exploring of the space port than is scripted in this adventure.
Outpost Zed by Mirco Paganessi. Art courtesy of Paizo Inc.
Against the Aeon Throne: Part Three: The Rune Drive Gambit is written by Larry Wilhelm and intended for level five characters. In it, the PCs head to a secret Azlanti science station in an asteroid where the experimental starship drive is being held. They’ll need to get inside, infiltrate or fight their way to the Rune Drive, and learn what the heck it is. Then they’ll need to find a way to steal it. Along the way they’ll fight Aeon Guard soldiers, rescue captive scientists, and face off against the man responsible for sending troops to Nakondis in the first place! Awesome!
EDIT: You can read our review on it here: Review: Against the Aeon Throne: The Rune Drive Gambit.
I hope you enjoyed taking an in depth look at the second volume of Against the Aeon Throne much as I did!
Archives of Nethys, an online database for official Pathfinder and Starfinder content and rules, recently announced the launch of their new website: 2e.aonprd.com! This new site will be dedicated to Pathfinder Second Edition and will launch on August 1st, 2019, at 7:00 am (Pacific Time). That’s right! It’s coming out the same day that Pathfinder Second Edition launches in print!
Exciting news!
Through the Archives of Nethys players around the world will have all the rules and characters options for Pathfinder Second Edition at their fingertips, online and free. I am absolutely ecstatic! I know cost is a huge factor to consider when deciding whether I’ll be able to give Pathfinder Second Edition a try. Seeing that barrier removed is amazing.
Today we’re taking a look at a board game my kids recently got for their birthday: 5-Minute Dungeon! This real-time card game tasks up to five players with working together to escape a dungeon in under five minutes. Each dungeon consists of a randomized deck of cards that features obstacles, monsters, people, and events to overcome. At the end of each dungeon is a powerful boss to defeat. To beat the game you’ll need to triumph over five separate dungeons.
This game is frantic, fast-paced, and more than a little chaotic! Communication and teamwork are essential to your success. Player’s win or lose as a team. 5-Minute Dungeon is intended for players ages eight and up. Although a single dungeon takes five minutes, playing through a whole game takes about thirty to forty-five minutes, depending how many times you fail to escape a dungeon.
Players take on the role of one of ten characters by selecting a character board. Each board is colour-coded and double-sided, with one male and one female character per board. Every character board makes use of one of five matching decks, and every character has their own unique ability which can be triggered by discarding three cards from your hand. That means that up to five people can play at a time.
Characters include the blue sorceress and wizard, green huntress and ranger, purple ninja and thief, red barbarian and gladiator, and yellow paladin and valkyrie. Most of the special abilities of these characters fall into two types: those that help get someone in your group extra cards and those that automatically defeat a certain category of card. There’s also the wizard’s unique ability to stop time. We found that it was very helpful to play with the wizard and a character who can help the group draw cards, with the rest of the players taking on abilities that can auto-defeat either monsters, obstacles, or people. Once you’ve got your character picked out you place the matching deck on their board.
Next you set up the dungeon. Start by selecting a boss. There are five to choose from and each is numbered 1 though 5. You simply start at Boss #1: Baby Barbarian and work your way up to Boss #5: Dungeon Master. Each boss also has a number of cards written on it. Baby Barbarian has 20, The Grime Reaper has 25, Zola the Gorgon has 30, and so on. This is the number of dungeon cards you’ll randomly select and place on the boss board. Then you’ll pick out two challenge cards per player and shuffle them into the deck of dungeon cards. This is the boss’s dungeon. You simply place the deck of cards into the space marked with the dotted line and you’re ready to begin.
Player’s begin by drawing a number of cards. This number is variable and determined by how many people are playing the game. Chances are you’ll start with three or four cards. Then you start the five minute timer, flip over the first card in the dungeon deck, and get adventuring!
To reach ‘The Grime Reaper’ you’ll need to defeat the ‘A Cactus that wants a hug.’ Oh, no! I hope you’ve got some shields….
This game doesn’t come with a physical timer. Instead there’s a timer app you can download on your phone, tablet, and other handheld device. It’s a quick download and easy to use. You simply select a voice for the announcer (I love the ‘fearful’ voice, but my daughter’s a fan of ‘spiteful’) and click start. Sometimes you’ll need to pause the game (such as with the wizard’s ‘time stop’ ability) in which case you simply push pause. If you defeat the dungeon you click ‘We Won,’ if you lose you click ‘We Lost’ and if you run out of time you don’t need to click a thing. It’s an enjoyable, humorous little timer app and my kids really like it.
Boss #1: Baby Barbarian. He takes two swords, two arrows, and three dash to defeat, and his dungeon contains twenty cards.
Baby Barbarian and an example of Challenge and Dungeon Cards
There are four major categories of dungeon cards: event, person, monster, and obstacle. Events are the simplest to resolve. They each have a sentence explaining what you need to do, you do it, then you move on to the next card. Examples of events are ‘Sudden Illness’ which forces every player to discard their hand, or ‘Trap Door’ which forces all players to discard three cards. The rest of the cards — monster, obstacle, and person — have circular symbols on them. These symbols match the cards that you must play to defeat them. These cards can be played in any order and by any player. There are no turns. As soon as all the needed cards are played you have defeated the card, it gets moved to the discard pile, and you flip over the next dungeon card. Once all of the dungeon cards are defeated you will see the symbols needed to defeat the Boss.
This makes gameplay fast and chaotic, with players slapping down cards, shouting out what they’re playing, and calling out what’s still needed to defeat the card. It’s the sort of game where everyone feels a sense of urgency and excitement, and get’s a thrill of triumph when a card is defeated.
The four types of cards you’ll find in a dungeon.
So what the heck are all these symbols?
There are five major symbols in the game, which are colour coded. These same symbols are seen across all the boss cards and all character decks. Called ‘Resources’ they include the red sword, yellow shield, green arrow, blue scroll, and purple jumping person (which my family always calls ‘sprint’ or ‘dash’ but is probably called ‘leap’). Every deck will have cards of these five types, although they will have them in different combinations. The red barbarian/gladiator deck will have a lot of red swords, for example, while the blue sorceress/wizard deck will have a lot of blue scrolls. In addition to these single symbol cards there’s double symbol cards — cards that have two red swords, two blue scrolls, and so on. These are seen in much lower quantities than the single symbol cards, and not every deck will have them in every kind. While the sorceress/wizard deck may have a few double scroll cards, the huntress/ranger deck won’t. One of the decks — the red barbarian/gladiator has special double symbol cards which consist of a red sword and a second other symbol.
The rest of the cards found in the character decks are black bordered and have a special ability written on them. The most common are abilities that let you auto-defeat a certain category of dungeon card. ‘Fireball’ defeats a monster, ‘Backstab’ defeats a person, and ‘Mighty Leap’ defeats an obstacle. These are super useful cards which can be found throughout all of the different coloured decks in differing quantities. While the sorceress/wizard has a lot of ‘Fireballs’ the ninja/thief has more ‘Mighty Leap’ and ‘Backstab’ cards. Finally, every colour deck has some unique black bordered ability cards. ‘Enrage’ from the red barbarian/gladiator deck lets you choose two players who may draw three cards each. ‘Divine Shield’ from the yellow paladin/valkyrie deck pauses time until someone plays a card and lets every player draw one card. ‘Magic Bomb’ from the blue sorceress/wizard deck counts as one of each type of resource. My personal favourite card? ‘Heal’ which lets you select a player who can put their entire discard pile back on top of their draw pile. Awesome!
The many card types found in 5-Minute Dungeon
As mentioned, every deck is different but equally useful. You’ll soon discover which play style you prefer and find a favourite, so I highly recommend trying each deck out. I love the yellow paladin/valkyrie deck best — particularly when played with the valkyrie character who can help her fellow players draw cards. The yellow deck has a lot of different healing cards, which I find can be incredibly helpful. My son, on the other hand, prefers the to play as the blue wizard. He’s a huge fan of the wizard’s ‘Time Stop’ ability — which is so helpful I’d go as far as to call it a necessity. He also loves the ‘Magic Bomb’ card which can only be found in the blue deck. Finally, my daughter prefers to play as the green huntress — solely because she loves the art. To each their own, I guess. Haha.
With all the decks in their places, cards in hand, and the timer started, play can begin. There’s a few other rules you need to know, but not many. Whenever you have less cards than your opening hand consisted of you can immediately draw cards to fill your hand back up to maximum. Discard piles do not get shuffled back into the draw pile once the draw pile is empty. This means that if your deck ever runs out you can no longer draw cards — unless someone plays a card that gives you cards from your discard pile or something similar.
Winning will take teamwork, speed, and luck. If you win you reshuffle your decks, select your character (you do not need to keep the same character throughout all the dungeons), set your boards back up, and build the dungeon for the next Boss. When everything’s ready you begin play again. If you defeat all five dungeons you win the game.
If you ever fail to defeat a dungeon you’re supposed to reset, going all the way back to the Baby Barbarian and his dungeon again, but my family didn’t like this rule. Instead we just replayed the dungeon we were on.
We’ve played this game quite a few times. Sometimes we finish it all the way through, and sometimes we only play a round or two. My kids and I really like it. They enjoy the teamwork aspect, and that they can always be playing. There’s no waiting for your turn or getting beat on by your friends. It’s fun and fast. It’s not a game for everyone, though. My husband doesn’t really like it. He’s a fan of strategic, complex games. Chances are whatever game we’re playing he’s going to be that player taking the longest turns. Unsurprisingly, the chaotic, real-time gameplay of 5-Minute Dungeon is not to his tastes. It’s also not the kind of game you can play anywhere. Players are going to get loud. Although you could bring to a party, family gathering, or friend’s house, it’s not the sort of thing you’re going to bring to play at the library, local coffee shop, laundromat, or airport. Finally, it’s not the sort of game you want to let the kids play late at night. Mine get antsy, excited, and leap and jump around. Not really a relaxing, winding-down sort of game.
The board after my kids and I defeated the final boss!
Victory!
All in all, we really liked 5-Minute Dungeon — especially my son. It’s fast paced, easy to learn, and enjoyable. My only complaints? I wish the boss cards were double sided so you could choose which of the two to face off against and I wish there were more dungeon and challenge cards included in the game so the dungeons felt more varied. But, I suppose wanting more of a game isn’t much of a complaint. More like a wish list. Haha. 5-Minute Dungeon is a pretty easy game to find that currently retails for around $30 Canadian. Our copy belongs to my eight-year old son, and made an excellent gift. He loves it.
Today we’re taking an in depth look at the first book in the Tyrant’s Grasp Adventure Path! This survival horror campaign pits the players against the return of the Whispering Tyrant, the lich-king Tar-Baphon, who was defeated and sealed away long ago. Tyrant’s Grasp will be the final Pathfinder 1st Edition Adventure Path released, before the switch is made over to Pathfinder 2nd Edition in August. Intended to take characters from levels 1 to 17, Tyrant’s Grasp is six volumes long.
A wonderful Player’s Guide for Tyrant’s Grasp is available as a free download on Paizo’s website here. The Player’s Guide gives players a relatively spoiler-free way to properly prepare for and integrate their characters into the Tyrant’s Grasp Adventure Path. I highly recommend checking it out!
The Tyrant’s Grasp Adventure Path begins with Pathfinder Adventure Path: The Dead Roads (Tyrant’s Grasp 1 of 6). Written by Ron Lundeen, The Dead Roads is an adventure intended for first level characters, which should bring PCs up to level five by its conclusion. This adventure begins when the PCs awaken already defeated in the Boneyard, a land where the dead go to be judged. There’s just one problem… They’re not quite dead. Trapped inside a tomb that doesn’t belong to them, they’ll need to escape, figure out what happened to them, and find a way to return home. But, how could one possibly escape the land of the dead?
Let me start by saying that The Dead Roads — and the Tyrant’s Grasp Adventure Path — is not for everyone. Terrible tragedies will occur, and you won’t always be able to prevent them. These events are bound to have a lasting effect on your characters, so players should be prepared to consider and role-play the marks left by the trials you face. Often you’ll be in dire situations with limited resources, so players will need to be resourceful to survive. Plenty of the imagery and events in this adventure are dark, morbid, and sorrowful. It’s definitely a horror campaign — though not your typical horror. It’s suspenseful survival horror, with a good deal of body horror in the first book, as well. The Dead Roads contains imagery that is inappropriate for children and some adult gamers will even consider an image or two disturbing. It’s definitely not a campaign I could play with my family.
That said, I loved The Dead Roads. Absolutely, positively, adored it.
For starters, it looks great. From cover to cover it’s a wonderful, high quality book filled with nice maps, and beautiful, dark artwork. The cover depicts Mictena (a catrina psychopomp the PCs are destined to interact with) in the foreground. Behind her is an image of Seelah (the Iconic paladin) and Yoon (the iconic kineticist) battling ostovites. Both images are by Igor Grechanyi. There’s a lovely map of The Gravelands (Lastwall and parts of Ustalav) on the inside cover. There’s a ton of artwork throughout the book — of enemies, allies, and characters who could become either. I particularly enjoyed the art for Prince Uspid and Mictena. Colulus was the most disconcerting image in the book. If any image is going to bug a squeamish player it’ll be that one. There’s a few characters that I wish had art but don’t (which is expected! Art’s not cheap and there’s only so much space!). Ayuki, in particular, would have been nice to see, as well as the jitterbone creature in the bestiary. The maps, all drawn by Matthias Rothenaicher, are really nice. They look great, of course, but they’re also well thought out, executed, and each has a unique feel to it. I particularly enjoyed ‘Roslar’s Tomb’ and ‘Deathbower.’ I wish that the maps of the various Dead Roads locations were given a bit more space, though. Squishing three multi-floor maps for three different locations onto one page is good for page count, but makes some of the maps difficult to read. Part of the eastern end of the ‘Palace of Teeth’ is nearly lost in the creases of the binding, while the entrance to ‘Salishara’s Scriptorium’ is hidden in the creases. If both of those maps were a few grid squares further to the left that would have been less of a problem. Finally, flipping back and forth between the map page and the various locations depicted in it (which is spread out over 28 pages) is a bit irritating. Have a bookmark or post-it note handy and try not to tear your pages. Much to my surprise there was also two player handouts which represent puzzles the group comes across. I’m really glad they’re depicted instead of just described. They’re necessary and a really nice touch.
Part of the maps lost in the creases.
The Dead Roads starts with a bang (HA!) and doesn’t let up. The entire opening has the feel of an ominous, suspenseful mystery. Your PCs don’t know where they are, how they got there, or what’s going on. Their locations hide clues to both their situation and the history of wider events, which the PCs may or may not be able to uncover. In time they will discover the answers to some of their questions, just as they realize it’s tied to an even bigger mystery.
There’s a lot of wonderful social encounters and NPCs in this adventure. Number Three, Barple Stonebreaker, Prince Uspid, Queen Carnassial, Kishokish and his portrait, Ayuki, Salighara, Berthold, the wyrwoods, Mrs. Pedipalp, Aydie, Reedreaper, Mictena — there’s just so many great interactions in this adventure! Among them, three particularly stand out amongst the crowd: interacting with the townsfolk of Roslar’s Coffer is poignant and amazing; speaking with Barzahk the Passage; and — my personal favourite characters — Umble and Thoot! This pair of friendly psychopomps are the best!
Umble and Thoot
Prince Uspid
Deathbower
Many of the creatures and NPCs you come across don’t look friendly — which doesn’t mean they aren’t friendly. Of course, it doesn’t mean they are friendly, either. Which I love! Appearances have no bearing on what a creature acts like and I appreciate that this adventure used that so effectively. It’s bound to throw players for a bit of a loop and make them feel… off-kilter. Which is great!
There’s a lot of challenging encounters in this adventure and plenty of unique monsters to face off against. I particularly enjoyed that so many can end in ways other than violence. But, don’t let that last sentence lull you into a false sense of security! There’s a lot of combat encounters in this book that cannot be avoided.
And the ending! Oh, the ending! I love it! I cannot wait to get my hands on the next book in this Adventure Path! I have a feeling Eulogy for Roslar’s Coffer is going to be just as good.
And now it’s time for a warning:
We’ve got more to say about this adventure, but it’ll come with spoilers! Don’t want to read them? Skip on past this next section until you see the large words ‘SPOILERS OVER.’ Got it? Good! See you on the other side where we’ll talk about the extra content in this book!
SPOILERS
The Dead Roads adventure is split into four major parts: Awake in Roslar’s Tomb, Among the Dead, Walking the Dead Roads, and Deathbower. One of these parts Walking the Dead Roads is particularly dense and is made up of three major locations: The Palace of Teeth, Nine-Eaves, and Salighara’s Scriptorium. All told The Dead Roads adventure is 52 pages in length with six pages afterwards dedicated to three NPCs: Mictena, Mrs. Pedipalp, and Reedreaper. All three of these are enemies the PCs will come across, but only one of them has to stay that way. The PCs have a chance to convince the other two to step aside without violence (although it’s extremely hard to accomplish for one of those two!).
Through this adventure the PCs will get to interact with psychopomps, a type of outsider native to the Boneyard who work to ensure that the processing of souls is done accurately and efficiently. Typically functioning as guides for the souls of the deceased, the psychopomps are confused over what to do about the mysterious PCs. Some will help them along their way (especially the delightful Umble and Thoot!) , and others with hinder them — particularly Mictena, a catrina psychopomp obsessed with putting the PCs spirits properly to rest. Through a good thorough death, of course! Psychopomps aren’t the only enemies and NPCs the players will interact with. The Boneyard is a huge realm, and there’s plenty of creatures living/stranded/invading there. Other major groups of enemies include fey, vermin, sakhil, and nightmarish beings from the Dimension of Dreams.
Fittingly, The Dead Roads begins with death. Lots of it. The entire town of Roslar’s Coffer has been destroyed in one terrifying instant. Including the PCs. I’ll leave the details out of this article, but suffice to say this will have a lasting effect on your players and their characters. Any family, friends, and companions — pets included — that lived in Roslar’s Coffer are dead. Although it might be tempting to warn some players about this in advance, that also will ruin some of the surprise and likely result in players purposely making no personal connections to the town of Roslar’s Coffer — which would be a mistake in my opinion. Every GM will need to judge their players accordingly, and perhaps provide them with some hints and warnings while they build their characters and backstories. In my opinion this event is handled incredibly well throughout this adventure, and I highly recommend allowing players to make a character with personal connections to Roslar’s Coffer. It adds so much to the story. However, it is important to inform PCs that if they have animal companions, mounts, or they are a wizard with a familiar, they will not have access to their pet at the start of the campaign. Player’s who have read the Tyrant’s Grasp Player’s Guide will already be aware of this, although they won’t (accurately) know why.
Happily, the player’s experience doesn’t begin with the death of Roslar’s Coffer. Instead, Part One: Awake in Roslar’s Tomb begins with the PCs waking up in a stone coffin. Literally entombed they need to push their way out of the stone box and into a cold, dark, mausoleum. It’s a great opening. Players and characters alike are bound to be curious what has happened and where they are. Players begin with any gear they had that could reasonably fit in a coffin with them. Any familiars who share a soul with your PCs (a shaman or witch familiar) will be in a coffin of their own, while all other companions are not present (as they are dead). Eidolons and phantoms can be summoned back normally, although all other familiars and companions will need to be replaced at a later time.
Soon, the PCs will discover they’re in someone else’s tomb — Ervin Roslar, Knight of Ozem and hero of the Shining Crusade. The same man that Roslar’s Coffer is named after, in fact. Interesting! As they navigate the tomb they’ll find strange creatures, animated bones (sort of…), a trapped spirit, and a tribe of mites. They’ll also discover that Ervin Roslar may have had a few secrets of his own, although it’s unlikely they’ll unravel his history completely. This section of the adventure is a suspenseful series of explorations, mysteries, tantalizing clues, and challenging combats. It’s going to be a ton of fun to both run and play.
Part Two: Among the Dead begins when the PCs exit Roslar’s Tomb to find themselves face to face with a pair of spooky looking (and absolutely delightful) psychopomps: Umble and Thoot! Seriously, they’re awesome. This quirky pair give the PCs some answers to their most pressing questions and explains that not only are the PCs dead and not dead at the same time — weird! — the rest of Roslar’s Coffer is well and truly dead. They ask the PCs to lend them a hand in convincing the spirits of the dead of Roslar’s Coffer that they are, in fact, dead. These poor fellows need a hand moving everyone on to the afterlife in a calm and orderly fashion! The PCs get to travel to a phantom version of Roslar’s Coffer where they interact with all the people in town — now dead. This is an amazing section of the adventure. Short and poignant, the GM has a chance to show the PCs what has happened to all their family and friends. They’ll need to convince loved ones to move on, and will have a chance to say goodbye. If they have any pets they’ll find them here as well. The adventure itself provides rules for interacting with these spirits, how to convince them to move on, and some tactics that will let them do it in a timely fashion — namely convincing the town leaders of their death. Some PCs will want to stay behind and die along with their family, others won’t have personal connections to the townsfolk, and others still will want to ‘save’ some of these spirits and attempt to return them back to life. There’s plenty of guidance in this book for handling PCs of every kind. After accepting their death the people of Roslar’s Coffer — even familial loved ones — want answers for what happened to them. The PCs are uniquely positioned to uncover this. And, of course, any spirits who can’t be convinced to move on (including those your PCs may want to bring back) will deteriorate in time until they become undead ghosts and other malevolent entities. Umble and Thoot can explain this to the group and ensure no PCs attempt anything so foolhardy. Also in this section the PCs are first introduced to the antagonist of this adventure, Mictena. Overall, this section of the book is among my very favourites. It’s exceptionally well handled and sure to be an emotional experience for players and characters alike. It’s a truly unique roleplaying opportunity. I’m not an overly emotional person, but I’m quite certain that if I was playing this with any character who had even a modest amount of family or friends in Roslar’s Coffer, under an even remotely talented GM, I would cry — in a good way! It has the potential to really tug at the heartstrings.
Part Three: Walking the Dead Roads begins after the PCs have helped the people of Roslar’s Coffer accept their death. Umble and Thoot, who are grateful and believe that since the PCs are only slightly dead they’re not truly dead at all, offer the PCs a way out of the Boneyard. The Dead Roads. They explain that this secret path is only ever trod by psychopomps and gatekeepers, the beings who watch over what amounts to traveller’s checkpoints along the road. Capable of leading anywhere, the PCs can use the Dead Roads to get home to Roslar’s Coffer (so they can figure out what’s happened) by taking a certain path. They’ll need to stop at the three checkpoints along the way and get stamped by that location’s master. Convincing them to grant the stamp should be the hardest part of the journey. Unbeknownst to Umble and Thoot, politics and turmoil have overtaken the three waystations, making each location more dangerous than expected. These locations may be visited in any order, although they are presented in order of difficulty (which is also how I recommend playing them).
The Palace of Teeth is a small castle ruled over Queen Carnassial and her court of tooth fairies. Not long ago her son, Prince Uspid, led a coup against her, and the two factions have been locked in a stalemate ever since. Although Queen Carnassial is the only one with the authority to stamp the PCs (at least until her death) it’s Prince Uspid the PCs are destined to meet first. They’ll need to navigate, bargain, and battle their way through bickering fey factions. They might even get to keep all their teeth…. This location is simultaneously goofy in a crazed sort of way and disconcerting. Although the Palace of Teeth was once a beautiful castle it’s undergone a rather morbid makeover since the fey moved in. The place is creepy and it’s denizens literally want to yank your teeth out. That can make bargaining… weird. Haha. I love the art for both the tooth fairy monarchs (particularly Prince Uspid!) and the stained glass angel. But, in my opinion, the creepiest encounter involves a pair of soulbound dolls in the midst of acting out a rather bloody play about dentistry. They attempt to make the PCs their next patients, using deep slumber and some particularly creepy statements. It’s awesome! Haha. The Palace of Teeth is my favourite location on in part three.
Nine-Eaves is a three storey manor owned by an old shoki psychopomp with a fondness for games and puzzles. Unfortunately, Kishokish’s manor has been invaded by sahkil and he’s now a prisoner in his own home. They PCs will need to free him if they want to get his stamp. Luckily they’re not without allies. An animated portrait created to pose riddles to visitors can lend the PCs a hand — if they can solve his puzzles! There are three puzzles total, and each one solved can earn the PCs information and advice. They’ll need to traverse the house as they seek answers, battling vermin, sahkil, and an unfettered phantom named Ayuki. I really enjoyed the puzzle aspects of this location.
Salighara’s Scriptorium was created by Salighara, a reclusive viduus psychopomp who is studying the Dimension of Dreams and oversees a crew of wyrwood scribes. Mictena attempted to convince Salighara to kill the PCs on her behalf, but was rebuffed. Mictena then offered the same deal to Salighara’s assistant, a plump woman named Mrs. Pedipalp (actually an aranea from a nightmarish section of the Dimension of Dreams). Happy to take the powerful psychopomp up on her offer, Mrs. Pedipalp has ousted Salighara from her own scriptorium and remade the building in her own image. Now a dark place of nightmares and horror, the PCs will need to set things right. This is definitely the most horror-themed location in The Dead Roads, with traps, haunts, and horrifying enemies. Colulus, a flayed ettercap and long-time minion of Mrs. Pedipalp is by far the most horrifying. But, even the Scriptorium is not without potential allies. PCs get to meet Salighara, some upset wyrwoods, and a ratling named Berthold. Mrs. Pedipalp herself is a great opponent — a capable liar, powerful spellcaster, and nightmarish foe all wrapped up in a kindly looking package. I particularly like her tactics. That said, it’s likely Colulus who will give parties the most trouble.
After receiving their stamps the PCs can finally traverse the rest of the Dead Roads and return to the land of the living — not! Mictena refuses to let them go! She magically relocated her domain, Deathbower, right onto the Dead Roads so that she and her dangerous shabti gardeners can kill your PCs properly. Which brings us to the final section of the Dead Roads adventure, Part Four: Deathbower. I love this location and its map. I love the inhabitants — gardeners, friends, and foes. And I love Mictena herself. Despite being an enemy of your PCs she’s not a bad being. She’s a psychopomp just doing what she thinks is right. Which is cool! Although some of the hazards and enemies in this glorious garden must be confronted head on, some characters can be swayed and may even join you for a while. Reedreaper is a particularly interesting character, although it’s unlikely he sticks around long enough to play much of a role. Even Mictena can be talked down — theoretically. The chances your PCs will be able to roll high enough are incredibly slim, but it could happen. Which I really like.
After leaving Deathbower behind the PCs find themselves back on the Dead Roads and greeted by an incredibly powerful psychopomp, Barzahk the Passage, a demigod and master of the Dead Roads. This enigmatic figure whisks the PCs off to their home in a matter of moments, giving them a bit of time to ask him any questions they might have. I thought this was a great moment and a wonderful way to end the adventure.
SPOILERS OVER
In addition to The Dead Roads adventure, this volume contains two articles intended for both GMs and players, one article solely for the GM, a campaign outline, and a bestiary containing five new creatures.
The first article, Tools of the Boneyard, is written by Matt Morris. In it you’ll find new gear and character options aimed at dealing with the dead. There is one alchemical remedy, one alchemical tool, and two alchemical weapons — bone burn is my favourite, so be sure to check it out! There are two new special materials useful for crafting — cryptstone can be used for ammunition and weapons, while spiresteel can be used for ammunition, weapons, and armour. Finally, there are five new magic items: crypt rod, grim helm, harbinger’s scythe, Lady’s Mercy, and Momument’s Truth. Although I enjoyed a lot of the items, it’s the character options that I found were most exciting. Graveslinger is a gunslinger archetype that specializes in combatting incorporeal undead. Soul Shepherd is a monk archetype that calm incorporeal undead and haunts with a touch. They also gain some otherworldly resistances and interesting ways to use their ki. Reaper is a new oracle mystery which I really enjoyed. Tightly themed and flavourful it’s capable of both killing the living and destroying undead. There are also six new barbarian rage powers including the psychopomp totem powers.
Thrilled to see shabti get some attention!
The second player friendly article is written by Mikhail Rekun and entitled The Half-Dead. This section talks about four races that have a strong connection to death and the undead. In addition to providing details and character options for dhampir, duskwalkers, and shabti, it also talks about the new subtype of creatures, mortics. Dhampir appear alongside two magical items, duswalkers have access to five new feats, and shabti have access to five new feats. I was particularly excited to see shabti included.
The next article, To Exceed Their Grasp, is written by Crystal Frasier and intended for GMs only. This article discusses some of the important concepts, characters, and events of the Tyrant’s Grasp Adventure Path and the role they play in the overarching story. It also contains a timeline. This is incredibly useful for GMs an will likely be referenced throughout the entire Adventure Path.
The Death of Arazni (Herald of Aroden) during the Shining Crusade. Art courtesy of Paizo Inc.
The Bestiary is up next! It contains a random encounter chart, two interesting social encounters, and five new creatures written by Ron Lundeen, Kyle T. Raes, and Mike Welham. All of the monsters in this book have ties to death and the Boneyard and two of them are featured in The Dead Roads adventure. Bonewrought Willow is an ominous looking intelligent plant capable of growing in Boneyard. Attracted to light and more benevolent than it appears this is a great CR 3 creature I can’t wait to confront my players with. Kaicherak are nasty little fanged worm beasts with ties to Achaekek and a fondness for messily gorging themselves on blood. At CR 4 they are among the most powerful new creatures in the bestiary. Mortics are living beings with strong connections to negative energy which makes them sort of like living undead. There are two mortic stat blocks included in the bestiary — the ghoulish elf-like angheuvore (CR 2) and the incredibly flexible halfling-like jitterbone (CR 4). As previously mentioned, more information on mortics is also included in The Half-Dead article. The final creature is the tooth fairy monarch, a CR 3 version of the lowly tooth fairy.
The last article is a campaign outline, written by Crystal Frasier and Ron Lundeen, that briefly details the events of the upcoming volumes of the Tyrant’s Grasp Adventure Path. Not the sort of thing you want your players peeking at! The campaign outline is incredibly useful for GMs.
Today we’re going to take a look at the most recent Pathfinder Society Scenarios that are available for purchase, and let you know we thought. Although you’ll find references to events in each that I liked or disliked, and comments about specific characters, these scenarios are not explored in detail. It’s not my intention to spoil the events in these scenarios, or give summaries and full reviews, but to share my opinions and provide recommendations. That said, if you want to avoid even minor spoilers then I recommend clicking on a different article. Whether you intend to use them in home games of the Pathfinder Roleplaying Game, sanctioned scenarios for use with the Pathfinder Society Organized Play, or just want to read a nifty new adventure, we’ve got you covered! So let’s get started!
Pathfinder Society Scenario #10-16: What the Helm’s Hide is a Tier 1-5 repayable scenario that consists of four short one-hour long quests. “Collection,” “Autumn,” “Dust,” and “Witness.” “Collection” should always be played first, “Autumn” and “Dust” may be played in any order, and “Witness” is the thrilling finale. Each quest is penned by a different author, including Calder CaDavid, Lysle Kapp, Kendra Leigh Speedling, and Nate Wright. While Speedling and Wright have written for Paizo before, this will be the first Paizo writing credit going to CaDavid and Kapp. Each quest also comes with its own player handout, which is always nice. Also, this scenario has a lot of great artwork in it!
The first quest, “Collection,” is written by Lysle Kapp and takes place in Korvosa’s Jeggare Museum. Here PCs will need to inspect relics discovered by the famous Pathfinder Helven Leroung and uncover clues about her history and character. You also get to delve into Helven’s relationship with the famous Montlarion Jeggare, for whom the museum (and much more!) is named. His descendant, Mercival Jeggare is curator of the museum and willing to lend you a hand. There’s a lot of information you can learn here, although groups are unlikely to get all of it, which I rather enjoyed. For more information on Korvosa you can check out Pathfinder Chronicles: Guide to Korvosa.
“Autumn” is written by Calder Cadavid and takes places in Andoran’s Arthfell Forest. PCs investigate a sliver of the history of the Pathfinder Zaul Blystone. It has amazing art for an NPC, Adelyn Rhinon, which is my favourite art in the scenario. This is a fun quest although I do have one minor complaint. I feel like one of the characters gives up a bit too easily. For more information on Andoran check out Andoran, Birthplace of Freedom.
A member of the Decemvirate. Illustration by Ernanda Souza. Art courtesy of Paizo Inc.
“Dust” by Nate Wright takes place in underground Dwarven ruins on the edge of Highhelm. There players get to dig a little deeper into the history of Veldrid Goldborough. I enjoyed the NPCs in this one and adore the art for Helga Silverbrew. She’s got such a great facial expression. I like enemies in this one a lot, and the… source of information. For further details on the Five Kings Mountains check out the The Inner Sea.
The finale, “Witness,” is written by Kendra Leigh Speedling and was an absolute delight! It takes place in the Grand Lodge of Absalom and involves the PCs enacting a sort of ritual to activate a secret cache hidden by the gnome Pathfinder Eylysia. As Master of Scrolls Kreighton Shaine and two members of the Decemvirate watch on your players get to experience an important event from Eylysia’s past. I won’t say any more to prevent too many spoilers, but I will say it was awesome. I loved the final battle and the revelations it uncovered. And Eylysia’s final line! So good. For more information on the Grand Lodge check out Pathfinder Chronicles: Seekers of Secrets and Pathfinder Society Field Guide.
What the Helms Hide is a really great series of Quests. So great, in fact, that it’s my favourite series of PFS Quests. All of it’s component Quests were enjoyable, but its the finale that really ties it all together and makes it exceptional. Really well done from the whole team of writers. Each Quest has a chance for battle, a social encounter, and to uncover clues regarding their respective mini mysteries. Overall I really enjoyed this scenario. I give it four out of five stars.
Captain Sevenfingers. Illustration by Josef Kucera. Art courtesy of Paizo Inc.
Like the three scenarios before it, On Sevenfingers’s Sails features Venture-Captain Calisro Benarry, a half-orc Pathfinder who has sent plenty of Pathfinders into the depths of the Gloomspires. It also features Benarry’s quartermaster Kakikko, and Hrethnar from Pathfinder Society Scenario #8-15: Hrethnar’s Throne. New NPCs introduced include the very disturbing Thael Shivers, Vashthrexa, Nightdrinker, and Sempet Sevenfingers himself. PCs will need to enter the terrifying tomb, contend with Captain Sevenfingers, and plunder everything they can. Of course, there’s some complications in this mission, and PCs will have to contend with far more than expected. This scenario features an optional Hard Mode for all those players out there who relish a challenge.
The scenario is wonderfully creepy, morbid, and ominous, although that sort of content is not for everyone. Players who have issues with body horror will want to give this scenario a pass. It’s definitely not an scenario for kids. Any characters who played the previous Gloomspires adventures are going to get a bit more satisfaction out of this scenario than their compatriots who haven’t, and will find they get a few extra bonuses along the way. This scenario is packed full of atmospheric environments, memorable characters, and foul villains. The battles are challenging and take place in dynamic locations. I particularly enjoyed the final encounter. Really well done! Overall I think this is a really great scenario that won’t be for everyone. It’s creepy, gory, and a great high level challenge. I give it five out of five stars!
Today we’re going to take a look at the two most recent Starfinder Society Scenarios that are available for purchase, and let you know we thought. Although you’ll find references to events in each that I liked or disliked, and comments about specific characters, these scenarios are not explored in detail. It’s not my intention to spoil the events in these scenarios, or give summaries and full reviews, but to share my opinions and provide recommendations. That said, if you want to avoid even minor spoilers I recommend you check out a different article. Whether you intend to use them in home games of the Starfinder Roleplaying Game, sanctioned scenarios for use with the Starfinder Society Organized Play, or just want to read a nifty new adventure, we’ve got you covered! So sit back, and get ready to explore the Pact Worlds!
Starfinder Society Scenario #1-34: Heart of the Foe is a Tier 3-6 adventure written by Nicholas Wasko. It takes place on Rax, an inhospitable planet the jinsul are known to visit on occasion. There you will explore a ruined city that shows signs of life for any information you can scrounge up on the jinsul and their society. This scenario features the Faction (Second Seekers [Jadnura]) and Faction (Second Seekers [Luwazi Elsebo]) tags making it the first mission to prominently feature both First Seekers. This scenario continues the ongoing Scoured Stars storyline (#1-05: The First Mandate, #1-11: In Pursuit of the Scoured Past, #1-13: On the Trail of History, #1-17: Reclaiming the Time-Lost Tear, #1-99: The Scoured Stars Invasion, #1-23: Return to Sender, #1-29: Honorbound Emissaries, and #1-31: Treading History’s Folly). As such you’ll want to bring along characters who have an interest in the Scoured Stars Trinary System or storyline, who have interacted with the jinsul, or are working on collecting the ‘Journey to Scoured Stars’ boons. I also recommend bringing a character who does not have a Personal Boon permanently slotted. This scenario does NOT involve starship combat, but it MIGHT feature a vehicle chase (more on that shortly). It makes use of Pathfinder: Map Pack: Frozen Sites, Pathfinder: Flip Mat: Tech Dungeon, and an awesome full page custom map that has a very ‘Borderlands‘ feel to it. This scenario features content from Starfinder Core Rulebook, Alien Archive, and Armory. All of the necessary stat blocks are included in the scenario itself. However, GMs will definitely need the Core Rulebook for this one. Although this scenario doesn’t include a vehicle chase (but it could) it does use modified vehicle chase rules, which most players do not have internalized (in my experience). GMs will likely need to brush up on the vehicle chase rules and be prepared to teach it to their players as needed. Be aware that this is a rather dense scenario, so groups that are unfamiliar with chases could cause it to run long.
Heart of the Foe begins when both First Seeker Luwazi Elsebo and First Seeker Jadnura task the PCs with travelling to a planet the jinsul are known to occassionally visit in order to discover actionable intel and information about the jinsul themselves. For those of you who don’t know, the jinsul are a violent race of aliens that conquered the Scoured Stars Trinary system while the Starfinder Society rescued their comrades during the #1-99: The Scoured Stars Invasion. The jinsul have been a thorn in the side of the Starfinder Society ever since and the First Seekers are worried at the threat they pose to the Pact Worlds. Your PCs will need to travel to the mysterious planet — alongside both First Seekers and three other Starfinder teams — investigate a few sites that show signs of life, and uncover what they can about the jinsul and their society. Neither the Starfinder Society nor the players know a whole lot about these insectile fellows, so I was thrilled to dig a little deeper into the history of the jinsul themselves. Exciting stuff! Throughout the course of this scenario PCs will get to learn about jinsul anatomy, culture, history, religious beliefs, and — oh yeah — fight a whole lot of jinsul! It’s an action packed, exciting scenario that’s going to be a lot of fun. The battles all serve a purpose, the chase scene is both exciting and complex, and the world itself is very atmospheric. The finale is exciting and challenging, with a lot of moving parts. It’s chaotic and really well done. Dare I say… epic? Yeah, I do. Haha. There’s only one real social encounter, but the character you get to interact with is really… enjoyable so it strikes a nice balance. I love their demeanour and attitude towards the PCs. So good!
Ekkerah, illustrated by Bryan Syme. Art courtesy of Paizo Inc.
But, it’s not all sunshine and roses radiation and bullets. I do have a few minor complaints with this one. First off, it’s tough to run. Now, this isn’t really a complaint. It’s an observation and potential warning. This is not the kind of scenario an inexperienced GM should attempt. There’s vehicle chase rules, modifications to the vehicle chase rules, environmental conditions, a whole lot of dice rolling during travel scenes, plenty of hopping around between pages for potential clues and intel, and complex battles with lots of enemies and allies to track. Not easy. Second, it has a bit of a slow start. Not the immediate start, but the… well let’s call it the travel scene. There’s a lot of dice rolling done every hour, which runs the risk of becoming a boring sort of routine if not handled right (particularly when you take into account the flipping between pages that might have to occur). That said, I do like the information your group could uncover about the jinsul along the way. Third, environmental protections. Chances are your characters have them. They protect us from a lot, but there’s also things it won’t protect you from. Fair. But in this one it feels like you get penalized for using them. You either use them and suffer X or don’t use them and suffer Y. Which is unfortunate. The scenario refers to snow clinging to your environmental protections’ helmet — when many armour’s environmental protections use a force field instead of helmets — and even if you are wearing armour that has a helmet, couldn’t you just wipe it off? And if you are wearing armour that has an environmental forcefield for it’s environmental protections, can it seriously not handle a bit of clingy snow? Sounds like that armour has a pretty big design flaw to me. I hope my Starfinder kept their receipt. Haha. It felt sort of arbitrary to me. I’m totally cool with some environmental hazards going through your protections, but this snow thing just wasn’t one of them. Contrariwise, if they wanted the snow to hamper visibility, I’m totally fine with that. I am no stranger to snow and yeah, it’s hard to see sometimes. And finally…. I love that baby jinsul on the cover! Except it’s not a baby jinsul at all. It’s a jinsul’s pet. I 100% thought it was a baby jinsul and was thrilled by it’s oddly adorable appearance. Jokes on me, I guess. Haha. Seriously though, I really like the creature, it’s stats, and it’s tactics. Overall, I thought this was a really great, exciting scenario that’s going to be a challenge to run — but well worth it! I give it 5 out of 5 stars.
Rasheen’s Riches sounds at first like a classic treasure hunt — in space! Which is only partly true. Radaszam recently discovered a treasure map said to lead to one of the last places the infamous space explorer Jelev Rasheen explored before disappearing. Presumed to house a treasure trove of unimaginable proportions, Radaszam’s taking a more measured approach. Although he doesn’t believe it’s actually the final resting place of Rasheen or her fabulous riches, he does hope that there you’ll find a claim beacon that she placed on planets she discovered but never fully explored. This beacon should be able to lead you to the next place Rasheen went. But, that’s another mission… Rasheen’s Riches is more accurately described as a treasure hunt where you’re aiming to find another piece of the treasure map. As long as this is clear to your players by the end of the mission briefing (which it should be) you won’t have a problem with any players feeling let down. However, if players think they’re off to find unimaginable riches they might be a little disappointed. I know my kids would say “That’s it? But where’s the treasure?!” Be sure to adjust those expectations a little. Haha. I enjoyed this scenario. It’s got some environmental challenges to overcome, an interesting investigation, illuminating player handouts, and a battle against some tragic enemies. It’s got the air of a mystery about it, which I liked. I absolutely adored the descriptions of this moon. The entire atmosphere of it — and the creatures that you encounter there — worked really well together. Definitely a highlight of the scenario for me. The starship combat was straightforward but enjoyable. I like the social encounter it begins with and the artwork of the ship! It looks like some kind of skeletal Batplane! Seriously cool. Overall I thought this was a really solid scenario that will — hopefully — lead to further adventures on the hunt for Rasheen’s riches! I give it four out of five stars.
Glaciomonitor, illustrated by William Martin. Art courtesy of Paizo Inc.
Thanks for joining us today! Be sure to tune it again soon to check out our reviews on the newest Pathfinder Society Scenarios!
Today we’re taking a peek between the covers of Pathfinder Player Companion: Wilderness Origins! If you’ve been reading d20diaries since its beginning you’ll know that my family and I adore Ultimate Wilderness. My kids love the races introduced — particularly the adorable vine leshys — and my entire family enjoys the shifter class. In fact, each of us have at least two shifters. Needless to say we were excited to get our hands on Wilderness Origins. My husband was hoping for more shifter options, my kids were hoping for more vine leshy options, and I was… Well, I was just hoping someone in my family would find something inside the book that they’d make use of right away.
We were not disappointed.
Pathfinder Player Companion: Wilderness Origins is a soft cover book that is 32 pages in length. As a book in the Player Companion line, it’s aimed at players, which means that you won’t find a ton of world lore or secrets inside. You’ll find archetypes, feats, traits, spells, and more! Wilderness Origins features amazing cover art by David Alvarez, which showcases the iconic shifter, Zova, engaged in battle against an earth elemental.
The inside front over of Wilderness Origins.
The front inside cover features brief information on a few plants described in the book alongside some sketches. The entire page is presented as if they were entries in a scholar’s journal, which is a nice touch. Although no important information is contained here that can’t be found later in the book, it’s nicely showcased. Plants depicted include ambrosial lotus, cleanthistle, ghostblossom, and a ghoran seed. There’s also art of a gathlain’s wing and a leaf leshy.
After this is the table of contents, the rules index, and the introduction which contains eight new regional traits themed around different terrains. Each trait is printed alongside an example background for each terrain, that emphasize how you can embrace nature and your environment. Guerilla tactics and surefooted ascent are sure to be popular, but fruit merchant and strong stomach turned out to be my favourites. Environments covered by these traits include the desert, road, forest, jungle, mountain, swamp, tundra, and coast.
Moving on from the introduction we come to six pages of new shifter options. It features a whopping nine new shifter aspects, all of which are pretty cool. The new shifter aspects are boar, crocodile, dolphin, dragonfly, electric eel, mantis, octopus, scorpion, and spider. Electric eel is my favourite, but my son LOVES the boar aspect. He immediately made a gnomish boar shifter for Pathfinder Society Organized Play and was super excited to give it a shot. Unfortunately, we suffered a TPK that weekend and poor Sid’s career was cut short. Still, my son loved the character and made a ton of use out of the boar’s minor aspect, which gives you diehard as a bonus feat.
A half-orc feyform shifter from Wilderness Origins.
After the shifter aspects are three new archetypes, dragonblood shifter, feyform shifter, and swarm shifter. They’re all pretty self-explanatory, with the dragonblood shifter allowing you to take on the aspects and forms of a variety of dragons, feyform shifter granting you some tricky defences and the ability to transform into fey beings, and swarm shifter allowing you to turn into a swarm of bugs. They’re all really cool, but dragonblood shifter turned out to be my favourite. My husband’s a big fan of the swarm shifter, though, and he’s not going to be the only one. It’s a really useful archetype which is sure to see a lot of play.
Also in the shifter chapter are thirteen new favoured class options, seven new feats (be sure to check out chimeric aspect, greater weapon shift, and raking claws), and my favourite new option for shifters: alternate natural attacks. Each shifter aspect currently released (new and old) has a list of alternate attack forms they can select in place of claw attacks. Bears have a bite attack, for example, while boars have a gore and a hoof. Any time you activate your shifter claws you can choose to take an alternate natural attack from your animal aspect options in place of one of your claw attacks. This changes the damage type and the way your natural attacks look, but otherwise functions as the shifter’s regular claw attacks. It’s a really nice option I’m happy to see available.
Up next are two pages on each of the races introduced in Ultimate Wilderness — gathlain, ghoran, and vine leshy. The new gathlain options include five alternate race traits (arborealvitality, feyresilience, and whimsicaloutlook are my favourites), seven new feats (mighty boughs and strength of wood are my favourites), and one new archetype. Sworn of the Eldest is a Charisma-based inquisitor archetype that I really enjoyed. Particularly the magic of the Eldest ability, which swaps out teamwork feats for some extra spells and spells per day.
Ghoran options include four alternate race traits (check out intoxicating aroma and magicalabsorption), three feats (I love spell mirror), two new spells (pinecone bomb and woodland rune), and the new ninja archetype petal ninja, which lets you transform into a cloud of flower petals.
Vine leshy verdivant. Illustration by Nathanael James. Art courtesy of Paizo Inc.
Vine Leshy options include four alternate race traits (lashvine and writhing eye are awesome!), four new feats (we like bounteous body best), and the cavalier archetype verdivant. This turned out to be both my kids’ favourite archetype — which came as no surprise since they both love vine leshys. The verdivant archetype lets you to have a plant mount, and enables you create effloresces, which are explosive plant growths that can be used a number of times per day and have some cool effects. While one might form a wall of vines to prevent attacks of opportunity, others can make you walk on air, or even give you and your allies fast healing. Effloresce replaces the cavalier’s banner and tactician abilities.
Up next in Wilderness Origins are two pages themed around flowers. It starts by introducing four new magical plants, ambrosial lotus, cleanthistle, ghostblossom, and gravebane petals. All four are surprisingly useful, but I think I like the cleanthistle best. It’s a great plant to add into my family game of Iron Gods. There’s also five awesome new witch hexes. I honestly had a hard time picking my favourite. My daughter loves leshy summoning, my son loves verdant familiar, and heralding bloom is going to be really useful for some characters. In the end its the floating lotus and iceplant hexes I’m most likely to use. Floating lotus conjures a flower that you can stand on to walk over water or gain a bonus on jump checks while Iceplant makes the witch and her familiar’s flesh harden, granting them a natural armour bonus and and the effects of endure elements. Finally, there’s a new alchemist archetype in this section: perfumer. This alchemist creates atomized perfumes in place of potions, an can distill pheromones that augment your Charisma, diplomacy, and bluff checks in place of mutagens. Very cool!
The next two pages are entitled Wardens of the Wild and involve kami. There’s a new kami eidolon subtype for unchained summoners, ward aspects for hunters to make use of, and the new spiritualist archetype ward spiritualist. This archetype allows a spiritualist to purposesly seek out a kami to bond with, and grants them a ward implement which can either be an object or their own body. With their ward implement they can gain occultist focus powers. They can also merge their kami with their implement to empower their implement in battle. I’m a huge fan of both spiritualists and occultists, so I’m totally biased to love this archetype. Haha.
Scorpion familiar. Illustration by Beatrice Pelagatti. Art courtesy of Paizo Inc.
The next four pages are packed full of options for our animalistic pals — animal companions, familiars, and mounts. It starts with two animal companion archetypes: apex species (which gives your companion benefits in certain terrains) and unexpected intellectual (which makes a vermin companion more intelligent). Then there’s three familiar archetypes: occult messenger, the super creepy parasite, and arcane amplifier (my personal favourite) which grants your familiar the ability to use some metamagic feats on touch spells they deliver. Following these are seven feats which can be taken by animal companions, familiars, and their owners. Three are relevant to familiars, three to animal companions, and one is relevant to both. I really like the animal companion feats curious companion and friendly face, but it was two familiar feats that turned out to be my favourite. Changeling familiar gives any familiar capable of changing shape the ability to transform into a child or teenager of their master’s race, while spark of the uncanny gives your familiar the ability to speak. Awesome! (My kids are absurdly excited for this one!) A few levels later you can swap it out for improved familiar. Next up are descriptions of five breeds of mounts along with a trait for each of them (these traits count towards their master’s total number of traits). Finally, there’s an expanded companion list for cavaliers paladins, and rangers.
The following two pages talk about the totem spirits of the Shoanti, with nine new totem rage powers geared at members of the Lyrune-Quah (moon clan), Shundar-Quah (spire clan), and any ancestor-revering character. There’s also a new shaman spirit, tribe.
Wilderness Magic is up next, with five new arcanist exploits, three disaster themed spells, and the psychic archetype Magaambyan telepath, which blends druidic magic and wilderness themed powers with the psychic. Wild stride and wooden flesh are my favourite arcanist exploits, while flash flood — a sixth level spell on the druid, shaman, and sorcerer/wizard spell list — is my favourite spell.
The iconic kineticist Yoon riding a fire steed.
Similar to magic, the following two pages are all about elemental power — specifically fire. First up is the flame steed spell, which conjures a mount made of fire. Continuing this theme is a new archetype, the cinderlands adept, a fire-based kineticist that gains a loyal mount and is based on the Burn Riders of the Sklar-Quah (sun clan). Finally, there are eight new kineticist talents — one form infusion (elemental trap) and seven utility talents. My favourites included fire corridor and the fire steed tree. I’m a huge fan of both the Shoanti and kineticists, so I was pleasantly surprised to discover these new options.
By now there’s only a few pages left. Two pages of character options themed around the sea and sky. It starts with two more archetypes — a very interesting paladin archetype called champion of the cascade and esoteric starseeker, a psychic archetype based around Golarion’s constellations. Following this are two very cool (and disconcerting) oracle curses that have to do with decay: putrid and scourge. Finally, there’s three new ki powers: floating breath, racing current, and zephyr blow.
And that’s it! The end of Pathfinder Player Companion: Wilderness Origins! My whole family loves this player companion. It contains a lot of fun options for all our favourite parts of Ultimate Wilderness — shifters, gathlain, ghoran, and vine leshys — and pays some loving attention to the many different pets you can acquire. It’s rare that we get to make in-game use of a d20 book right after reading it, but this one immediately inspired us to create something new. It was well worth the investment for my family.
Thanks for joining us today! I hope you enjoyed taking a peek behind the covers of Wilderness Origins.

 Starfinder Society Scenario #1-36: Enter the Ashen Asteroid is a Tier 1-4 adventure written by Larry Wilhelm. It takes place on Sledgehammer, a mining facility and exploration vessel owned by Ulrikka Clanholdings, a dwarven mining consortium that may be familiar to PCs who’ve played Starfinder Society Scenario #1-12: Ashes of Discovery. From there the PCs enter Asteroid AA-126D, an asteroid in the Diaspora that contains duergar ruins dating back to the time of the Gap — and marked with the unholy symbol of Droskar. There you will explore the the site and collect any objects of archaeological importance. This does not feature any tags and does not contribute to the ongoing Scoured Stars storyline. PCs who are dwarves, speak dwarven, or have the Contractor’s Respect (Ulrikka Clanholdings) boon from Starfinder Society Scenario #1-12: Ashes of Discovery will find they have an edge in this scenario. Enter the Ashen Asteroid does not feature starship combat. It includes two custom half-page maps (which are beautifully detailed!) and Pathfinder Flip-Mat: Elemental Planes. It makes use of the Starfinder Core Rulebook, Starfinder Armory, and Alien Archive 2. Although this scenario doesn’t feature any recurring characters it does introduce a new NPC of importance, dwarven Venture-Captain Thromkendal. In addition, five other NPCs you’ll have a chance to influence are introduced, most of which (but not all!) are dwarves.
 Starfinder Society #1-37: Siege of Civility is a Tier 5-8 adventure written by Kalervo Oikarinen. It takes place on a fortress moon named the Eye of Gideron, that orbits a gas giant named Maelstrom’s Maw. These areas are located within the territory of the Gideron Authority, a mostly-hobgoblin militant space empire at war with the Marixah Republic, both of which are introduced in Starfinder Society #1-24: Siege of Enlightenment. Although the two scenarios are linked, playing them is order isn’t necessary. In fact, characters who haven’t played Siege of Enlightenment are likely to have a different outlook on the Gideron Authority than those who have, which can make for some fun roleplaying between the party members. I think it’s best to have a mix of PCs who have and haven’t played Siege of Enlightenment. Whatever the party composition, your PCs mission is to convince representatives of the Gideron Authority to lend the Starfinder Society their aid — the Wayfinders flagship Master of Stars needs a drift engine only the Gideron Authority can provide, and the Starfinder Society would like exploration rights to some of their archaeological sites. This scenario features the Faction (Wayfinders) tag and does not contain starship combat. It makes use of one half-page custom map and no flip-mats. It includes content from Starfinder Core Rulebook, Alien Archive, and Alien Archive 2. There are two recurring characters in this scenario: Fitch, leader of the Wayfinders Faction, and Ceobarn Zeizerer, a drow who first appeared in Starfinder Society Scenario #1-06: A Night in Nightarch. There are five other new NPCs from the Gideron Authority who are likely to be of further importance in the future. PCs who have the Victory Over Authority boon will need to slot it for this mission.


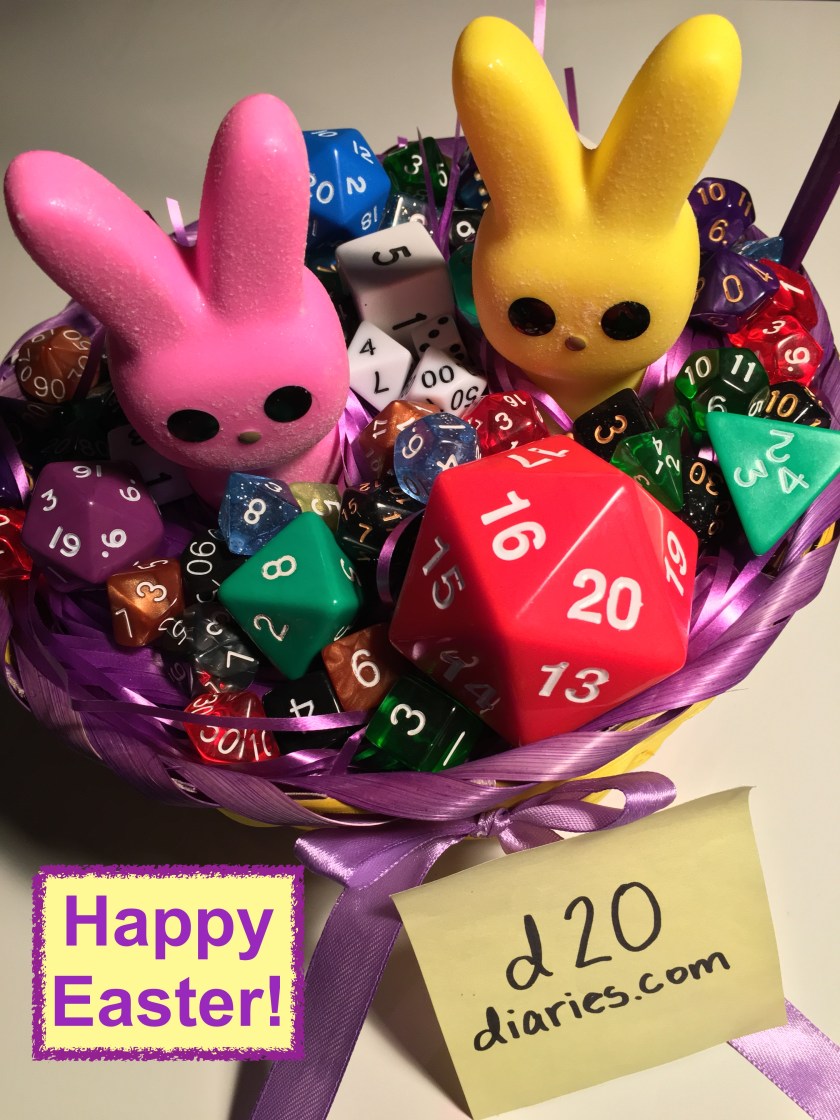


 By the end of this chapter the PCs will have freed Cedona, made their escape from the Prison Moon, and retreated to Outpost Zed. But their mission’s not yet complete. The PCs and Cedona know they need to get back the experimental drive from the Azlanti before its too late.


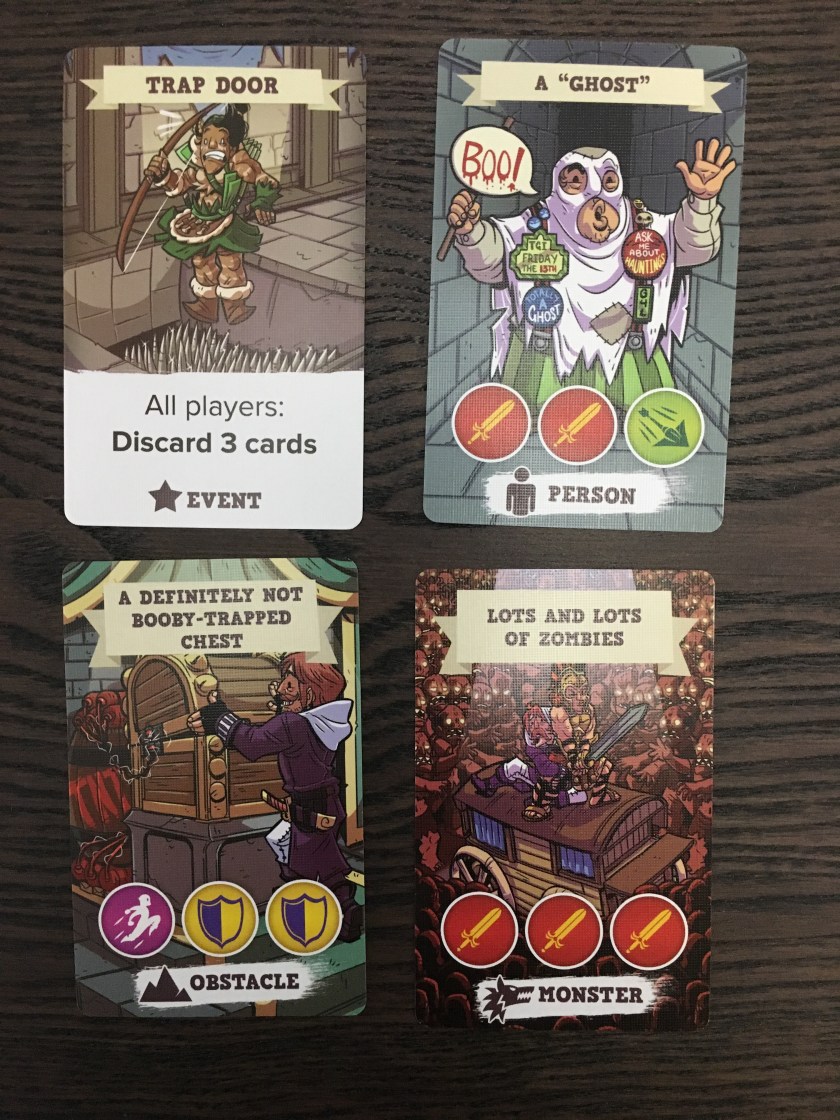


 A wonderful Player’s Guide for Tyrant’s Grasp is available as a free download on Paizo’s website


 The first article, Tools of the Boneyard, is written by Matt Morris. In it you’ll find new gear and character options aimed at dealing with the dead. There is one alchemical remedy, one alchemical tool, and two alchemical weapons — bone burn is my favourite, so be sure to check it out! There are two new special materials useful for crafting — cryptstone can be used for ammunition and weapons, while spiresteel can be used for ammunition, weapons, and armour. Finally, there are five new magic items: crypt rod, grim helm, harbinger’s scythe, Lady’s Mercy, and Momument’s Truth. Although I enjoyed a lot of the items, it’s the character options that I found were most exciting. Graveslinger is a gunslinger archetype that specializes in combatting incorporeal undead. Soul Shepherd is a monk archetype that calm incorporeal undead and haunts with a touch. They also gain some otherworldly resistances and interesting ways to use their ki. Reaper is a new oracle mystery which I really enjoyed. Tightly themed and flavourful it’s capable of both killing the living and destroying undead. There are also six new barbarian rage powers including the psychopomp totem powers.
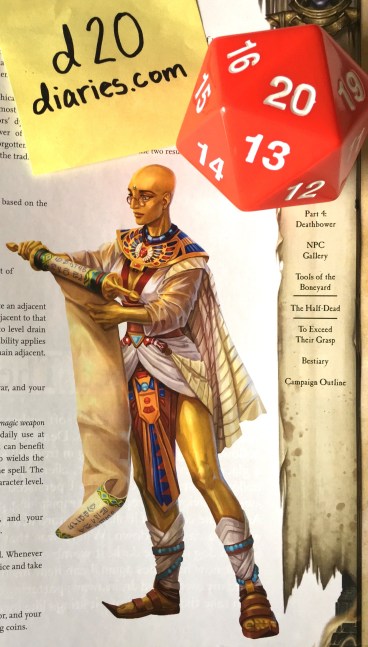


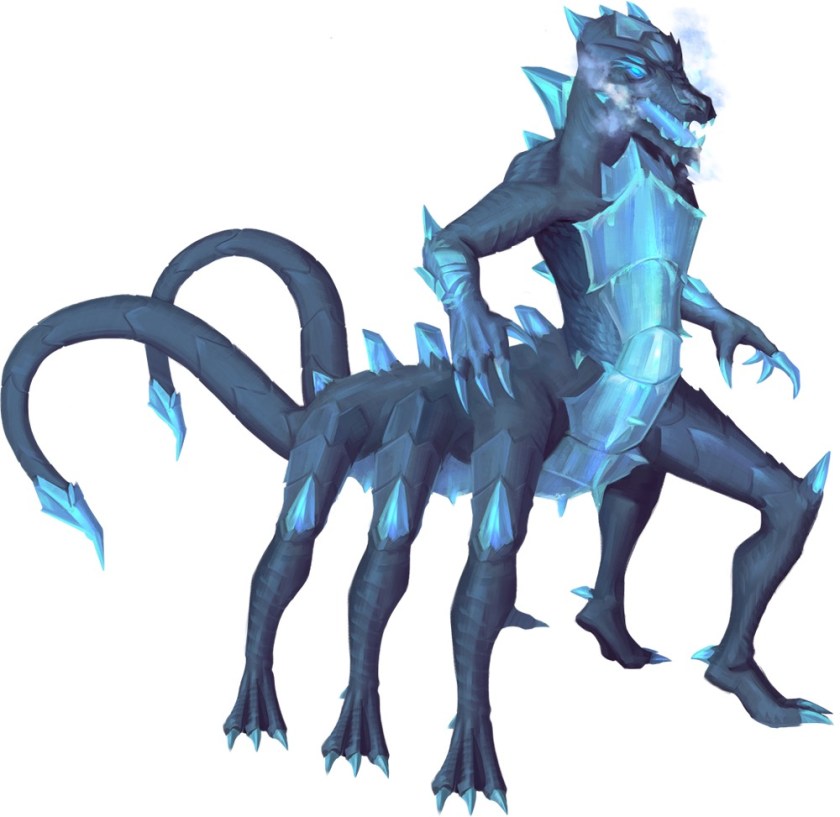
 Ready to get wild?


