Mists of Akuma: Trade War

Hello, and welcome to d20diaries! Today we’re taking a look at a dark and dramatic adventure path filled with political intrigue and horrifying monsters. Trade War for the Mists of Akuma campaign setting.


What is Mists of Akuma?

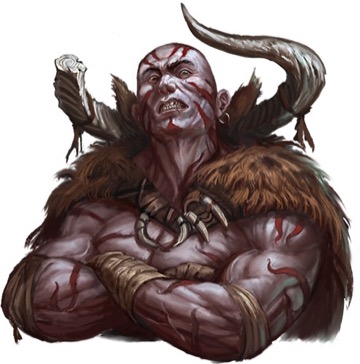
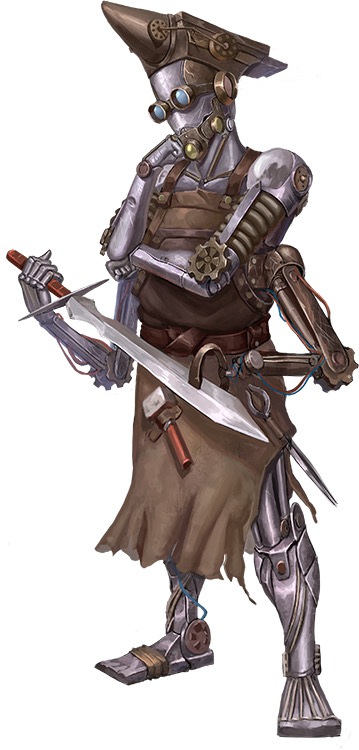
Mists of Akuma is an Eastern fantasy noir steampunk campaign setting that’s compatible with fifth edition Dungeons and Dragons. Created by Mike Myler and published by Storm Bunny Studios, Mists of Akuma is based in a fictional nation called Soburin which is very closely based on Japanese culture of… oh, the Sengoku period of the 16th century if I had to guess (but I’m no expert). Soburin’s many prefectures are locked in a tenuous peace, torn between tradition and new technology, and beset on all sides by the terrifying Mists of Akuma, which corrupt everything they touch. Capable of transforming the land into a poisoned wasteland, peaceful dead into undead monstrosities, helpful spirits into foul oni, family heirlooms into cunning living objects, and people into terrifying monsters, the Mists of Akuma are a malignant evil. The Mists of Akuma campaign setting also features a wide variety of new character options, rules, technological items, magical objects, and creatures.

It’s a sorrowful, rich setting that pays close attention to eastern traditions and culture, and brings it into an exciting fictional fantasy world. Manners, honour, and lack of, all play a part, as do kami, oni, and a variety of other Japanese myths and traditions. Mists of Akuma is a setting bursting with creativity, intrigue, mythology, and tragedy that fills a niche all it’s own. For more information on the Mists of Akuma campaign setting you can visit Storm Bunny Studios. To pick up a copy of Mists of Akuma you can visit the Open Gaming Store, Paizo, and Drive Thru RPG. There’s also a few FREE primers available. I highly recommend picking up Mists of Akuma: Soburin Primer  for a glimpse at the world of Soburin and the Mists of Akuma campaign setting, Mists of Akuma: Primer for a sampling of character options, and Mists of Akuma: Tsukumogami for a collection of new creatures (objects transformed into fell beasts by the corrupting Mists of Akuma).

Mists of Akuma
Mists of Akuma by Mike Myler and Storm Bunny Studios

But, enough about the campaign setting. Let’s talk Trade War.


Trade War

Mists of Akuma: Trade War is a 375-page adventure for the Mists of Akuma campaign setting written by Mike Myler, along with Christopher Rippee, Andrew Engelbrite, and Dirk van de Rijt. Intended for 4-6 players, Trade War should bring characters from levels three all the way to level twelve or so. Although Trade War contains everything you need to play the adventure path, I highly recommend picking up the Mists of Akuma campaign setting or downloading the free primers mentioned above. They really enrich the adventure and your players understanding of their world and the beings in it.

Mists of Akuma - Trade War
Trade War: A Mists of Akuma Adventure Path

Trade War is a campaign focused on politics, intrigue, and tragedy, with it’s true plot is hidden under layers of other stories and adventures. Players uncover threads of the mystery and its villains right from the beginning of the adventure path, with time weaving these seemingly disparate tales into a wonderful, layered story. The adventures are all open ended, providing information on a variety of paths your players might choose to follow instead of just assuming one ‘ending’ occurs. There’s plenty of important NPCs to interact with — both allies and enemies — and monsters to battle, with the lines between good and evil becoming increasingly blurred. Alliances can be forged, loyalties swayed, promises betrayed, and throughout it all your PCs will need to make difficult choices. For doing the right thing isn’t always easy — if you can even determine what the ‘right thing’ is.  These tough decisions, moral dilemmas, and pyrrhic victories are truly a highlight of the adventure path.

Before we get any further into this review it’s important to note that not all of the content of Trade War is new. In fact, Trade War consists of six previously released adventure modules bound together with new adventures, side quests, and connections, all culminating in a brand new, epic conclusion. And when I say ‘epic’ I truly do mean it. The final adventure is exceptionally well done.

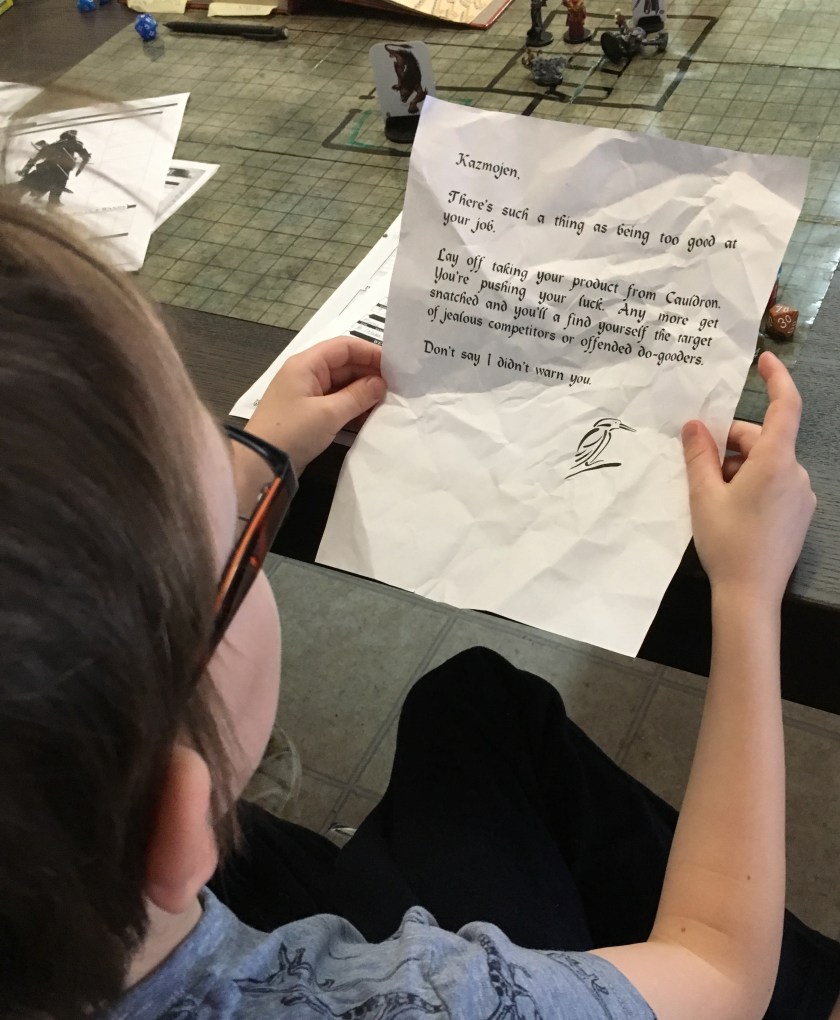
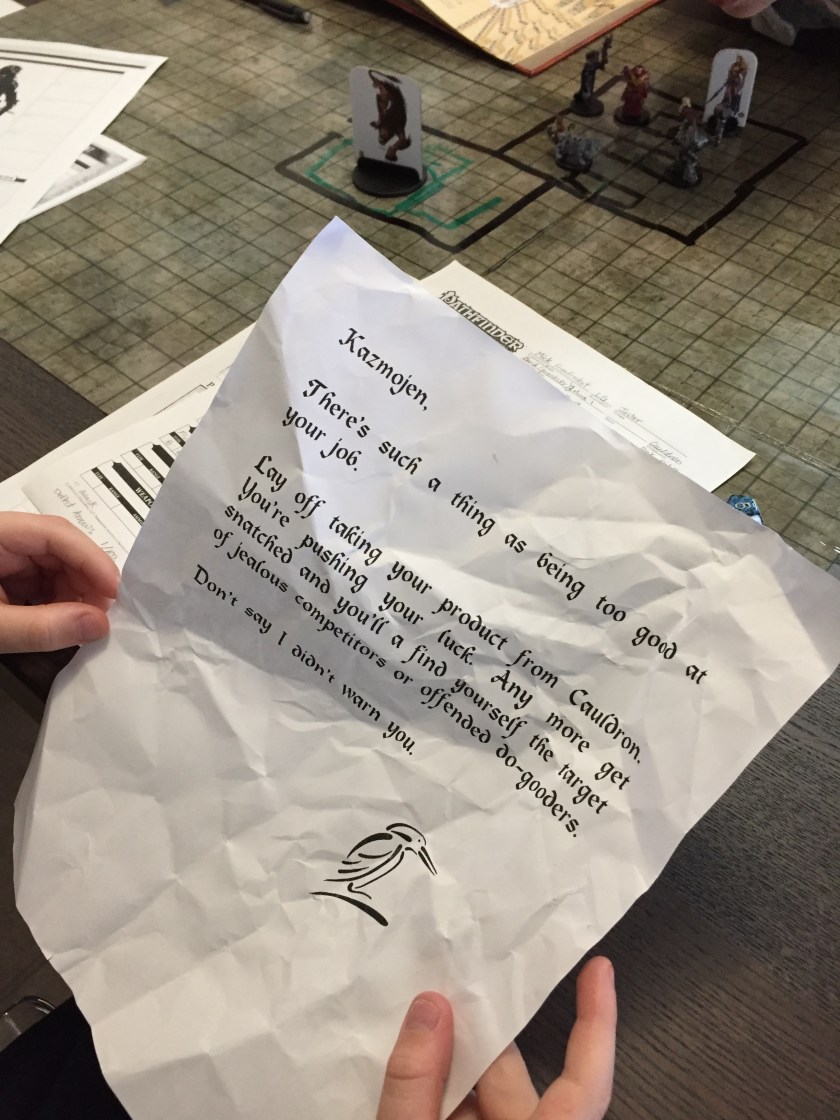
The six previously published adventures contained in Trade War are Scourge of Róbai Shita TempleFeud Primordial, Fangs of Revenge, Curse of the Scorpion Samurai, Yai Sovereign of Storms, and Revenge of the Pale Master. The finale is entitled Hone-Noroi Keep Ascends. There are also two side trek adventures (Golden Carp and Cursed Well of Itami) which have varying difficulty levels and are intended to be inserted by the GM when they need to get the players back on track (or whenever they feel is most dramatic). There’s also a series of five ‘Connections,’ which are basically a collection of short social and combat encounters which occur on the journey between adventures and all tie in with the various ongoing plots and events of the adventure path. In addition to these adventures and connections, Trade War contains a bit of important information on the Mists of Akuma campaign setting, some new rules, a wide array of new character options, a player handout, and a character sheet. Finally, Trade War contains some quick and simple instructions for those GMs who want to run Trade War without the steampunk components. 

Because Trade War is a mystery I won’t get into the plot just yet. Instead, information on the adventure’s storyline and various adventures will all be contained at the end of this blog post after a large spoiler warning. So, without spoilers, what do I think about Trade War?

For starters, Mists of Akuma is a really great, atmospheric setting. I love it. Trade War is grand campaign that’s much more layered than it originally appears. Despite it’s rather tightly constructed meta-plot it leaves a lot of room for players to make their own decisions, managing to continue the events of the adventure path no matter how honourable or disreputable your players turn out to be. It’s got a lot of climatic moments, dynamic battles, moral dilemmas, betrayals, and surprises. All of the scripted social encounters matter, playing a role in either the meta-plot, current adventure, or foreshadowing other important events. Many NPCs — both ally and enemy — have chances to make return appearances, and players will often be surprised at the role some of the people they meet will come to have. There’s a variety of factions your players could ally themselves with throughout the course of the adventure, all of which are very different.

However, all that open-ended storytelling does come with a downside. This is a rather loosely scripted campaign, with plenty of decisions for GMs to make, NPCs for GMs to create, and plenty of downtime for GMs to fill. While many GMs will be thrilled with this, I do prefer my adventures have a tighter narrative. Why your characters are travelling from one region to another between adventures is left for GMs to determine in most instances and, although the journey and ‘Connections’ themselves are filled with engaging encounters, the motivations behind the journeys are lacking (until the later adventures). In addition to this, many of the adventures utilize the same opening plot hook: a bengoshi told you to. Bengoshi in Mists of Akuma are essentially government officials who have the power to deputize citizens into performing tasks on their behalf. Refusal is met with execution. Obviously “do this because I said so or you die” is not really an engaging motivator. Although for some of these adventures it makes sense that a bengoshi would hire your PCs, at other times it’s unnecessary. There’s plenty of other PCs who could have acted as quest givers and, in many instances, the plot of the adventure itself or a few social encounters could have done a better job.

As previously mentioned, many of the battles are dynamic and complex. Although thrilling and rewarding, they aren’t easy to run. If you’re a beginner GM this is not the campaign for you to start with. Trade War has a lot of cool new creatures, some of which can transform into more powerful forms. Overall, the battles in this adventure path are challenging, memorable, and very well-crafted.

Mists of Akuma is not for the feint of heart. There are strong themes of tragedy, decay, corruption, and sorrow. There’s also some rather gross, horrific depictions (particularly in the finale), and body horror (as the Mists of Akuma can transform even your PCs into terrifying monsters). Although I thoroughly enjoyed the atmospheric, mature tone, it’s not for everyone. And certainly not a child-friendly or family campaign.

Mists of Akuma utilizes many Japanese terms throughout its length, which I really enjoyed. Particularly for names of people, locations, monsters, weapons, and titles. That said, I found that some terms are used but not explained, so I had to stop and look them up. In a few instances the Japanese version of an English loan word is used, instead of just using the English word, which was both jarring and a strange choice. I’m a fan of using culturally appropriate terms and naming conventions whenever possible, but in my opinion Trade War took it a bit too far. It hindered my comprehension of the material on more than a few occasions, which in turn made it less useful for me as a GM and less enjoyable for me as a reader. This adventure would have greatly benefitted from a glossary.

All in all I thought this was a wonderful, challenging, dramatic campaign that mature players are going to really enjoy. It’s set in an atmospheric fantasy world filled with tragedy, desperation, and corruption, wherein players get to make important, complicated decisions — and live with the consequences.  I really enjoyed Mists of Akuma: Trade War.


SPOILERS


Be warned! The following section contains information on the plot and component adventures of Trade War. If you don’t want any spoilers, stop reading!

Trade War‘s metaplot involves an ancient necromancer called the Pale Master, whose minions are working to bring him back into the world of the living. Fortunately for the world of Soburin, a powerful figure (who I won’t mention by name to prevent too many spoilers) has foreseen the return of the Pale Master and set events into motion that they hope will allow the people of Soburin to have a future. It’s the machinations of both the Pale Master and this other figure that drive the events of the Trade War adventure path. Set amongst this turmoil is a variety of other groups and factions which become embroiled in the growing conflict, either as allies, enemies, minions, pawns, or victims. PCs will have the chance to interact with members of all of the above mentioned groups on multiple occasions and forge relationships with them as they see fit (for good or ill).

Throughout this adventure PCs will face off against scheming humanoids, dark magic, ancient evil, corrupting fog, terrifying oni, powerful demons, unquiet spirits, animated dead, ninja, samurai, dragons, and even the undead army of a necromancer.

Trade War begins with Scourge of Robai Shita Temple, an adventure for third level characters. Tasked by a bengoshi to investigate the village of Shibai, PCs will need to determine why the village —  which was mystically protected from the Mists of Akuma — has suddenly become overrun by the mists, the monsters that stalk within it, and a powerful wind demon named Fukō. This mystery is fun and pretty free-form, although I think having a bengoshi give your PCs their task is unnecessary. The various NPCs (or even just the events of this adventures) could have motivated the PCs just as easily. I particularly enjoyed the interactions with another group hired to protect the town, the boisterous Mubō Brothers. My only complaint is that there are a lot of battles with tsukumogami in this one (a bit too many, in my opinion).

From there your PCs travel East over the course of the winter, having a variety of adventures on their journey. Some important events in the adventure path are foreshadowed with social encounters, which was nice to see, and important rumours are already flying. I particularly enjoyed the encounters with the elemental oni Kumo-Rui, an ice-themed spider-like monster who has brought about an unnaturally cold winter. In this section the PCs also meet another bengoshi, Akia the Iron Shell, who tasks them with tracking down an oni-touched sorcerer who has formed his own cult and bringing her anything of value in his possession. This task is trickier than it seems, continuing on into the next adventure, Feud Primordial. It should be noted that the inclusion of Akia the Iron Shell is one I support, as she is important to the ongoing plot line and the next adventure, and it makes sense for her to hire the PCs in order to see her goals accomplished.

Feud Primordial is intended for fifth level characters, and begins with the PCs already in the middle of tracking down a cult-leader. Unfortunately, he has way too many possessions for the PCs to easily carry, making them unable to bring everything back to Akia the Iron Shell. They need to determine what’s valuable and sell the rest. Unfortunately, turns out the object Akia most wanted — in fact the whole reason she sent you after the cult-leader — was to fetch a specific object that was valuable to her, but not actually valuable. An object PCs have either sold (most likely) or was stolen from them (less likely). Furious, the bengoshi sends your PCs back out to hunt down the missing object. This adventure leads the PCs to a town where a murderer stalks the streets, and eventually casts them as pawns locked in a power struggle between two incredibly powerful ancient beings.

After finally appeasing Akia the Iron Shell the PCs accept work as a caravan guard and travel north. Along the journey they get involved in some interesting events, my favourite of which involves a corpse-eating oni.

In time the PCs arrive in Samon, home of the Tazuki Rail Company, where they become embroiled in the events of the next adventure, Fangs of Revenge. Once again, they’re hired by a bengoshi, although this time they’re asked to investigate a growing unrest among the labourers of Samon, discover the leader of the workers growing rebellion, and put and end to their uprising before it begins. This leads to a complex web of intrigue and a large cast of interesting characters. PCs will soon discover that there’s more going on in Samon that meets the eye as they clash with shapeshifting snake-folk, and dark rituals.

Leaving Samon behind the group travels south, working as guards for two different groups at different times. By now they’re likely catching wind of a smuggling operation that’s apart of this campaigns meta-plot, although they won’t necessary understand all the movers and shakers behind it. The PCs actions will continue to affect how a few factions see them later in the campaign.

The next adventure, Curse of the Scorpion Samurai, is intended for 7th-level characters and begins when the PCs are hired by a bengoshi from Fuson prefecture to sneak into Fuson, investigate a series of grisly murders, and lay a trap for the killer using his intended victims as bait. But their enemy, the Scorpion Samurai, was once a local folk hero with a tragic past. PCs will need to be exceptionally canny to prevent the people of Shinjitsu from informing the Scorpion Samurai of their presence lest they go from the hunters to the hunted.

From Fuson prefecture the PCs take a mountainous journey at the behest of a poor woman.  Although their mission does not reach its conclusion, they do make some important discoveries related to a series of black torii gates that have been popping up throughout Soburin since the start of Trade War.

The next adventure, Yai Sovereign of Storms, is intended for 8th-level characters and takes place in a mountainous region of the GMs choosing, likely the same mountains that PCs were just travelling through. The PCs find themselves ambushed by a fearsome oni bengoshi who wants to hire them (this marks the second instance where I thought using a bengoshi quest giver was particularly important to the story). Xiqzoxix has heard of the PCs recent exploits and needs their aid to oust a powerful storm demon who usurped the throne from the previous warlord that ruled the oni city of Tsukisasu. Unfortunately, the storm demon is a hate-filled beast who gets more powerful by the day. PCs will need to sneak into the city of monsters in disguise, undo the storm demons magic circles, and defeat him before he becomes too powerful. In the end they’ll get to decide who will rule in the storm demons place — the original oni warlord or Xiqzoxix himself.

Leaving the magically hidden city of Tsukisasu behind the PCs suddenly find themselves in a forest near a newly laid rail track. In this series of connections they’ll have to battle an enemy atop a moving train, punish the oni behind the corrupted black torii gates, and discover that the various factions of Soburin are preparing for war.

Revenge of the Pale Master begins in the city of Kizaki immediately before the annual Festival of Falling Hawks. Intended for 8 – 10th level characters, this adventure once again sets the PCs on the trail of an infamous murderer. This time the murderer has come back from the dead to sacrifice six children whose relatives he tried to sacrifice in life exactly ten years ago. Although the local government has already placed three of these children in protective custody, the other three were kidnapped and need to be rescued. Except… that’s not really what’s going on at all. Haha. This adventure is full of twists, surprises, and betrayals. Whether the PCs ever figure out what’s really going on is entirely up to them. Revenge of the Pale Master is my favourite adventure in Trade War.

Which brings us to the all new finale to Trade War: Hone-Noroi Keep Ascends. In this adventure intended for 12th level characters the Pale Master’s bone tower rises from the earth and towers above Soburin, disappearing into the clouds. Undead march from the tower, the land becomes tainted, and dark magic is seen roiling in the skies. Villagers are evacuated by the government and the various factions met in this adventure path put their brewing war on hold to combat this ancient evil. The PCs may be able to ally with one or more of these armies and gain advantages (and disadvantages) based on how they treated the various groups. Some may be trusted allies, while others may be bitter enemies. Together with these armies your PCs will assault the Pale Master’s undead armies, storm the tower, ascend to the top, and defeat the Pale Master. It’s a gross and horrific gauntlet that’s packed full of challenging encounters and foul enemies. Such a great conclusion to this campaign!

Although that’s the end of the adventure path there are two more adventures in this book. Each is a short side quest intended for varying level difficulties. The first, Cursed Well of Itami, is best played at 5th level, and fits well between Feud Primordial and Fangs of Revenge. In it the PCs find themselves in a village whose well has been corrupted and now holds only blood and other vile substances. PCs need to descend into the well — and the hidden chambers connected to it — in order to cleanse the well and save the town. The second adventure, which is my favourite of the side quests, is Golden Carp. Intended for 7th-level characters, this adventure fits well between either Fangs of Revenge and Curse of the Scorpion Samurai or between Curse of the Scorpion Samurai and Yai Sovereign of Storms. In this adventure the PCs find a magical golden carp who begs them to prevent a noblewoman from catching him in her fishing net. If they choose to save the little fish from the woman — who’s actually an oni in disguise — they discover it is a powerful dragon on a pilgrimage back to its home. The dragon must undertake the journey in the humble form of a carp once every century in order to maintain is powers. They’ll need to protect the fish on it’s trip up to it’s mountain shrine without physically interfering in its journey.

Which brings us to the end of Mists of Akuma: Trade War!

Thanks for joining us today. I hope you enjoyed checking out the dark fantasy world of Mists of Akuma as much as I have.

Jessica

March New Releases

March is here, and with a bunch of new Pathfinder and Starfinder products. Considering the awesome releases last month — including the launch of two new Adventure Paths with Starfinder’s Firestarters (Dawn of Flame 1 of 6) and Pathfinder’s final first edition Adventure Path: The Dead Roads (Tyrant’s Grasp 1 of 6) — this month has a lot of live up to!

Pathfinder is releasing three big products in late March: Pathfinder Pawns: Return of the Runelords Pawn Collection (which is going to be awesome!), Pathfinder Adventure Path 140: Eulogy for Roslar’s Coffer (Tyrant’s Grasp 2 of 6), and Pathfinder Player Companion: Heroes of Golarion.

Starfinder is releasing only one book this month, Starfinder Adventure Path 14: Soldiers of Brass (Dawn of Flame 2 of 6). They’re also releasing the Starfinder Critical Fumble Deck, a follow up to the previously released Starfinder Critical Hit Deck.

Maps released this month include Pathfinder Flip-Mat: Wicked Dungeon, which features a mossy dungeon on one side and a lava-lit dungeon on the other, and Starfinder Flip-Mat: Warship.

Pathfinder Society Scenarios released at the end of this month include #10-16: What the Helms Hide (a set of four quests for Tier 1-5 written by Calder CaDavid, Lysle Kapp, Kendra Leigh Speedling, and Nate Wright) and #10-17: On Sevefinger’s Sails (a Tier 7-11 scenario that takes place in the Gloomspires and is written by Tom Phillips).

Starfinder Society Scenarios released at the end of this month include #1-34: Heart of the Foe (a Tier 3-6 scenario written by Nicholas Wasko which continues the Scoured Stars storyline and involves the history of the menacing jinsil) and #1-35: Rasheen’s Riches (a Tier 5-8 scenario written by Mara Lynn Butler that has the Faction (Acquisitives) tag).

One final thing to mention, last month marked the release of the massive Mists of Akuma campaign: Trade War. You can expect to see a review of this political-Eastern Fantasy–noir-steampunk adventure for 5th edition Dungeons and Dragons in the coming week.

Enjoy!

Jessica

Pathfinder Second Edition Releases Unveiled!

Paizo Inc. has announced the launch of the second edition of the Pathfinder Roleplaying Game on August 1st, 2019! With over nine releases in August and more to come the following month, Pathfinder Second Edition is scheduled to launch with a BANG!

“The launch slate provides everything you need to set out on a world of limitless fantasy adventure,” said Paizo Publisher Erik Mona. “With more than 20 years of active development and playtest feedback from more than 125,000 gamers, the new Pathfinder rules are easy to learn and exciting to master. We can’t wait to see the diverse and deeply customized characters the RPG community will create!”

Pathfinder Second Edition Core Rulebook
Pathfinder 2e: Core Rulebook

Pathfinder Second Edition is releasing three major hardcover rulebooks right from the start: Core Rulebook, Bestiary, and Lost Omens World Guide. The Core Rulebook is THE BOOK. The one you need no matter who you are and what role you take at a gaming table. Packed full of all the rules players and Game Masters need to play Pathfinder Second Edition, create characters, and run games, the Core Rulebook is a must have. Said to contain streamlined rules and intuitive presentation, Pathfinder Second Edition features the same deep character customizations we all love, allowing for unique characters and boundless creativity. Weighing in at an impressive 640 pages, the Core Rulebook contains game rules, advice, characters options, treasure, and more. There’s six ancestries to choose from (elf, dwarf, gnome, goblin, halfling, and human, as well as the variant human half-elf and half-orc), twelve classes (alchemist, barbarian, bard, champion, cleric, druid, fighter, monk, ranger, rogue, sorcerer, and wizard), thirty backgrounds (such as apprentice, bartender, and soldier), and hundred of spells, feats, and other character options. The hardcover will sell for $59.99 American, while the deluxe hardcover (bound in faux leather with metallic deboss cover elements and a bound-in ribbon bookmark) will sell for $79.99 American.

Pathfinder Second Edition Bestiary
Pathfinder 2e: Bestiary

Bestiary is packed with around 400 monsters spread over 360 pages. This means that not every monster will get its own page and artwork, although there’s said to be full-colour illustrations on nearly every page. While statistics will fill the pages, sidebars are going to contain lore. In Bestiary you’ll also find the always handy Universal Monster Rules, guidelines for awarding treasure, and a variety of monster lists sorted by different qualities (like level, type, and rarity). Many of the creatures in the Bestiary will be familiar, but new creatures are also included (like the “living-nightmare nilith and the three-headed mutoli”). The hardcover Bestiary will sell for $49.99 while the Deluxe Hardcover will sell for $69.99 (bound in faux leather with metallic deboss cover elements and a bound-in ribbon bookmark).

Pathfinder Second Edition Lost Omens World Guide
Pathfinder 2e: Lost Omens World Guide

Lost Omens World Guide is basically the new Inner Sea World Guide, with ‘Lost Omens’ being the new name for the Golarion campaign setting. This 136-page hardcover book sorts the Inner Sea into ten regions, and talks about each one. ‘The Saga Lands,’ for example, is a region which encompasses the Lands of the Linnorm Kings, Varisia, New Thassilon, Irrisen, and the Realm of the Mammoth Lords. Each region also contains backgrounds and archetypes thematically tied to the region. Finally, the Lost Omens World Guide contains a giant, two-sided, fully-detailed, poster map of Golarion. Let me repeat that: of Golarion, not the Inner Sea. Awesome! Want to know more about Tian Xia, Casmaron, and other areas outside the Inner Sea? You’ll have to wait — but hopefully not for too long. Lost Omens World Guide is the first book in the Pathfinder World Guide line, which will continue to release region specific books (like those currently in the Pathfinder Campaign Setting line) in a larger, hardcover format, to allow for greater exploration of the world of Golarion. Lost Omens World Guide is $36.99.

In addition to important rulebooks, Paizo is releasing two print adventures: Hellknight Hill, and The Fall of Plaguestone.

Pathfinder Second Edition - Hellknight Hill (Ages of Ashes 1 of 6)
Pathfinder 2e Adventure Path: Hellknight Hill (Age of Ashes 1 of 6)

Age of Ashes is a six-part, monthly adventure path that begins with book one: Hellknight Hill. Said to contain “continent-spanning conflict against cultists, slavers, and a fiery draconic devastation that could unleash an Age of Ashes upon the world,” this is sure to be an exciting campaign! Set in Isger, Hellknight Hill begins when your PCs investigate mysterious fires which burn atop “the towers of a nearby citadel long ago abandoned by an order of Hellknights.” Written by Amanda Hamon for first level characters, Hellknight Hill will also contain a gazetteer on the town of Breechill (the starting location for this campaign), a GM guide Age of Ashes, new magic items, and over six new monsters. Hellknight Hill (and presumably all the follow-up adventure path volumes) will sell for $24.99.

The Fall of Plaguestone is a 64-page standalone adventure for first-level characters written by Paizo Director of Game Design Jason Bulmahn. Beginning with the PCs attempting to solve the murder of a friend, this adventure soon spirals out of control with the “discovery of forbidden alchemy, mutant animals, and a nearby forest rotting away due to a mysterious blight.” Ominous! The Fall of Plaguestone features wilderness exploration, dungeon encounters, and urban mystery. In addition to the adventure itself, The Fall of Plaguestone (and every Pathfinder Adventure to follow) includes new monsters, treasures, and player options. The Fall of Plaguestone is $24.99. Launching alongside this adventure is Pathfinder Flip-Mat: The Fall of Plaguestone which depicts the “hillside hideout of an evil alchemist.” The Flip-Mat measures 24″ x 30″ unfolded, 8″ x 10″ folded, and can handle dry erase, wet erase, and permanent marker. It costs $14.99.

Paizo is partnering with the awesome folks over at Dwarven Forge to release a deluxe set of pieces which will allow you to create encounter areas from The Fall of Plaguestone! Which is amazing, by the way. If you haven’t seen any of the Dwarven Forge terrain you should definitely check it out. They make gorgeous 3D terrain and map components, although be warned: it’s expensive!

Finally, Paizo is releasing five other accessories for Second Edition. First up? A GM screen! Featuring beautiful artwork on one side and handy charts, tables, and information on the other side, these high-quality screens are really useful. Available in a landscape style with art by Ekaterina Burmak, or in a portrait style with art of the Iconics by Wayne Reynolds, GM Screens are $19.99.

Up next? Pathfinder Combat Pad, which is basically a double-sided, magnetic, dry and wet erase board that functions as an initiative tracker. It comes with two sheets of magnets, which break down into 13 blue player character magnets, 13 red enemy magnets, 9 green NPC magnets, two round arrows, two turn arrows, and two next round magnets. Pathfinder Combat Pad sells for $24.99.

Pathfinder Character Sheet Pack is a set of class-specific, double sided, black and white character sheets. This set contains one character sheet for each of the twelve classes, as well as extra sheets for equipment and spells. The character sheets come in a folder and costs $14.99.

Finally, my favourite of the accessories, Pathfinder Condition Card Deck! I adore condition cards. I use them all the time in both Pathfinder and Starfinder, so I’m thrilled that they’re releasing a set for Pathfinder Second Edition right out of the gate. This 110 card deck of full-colour cards contains details and rules on the many Conditions in Pathfinder Second Edition, with the most common conditions having multiple cards. Pathfinder Condition Card Deck costs $22.99.

In addition to these awesome products, the Pathfinder Society Organized Play program will release two scenarios and a short quest every month!

For more information on Pathfinder Second Edition, it’s products, and to preorder, head over to PathfinderSecondEdition.com

I can’t wait to see how Pathfinder Second Edition turns out! (Now, if only I had the funds to buy some of it…). What are you most excited for about Pathfinder Second Edition? Let me know in the comments.

Jessica


UPDATE: Pathfinder Second Edition is now out! Click here for more information!

Pathfinder Society Scenarios: Debt to the Quah and Tapestry’s Trial

Today we’re going to take a look at two of the most recent Pathfinder Society Scenarios that are currently available for purchase, and let you know we thought. Although you’ll find references to events in each that I liked or disliked, and comments about specific characters, these scenarios are not explored in detail. It’s not my intention to spoil the events in these scenarios, or give summaries and full reviews, but to share my opinions and provide recommendations. That said, if you want to avoid even minor spoilers I recommend you check out a different article. Whether you intend to use them in home games of the Pathfinder Roleplaying Game, sanctioned scenarios for use with the Pathfinder Society Organized Play, or just want to read a nifty new adventure, we’ve got you covered! So let’s get cracking!

10-14 - Debt to the QuahPathfinder Society Scenario #10-14: Debt to the Quah is a Tier 3-7 adventure written by Adrian Ng. It takes place in Varisia’s Storval Plateau, in a sepulchre along the Muschkal River, and heavily features the Shoanti people and their culture. For more information on Varisia, the Storval Plateau, and the Shoanti, check out Pathfinder Campaign Setting: Inner Sea World GuidePathfinder Player Companion: Varisia, Birthplace of Legends, and Pathfinder Adventure Path 10: A History of Ashes (Curse of the Crimson Throne book 4 of 6). Debt to the Quah features creatures from Pathfinder Roleplaying Game: BestiaryBestiary 3Monster Codex, and Pathfinder Campaign Setting: Occult Bestiary (although all of the necessary stat blocks are included within the scenario). In addition to the Pathfinder Core Rulebook it utilizes content from the GameMastery Guide  and Ultimate Equipment, and heavily uses the influence subsystem from Ultimate Intrigue. The influence subsystems and all of its relevant rules are included in an easy to understand Appendix at the back of this scenario. Finally, Debt to the Quah makes use of one map: Pathfinder Flip-Mat Classics: Dungeon.

Recently the Shoanti people of the Storval Plateau were angered by the actions of the Pathfinder Society, when an over-enthusiastic Pathfinder raided and destroyed an important Shoanti burial ground — and then passed it off as Thassilonian. Angered (with reason) at the actions of this Pathfinder many Shoanti are calling for the expulsion of the Pathfinder Society from their lands (or worse!). This adventure tasks the PCs with attending a Shoanti council where they will need to return the grave goods taken from the site, and attempt to salvage what they can of the relationship between the Pathfinder Society and the representatives from the various Shoanti Quahs. More specifically, their goal is to earn a chance to fix the damage that has been done to the ancient Shoanti sepulchre, and make what reparations they can. This scenario doesn’t continue any ongoing storylines and isn’t connected to any factions. If you’ve got any characters who have played a PFS scenario involving the Shoanti people (such as #4-06: The Green Market, #8-22: Wrath of the Fleshwarped Queen, or #8-23: Graves of Crystalmaw Pass), now is a good time to play them. In addition, characters with other connections to the Shoanti, characters who have a respect for foreign cultures and history, and characters who are diplomatic, will all find something to be excited about in this scenario. Reckless, destructive, and rude characters are not going to excel in this adventure.

Michele Giorgi-Sklar
Kemchet Flame Stoker, chosen representative of the Sklar-Quah (Sun Clan). Illustrated by Michele Giorgi. Art courtesy of Paizo Inc.

First off: I love the premise of this scenario! As a student (once upon a time) of anthropology and archaeology, I adore any adventure that goes out of its way to add some semblance of reality to Pathfinder excavations. So, cleaning up after some shoddy treasure hunter? Sign me up! In addition, the Shoanti are one of my very favourite ethnic groups in the world of Golarion, so getting both in one adventure had me more than a little excited. Putting aside my biases, this is a really fun adventure. It has some useful handouts, lots of nice art, and an interesting cast of NPCs. Influencing the clans at the council meeting was both enjoyable and rewarding, but could be difficult for some GMs to run. It features seven important NPCs (Payah Against the Winds, Cousin to All, Kemchet Flame Stoker, Lake at Dawn, Memory Tender, Rollicks in Waves, and Togimal in Shadow), each of whom has their own personality, values, and pet peeves. This could get confusing for GMs and players alike. However, with some prep work (or great improv) this scene is going to be tense and exciting — a lot’s riding on it, after all! Repairing the tomb and the devastation wreaked there was very enjoyable for me, and the more… talkative inhabitant of the sepulchre was a really nice touch! The final encounter is quite a challenge, both for the participants synergy and for the encounter context. This battle is likely to cause some PCs to hesitate or stress, which leads to one of my only issues with this scenario. However, my relatively vague comments on it are heavier on the spoilers than I typically share, so if that makes you nervous skip the next paragraph.

If something is meant to be in a tomb that you’re restoring, but that something is hazardous to you, should you preserve it or destroy it? A nice dilemma! Unfortunately, this scenario doesn’t embrace that conundrum and has no notes on what should be done if PCs attempt to circumvent it instead of using more destructive methods. A bit of a missed opportunity, I think. Now, most groups will have no such qualms and leap into the encounter without issue, but for those groups who do show professional restraint, their hesitation could prove their undoing, and cause this nice challenging encounter to be too difficult. I’m curious to hear how this shakes out in play!

Overall, I really enjoyed the topic, content, and execution of this adventure. It’s right up my alley, and I can’t wait to play it. I give it four out of five stars.

10-15 - Tapestry's TrialPathfinder Society Scenario #10-15: Tapestry’s Trial is a Tier 7-11 adventure written by Alex Greenshields. It takes place in Axis, a lawfully aligned plane. For more information on Axis and its denizens check out Pathfinder Campaign Setting: Inner Sea World Guide and Pathfinder Roleplaying Game: Planar Adventures. Tapestry’s Trial features creatures and templates from Pathfinder Roleplaying Game: BestiaryBestiary 2Bestiary 5, and Monster Codex (although all of the necessary stat blocks are included within the scenario) and utilizes the Pathfinder Flip-Mat: MuseumGamemastery Map Pack: Magic Academy, and might also use a blank flip-mat. In addition to the Pathfinder Core Rulebook, this scenario includes content from the Advanced Player’s GuideUltimate Magic, and Pathfinder Player Companion: Heroes of Golarion (although Heroes of Golarion  is not needed to run this scenario). This mission is not directly related to any Pathfinder Society factions, although thematically it aligns well with members of the Grand Lodge and Dark Archives.

This adventure tasks the PCs with travelling to Axis, finding the legendary sorceress Hao Jin, and attaining her help in repairing the Hao Jin tapestry, a powerful artifact and demiplane used by the Pathfinder Society for a whopping seven seasons of play.  This scenario continues the ongoing saga of the Hao Jin Tapestry, and any characters who have interacted with the Hao Jin Tapestry — particularly those who helped attain, defend, or protect it — will have ample reason to get involved in this scenario. It’s also a direct continuation of events from Pathfinder Society Scenario Special #10-00: Hao Jin Cataclysm, and Scenarios #10-11: The Hao Jin Hierophant and #10-13: Fragments of Antiquity. Although I won’t get into the reasons why (to avoid spoilers), characters who were involved in any of the following scenarios will find a familiar face/event or two seen/mentioned: #4-16: The Fabric of Reality, #5-09: The Traitor’s Lodge, #6-98: Serpent’s Rise, #7-09: The Blakros Connection, and #7-23: Abducted in Aether.  I highly recommend you bring along such characters (although not necessarily more than those who have an interest in Hao Jin and her tapestry). Finally, any worshippers of Abadar, Brigh, Chaldira Zuzaristan, and Pharasma will have a chance to visit or glimpse their god’s domain throughout the course of this scenario, which can be an awesome and fulfilling character moment.

Leonardo Santanna-TheMaker
The Maker, an eccentric kolyarut from #10-15: Tapestry’s Trial. Illustrated by Leonardo Santanna. Art courtesy of Paizo Inc.

Planar adventures are tricky. Players need to feel like they’re someplace totally different — a whole other world — but not so much that it hinders play. NPCs need to be extra memorable, locations need to be extra unique, and through it all you need to try to distill a whole planar environment into a short amount of time and a few encounters. Players want to experience a plane — after all, it’s likely they’ll only go there once! This scenario does an awesome job of showcasing Axis. The place is at once understandable and completely alien, with cool environments, and a lot of fun NPCs. And by a lot, I mean a lot! There’s a whopping nine new NPCs to interact with. I really enjoyed the various social interactions, particularly the entire final sequence of events. Many of these social interactions and encounters have unexpected effects and consequences, some of which will even have effect past the end of this scenario (which is always a treat!). Of the various locations you can visit I particularly enjoyed The Floating Library, not only for its contents and librarian, but also for the view. PCs can literally see a few domains of the gods from this vantage point, which is a really nice moment. Although social encounters and big decisions are the major focus of this scenario, it’s not without its combats. Chaotic and unlucky groups could have as many as four combat encounters (or more if they continue to attract the ‘law enforcement’ of Axis), while other groups will have as few as one combat encounter. The battles that are included are enjoyable, and all have extra considerations and complications for player’s take into account, which is a really nice touch. Overall, I love this scenario. I think it’s going to be a satisfying, exciting experience, that has a lot of cool moments, and ramifications for further scenarios. I give it five out of five stars.

Thanks for joining us today. Tune in later this week for a look at this month’s new d20 releases!

Jessica


Starfinder Society Scenarios: Acts of Association and Data Breach

Today we’re going to take a look at the two most recent Starfinder Society Scenarios that are currently available for purchase, and let you know we thought. Although you’ll find references to events in each that I liked or disliked, and comments about specific characters, these scenarios are not explored in detail. It’s not my intention to spoil the events in these scenarios, or give summaries and full reviews, but to share my opinions and provide recommendations. That said, if you want to avoid even minor spoilers I recommend you check out a different article. Whether you intend to use them in home games of the Starfinder Roleplaying Game, sanctioned scenarios for use with the Starfinder Society Organized Play, or just want to read a nifty new adventure, we’ve got you covered! So sit back, and get ready to explore the Pact Worlds!

SFS 1-32 - Acts of Association by Scott YoungStarfinder Society Scenario #1-32: Acts of Association  is a Tier 1-4 repeatable adventure written by Scott Young. It takes place on Absalom Station, and tasks the PCs with taking a visiting dignitary a tour of the space station. This scenario features the repeatable tag, meaning it can be played once per character instead of once per player. It doesn’t directly continue any ongoing storylines, although it does build off of previous events. The Scoured Stars Invasion has come to an end, and the Starfinder Society has begun to rebuild their once stellar reputation. Acts of Association does not feature starship combat. It makes use of Starfinder Flip-Mat: Urban SprawlStarfinder Flip-Mat: Jungle WorldStarfinder Flip-Mat: CantinaStarfinder Flip-Mat: Starship, and Starfinder Flip-Mat: Space Station. A lot, I know, but you won’t need all of them at the same time. Some of the events in this scenario are randomly determined, so you’re going to need three or four of the flip-mats depending on which events you roll. Acts of Association makes use of the Starfinder Core RulebookArmoryAlien Archive, and Alien Archive 2. All of the necessary stat blocks are included in this scenario, although one randomly altered stat block allows GMs to apply select race grafts onto it (if desired), which are found in Alien Archive and Alien Archive 2. These grafts are not included in the scenario and are entirely optional. This scenario features only one returning character, Chiskisk, who was previously featured in the Dead Suns Adventure Path and Starfinder Scenario #1-25: Beacon Code Dilemma. There’s no specific boons you should slot for this scenario, nor are any factions invested in this mission more than the others. However, thematically it fits well with members of the Acquisitives and Wayfinders factions.

Acts of Association begins in Absalom Station’s Lorespire Complex, base of the Starfinder SocietyWith the Scoured Stars Incident behind them and some prominent successes under their belt, the Starfinder Society is seeking to expand its influence back into Near Space and the Vast. To that end they’ve entered into negotiations with a variety of distant civilizations in order to acquire exploration rights in their territories.  Many ambassadors and dignitaries have made the journey to Absalom to negotiate with the Starfinder Society, and one of them needs a break. They want a tour of Absalom Station. That’s right! Chiskisk is calling on your PCs to act as tour guides. Although it may sound mundane, this is actually a pretty important. They’ll need to take the dignitary to multiple locations, ensure they are safe and entertained, all while making a good impression of the Starfinder Society. As a repeatable scenario, this adventure has some randomized elements to it. There’s a series of seven different pre-made dignitaries, as well as an eighth dignitary which is created entirely by the GM. In addition, each dignitary has randomized personality traits, values, taboos, and attractions they want to see. These attractions will determine the locations your PCs visit.

Emissary
Emissary DV8, one of the potential dignitaries you could meet in Starfinder Society Scenario #1-32: Acts of Association. Art courtesy of Paizo Inc.

I really enjoy the pre-made dignitaries and the random personality traits. They’re all unique, memorable, and are going to be great fun to interact with. As a lot of this scenario involves social interactions, playing the scenario through with different dignitaries will make each play through unique. As an added bonus, playing through the scenario with the same dignitary can also have its own surprises, as they may not be the same person or value the same things the second time through. I enjoyed the rather mundane tourism destinations that all seem to go awry — either this poor dignitary has the worst luck or Absalom Station is the worst place to go on vacation! There’s a lot of opportunity for clever use of skill checks and combat, and how you handle each situation can affect what the dignitary thinks of you — although how it affects them depends entirely on your actions and their personality traits. Their outlook matters, and you can’t just leave all the social interactions to your most charismatic PC — which is great! The downside to all this randomness is how loosely scripted the social interactions are. The reactions of the dignitaries is entirely up to the GM to determine (based on their randomly rolled traits), which puts a lot of work into the GMs hands — particularly when you take into account how much of this scenario is social interactions. It’s definitely going to take some prep work or some great improv. Still, in the hands of a decent GM Acts of Association is going to be a lot of fun and really memorable. Another minor downside is the number of attraction options. There’s only six locations, and on each playthrough the dignitary will want to visit four of them. That means that on your second playthrough you’ll already have some overlap. That said, it’s more variable than the other repeatable scenarios out there, so I think it’s going to be a popular one. Acts of Association has some nice player handouts — dossiers on each of the dignitaries (although you’ll only get one on a playthrough). Unfortunately, one has a typo. After labelling one of the dignitaries preferred pronouns He/him he’s referred to as she/her throughout the rest of the dossier. Overall, I think it’s a really fun scenario that’s sure to create some memorable moments when run by any GM willing to embrace the roleplaying and social interactions. I give it four out of five stars.

#1-33: Data BreachStarfinder Society Scenario #1-33: Data Breach is a Tier 3-6 adventure written by Jim Groves. It takes place on the edge of the city of Cuvacara on the planet Verces where you’re tasked with breaking into a secure facility and stealing classified data. For more information on Cuvacara you can check out Starfinder Adventure Path 11: The Penumbra Protocol (Signal of Screams 2 of 3) and for more information on Verces you can check out Starfinder Pact Worlds or the Starfinder Core Rulebook. This scenario features the Faction (Dataphiles) tag and is of particular importance to members of that faction. This scenario does not have starship combat and utilizes a single full-page custom map.  It makes use of the Starfinder Core RulebookStarfinder Armory, and Starfinder Pact Worlds. It features creatures from Alien Archive, and a variant of a creature first introduced in Starfinder Adventure Path 2: Temple of the Twelve (Dead Suns 2 of 6). All of the necessary stat blocks are included in the scenario itself.

Hira Lanzio
Hira Lanzio from #1-33: Data Breach. Art courtesy of Paizo Inc.

Data Breach continues an ongoing storyline that began in #1-07: The Solar Sortie and continued in #1-14: Star Sugar Heartlove!!! I highly recommend playing those two scenarios before this one, although it’s not necessary. It’s also assumed that #1-99: The Scoured Stars Invasion has taken place, although that has little effect on this scenario for players. If you have the ‘Tip of the Conspiracy’ ally boon from Star Sugar Heartlove!!! now’s the time to slot it. The events in this ongoing storyline are sure to continue on in future scenarios, including the upcoming #1-38: The Many Minds of Historia. Recurring characters in this scenario include Historia-7, leader of the Dataphiles, Hira Lanzio, a mysterious businessman first introduced in #1-14: Star Sugar Heartlove!!!, and a cameo from Venture Captain Naiaj. New characters introduced include Xatina Marcos of the Stewards, and two Dataphile technicians, Kaizel and Xarafo. It should be noted that Computer and Engineering skills are integral to this scenario, so select your characters wisely. It’s important to ensure your team has at least one tech-savvy character (preferably more than one!). If you don’t, slot one of the ‘Hireling Access’ boons. You’re gonna need it!

Data Breach begins in Absalom Station, where players are tasked with breaking into a secure facility on Verces and obtaining all the information they can from the site. Although there’s good reason for this heist, I won’t get into the details of it here, as it involves mild spoilers from some previous scenarios. Rest assured: it’s important! Before heading off on their mission the Starfinders have a chance to question a prisoner being detained by the Stewards at their base of Absalom Station, Bastion, and potentially uncover more information on the facility and its defences. From there we head right to Verces and the infiltration of the top-secret facility. Admittedly, computers and hacking aren’t my favourite parts of Starfinder. But, that said, I love a good heist. So I wasn’t sure how much I would enjoy this scenario. Turns out, I loved it! I really like the mission premise and its importance to the overarching events of this season. I like the complex itself, it’s set up, and it’s defences. I really enjoyed that many of your actions as players can have consequences in this one (including past the end of the scenario), which aren’t always immediately obvious. It was nice subtlety. Although it isn’t the major focus of the scenario, I liked the opportunity for social encounters at the beginning and end of the mission. The battles were complex and layered, particularly the final combat, which is going to be a really nice challenge. All in all, I think Data Breach is a great, guilt-free romp that I think a lot of players are going to enjoy. I give it four out of five stars. (Although, if you particularly enjoy computers, hacking, and intel-themed missions, consider it a five!)

Thanks for joining us today. We’ll see you again soon when we take a look at the newest Pathfinder Society Scenarios.

Jessica


Shackled City: Part Eight: Reunion

Welcome back to Cauldron, home of the The Shackled City Adventure Path! When we last left off our heroic musicians were investigating a series of missing person cases which recently culminated in the abduction of four children from a local orphanage. Fate led to our characters taking the rescue of these people upon themselves! Although they’ve defeated the kidnappers, and rescued the children, there’s plenty of other missing citizens of Cauldron to save. And their captors? Slavers! They’ll have to work fast if they want to save their fellow citizens before they’re sold!

If none of this sounds familiar you can read this blog post, which details our characters, or continue on with this article to hear a quick summary and jump right into the action! You can also check out our previous adventures in Shackled City: Part OneShackled City: Part Two: A Mystery!Shackled City: Part Three: Jzadirune, Shackled City: Part Four: Enter the Malachite Fortress, Shackled City: Part Five: This Place is the Pits!, Shackled City: Part Six: Kazmojen, and Shackled City: Part Seven: Bad Luck.

The Shackled City Adventure Path is available for purchase in its entirety here. The first volume, Life’s Bazaar, is available for purchase here.

shackled city adventure path d20diaries
The Shackled City Adventure Path is a 3.5 Dungeons and Dragons Adventure originally printed in Dungeon Magazine by Paizo Publishing.

The Heroes

Our eccentric heroes are all members of ‘Dinorabbit,’ a musical band that changes its name frequently and was most previously known as ‘Boople Snoot.’ The band’s lead singer and song-writer is Falco Rhiavadi, a foppish noble bastard of mixed Tien descent whose father was devoured by a dragon when Falco was just a boy. A well-groomed, handsome man with an easy smile and a winning personality, Falco’s a black sheep among his family. Mechanically, Falco is an oracle of life whose familiar is a jealous and demanding thrush named Ruby. Falco is played by my husband.

Mick Frimfrocket is a gnome with dark blue skin, bright pink hair that stands straight up on his head, and light blue eyes with flecks of red around his pupils. He’s energetic, bold, and loves nothing more than a good laugh! Mick acts as the band’s pianist and creative director. He’s the driving force behind the band’s constant name changes, and over-the-top performances. Mick was born in the gnomish enclave of Jzadirune but was brought to the city of Cauldron to escape the Vanishing. Orphaned by the mysterious events and with few memories of those early years, Mick was raised in the Lantern Street Orphanage — the very same orphanage that recently had four children kidnpapped right from their beds! Determined to save those little scamps, Mick was very excited to take up this missing person’s case and follow it to its conclusion — particularly when he realized that it led through his one-time home. Mechanically Mick is a monk / bard (prankster) who attacks with wild kicks while playing his piano in battle. Partway through exploring Jzadirune he came into possession of a broken magical construct. He’s played by my seven-year old son.

Rabbity Castalle is a rabbitfolk waitress who works at the Tipped Tankard Tavern. A dancer and singer for the band Dinorabbit, Rabbity also has a pet panther named Panthy. She’s lucky, nimble, and quick, but a little skittish. One of her co-workers is one of the people who was recently abducted, so she’s very keen to solve this mystery and return him home. Rabbity is a hydrokineticist played by my six-year old daughter, using the rabbitfolk race. Rabbitfolk are a Pathfinder Compatible race created by my daughter (with some help) which will soon be published in the upcoming Realms of Atrothia: Primary Expansion by Sunburst Games (Kickstarter coming in February!). Rabbity recently ‘befriended’ (she thinks) a vicious howler named Prickles. What could go wrong?!

The final member of our party is Aeris Caldyra, a local locksmith who was cajoled by her roommate, Rabbity, to join the band as a percussionist and set designer. With few friends to call her own, Aeris relented to the rabbitfolk’s request and is the least talented member of the band. The last worshipper of Alseta in Cauldron, with more than a few secrets and regrets, Aeris is a suli bloodrager with a chip on her shoulder. Always one to lend a hand, like her Grandfather Marzio once would have done, Aeris is determined to rescue the missing citizens of Cauldron. Aeris is my character for the Shackled City Adventure Path.

Although that’s the last of our PCs, that’s not the last of our party. The members of Dinorabbit are also travelling with a half-orc janitor named Patch, and an ex-guard named Krylscar Endercott! Patch is a big, stuttering, fool who works at the Lantern Street Orphanage — the very same place he was raised. Patch recently got recruited to the Last Laugh Thieve’s Guild and was asked to watch over an orphan named Terrem. Unfortunately, Terrem was kidnapped on the very evening that Patch went out to meet with with the guild. Distraught over the boy’s disappearance, Patch was pressured by Falco and Mick into helping them rescue the kids. Patch has gone from a meek coward to a stalwart companion. He’s currently acting as protector of all of the citizens we’ve liberated, keeping watch over them in a secure location while our heroes continue to forge ahead.

Krylscar was abducted from Cauldron over a month ago, and was only recently freed by the team. He was found unconscious in his cell, beaten by his captors for impertinence. When they healed him they discovered Krylscar was bloodied, but far from broken. He demanded gear, equipped himself, and insisted on helping the members of Dinorabbit explore the rest of the Malachite Complex. Occasionally helpful and always reckless, Krylscar is stubborn and brave.

the team
The Team!

The Adventure

Kneeling in the wreckage of their battle, Aeris gasped for breath. She and Falco had narrowly avoided being crushed to death and devoured by a mimic disguised as a gong in a well-stocked treasure vault. The gold had not been worth it. Not to them, anyway. Their teammates may think otherwise…

“WOW! Look at all this gold!” Rabbity exclaims. “Oh, gems! I LOVE gems! Can I have them all, guys?” Without waiting for an answer, Rabbity scooped up all of the gems and jewelry, and dumped them into her bag. “Thanks!”

“There’s a lot of neat things in here, Rabbity, not just gems,” Mick remarks. He was in the process of carefully examining everything, packing it up in trunks and bags, and then giving it to his magical, half-broken, construct to carry. He had packed up weapons, armour, and plenty of gold. With a cock of his head he picked up a crumpled piece of paper. “What’s this?”

At our gaming table, I handed my son a crumpled up piece of paper. He grinned, and unscrunched it, leaving him with a wrinkled letter. More than a little pleased with this turn of events, my son studied the letter carefully, then read it out loud.

son - mick - reading the note
My son reading the mysterious letter.

Kazmojen,

There’s such a thing as being too good at your job.

Lay off taking your product from Cauldron. You’re pushing your luck. Any more get snatched and you’ll find yourself the target of jealous competitors or offended do-gooders.

Don’t say I didn’t want you.

The letter was signed with an image of a stylized bird, which Rabbity recognized as a kingfisher.

Now, my kids adore player handouts. Everyone does, I know. But, my kids really get into them. They read, re-read, and re-read again the handouts. They search for clues in everything. This letter they worried over the words, the potential meaning behind them, the kingfisher, and even any pictures hidden in the paper crinkles. They keep notes and wild theories in a notebook and go back to compare new handouts to old ones. They’re obsessed with player handouts.

Which is awesome! No handout is ever under appreciated.

So when I handed them this letter they freaked (in a good way). It was a solid ten minutes of conspiracy theories and excitement before they settled enough that we could continue the game.

letter 1

When we were finally ready we moved on, backtracking through all the hallways and rooms we’d already explored until we only had two left. The first chamber was a fine bedroom, complete with nice wooden furniture, a chain wrapped iron trunk, food, refreshments, and …. infernal guardians!

A pair of quivering, nasty mounds of flesh surged to life as soon as Aeris opened the door.

Lemures!” she shouted. “They’re resistant to damage. You’ll need to hit them really hard to have any effect.”

“Or use silver,” Falco added. He pulled out his silver holy symbol of Shelyn and passed it to Mick. “Try this.”

Aeris rushed into battle and swung her sword, but her blade struck the lemure and bounced off their flesh. Not hard enough.

Rabbity peeked into the room and launched a blast of water at one lemure. Unfortunately, she rolled low and dealt only minor damage to the foul outsider.

With a shrug, Mick followed the others into the room and tossed the holy symbol right at the wounded lemure. Capable of turning anything into a lethal weapon, Mick was pleasantly surprised to see he not only hit, but he defeated the creature! With a critical hit he took down the lemure. It shuddered, quivered, and lost its form, turning into a nasty puddle of goo before being torn back to its home plane. All that was left behind was the shining holy symbol. “Ha!” My son shouted loudly as he jumped out of his seat and danced around the living room. “Don’t mess with Mick! Yeah! Dance party! WHOO!”

Falco stepped into the room, sure to stay near the back, and cast some hexes at the remaining lemure, lowering its defences. Krylscar hurried into the room to help Aeris combat the creature in melee. The pair both managed to trike, dealing some minor damage to the devils once DR was taken into account. But, it was a kinetic blast from Rabbity that slammed into the lemure with massive force that finally brought the creature down. My daughter joined my son in their victory dance.

lemure battle - malachite fortress - shackled city
Battling lemures.

They sifted through the room but were disappointed in its contents. The trunk contained the personal effects of someone short and prone to colourful attire, and plenty of shackles and chains. Deciding it must belong to that weaselly gnome-like slave merchant who fled when they fought Kazmojen and Prickles (in Part Six: Kazmojen), they discussed whether finding his things was good or bad.

“Hmmm… If his things are here maybe he hasn’t really ran away yet,” my daughter said.

“No,” my son disagreed. “I think he was so scared he left without any of his stuff. That means that he probably left without taking anymore slaves or anything with him.”

“We should chase him in case he has my friend Griffin!” my daughter decided.

“No! We should finish looking around in here for any more slaves. And Griffin.”

My husband had to weigh in with his opinion to settle the discussion and get us moving again. We continued through the Malachite Fortress, exploring the rooms we still hadn’t checked out. There was only one. The kitchen.

Preparing themselves for anther battle, everyone drew their weapons, and drank a scavenged potion or two. There were voices inside. Two chittering goblinoid voices, and an exasperated sounding man.

“Ugh,” the man’s voice groaned. “That’s a fork. I said I needed a spoon. A BIG SPOON.”

The goblinoid voices sounded like they were arguing some more.

“Hey!” Rabbity exclaimed. “That sounds like Griffin!”

Krylscar looked at Rabbity strangely. “You know Griffin?”

“Yeah!” exclaimed Rabbity. “He works at MY work. We are friends. His fiancé has been so sad since he was kidnapped that she NEVER stops crying. It is super annoying and super sad!”

Krylscar chucked. “Griffin’s been my friend since we were kids. Used to get into all kinds of scrapes. Until he settled down with that girl of his. Never saw him much, after that.” With a grim sort of look Krylscar nodded at the door. “Let’s do this.”

Rabbity and Krylscar opened the door, both leaping through and into the kitchen in a flash. Rabbity blasted one of the goblins with a wave of water before he even had time to react, while Krylscar stabbed the second.

At the sight of a pair of dying kitchen hands Griffin Malek screamed. And screamed. And screamed.

“It’s us, it’s us!” Rabbity said to him.

“AAAAAAAHHHHH! YOU JUST BARGED IN AND KILLED PEOPLE! Oh, I’m going to be in so much trouble!”

“What are you talking about, mate?” Krylscar asked. “You’re free. You’re welcome.”

“Kryl? You’re still alive?”

“Of course!” Krylscar replied. “Thought you were dead, though.”

“No, I bargained with Kazmojen to work as a cook. It earned me warm food and a bed. Plus, he promised he wouldn’t sell me. It’s a pretty sweet deal, by the way, so I’d appreciate you guys getting out of here before you mess it up!”

Krylscar laughed. “Ah, you weasel! Always were the smart one!”

“I thought you’d be dead for sure!” Griffin replied.

Krylscar laughed some more. “Yeah, they said they’d eat me if I didn’t start behaving. I said I hoped they’d choke! HA!”

Griffin laughed for a moment, then paled. “I would have had to cook you.”

Krylscar paused, suddenly thinking it wasn’t that funny anymore…

“You don’t need to worry about Kazmojen. We killed him. And his guards,” Rabbity pointed out. “Like… lots of them.”

“Lots of them or all of them?”

“Lots!” Rabbity exclaimed happily.

“Not good enough!” Griffin replied, crossing his arms. “I’m not leaving.”

“All of them,” Falco corrected.

“Really?”

“Yes.”

The bickering continued for a while, until Griffin finally relented. “Well, alright. But if you get me killed I’ll curse you with my dying breath.”

The group met up with Patch and the other survivors. They double/triple checked the complex, then headed for the elevator. They rode it up to Jzadirune, and then continued, walking through the confusing tangle of hallways and rough tunnels, until they arrived in Keygan Ghelve’s home. With a wave of her hands, Rabbity opened the door, revealing the bright red sun, rising over Cauldron.

The prisoners shielded their eyes. Some wept, some cheered, and some stood stunned. The saddest amongst them were still in shock.

“Welcome home!” Rabbity exclaimed

With shaky, hesitant steps, the prisoners returned to the streets of Cauldron.

We wrapped up there and my kids hopped out of their chairs, dancing and jumping and singing in triumph. We had just completed ‘Life’s Bazaar,’ book one of the Shackled City Adventure Path. Reason to celebrate! Plus? They honestly felt like heroes.

“This was great, Mom!” my son said.

“Yeah, what’s next?” my daughter asked.

“Oh, you’ll have to wait and see,” I told them. “But you should give some thought to what you want to do over the next few days or weeks in Cauldron. Think about it, so you’re ready for the next time we play.”

“Okay!” they shouted. As they started chattering over their plans, my husband grinned.

“XP?”

Yes, you all get a level up.”

Cue the victory dance from my children.

We had a ton of fun playing ‘Life’s Bazaar.’ Next session we’re slowing things down a bit, and doing some roleplaying in Cauldron, before launching into the next chapter of the Shackled City Adventure Path: Drakthar’s Way.

Wish us luck!

Jessica

life's bazaar d20diaries shackled city beholder
Life’s Bazaar is the first adventure in the Shackled City Adventure Path.

Behind the Screen

The Shackled City Adventure Path is a difficult to get your hands on adventure path published in eleven separate Dungeon Magazines, or available in hardcover from Amazon here or from Paizo Publishing’s website here. The first adventure, Life’s Bazaar is available in Dungeon Magazine #97 from Paizo Publishing’s website here.

Despite being a 3.5 Dungeons and Dragons Adventure Path, we’re running this campaign with Pathfinder (both the campaign setting and the ruleset). Our characters utilize content from many sources, some of which are listed below.

The shaman and the bloodrager classes, as well as the bloodrager archetype spelleater, can all be found in the Advanced Class Guide. The urban bloodrager archetype can be found in Heroes of the Streets. The Kineticist class can be found in Occult Adventures. The monk and bard are base classes found in the Pathfinder Roleplaying Game: Core Rulebook (or in a convenient travel-sized edition: Core Rulebook (Pocket Edition)  while the prankster archetype for bards can be found in the Advanced Race Guide.

Endless Quest Continues

After the successful relaunch of the Endless Quest choose-your-own-adventure style kids novels set in the world of Dungeons and Dragons, author Matt Forbeck is bringing us two more! My family and I are thrilled to hear this, as we own all four of the previous books, and really enjoyed them. Fun, detailed, and filled with colourful characters, each novel explores different iconic locations, casts you in the role of different classes, and ties in with other Dungeons and Dragons campaigns! For detailed information on the previous Endless Quest books, check out this blog post.

Currently consisting of four books — Big TroubleEscape the UnderdarkInto the Jungle, and To Catch a Thief — the Endless Quest series will expand to include two more releases in September.

Escape from Castle Ravenloft casts you in the role of a cleric in the mist-shrouded, gothic realm of Ravenloft. There you catch the eye of the infamous vampire Count Strahd and are turned into his vampire spawn. You’ll need to find a way to escape the his castle (and his control!) or be doomed to serve him for the rest of your immortal life. This book coincides with and features characters from the Dungeons and Dragons adventure, Curse of Strahd.

The Mad Mage’s Academy casts you in the role of a thief tasked with stealing the spell book of the Mad Mage himself, Halaster Blackcloak. You’ll need to pose as a student at a magic academy, locate and steal the spell book, and escape — all without getting caught! This book coincides with and features characters from the Dungeons and Dragons adventure, Dungeon of the Mad Mage.

We can’t wait to get our hands on more of these delightful little books!

Jessica

D&D Starter Set

For Valentine’s Day my seven-year old son received the D&D Starter Set. He was pretty proud of this turn of events, as it marked the very first d20 product he has ever personally owned. He has some hand-me-down books, of course. And he reads my books all the time, but this one? This one was HIS.

Today we’re going to take quick look at the contents of the D&D Starter Set, and let you know what we thought. For more information on our experiences playing through the D&D Starter Set, tune in later this week!

The D&D Starter Set comes in a high quality, really nice looking box that is deeper than necessary. Although this might seem like a waste, at first, it’s not. The box is the perfect size to also place a D&D Player’s Handbook in, which any fan of the D&D Starter Set is going to want to do pretty quick. You can also fit in a notebook and a few pens, which is also a must have. Being able to pack all of that up in the box is great.

Inside the box you’ll find a set of beautiful little dice, swirled in shades of vibrant blue, with bright white numbers. The dice are really nice looking and incredibly easy to read — which is a must! I despise dice you have to squint at just to figure out what they say. Not that it matters what I think, since the dice belong to my son. Happily, he loves them, ranking them as his very favourite set of dice (he owns two sets and a variety of extra dice of all kinds). There are six dice total: a d20, d12, d10, d8, d6, and d4. There is no percentile dice in this set, or extra d20, which is a little unfortunate. It’s always nice to have a second d20 for all those advantage and disadvantage rolls.

Starter Set Dice
Dice from the D&D Starter Set

Beneath the dice is the D&D Starter Set Rulebook. 32 pages long, this 8 1/2″ by 11″ booklet contains all the rules needed to play and run a game of Dungeons and Dragons. The first seven pages explain how to play D&D, the six ability scores, and their uses, as well as advantage, disadvantage, and so on. After that there’s six pages on combat, six pages on adventuring (including equipment), four pages on spellcasting, a description of all the spells mentioned in the D&D Starter Set, and finally, the back page is an appendix that lists conditions. The book does it’s job well, providing enough information without overwhelming players too much. That said, it doesn’t contain any information on creating your own characters, so anyone who wants to move on from the Starter Set into regular D&D will need to pick up the D&D Player’s Handbook.

The second booklet in the D&D Starter Set is an adventure: Lost Mine of Phandelver. This adventure is a whopping 64 pages long — much longer than I expected from a starter set! I was really impressed. The adventure is split into four major parts: The opening ambush and a small dungeon crawl, time socializing and solving problems in the town of Phandalin, a sandboxy exploration of the surrounding wilds where your players can further investigate the quests they may have taken on, and the finale, a final large dungeon crawl. Before the adventure is an introduction, which gives a quick run down of how DMing works, and explains how to go about it. At the end of the adventure is an appendix containing all the magic times found in the adventure, and a second appendix which contains details on all the monsters and enemies found in the adventure. Finally, the back page of the booklet is a rules index, which lists different rules and the page numbers that they can be found in the Starter Set Rulebook.

D&D Starter Set Contents
Contents of theD&D Starter Set

Lost Mine of Phandelver is a fun adventure. It’s got a simple opening premise that’s easy to attach a wide variety of characters to, and has a good balance of combat, exploration, investigation, and social encounters. The plot line is easy to follow, and contains a few twists. It’s not overly complex and will appeal to a wide audience. Throughout the adventure there are plenty of notes for DMs, which give further guidance, rules references, and advice. This is super handy for new DMs and was really well handled.

The town of Phandalin was interesting, but I found it a bit brief. The only locations detailed are those where the PCs can pick up quests, which is unfortunate. That said, this adventure isn’t made for me, it’s made for new DMs. And for new DMs? There’s more than enough details, information, and NPCs to work with. Plenty of the townsfolk have tasks and information they can give players, links to other organizations (which can be used for continuing the campaign after you’re done with the Starter Set), plus there’s some trouble in town the players can stumble into on their own. Many of these quests can be completed in the region surrounding Phandalin, in Part Three of the adventure.

There’s some nice maps in Lost Mine of Phandelver, and art representing all of the monsters that need it (although not all of the monsters total). A few humanoid enemies are also illustrated, although none of the NPCs are. I really wish there was art for at least one of them — Silas Hallwinter, for example — but despite lacking art, each NPC in the book has a line or to about their physical appearance and behaviour, so DMs aren’t adrift.

Overall, Lost Mine of Phandelver is a fun beginner’s adventure with lots for player’s to do. It showcases the major types and styles of D&D, and weaves it all together in an entertaining and coherent story. I was really pleased with the adventure’s length. Groups will get more than a few play sessions out of this one, which is really nice to see.

This brings us to the final components contained in the D&D Starter Set: pre-generated characters. This box contains five already made characters. A neutral good hill dwarf cleric soldier, a lawful good human fighter folk hero, a lawful neutral human fighter noble, a neutral lightfoot halfling rogue criminal, and a chaotic good high elf wizard acolyte. The character sheets are easy to read and understand. Abilities are explained right on them, with more information on each one’s race, class, and background on the back of the sheet. Each of these characters has their own personality traits, ideals, bonds, and flaws which is simple to understand and really useful for roleplaying the characters. As the adventure will allow you to get multiple level ups, the back also has detailed information on what each character gains at each level. The best part? Each of the characters feels unique and fun, and none of them have names or genders. Which is great! Each player gets to decide their personal identity, and add those finishing touches themselves. I thought the characters were all really nicely done. The only downside? Whoever plays the wizard will need to make use of the Starter Set Rulebook to find information on their spells.

Which is it! The entire contents of the D&D Starter Set! This little box is packed full of fun, with everything you need to get started playing D&D. The dice are gorgeous, the rulebook is useful but not overwhelming, the adventure is fun, varied, and much longer than I expected, and the characters are well-made and enjoyable to use. The only thing this starter set lacks? A play mat and minis, but technically you don’t need those to play D&D. They really add to the game, though, so player’s who continue on to play D&D are likely to wish they had some. But, the best part of the D&D Starter Set? The cost! This box is an amazing value! We picked ours up for only $15 Canadian, which is only a few dollars more than the cost of a set of dice. Getting the rules and a good sized adventure in there, as well, makes this a great deal. I highly recommend the D&D Starter Set for anyone interested in learning how to play D&D, or for anyone who just wants a nifty new adventure and some cool dice. Well worth the investment!

Thanks for joining us today. We’ll talk again soon when we discuss our experiences playing through the D&D Starter Set adventure: Lost Mine of Phandelver.

Until then,

Jessica


Celebrate 10 Years of Pathfinder with Humble Bundle

PaizoLogo Hi-ResPaizo is celebrating 10 years of the Pathfinder Roleplaying Game with Humble Bundle! For under twenty dollars you can get over five hundred dollars worth of Pathfinder PDFs, with part of the proceeds going to charity.

Awesome, right?

Right!

What is a Humble Bundle?

Humble Bundle is a distribution platform that sells ebooks, games, software, and other digital content. Consumers pay what they want, and then get to select how that money is distributed between the content creators, charity, Humble Partners (affiliates), and Humble Bundle. In many cases the Humble Bundle has tiers, where different amounts of money can get you even more product. In any case, Humble Bundles provide a lot of value for your money, and contribute to a worthy cause. According to their website, the Humble community has over 12 million customers throughout the world, and has contributed over 144 million dollars to charity. For more information on Humble and to see what other products they have up for offer, check out their website.

Pathfinder’s 10 Year Anniversary Humble Bundle

The Pathfinder 10th Anniversary Humble Bundle contains a ton of awesome digital PDFs split across four tiers of rewards. Each tier provides you with a digital key which can be entered on Paizo’s website, to download your purchased products.

By paying one dollar (American) or more you get a digital copy of 10 RPG books and a free trial of Pathfinder Online. Books included are the Core Rulebook, Beginner Box, Bestiary, Game Mastery Guide, and the Player Character Folio — literally everything you need to get playing Pathfinder! There’s also four adventures in this bundle, each of which features goblins: We Be Goblins, We Be Goblins, Too!, We Be Goblins Free, and We B4 Goblins. Finally, it includes a the Player’s Guide to the Shattered Star Adventure Path, a really fun campaign that takes place in Varisia.

By paying eight dollars or more you can get your hands on all of the previously mentioned product, plus nine more books: The Advanced Player’s Guide, Advanced Class Guide, NPC Codex, Monster Codex, Villain Codex, Inner Sea World Guide, Goblins of Golarion, and the first two volumes of the Shattered Star Adventure Path: Shards of Sin and Curse of the Lady’s Light (as well as interactive maps for both volumes).

By paying fifteen dollars or more you get all of the previously mentioned product, plus thirteen more books, including the Advanced Race Guide, Ultimate Campaign, Ultimate Combat, Ultimate Equipment, Ultimate Intrigue, Ultimate Magic, Bestiary 2, Bestiary 3, Inner Sea Gods, Magnimar City of Monuments, Varisia Birthplace of Legends, and the third and fourth volume of the Shattered Star Adventure Path: The Asylum Stone and Beyond the Doomsday Door (and their associated interactive maps)!

Finally, by paying eighteen dollars or more you get all of the previously mentioned product, plus a whopping eighteen more books! These include Occult Adventures (one of my personal favourites), Inner Sea Races, Mythic Adventures, Pathfinder Unchained, Strategy Guide, Bestiary 4, Bestiary 5, Dwarves of Golarion, Elves of Golarion, Gnomes of Golarion, Halflings of Golarion, Humans of Golarion, Kobolds of Golarion, Orcs of Golarion, the final two volumes of the Shattered Star Adventure Path: Into the Nightmare Rift and the Dead Heart of Xin (and their maps), and the Shattered Star Poster Map Folio. Finally, you get the Core Rulebook for the Starfinder RPG!

That’s a crazy value! Seriously. I bought it immediately. Haha.

At the moment of writing this over 10,000 people have purchased bundles, and the numbers just keep on climbing. If you want to get your hands on the Pathfinder 10th Anniversary Humble Bundle, you’ve only got 12 more days to do so. This offer ends on March 5th.

Enjoy!

Jessica

Shackled City: Part Seven: Bad Luck

Welcome back to Cauldron, home of the The Shackled City Adventure Path! When we last left off our heroic musicians were investigating a series of missing person cases which recently culminated in the abduction of four children from a local orphanage. Fate led to our characters taking the rescue of these people upon themselves! Although they’ve defeated down the kidnappers, and rescued the children, there’s plenty of other missing citizens of Cauldron to save. And their captors? Slavers! They’ll have to work fast if they want to save their fellow citizens before they’re sold!

If none of this sounds familiar you can read this blog post, which details our characters, or continue on with this article to hear a quick summary and jump right into the action! You can also check out our previous adventures in Shackled City: Part OneShackled City: Part Two: A Mystery!Shackled City: Part Three: Jzadirune, Shackled City: Part Four: Enter the Malachite Fortress, Shackled City: Part Five: This Place is the Pits!, and Shackled City: Part Six: Kazmojen.

The Shackled City Adventure Path is available for purchase in its entirety here. The first volume, Life’s Bazaar, is available for purchase here.

shackled city adventure path d20diaries
The Shackled City Adventure Path is a 3.5 Dungeons and Dragons Adventure originally printed in Dungeon Magazine by Paizo Publishing.

The Heroes

Our eccentric heroes are all members of ‘Dinorabbit,’ a musical band that changes its name frequently and was most previously known as ‘Boople Snoot.’ The band’s lead singer and song-writer is Falco Rhiavadi, a foppish noble bastard of mixed Tien descent whose father was devoured by a dragon when Falco was just a boy. A well-groomed, handsome man with an easy smile and a winning personality, Falco’s a black sheep among his family. Mechanically Falco is an oracle of life whose familiar is a jealous and demanding thrush named Ruby. Falco is played by my husband.

Mick Frimfrocket is a gnome with dark blue skin, bright pink hair that stands straight up on his head, and light blue eyes with flecks of red around his pupils. He’s energetic, bold, and loves nothing more than a good laugh! Mick acts as the band’s pianist and creative director. He’s the driving force behind the band’s constant name changes, and over-the-top performances. Mick was born in Jzadirune but was brought to the city of Cauldron to escape the Vanishing. Orphaned by the mysterious events and with few memories of those early years, Mick was raised in the Lantern Street Orphanage — the very same orphanage that recently had four children kidnpapped right from their beds! Determined to save those little scamps, Mick was very excited to take up this missing person’s case and follow it to its conclusion — particularly when he realized that it led to his one-time home. Mechanically Mick is a monk / bard (prankster) who attacks with wild kicks while playing his piano in battle. Partway through exploring Jzadirune he came into possession of a broken magical construct. He’s played by my seven-year old son.

Rabbity Castalle is a rabbitfolk waitress who works at the Tipped Tankard Tavern. A dancer and singer for the band Dinorabbit, Rabbity also has a pet panther named Panthy. She’s lucky, nimble, and quick, but a little skittish. One of her co-workers is one of the people who was recently abducted, so she’s very keen to solve this mystery and return him home. Rabbity is a hydrokineticist played by my six-year old daughter, using the rabbitfolk race. Rabbitfolk are a Pathfinder Compatible race created by my daughter (with some help) which will soon be published in the upcoming Realms of Atrothia: Primary Expansion by Sunburst Games (Kickstarter coming in February!). Rabbity recently ‘befriended’ (she thinks) a vicious howler named Prickles. What could go wrong?!

The final member of our party is Aeris Caldyra, a local locksmith who was cajoled by her roommate, Rabbity, to join the band as a percussionist and set designer. With few friends to call her own, Aeris relented to the rabbitfolk’s request and is the least talented member of the band. The last worshipper of Alseta in Cauldron, with more than a few secrets and regrets, Aeris is a suli bloodrager with a chip on her shoulder. Always one to lend a hand, like her Grandfather Marzio once would have done, Aeris is determined to rescue the missing citizens of Cauldron. Aeris is my character for the Shackled City Adventure Path.

Although that’s the last of our PCs, that’s not the last of our party. The members of Dinorabbit are also travelling with a half-orc janitor named Patch! Patch is a big, stuttering, fool who works at the Lantern Street Orphanage — the very same place he was raised. Patch recently got recruited to the Last Laugh Thieve’s Guild and was asked to watch over an orphan named Terrem. Unfortunately, Terrem was kidnapped on the very evening that Patch went out to meet with with the guild. Distraught over the boy’s disappearance, Patch was pressured by Falco and Mick into helping them rescue the kids. And so, the poor one-eyed janitor finds himself heading into danger.

gms needs - tea and dice
My favourite mug and dice! Dice are Pathfinder Iron Gods Dice Set by Q-Workshop. Mug is Critical Hit D20 Mug by ThinkGeek.

The Adventure

Leaving behind Patch to watch over the children, our eclectic crew of musicians headed  out onto a mysterious bridge, intent on saving as many people as they could. Falco casts a spell, sinding a trio or glowing orbs of light along the length of the bridge, then under it. The span was over thirty feet across, and below was a drop of nearly fifty feet into frigid, flowing water. They crossed in silence, finding themselves on a narrow landing. Ahead was a sturdy double door flanked by two massive statues of dwarven warriors. To both the left and the right the ledge continued, eventually ending at a smaller door. Unsure which way to go, Aeris approached the left doors.

Mick, followed by his stolen, unreliable, half-broken construct — whose primary job now was carrying sacks of loot — placed a hand on Aeris’ elbow. “Be careful of those statues. I have a bad feeling about this.

“I can put those fears to rest, I think,” Falco remarked grandly. Ruby, his colourful, demanding thrush sat perched upon his shoulder. He wove his hands around and cast another spell, causing his eyes to glow brightly. With his vision now capable of detecting magical auras he examined the statues. “They not animated constructs. No magical auras of any kind.” With a nod, he winked at Aeris. “You’ll be fine.”

“Unless they’re trapped,” Mick pointed out.

“Yes. Well, they’re not magically trapped,” Falco clarified.

“Maybe just the normal kind,” Mick worried.

Aeris sighed. “I can handle a few traps. Besides, we don’t have time for this.”  Aeris approached the far left door, looked around cautiously, and opened it.

No traps. Yet.

The door opened into a large guard post, with a set of stone bunkbeds, a table, and some chairs. Another two doors exited the room at the far side. Sleeping in two of the beds were a pair of hobgoblin guards. Two others sat at the table playing some kind of gambling game involving stones and a rough dice.

Aeris leapt into action, charging into the room and swinging her sword at the nearest hobgoblin. Unfortunately, she wasn’t fast enough! The hobgoblins shouted out a loud alarm, waking their sleeping brethren and surely alerting any other enemies nearby. Aware that the last time a hobgoblin shouted an alarm down here they ended up fighting wave after wave of guards, the members of Dinorabbit knew they had to end this quickly!

From outside the room, Rabbity smiled at Prickles. “You stay here, okay? I’ll go check it out.” Rabbity rode Panthy into the room, took a quick peek around, and urged Panthy up onto one of the stone bunkbed’s top beds. Prickles listened and stayed behind.

That’s where our good luck ended.

You see, this past session we had the worst luck. Absolutely, the worst. We constantly — all four of us — rolled critical misses. Yup! A whole lot of ones. And our enemies? Critical hits! SO many critical hits! Despite coming up against weaker enemies nearly the entire session, we barely survived. And you know what? We counted ourselves lucky! It was brutal! Haha.

Back in the guard room the hobgoblins launched into action. They found chinks in our armour, gaps in our defences, and took advantage of our distraction! In short, they dismantled us! And those two armoured hobgoblins? They scored a whopping three critical hits before Aeris and Falco brought them down. As for the two sleeping hobgoblins? They leapt out of bed, grabbed a weapon, and fought unarmored. We missed them over and over again until — finally — Rabbity got a streak of luck (really, it was a pair of average rolls, haha) and took down those two wily hobgoblins in one kinetic blast a piece.

Heavily wounded and more than a little discouraged, our heroes remained alert for further enemies. Thankfully none came.

malachite fortress - d20diaries - crop
The Malachite Fortress!

They took a moment to loot the room, heal what wounds they could, and then moved on. Through the other door they found some swords swinging right at their faces! Yup, there were enemies on the other side of that door, and they were more than prepared for our heroes! With crossed fingers we headed into battle…. only to face more bad luck! Two hobgoblin guards battled Aeris in tight quarters, while another hobgoblin — this one with only one arm — brought a burning hot iron near the face of a captive female human woman across the room.

Aeris tried to get into the room and past the hobgoblins — no luck! She tried to distract the one-armed torturer — no luck! She resorted to fighting her way past the hobgoblins — no luck! Curse their fine armour!

Really, it was curse my luck! I never rolled higher than a 2, and those were the good rolls! We’re a fan of using critical hit and miss cards in our sessions, so my constant 1s caused me to stab myself, exhaust myself, and lower my own AC due to clumsiness.

Perfect.

Aeris’ allies offered support from behind. Falco threw hexes to curse the enemies, Mick performed some inspiring music, and Rabbity… Well she didn’t help Aeris. Instead she shot kinetic blasts past Aeris, through the doorway, and past the guards, in an effort to hit the torturer in the back.

Which miraculously worked. It was our only good roll of the fight! Angry, the torturer turned and left the prisoner alone, turning his attention to… Aeris. Cause she was in the way. Haha.

As the battle raged on Aeris was forced to retreat, and the hobgoblins filtered into the next room. This exposed the weaker party members to melee combat, but it also allowed more of them to attack the hobgoblins. In the end the members of Dinorabbit won the fight, but only due to greater numbers. And an angry howler who bit a hobgoblin’s head right off!

My daughter was very proud of Prickles. Until he leaped into the fray like a maniac and started eating the hobgoblins alive. The others backed up in worry. But, it wasn’t until Prickles approached the chained up human that Rabbity started to get nervous….

With great effort and distractions she managed to get the howler under control. Aeris quickly freed the woman — whose name was Coryston Pike — and helped her out of the room. They chatted with the poor woman for a short time — turned out she was an ex-adventurer — then brought her out to Patch. They repositioned the half-orc and his charges a bit, and asked them to wait. Mick called over his construct and searched through his sacks of loot. He pulled out a shortbow, arrows, quiver, short sword, and leather armour, and gave it to the woman. With well-practised hands she strapped on her armour and gear.

In a final parting, Falco asked Coryston, “How many others prisoners are there?”

Coryston looked grim. “Not nearly enough. Plenty were sold.” After a moment of thought she added, “No more than ten.”

My kids and husband checked their list of missing persons then frowned. If they only found ten more, lots would go unaccounted for. Rabbity hoped her friend, Griffin, would be among them.

Continuing on they found the cell block. Cell after cell was empty. Finally, near the end, they found a few prisoners. The first was a man who had been beaten unconscious. The second was a young man named Deven Myrzal who was huddled in the corner of his cell, terrified they were hobgoblins coming to eat him — as they had promised they would. The next cell had an equally scared and despondent woman named Irruth Mercadi. Rabbity tried to convince the pair that they were safe, but the sight of Prickles did little to help her cause.

Meanwhile, Aeris freed one more. Jasper Drundlesput, an obsessed mathematician who grinned at the sight of her.

“Ah, the odds! The odds indeed! Not in my favour, were they? And look! Here we are. Such a small chance of rescue! And YOU! Such a small chance of success! Smaller even, yes!”

Aeris gave her head a shake and continue checking the cells, while Mick bonded with the gnome. My son thought he was amazing. Haha.

And the rest of the cells? Empty. There were less than ten prisoners.

My daughter freaked out for a bit. Her friend wasn’t here! Was he sold already? She sure hoped not!

Falco healed the unconscious man and learned that his name was Krylscar Endercott, an ex-guard. The boisterous fellow demanded some gear and insisted on helping them out. With a shrug Mick sifted through the gear and gave him some armour and weapons. Falco and Aeris led the freed prisoners back out to Patch. Thus prepared, they continued on… Finding nothing. It was a dead end.

Mick pointed at the bare walls. “Check for secret doors! This place LOVES secret doors.” After only a few minutes they found one. It led to a strange shaped room with another construct in it! This one had big hammers for hands. The construct reached up and pushed on a lever. There was a loud grinding sound, but they couldn’t see what had happened.

Mick tried to command the construct like he did his own! …And it didn’t work. The construct tried to smash in his head.

“New plan!” Mick shouted as he ducked the hammer blows. “Break it!”

Easier said than done! The battle was tough, and just as they thought they had finally won the fight, Rabbity felt something whack against her ears! She look behind her, but only found a wall. Every turned and stared at the wall suspiciously… A few seconds later they saw a metal hammer swing right through the wall at Rabbity again!

Half of the group was super confused, but Mick grinned. “Illusion!” With a laugh he added, “That’s really clever!”

“It’s horrible!” Rabbity shouted.

Luckily, this construct turned out to be the only fight of the day where we didn’t have horrible luck. We had average luck. Which was a huge relief! Heavily wounded but alive, the group took a break.

“We should rest somewhere,” Mick said.

But Rabbity shook her head. “No! There could be more people here! And if we wait they might get sold! Or DEAD!” She said ‘dead’ with such drama. It was adorable.

With a begrudging nod, Mick agreed. “You’re right. Let’s go.”

Exploring the room they found another illusory wall hiding another room and lever. Nothing else. Curiously, they pulled the levers. A pair of blocks slid out of the way and disappeared into the wall revealing two more cell blocks. With a cheer of excitement, Mick and Rabbity hurried in.

The cells were empty.

Every one.

With a sigh and some frowns the group continued on. In time they found another secret door. Aeris stepped inside and the floor fell out from under her feet.

“Pit trap!” my son shouted with a laugh.

Aeris took a maximum damage — surprising no one — and clambered out. After some further healing the group moved on. With nowhere left to go they did a little backtracking and checked out some other doors. Eventually they discovered Kazmojen’s bedroom — which was disgusting. It was filled with mounds of bones, gore, and plenty of gross furnishings. Prickles wandered in and sat in a mound of mold that was clearly his bed. Deciding to let him relax there for a bit the gang continued on and discovered a hidden treasure chamber filled with gems, coins, armour, weapons, a massive gong, and a trio of treasure chests. My kids were very suspicious of the chests. One was bound in iron, one looked like it had a mouth and was covered in blood, and the third had a fancy dagger on the lid.

mimic - shackled city - malachite fortress
More bad luck!

“Mimic!” My son exclaimed. “That one with a mouth is BOUND to be a mimic! I know it!”

Aeris approached closer. She discovered the dagger chest was trapped, the iron one was locked, and the mouth chest….

Not a mimic!

But the gong behind the chest was!

“AHHHH! I DID NOT EXPECT THE GONG!” my son exclaimed. “But I should count as right anyway!”

The gong-mimic slammed into Aeris, (with a critical hit!) wrapped her up, and chomped on her. She fought and struggled, but couldn’t escape. “It’s like glue!” she told her companions. “Don’t touch it!” As the mimic kept gnawing on her she gave up trying to escape and instead pulled out a dagger, trying to wound the beast as much as she could before she died. The group tried their best to battle the beast from afar, but the mimic surged forward and slammed into Falco next (with another critical hit!). With both of them being crushed by the sticky mimic, it was up to Mick and Rabbity to claim victory.

critical fail 2
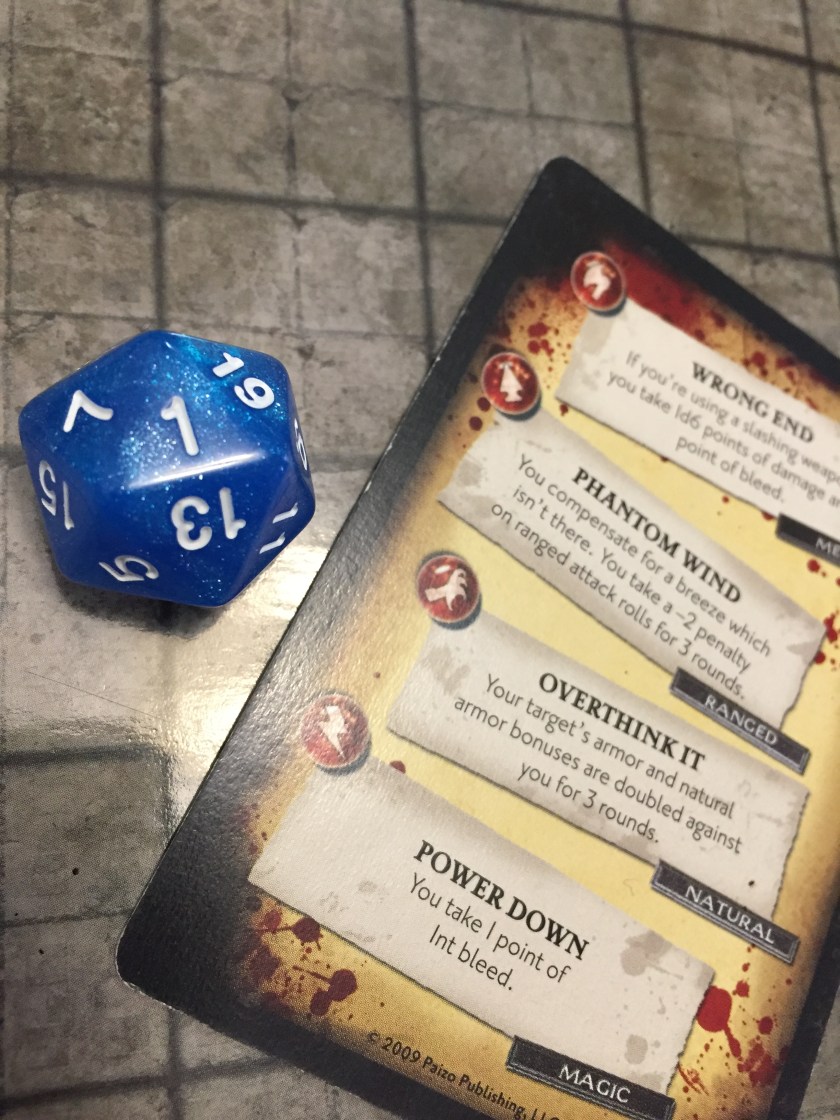
Oh, look! More critical fails from our heroes!

In the end the group barely pulled through with both Falco and Aeris a turn away from death. Whew! We were lucky to survive!

Deciding we’d had enough bad luck for the night, we packed up our dice, markers, and papers. Whatever surprises were left for us in the Malachite Fortress would have to wait for another time.

Until then,

Jessica

life's bazaar d20diaries shackled city beholder
Life’s Bazaar is the first adventure in the Shackled City Adventure Path.

Behind the Screen

The Shackled City Adventure Path is a difficult to get your hands on adventure path published in eleven separate Dungeon Magazines, or available in hardcover from Amazon here or from Paizo Publishing’s website here. The first adventure, Life’s Bazaar is available in Dungeon Magazine #97 from Paizo Publishing’s website here.

Despite being a 3.5 Dungeons and Dragons Adventure Path, we’re running this campaign with Pathfinder (both the campaign setting and the ruleset). Our characters utilize content from many sources, some of which are listed below.

The shaman and the bloodrager classes, as well as the bloodrager archetype spelleater, can all be found in the Advanced Class Guide. The urban bloodrager archetype can be found in Heroes of the Streets. The Kineticist class can be found in Occult Adventures. The monk and bard are base classes found in the Pathfinder Roleplaying Game: Core Rulebook (or in a convenient travel-sized edition: Core Rulebook (Pocket Edition)  while the prankster archetype for bards can be found in the Advanced Race Guide.